Usage:
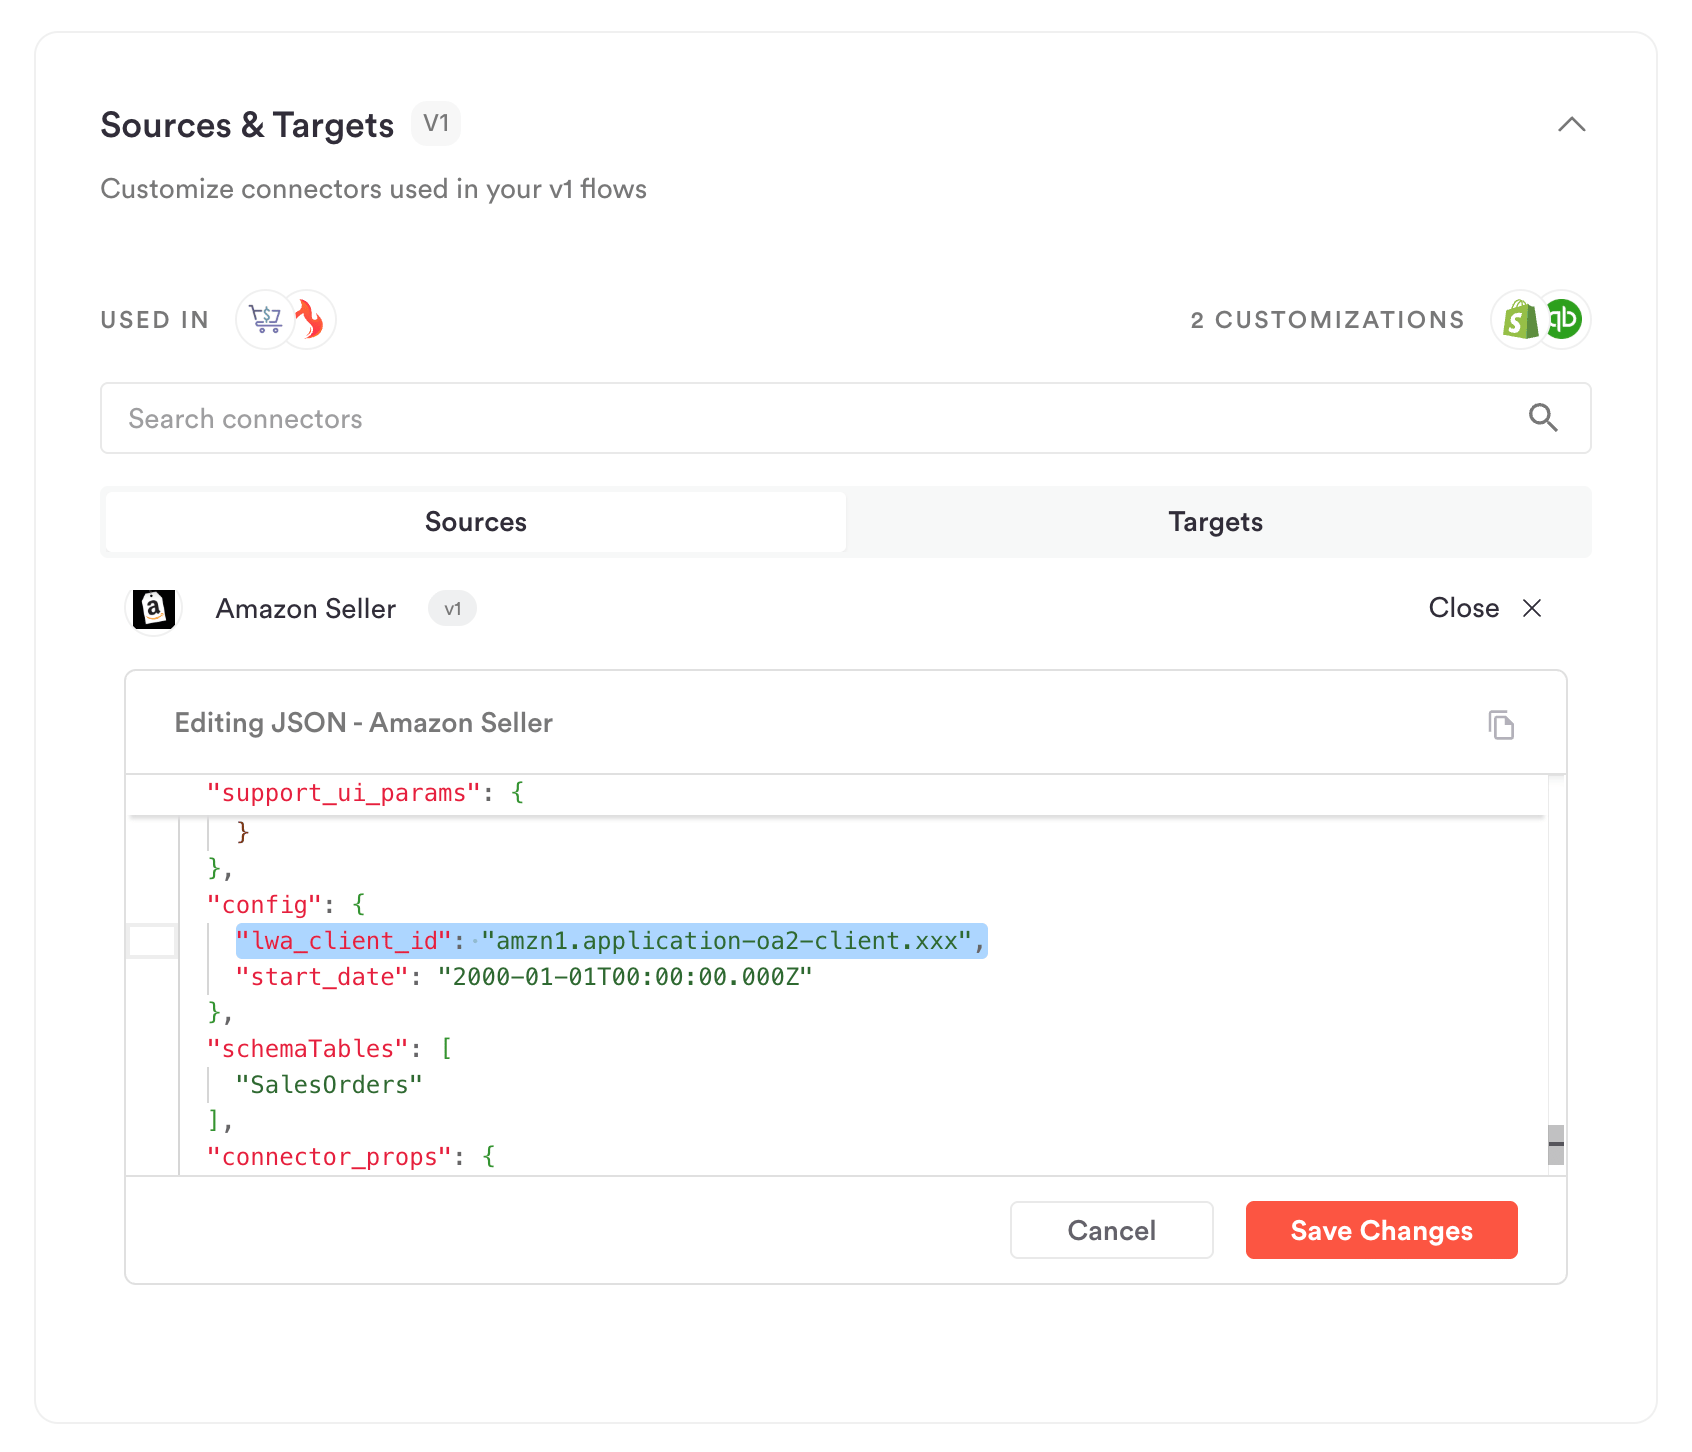
| | Unified Schema | [Supported in Ecommerce Unified Schema.](https://hotglue.com/docs/unified) | # Credentials Setup The Amazon Seller connector utilizes the Selling Partner API to fetch your customers' selling data. 1. To start, you will need to [register as a Public SP-API Developer](https://developer-docs.amazon.com/sp-api/docs/register-as-a-public-developer?ld=NSGoogle\&pageName=US%3ASPDS%3ASPAPI-getting-started-guide). 2. Once you are registered and create your first app, you will receive three credential strings: 1. Your App ID (e.g.`amzn1.sp.solution.<...>` ) 2. Your LWA Client ID (e.g.`amzn1.application-oa2-client.<...>` ) 3. Your LWA Client Secret (e.g. `amzn1.oa2-cs.v1.<...>` ) 3. Once you have your credentials, go to Settings > Connectors. 1. Open `Bi-Directional Connectors` (V2 flows) or `Sources & Targets` (V1 flows) depending on the flow type that you use. 2. If modifying a Connector, add your LWA Client ID to the definition via `options.config.lwa_client_id`. 3. If modifying a Source, add your LWA Client ID to the definition via `config.lwa_client_id`.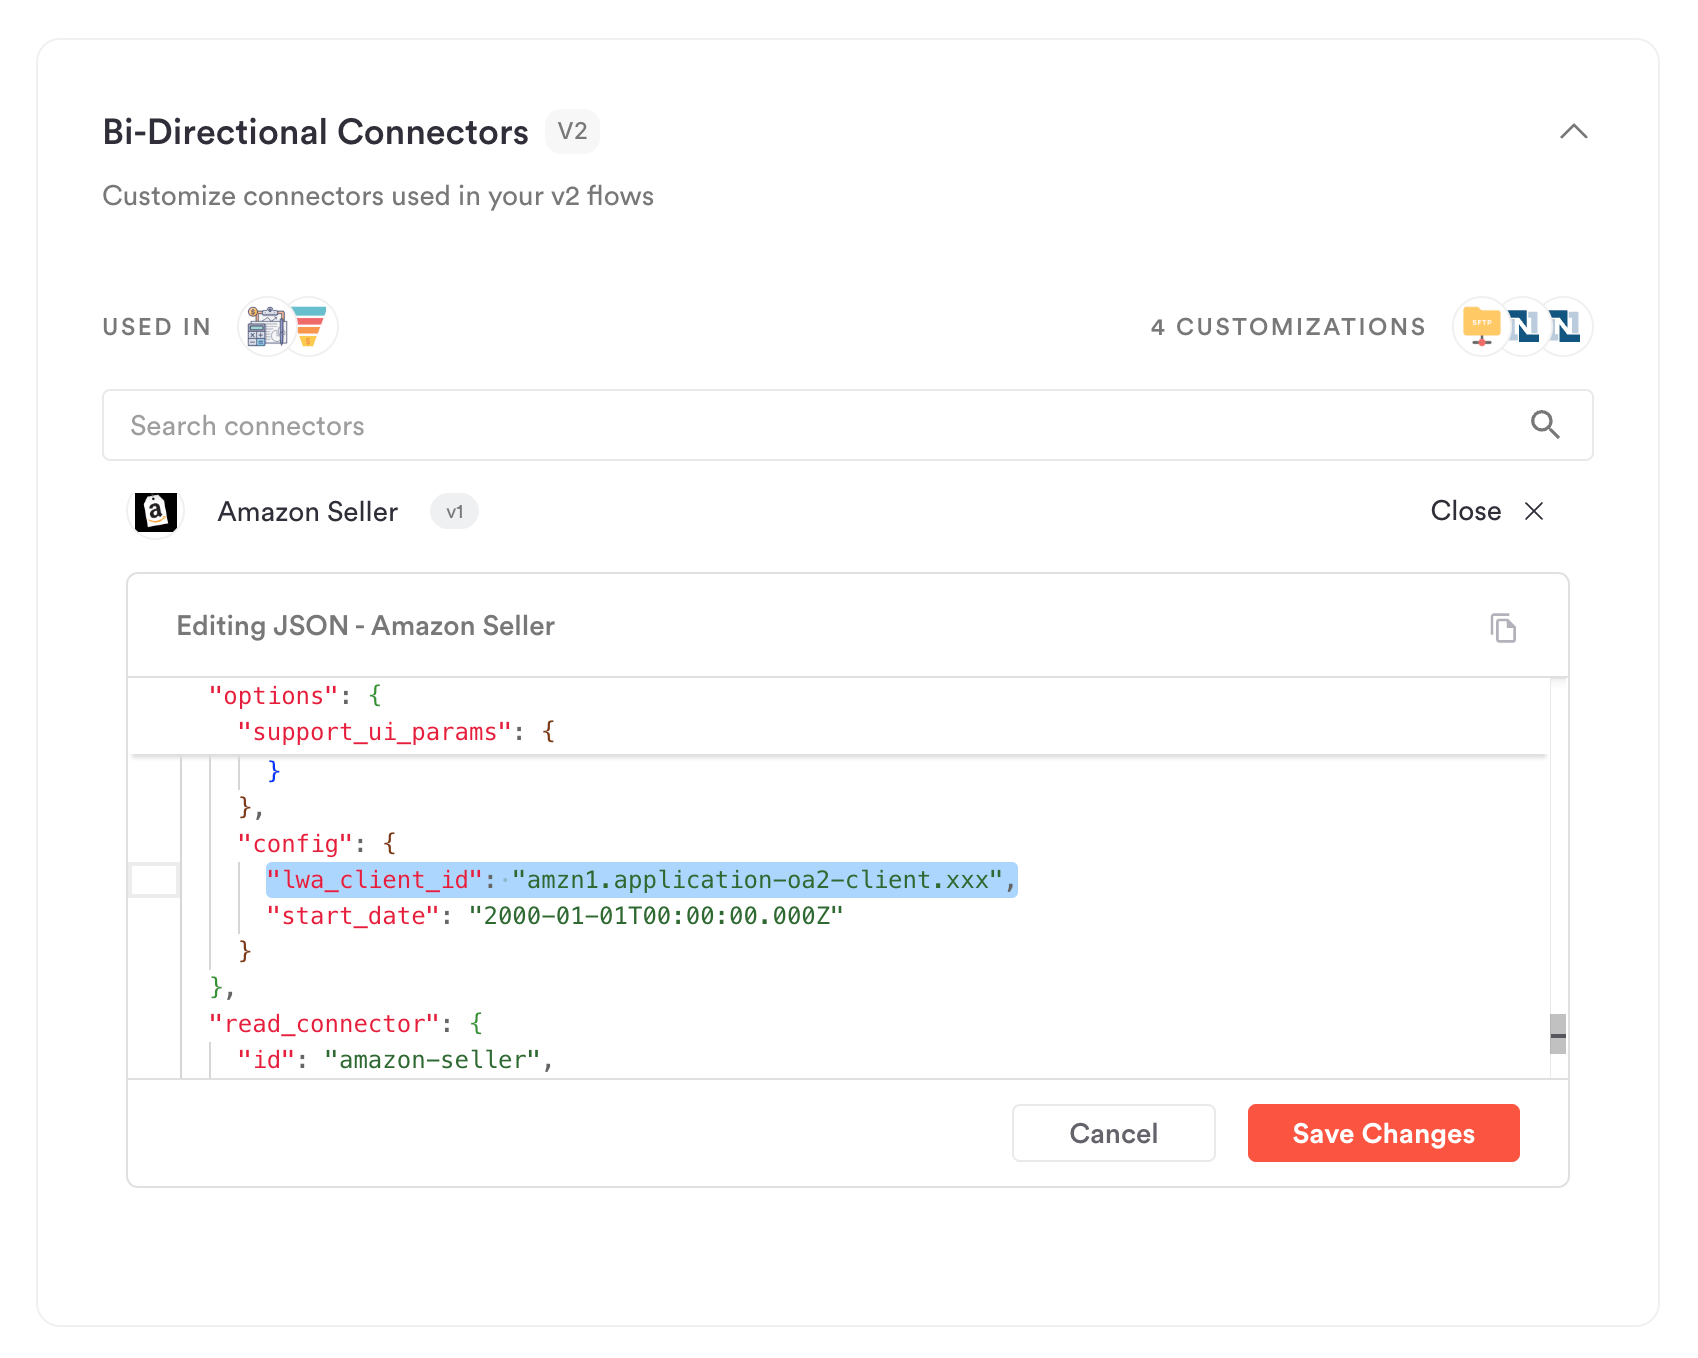
 5. Finally, go to your flow, add Amazon Seller, and add your `App ID` and `LWA Client Secret` as the Client ID and Client Secret.
6. After clicking save, you will go through authorization of your test shop. This "enables" the Amazon Seller Central connector. After a successful authorization, Amazon Seller is ready to be authorized by your users!
5. Finally, go to your flow, add Amazon Seller, and add your `App ID` and `LWA Client Secret` as the Client ID and Client Secret.
6. After clicking save, you will go through authorization of your test shop. This "enables" the Amazon Seller Central connector. After a successful authorization, Amazon Seller is ready to be authorized by your users!