What are Custom Params?
hotglue allows you to specify custom parameters that will be collected before a tenant links an integration in the hotglue widget. These parameters are then made available to your transformation script during execution. The screenshot below shows a sample of custom parameters applied to a QuickBooks integration:Enabling custom params
Start a JupyterLab workspace
To enable custom params, you should first launch a JupyterLab workspace.Configure the custom params
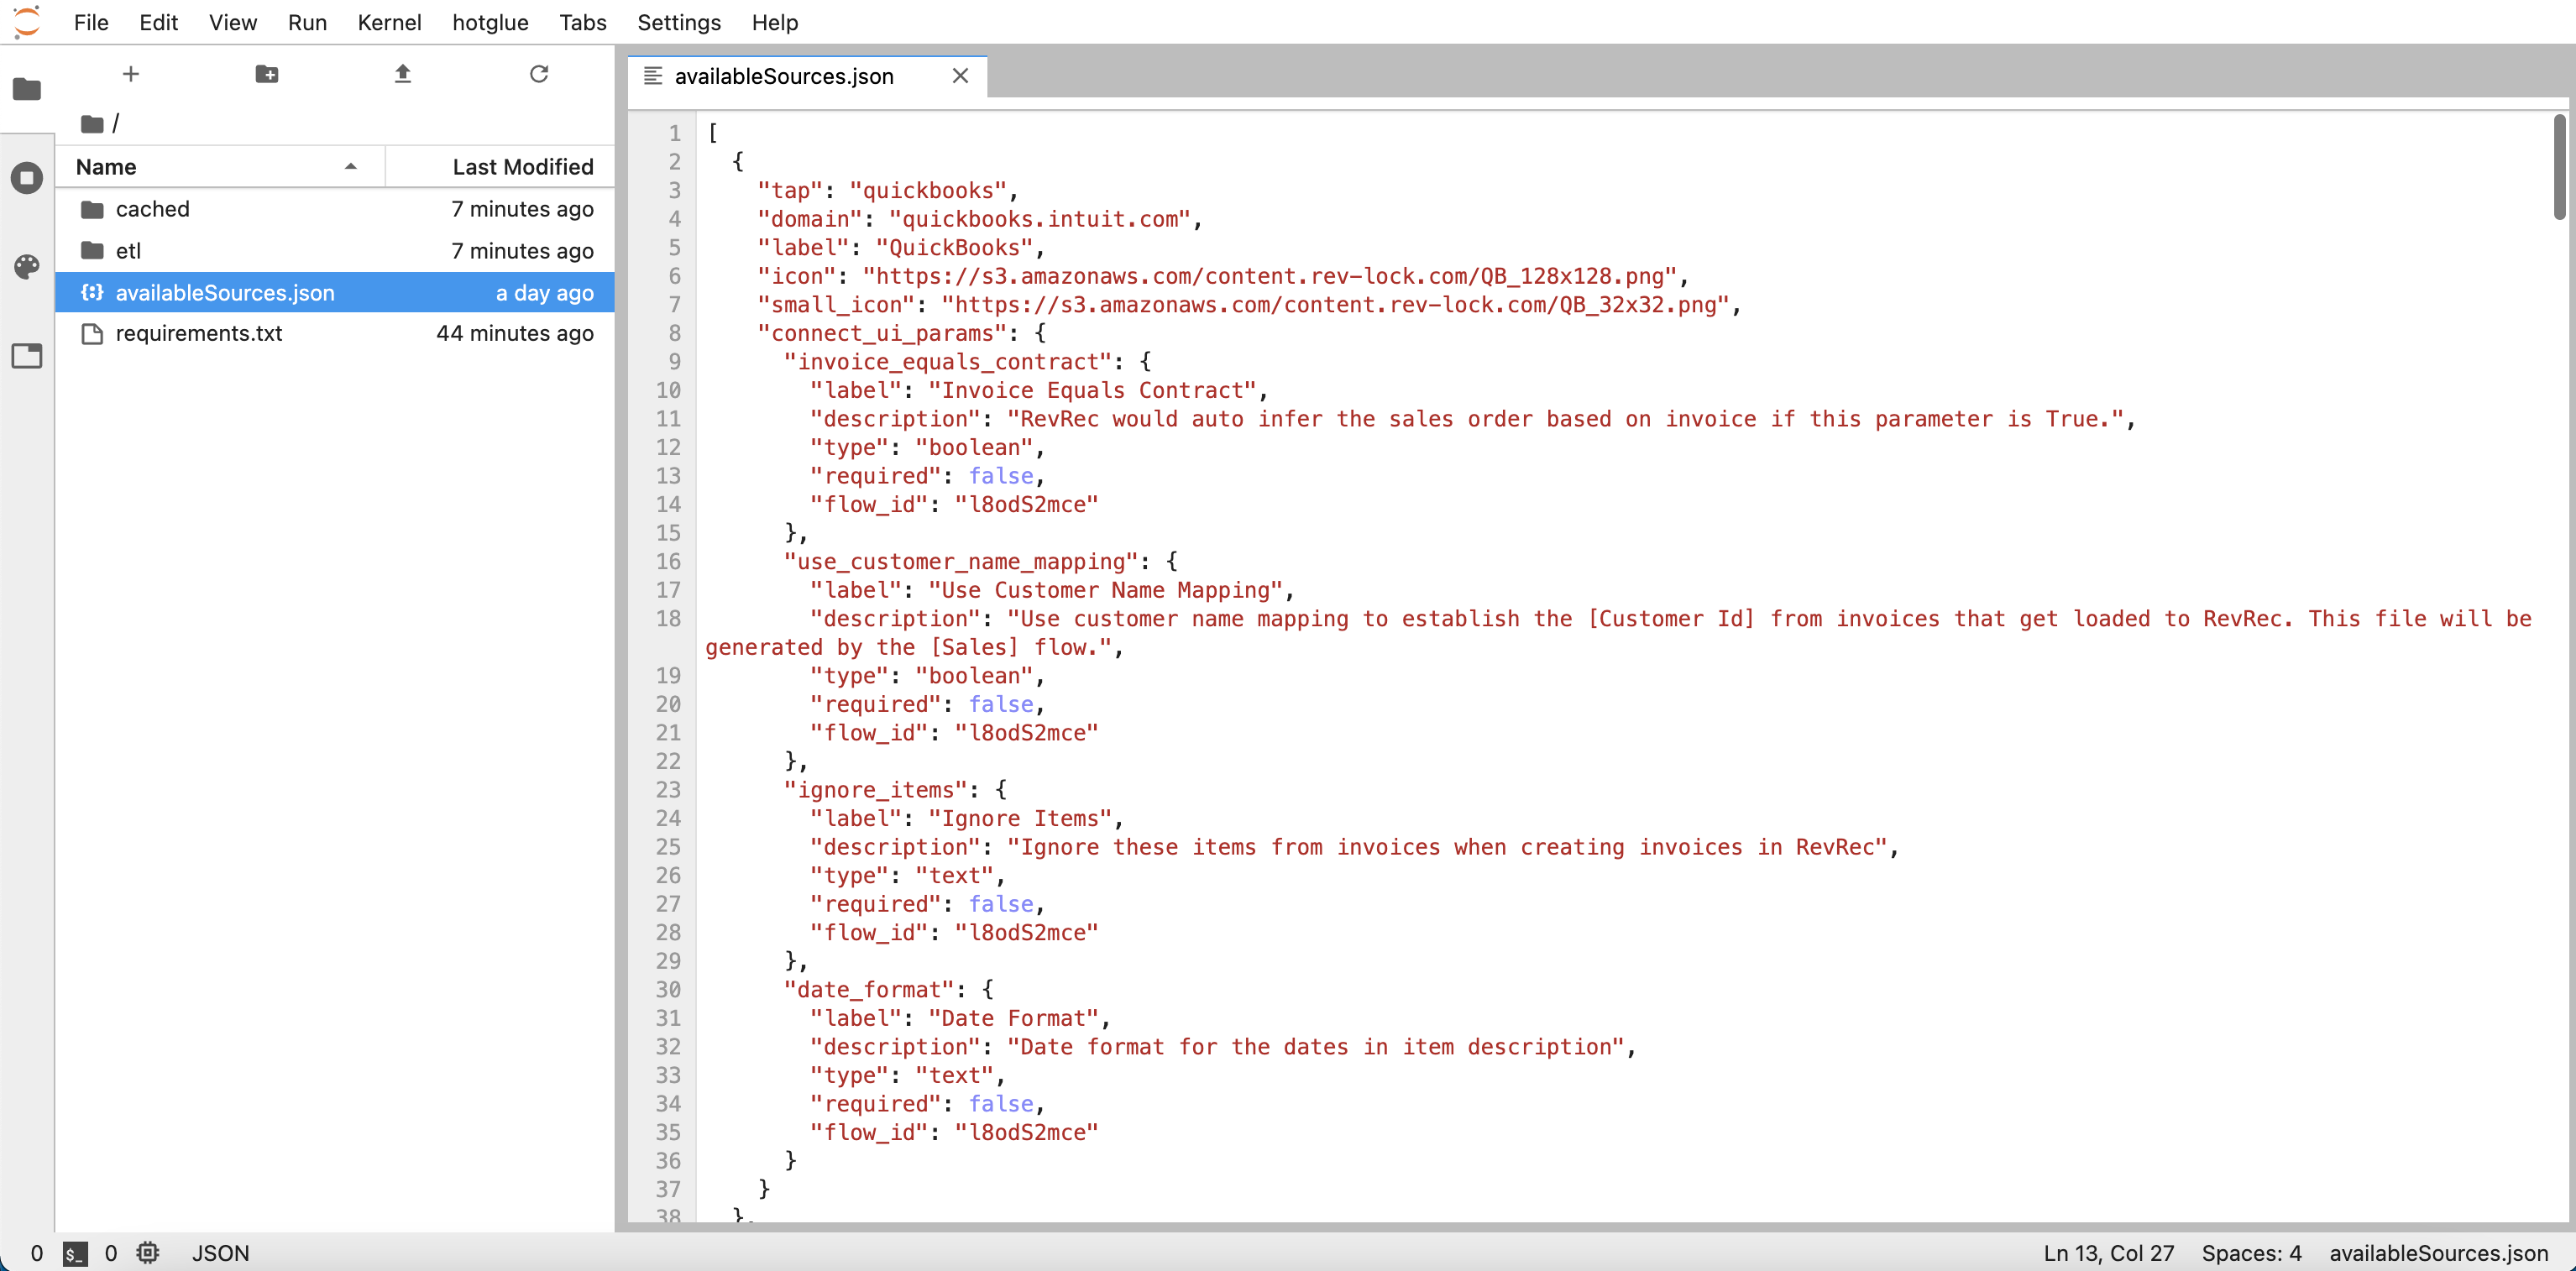
Once inside, you will create anavailableSources.json which specifies an override for the source you wish to specify custom parameters for. A sample is given below:
JSON
connect_ui_params key and have the following options:
| Name | Description |
|---|---|
label | The label shown in the hotglue widget for this parameter |
description | The description shown in the hotglue widget for this parameter |
type | The type of the parameter. Valid values are: text, password, boolean, select, and list |
required | Whether this parameter is required for connection true or false, defaults to false |
Deploy the custom params
Once you’ve specified the parameters, you must deploy them to hotglue. To start, verify youravailableSources.json is in the root directory as shown below:


How to access the custom params?
Now that your custom params are configured, you can access the values tenants set in your transformation script. The data will be available in theconfig.json file, here’s a sample script:
Python