Connector Details
| Name | Value |
|---|---|
| Platform | BigQuery |
| Auth Type | API Keys |
| Direction | Bidirectional |
| Tap Repo | https://gitlab.com/hotglue/tap-bigquery |
| Target Repo | https://github.com/hotgluexyz/target-bigquery |
| Tap Metrics | Usage: |
| Target Metrics | Usage: |
Credentials Setup
Follow the steps below to get the credentials you need to use the BigQuery connector.How to get your BigQuery credentials
Enable the BigQuery API
First and foremost, make sure you are logged in to the correct Google account that you would like to access BigQuery from. Once you’re logged in to the correct Google account, head to the Google Cloud Platfrom Web Console. Once you are on the home page of GCP’s Web Console, head to the navigation bar on the left side of the screen. Once you open the Navigation bar, head to the APIs & Services tab, and select Library from the resulting drop down.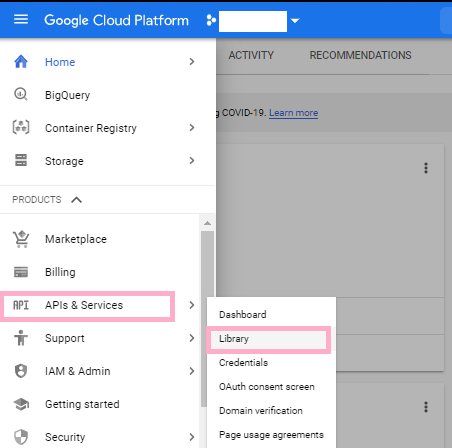 This will take you to a page where you should input BigQuery in the search box. Once it pops up, go ahead and click on it.
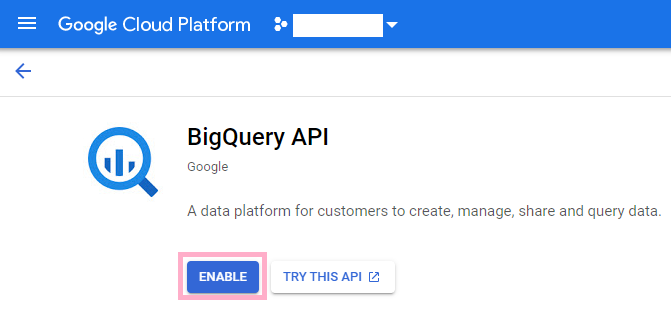
Now, go ahead and click the Enable button in order to enable the BigQuery API.
This will take you to a page where you should input BigQuery in the search box. Once it pops up, go ahead and click on it.
Now, go ahead and click the Enable button in order to enable the BigQuery API.
Authenticating with a service account
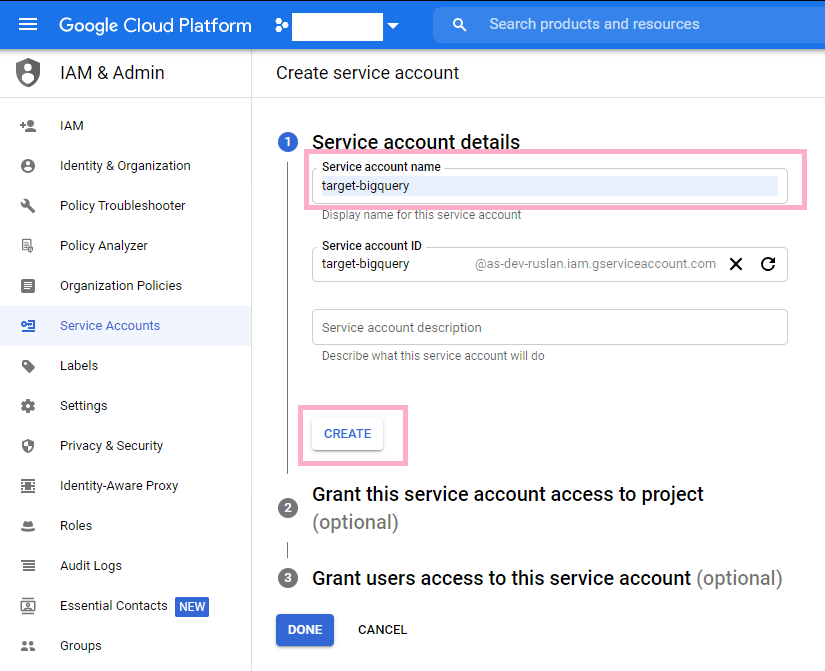
It is recomended that you use a service account with the BigQuery target. To create service account credentials, take the following steps. Use the navigation bar on the left again to navigate to the APIs & Services tab and select Credentials from the resulting drop down menu. Once you are on the Credentials page, click the Create Credentials button at the top of the page, which will trigger a drop down menu. From that drop down menu, go ahead and select Service Account.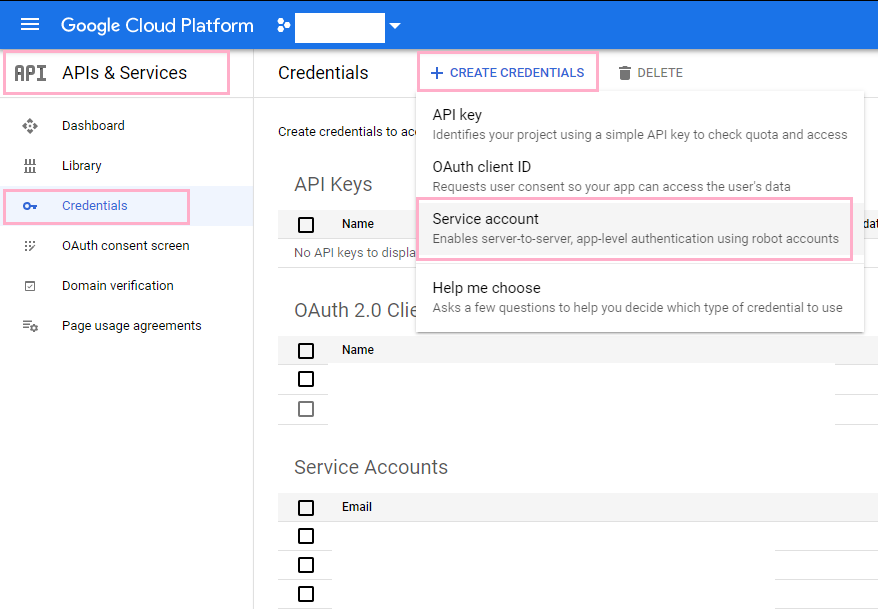 Under the Service account details, title the account target-bigquery and click the Create button.
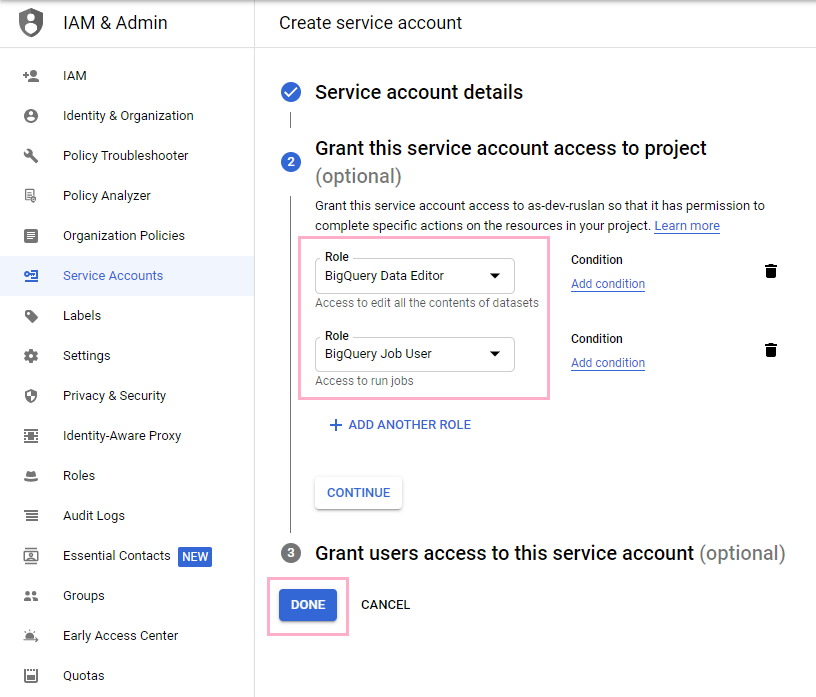
 Under Grant this service account access to project, make sure that you have two roles. The first role should allow the service account to be a BigQuery Data Editor. This allows the target to edit the contents of the data sets (write permissions). Make sure that the second role is BigQuery Job User. This is a bit self explanatory, it allows the target to run jobs.
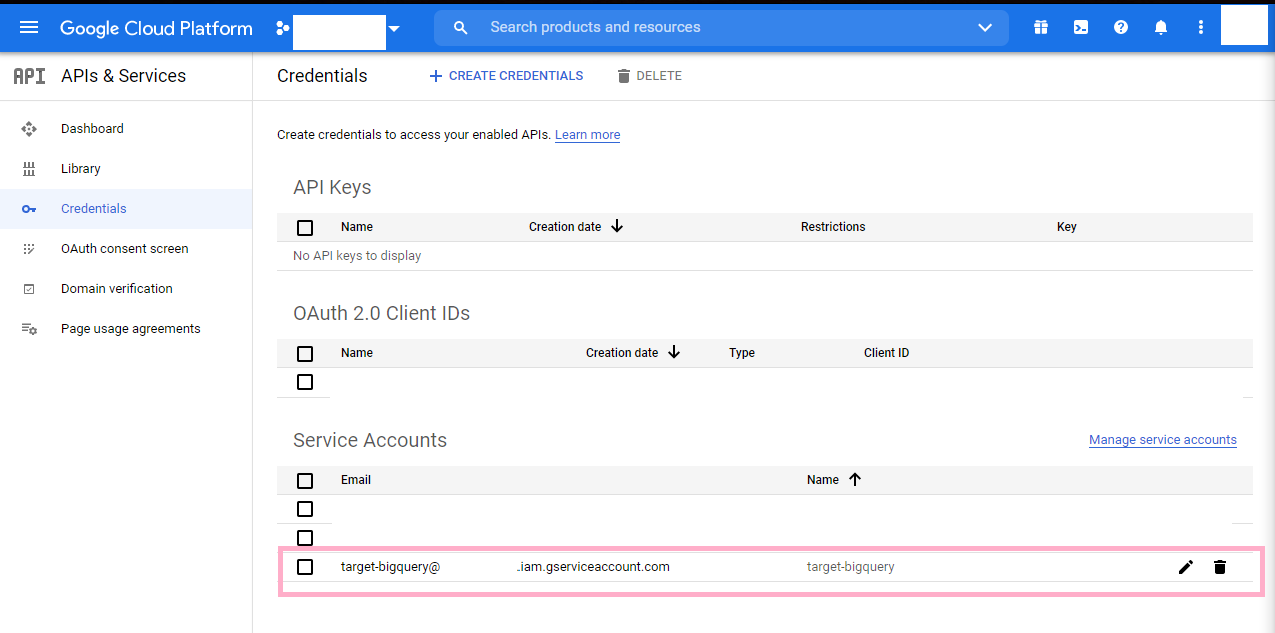
 Now, using the navigation panel again, head back to the APIs & Services tab and go the Credentials tab within the tab. You should see the service account you just created near the bottom of your screen. Go and click on it.
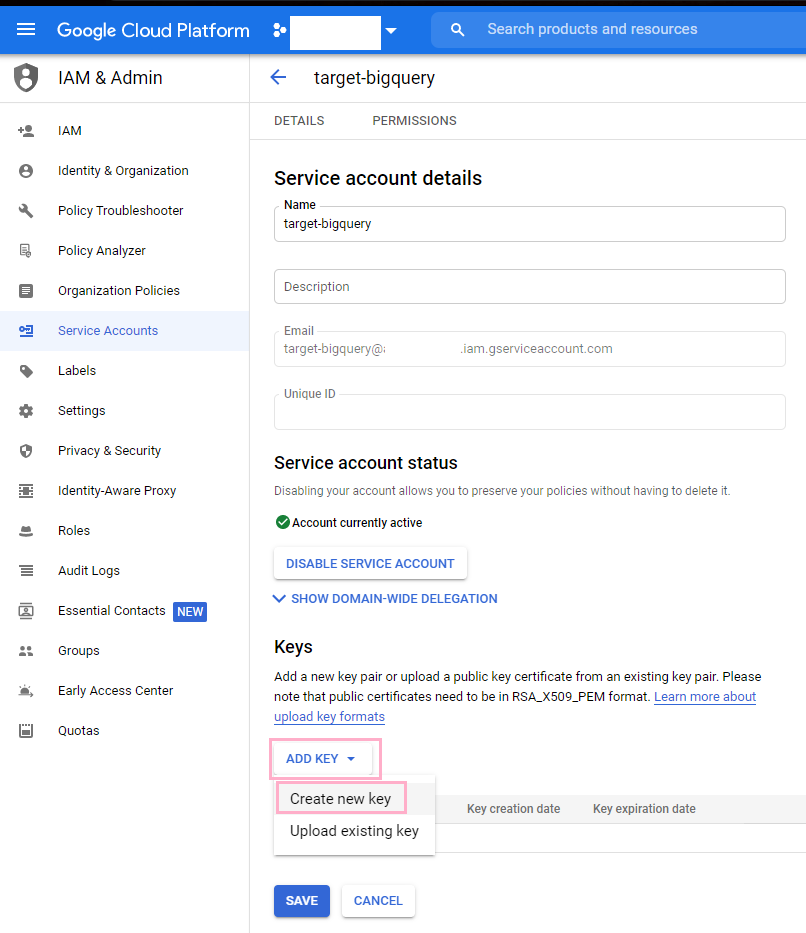
 Near the bottom of the page, you should go ahead and click the Add Key button which will prompt a dropdown. Once it does this, click Create new key.
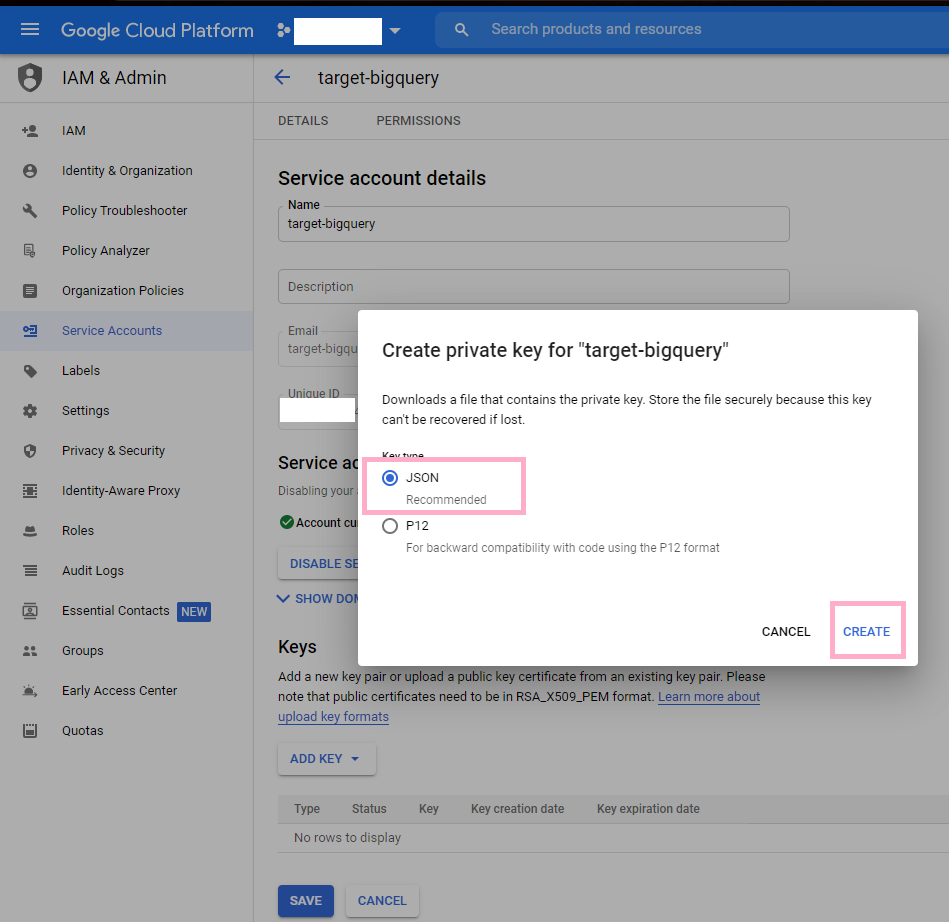
 Select JSON for your private key and click Create.
 You should go ahead and open the file. Make sure you keep this somewhere safe. This file holds the credentials that you should use to connect your BigQuery account as a target in hotglue.
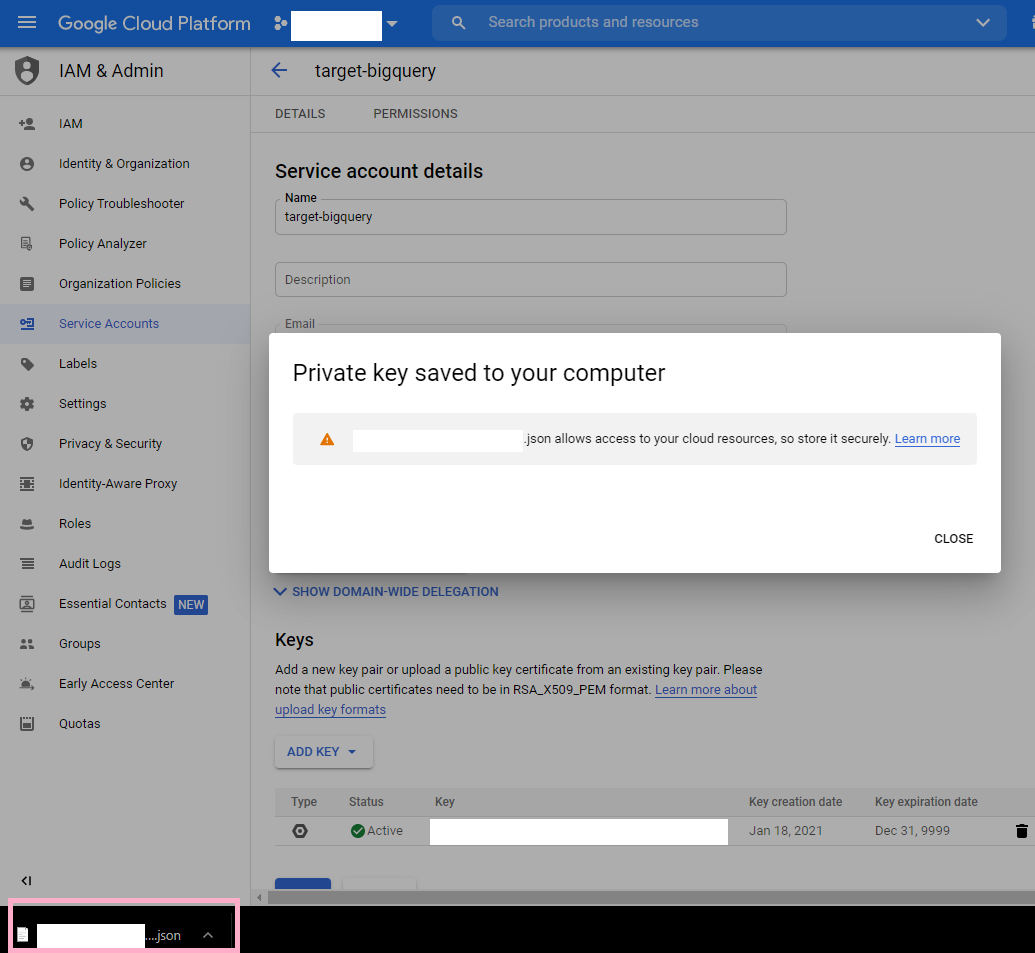 These are the credentials that are relevant for configuring your hotglue target. Paste them into their corresponding places in hotglue and you are all set!
Target BigQuery
Config
In addition to the BigQuery credentials above, you will need to specify the dataset the target should write to:target-tables-config: Set up partioning and clustering
Target-BigQuery also supports an optionaltarget-tables-config.json which can be written during the ETL phase.
The config allows you to detail partioning and clustering logic for particular streams.
Partitioning background
A partitioned table is a special table that is divided into segments, called partitions, that make it easier to manage and query your data. By dividing a large table into smaller partitions, you can:- improve query performance,
- control costs by reducing the number of bytes read by a query.
- Ingestion time: Tables are partitioned based on the data’s ingestion (load) time or arrival time.
- Date/timestamp/datetime: Tables are partitioned based on a TIMESTAMP, DATE, or DATETIME column.
- Integer range: Tables are partitioned based on an integer column.
Clustering background
- When you create a clustered table in BigQuery, the table data is automatically organized based on the contents of one or more columns in the table’s schema.
- The columns you specify are used to colocate related data.
- When you cluster a table using multiple columns, the order of columns you specify is important. The order of the specified columns determines the sort order of the data.
- Clustering can improve the performance of certain types of queries such as queries that use filter clauses and queries that aggregate data.
- You can cluster up to 4 columns in a table
Replication Methods
There is also an optional parameterreplication_method which can be used to determine the upserting behavior for a particular stream.
Possible values are:
append: Adding new rows to the table (Default value)truncate: Deleting all previous rows and uploading the new ones to the tableincremental: Upserting new rows into the table, using the primary key given by the tap connector (if it finds an old row with same key, updates it. Otherwise it inserts the new row)
Example target-tables-config.json
To add partioning and clustering to a given stream, you can specify the partition_field and cluster_fields values respectively.
Example ETL Script
Optional config flags
| Property | Type | Description |
|---|---|---|
| table_suffix | String | Suffix to be added to the table name. |
| validate_records | Boolean | If true, validates records before loading. |
| add_metadata_columns | Boolean | If true, adds metadata columns to the table. |
| location | String | Specifies the location where the data will be stored. Default is “US”. |
| replication_method | String | Method for replicating data. Options: append, truncate, incremental. Default is append. |
| max_cache | Integer | Maximum number of records to cache before writing to BigQuery. |
| merge_state_messages | Boolean | If true, merges state messages. |
| force_alphanumeric_table_names | String | If true, replaces all non-alphanumeric characters in table names with _ |