Connector Details
| Name | Value |
|---|---|
| Platform | Chargebee |
| Auth Type | API Keys |
| Direction | Read |
| Tap Repo | https://github.com/hotgluexyz/tap-chargebee |
| Tap Metrics | Usage: |
Credentials Setup
Follow the steps below to get the credentials you need to use the Chargebee connector. To obtain your Chargebee credentials, you must first login to Chargebee. If you don’t currently have an account, you can make a free one here.Site Name
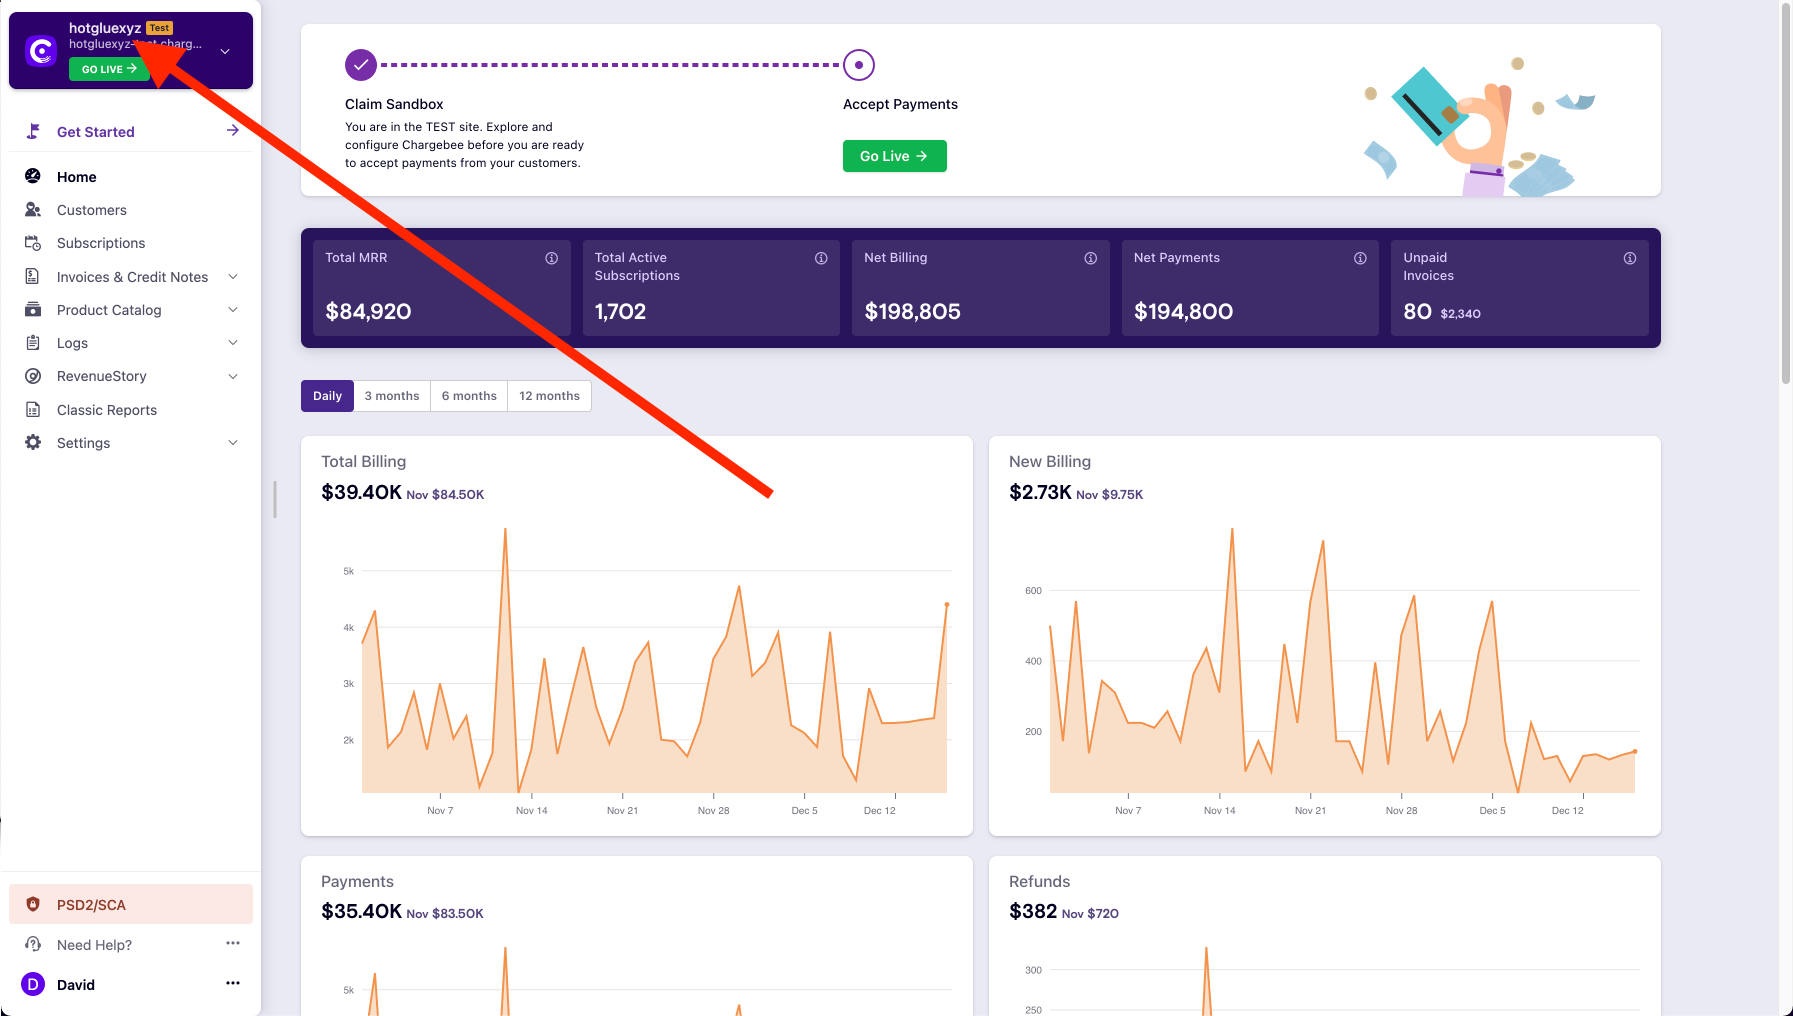 Once you do login, you should be greeted with a page similar to this. The first credential you will need for hotglue is your site name. You can find that in the top right hand corner of your screen.
Note: If you are using a testing account and/or sandbox, your site name will be yoursitename-test. You can see in the example above that the account we are connecting is a test account. If you are not sure if you have a test account, you can also check the url of your site. The beginning of the URL is also your site name.
API Key
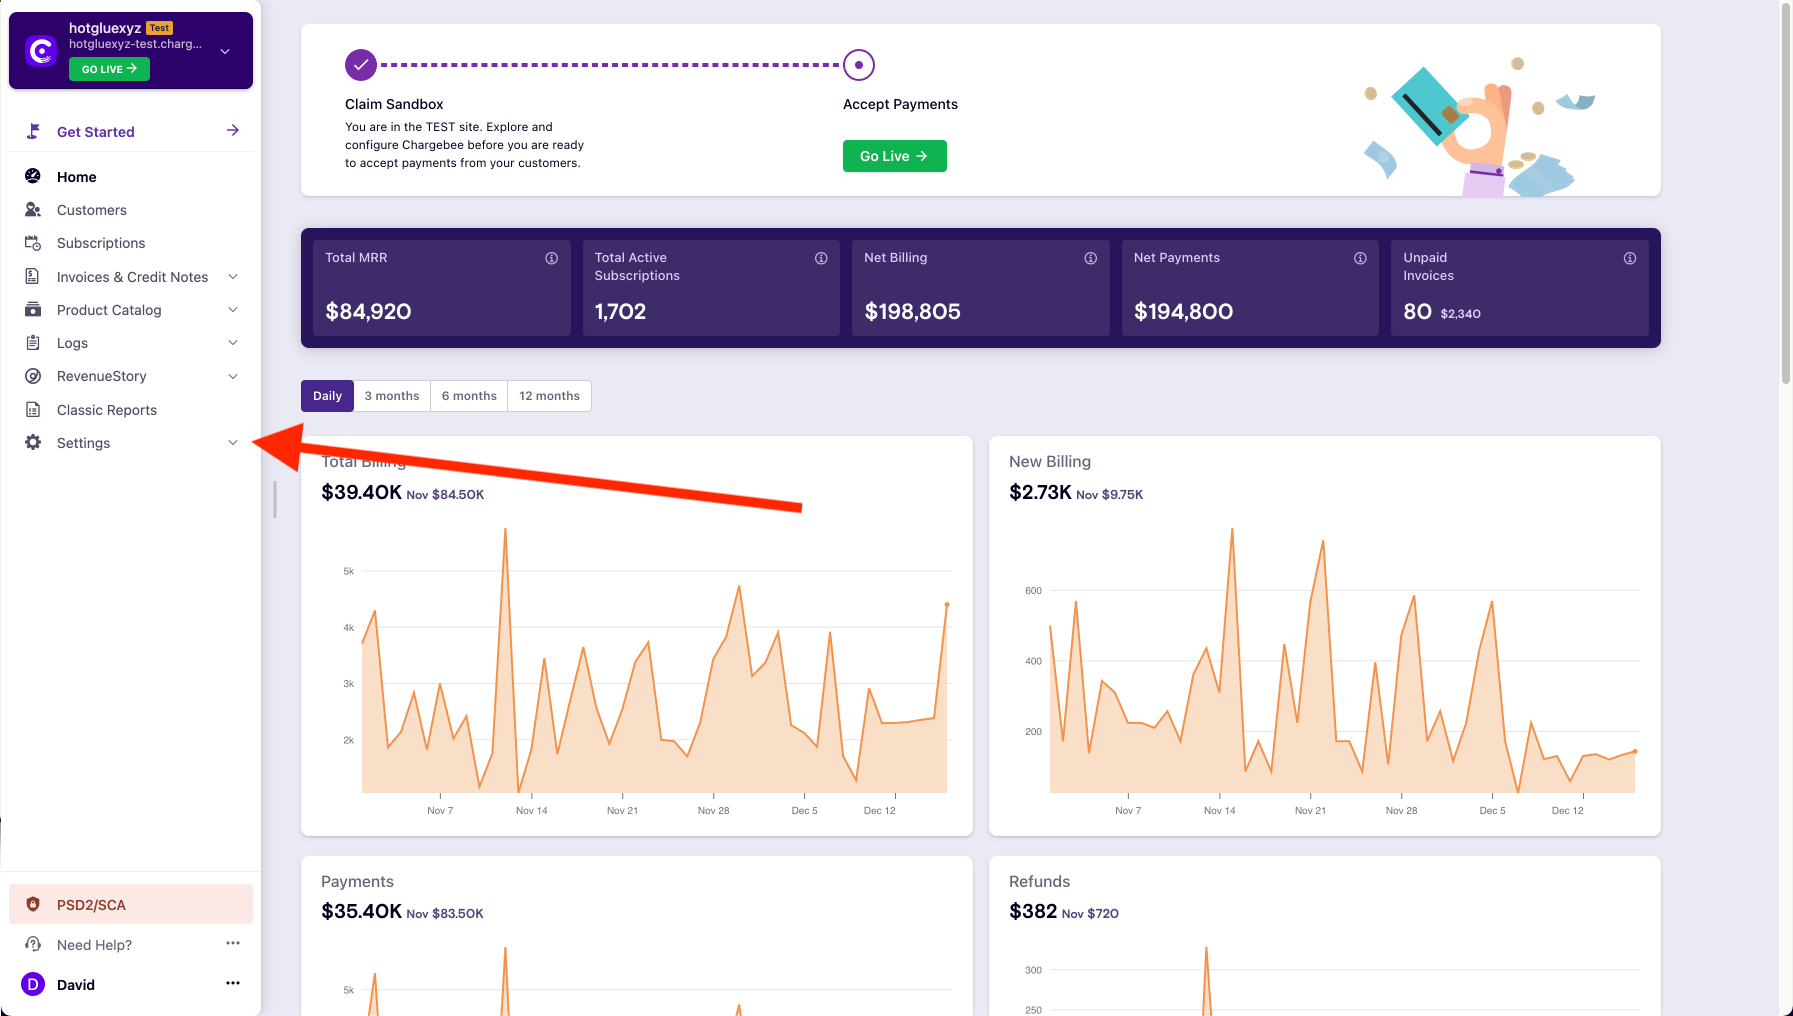 The next credential you will need is your API key. From the home page, you should click the Settings dropdown from the navigation bar on the left hand side.
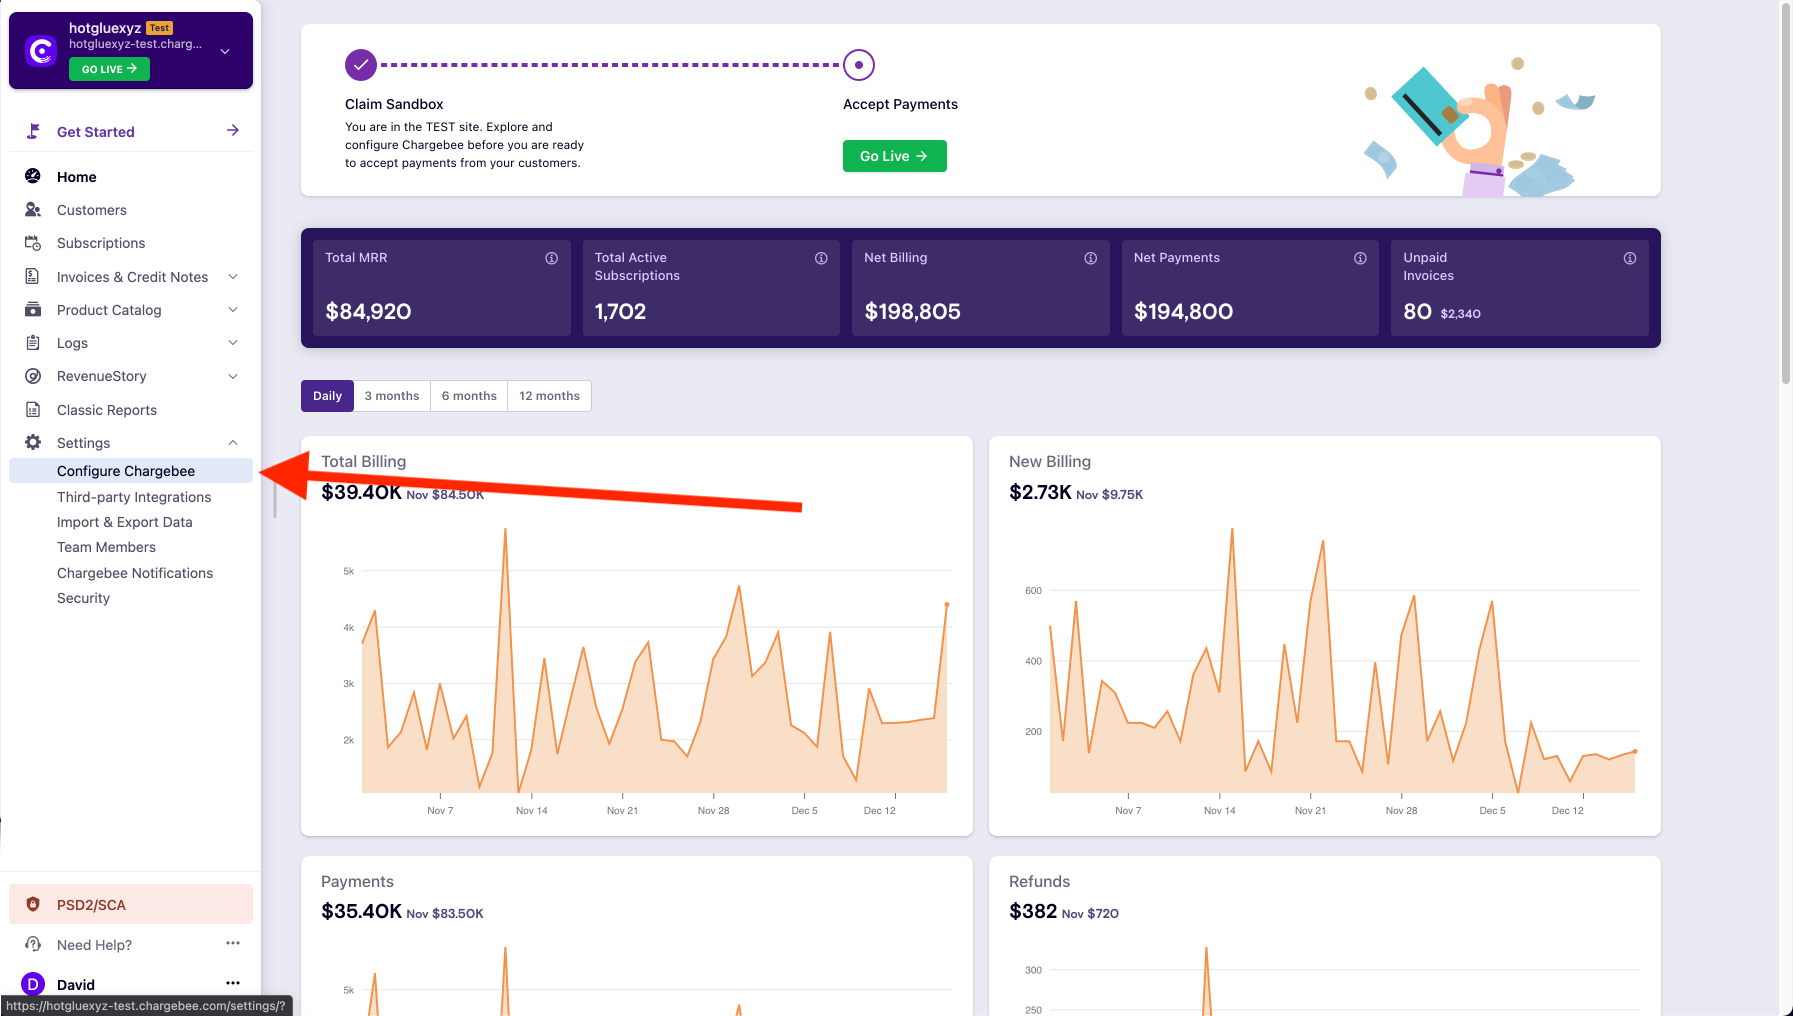 From the resulting drop down, you should select the Configure Chargebee tab.
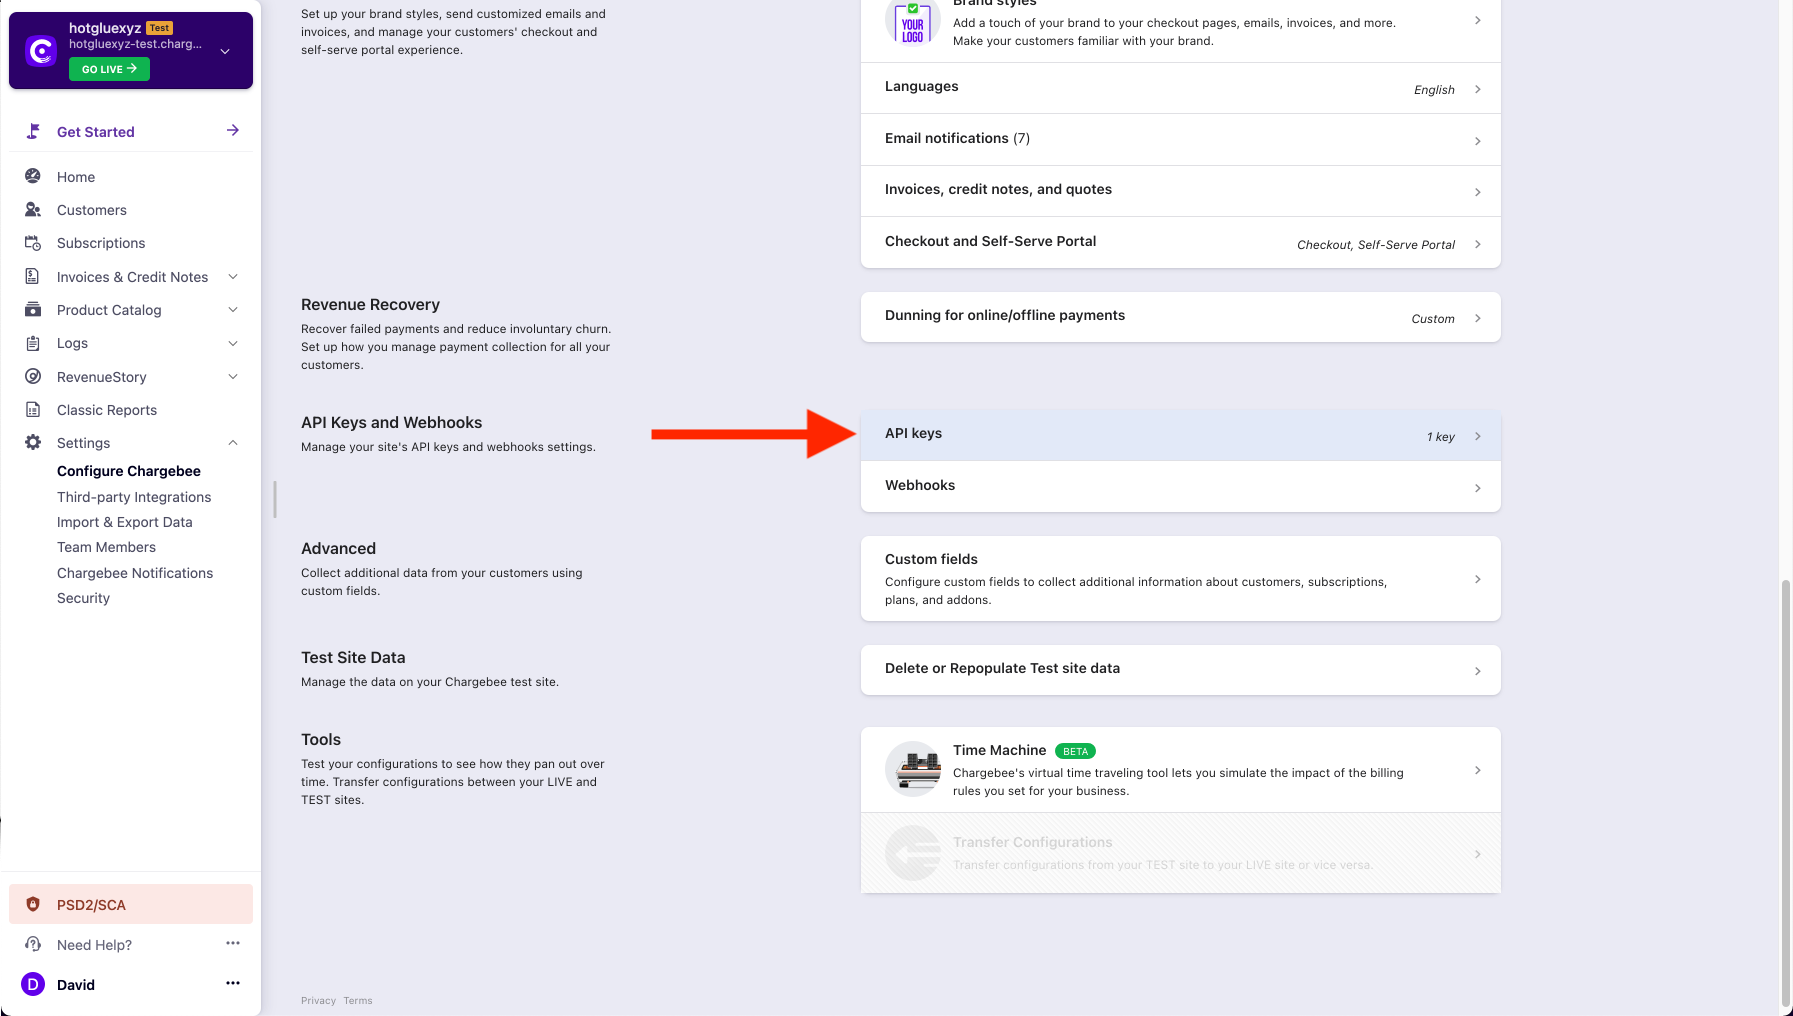 On this page, scroll down until you get to the API Keys and Webhooks section. You should then click on the API keys option.
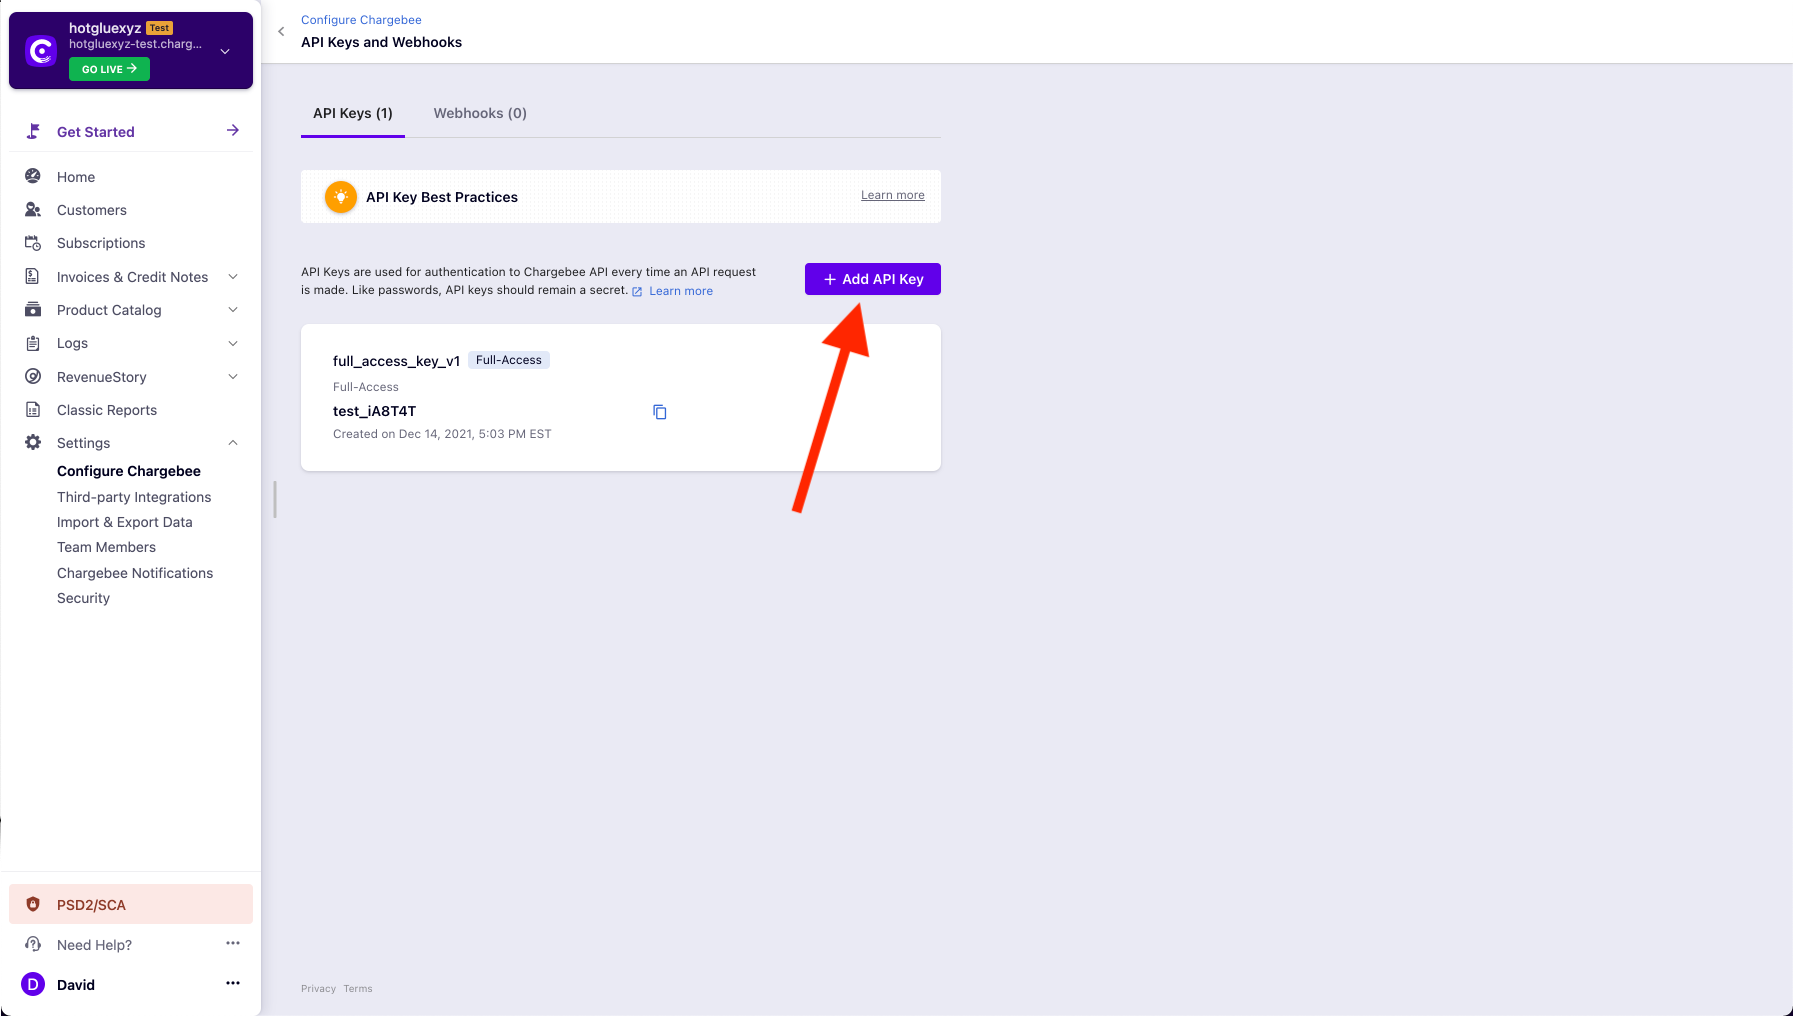 You will now be on a page where you can create new API Keys. You should go ahead and create a new key for hotglue. Do this by click on the Add API Key button.
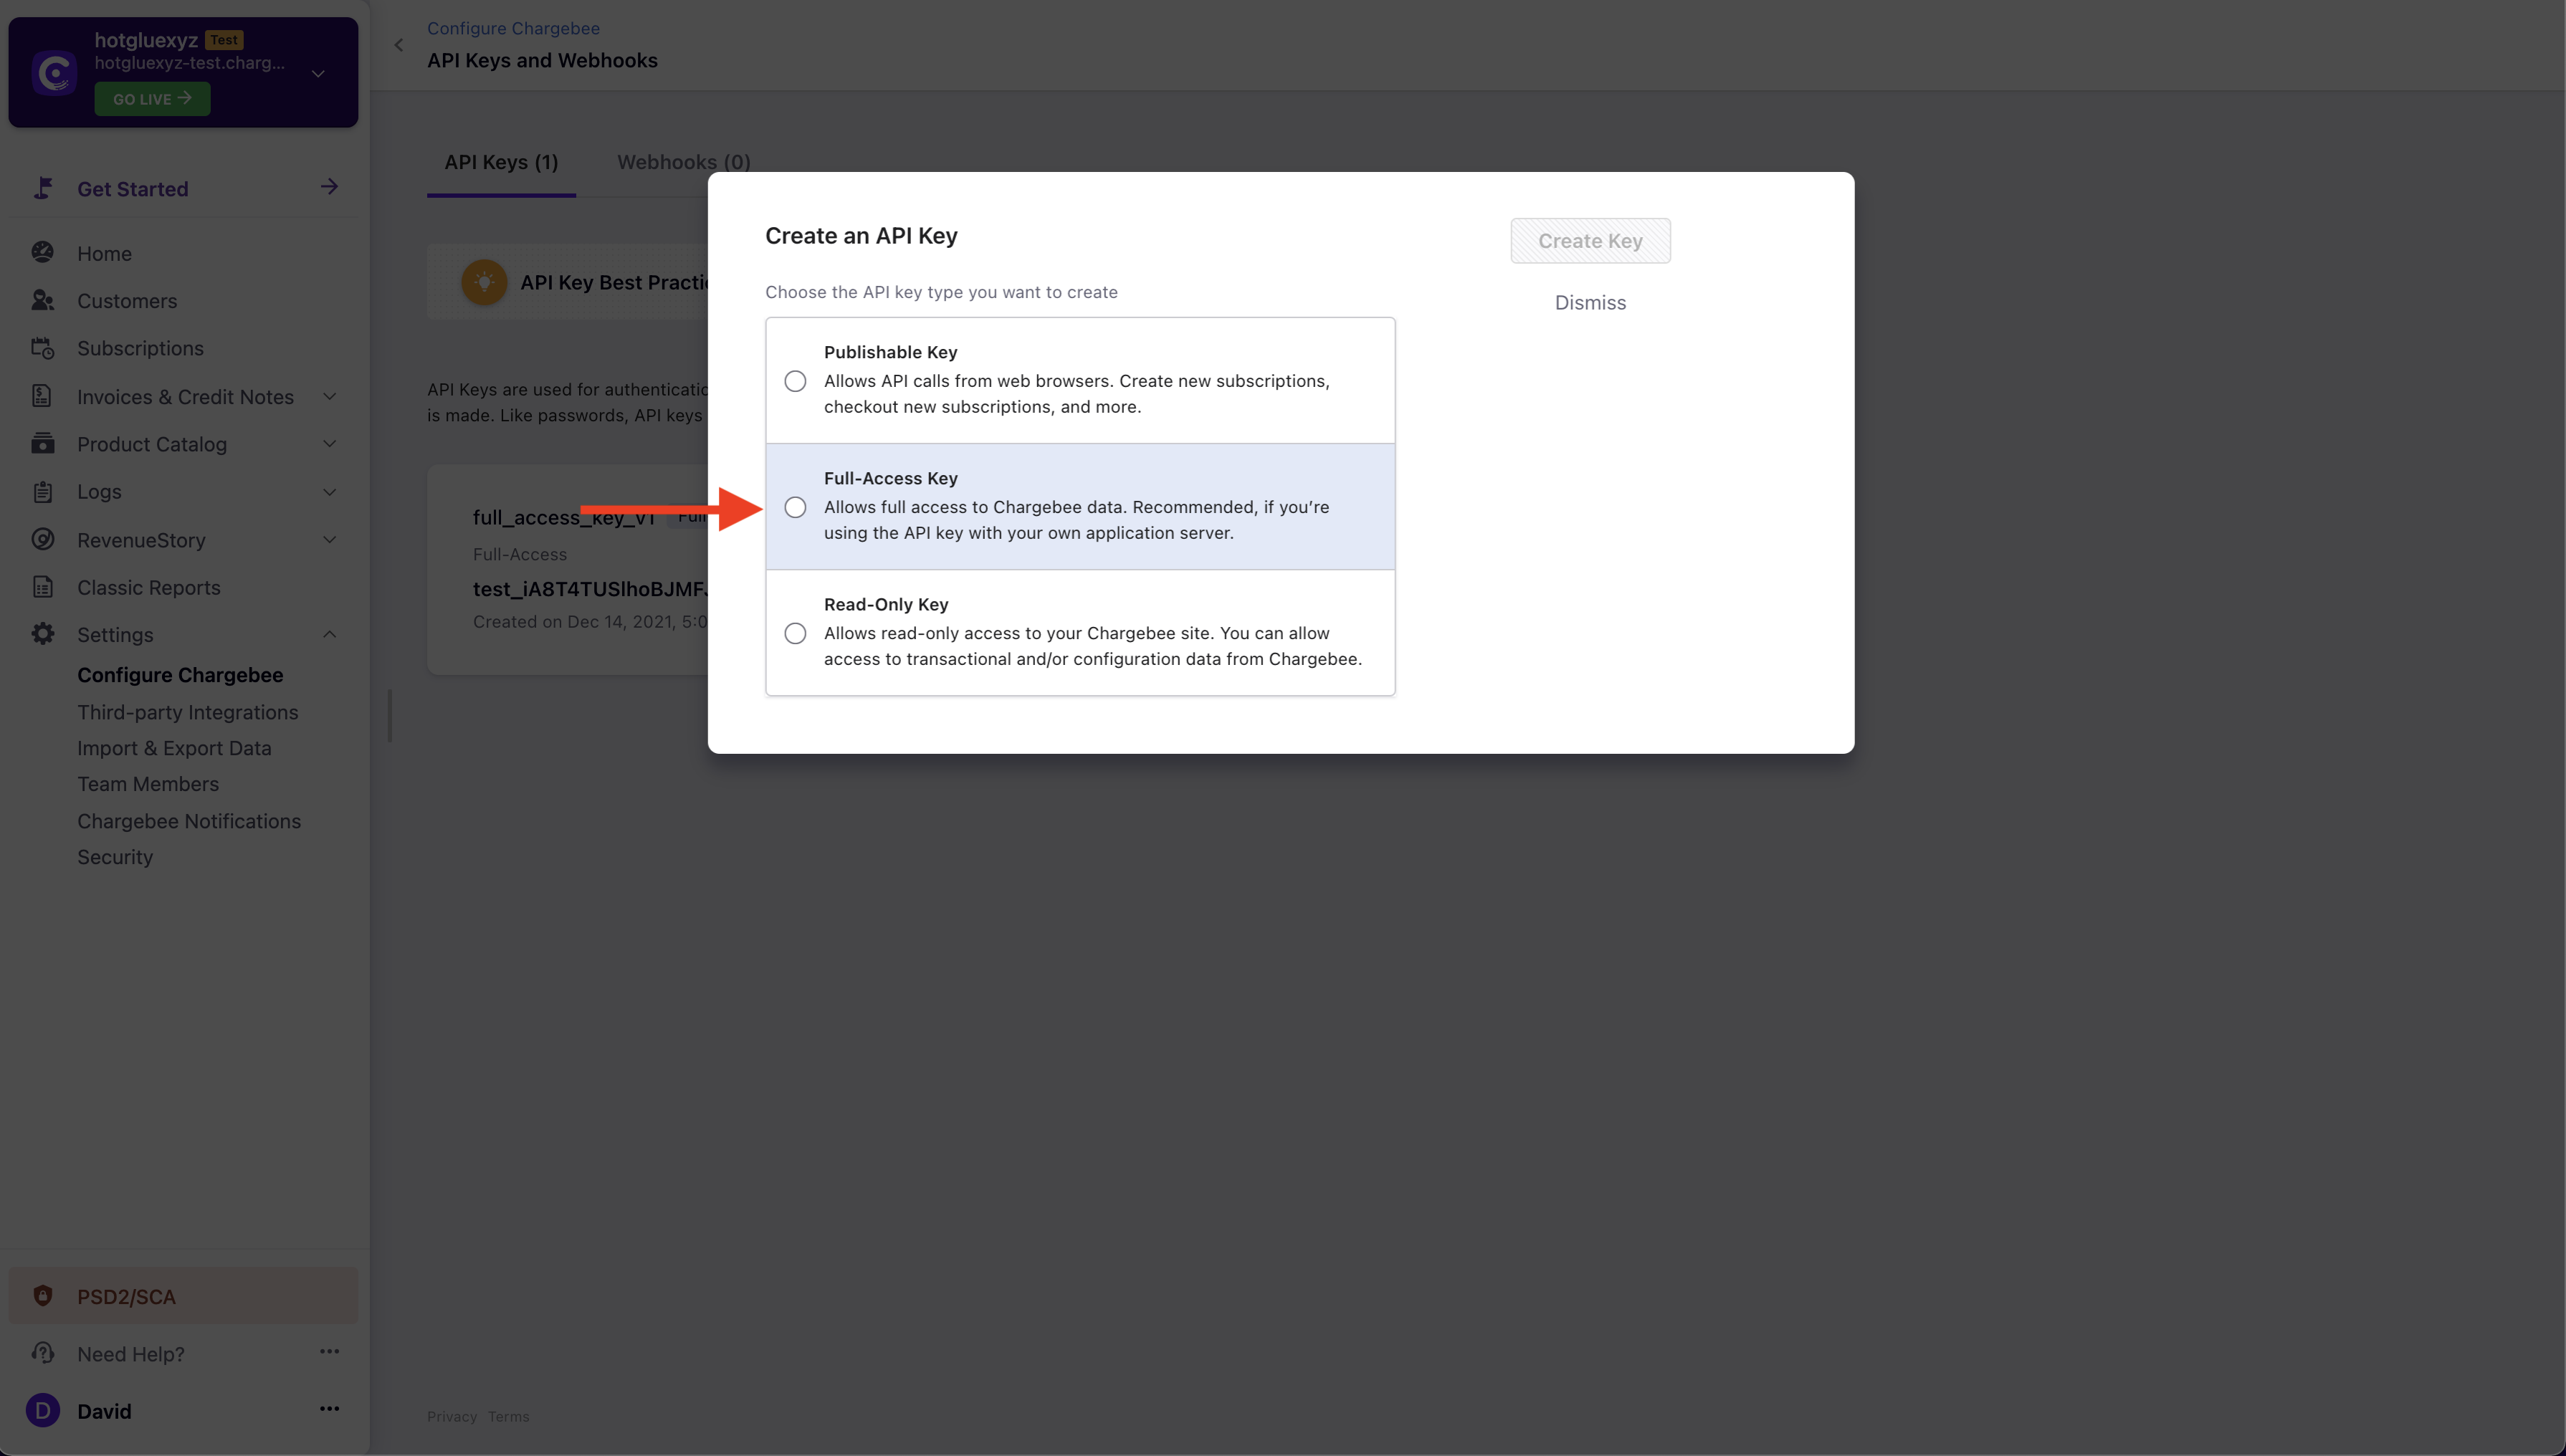 You will now be asked what kind of key you want to create. You should go ahead and select the Full-Access Key option.
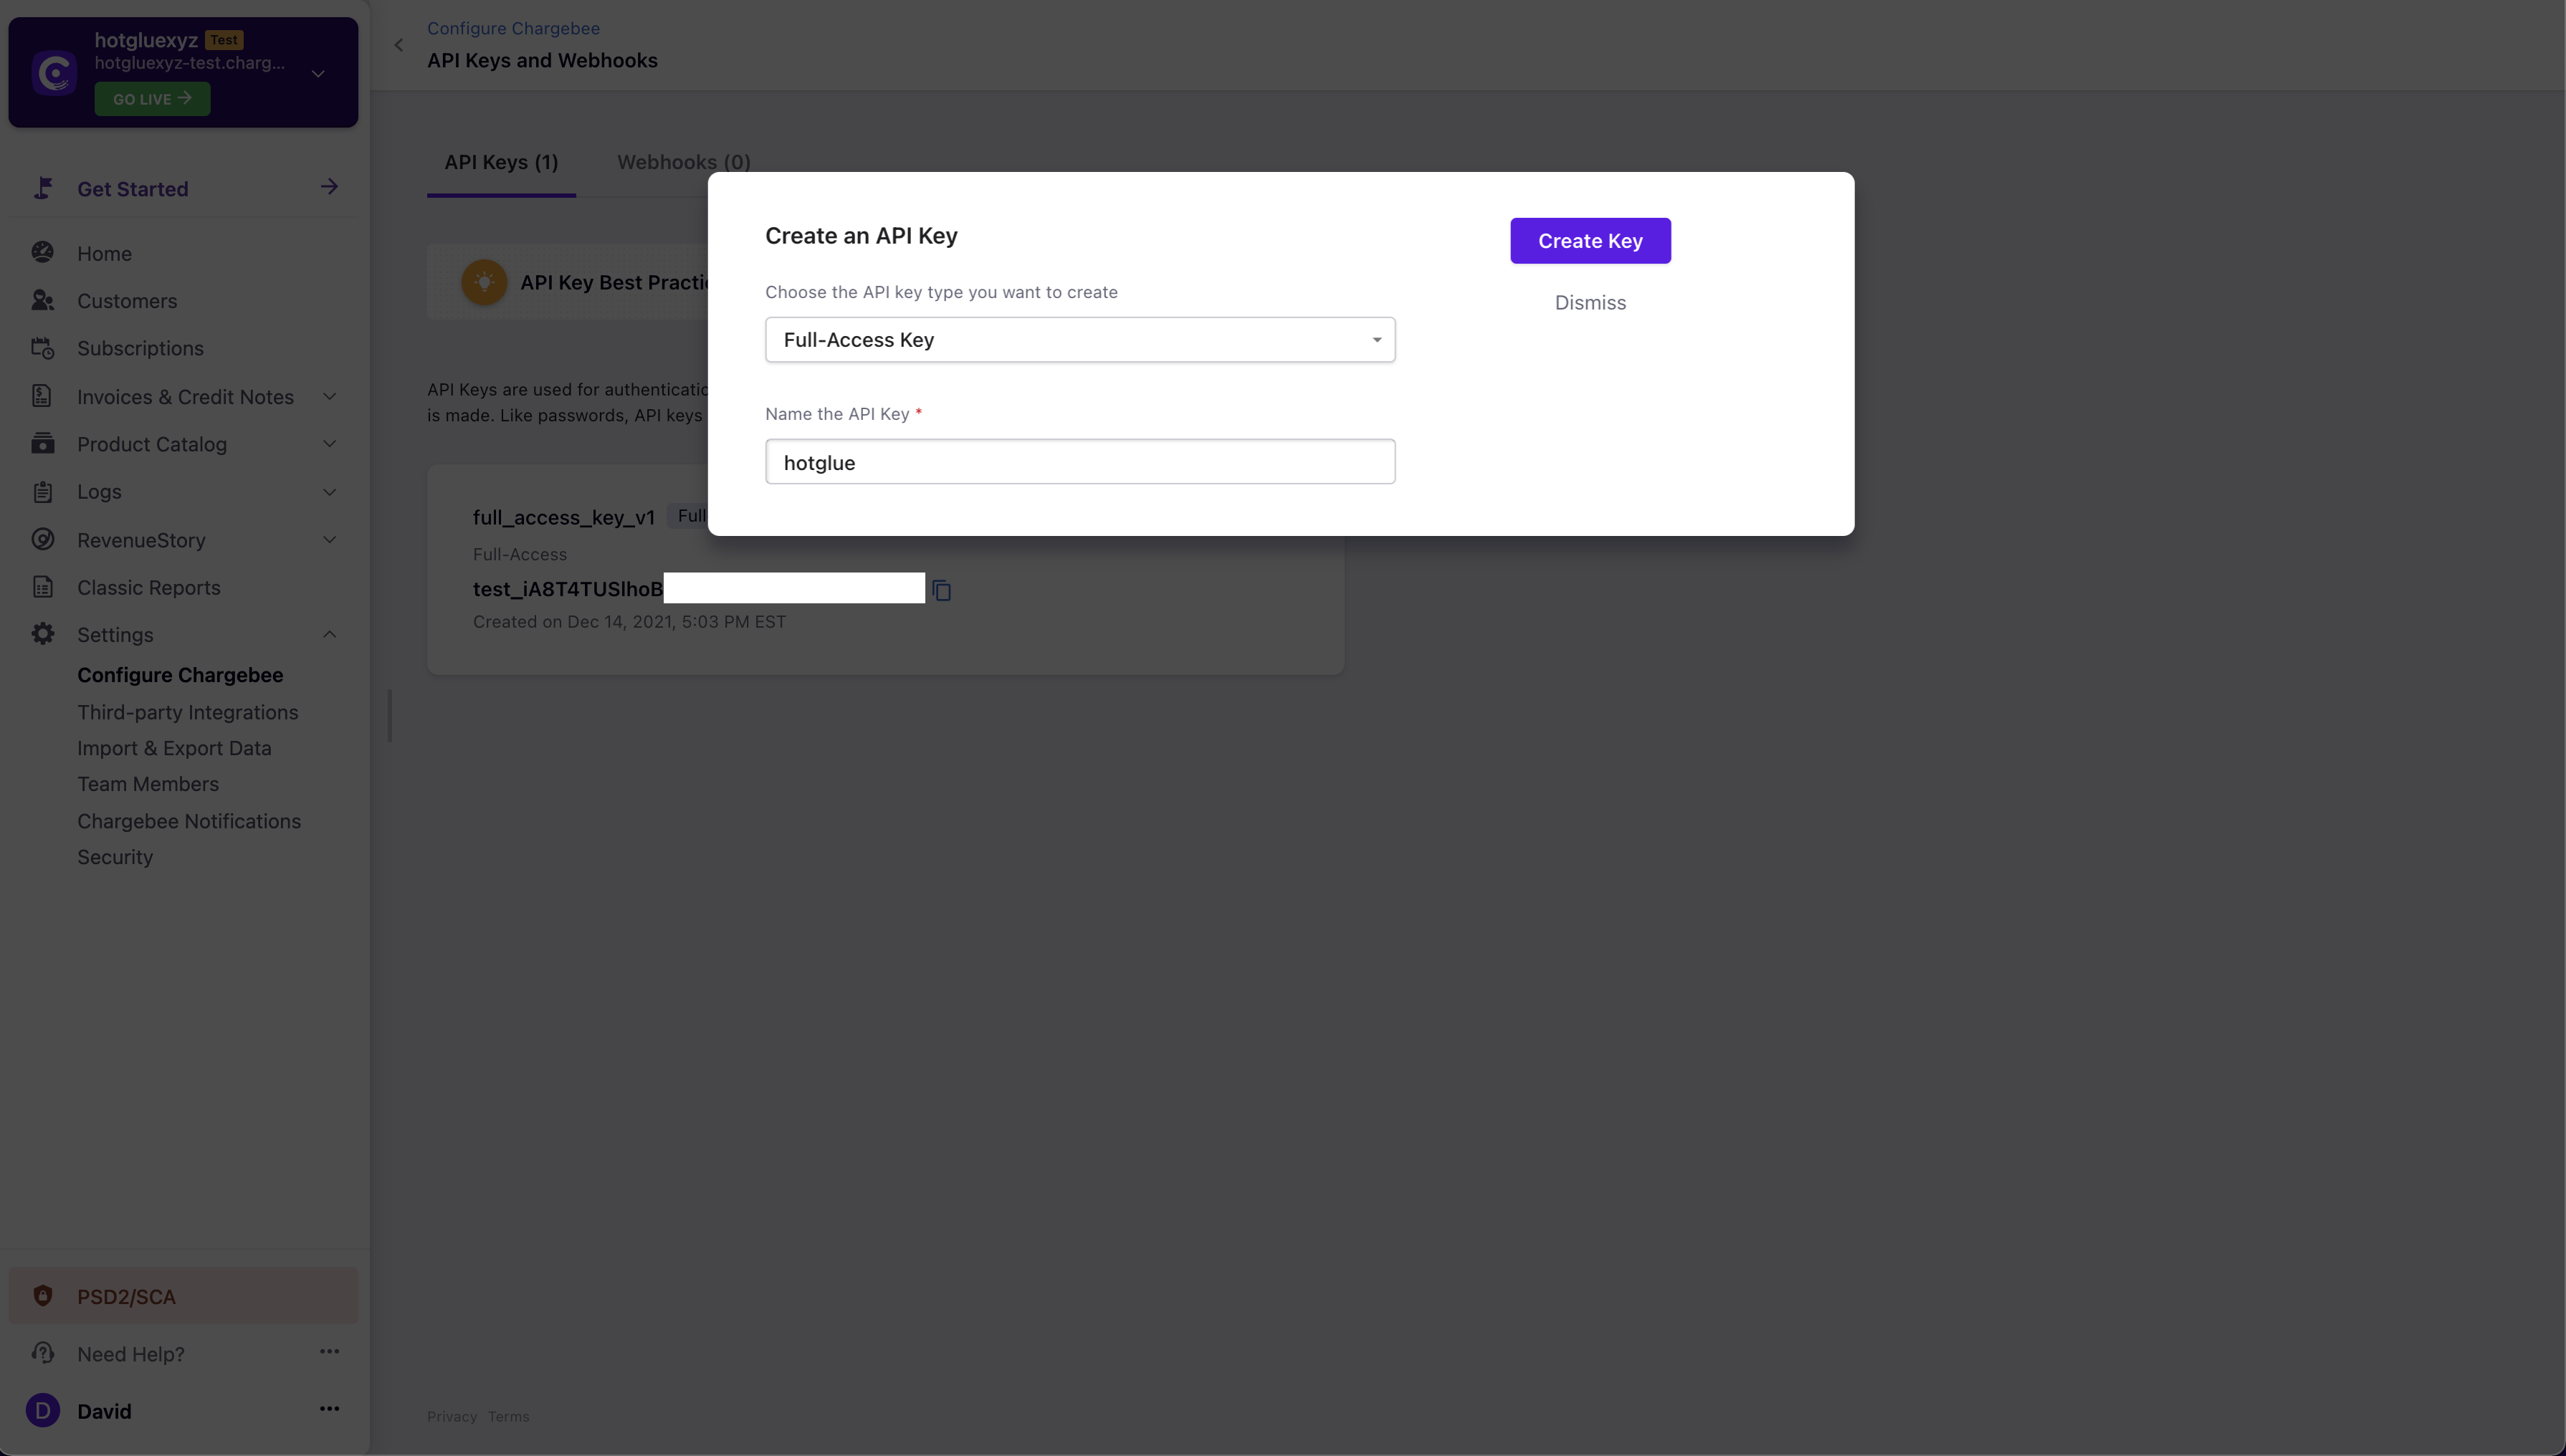 Now go ahead and name your key hotglue. Subsequently, you should click Create Key.
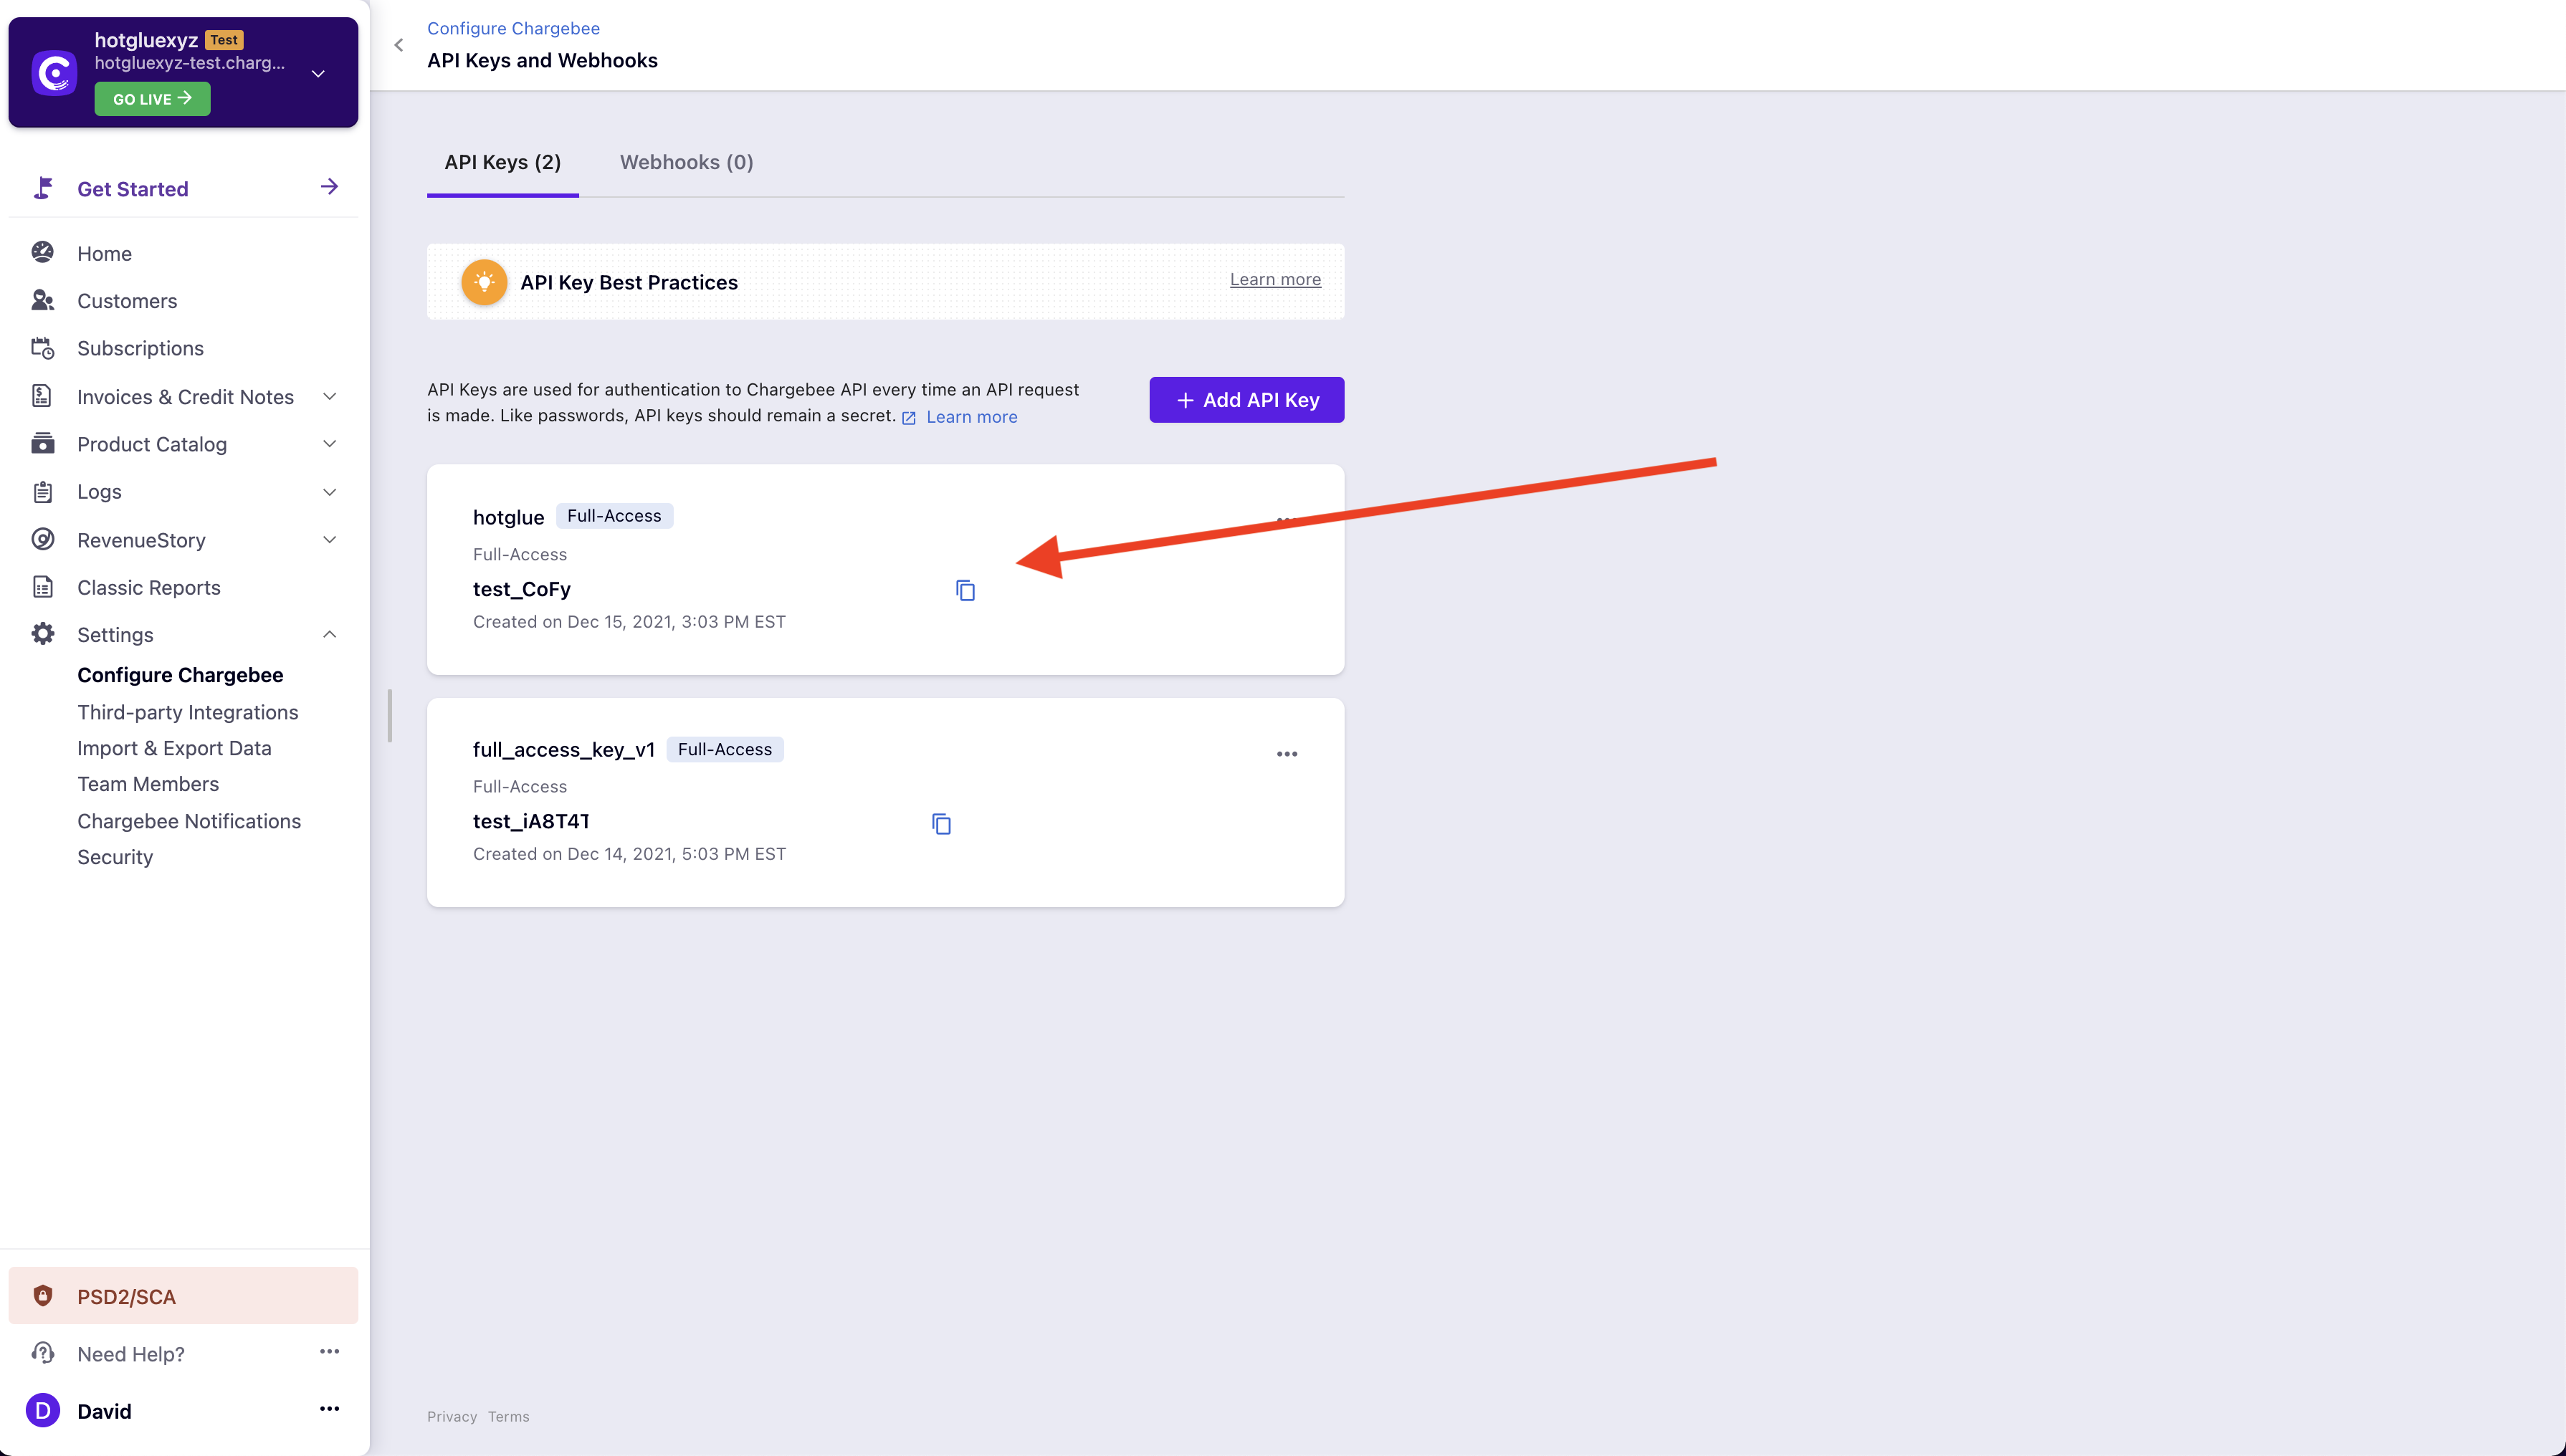 Now you have your API Key! Make sure to copy this into hotglue.
Tap Changelog
Tap Changelog
Tap Changelog
| Version | Notes |
|---|---|
| v1.0.33 | |
| v1.0.32 | |
| v1.0.31 | Add ramps stream |
| v1.0.30 | |
| v1.0.29 | |
| v1.0.27 | |
| v1.0.26 | |
| v1.0.25 | |
| v1.0.24 | |
| v1.0.22 | |
| v1.0.21 | |
| v1.0.20 | |
| v1.0.19 | |
| v1.0.18 | |
| v1.0.17 | |
| v1.0.16 | |
| v1.0.15 | |
| v1.0.14 | |
| v1.0.13 | |
| v1.0.12 | |
| v1.0.11 | |
| v1.0.10 | |
| v1.0.9 | |
| v1.0.8 - Bug fixes | - Update tap to handle invalid responses from Chargebee API with retries |
| v1.0.7 - Add exchange rate to credit notes | - Add exchange rate to credit notes |
| v1.0.2 - Add Product Catalog 2.0 support | Adds support for new Chargebee product catalog |