

Connector Details
Credentials Setup - How to create a Salesforce Connected App
There are two separate authentication flows available for the Salesforce connector: Use only the section that matches your authentication flow. The steps below cover both OAuth flow and Client Credentials flow.OAuth flow
Follow the steps below to get the credentials you need to use the Salesforce connector. The first thing you need to do is go ahead and log in to Salesforce. Once you are logged in and on the home page, navigate to your Setup Menu: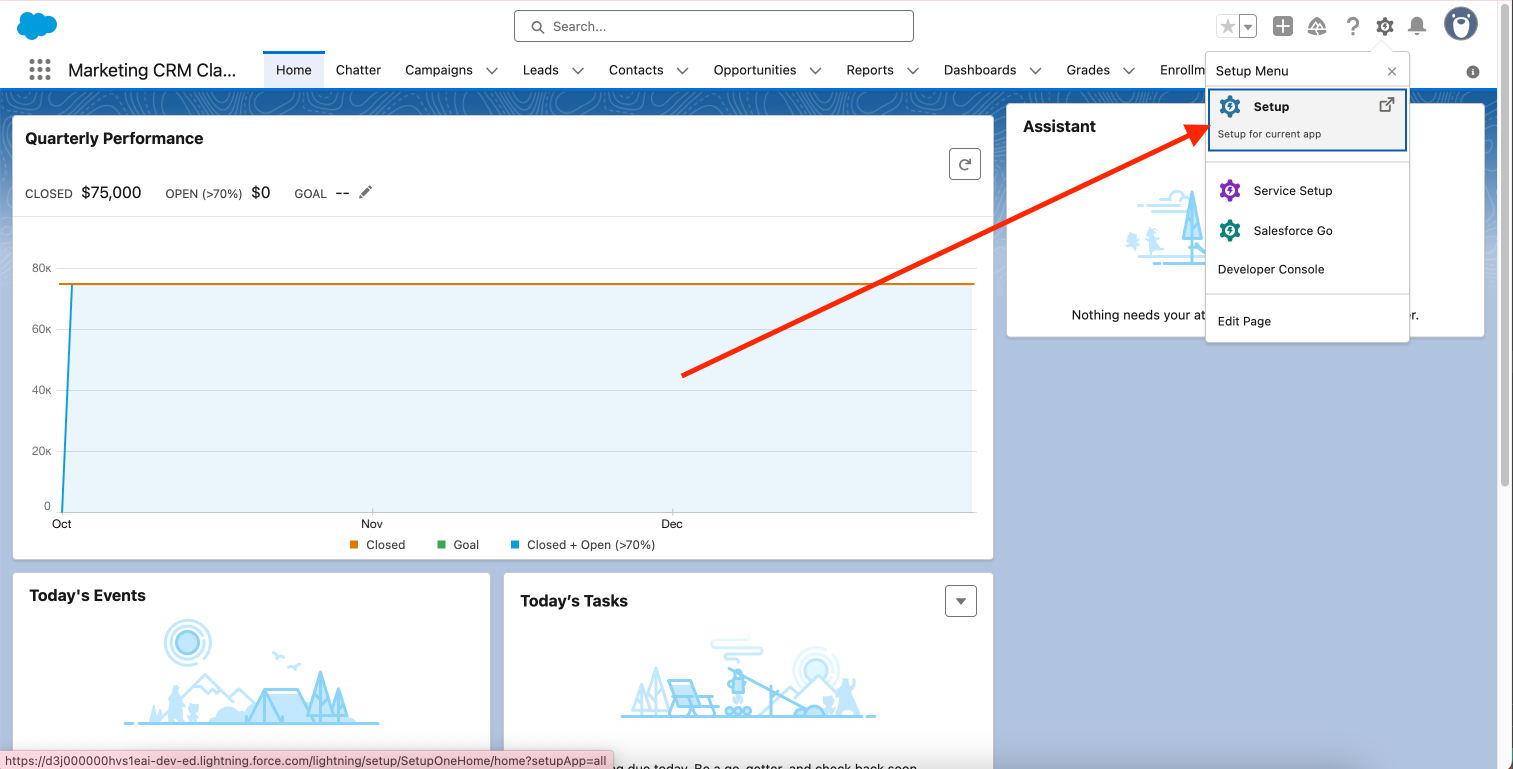
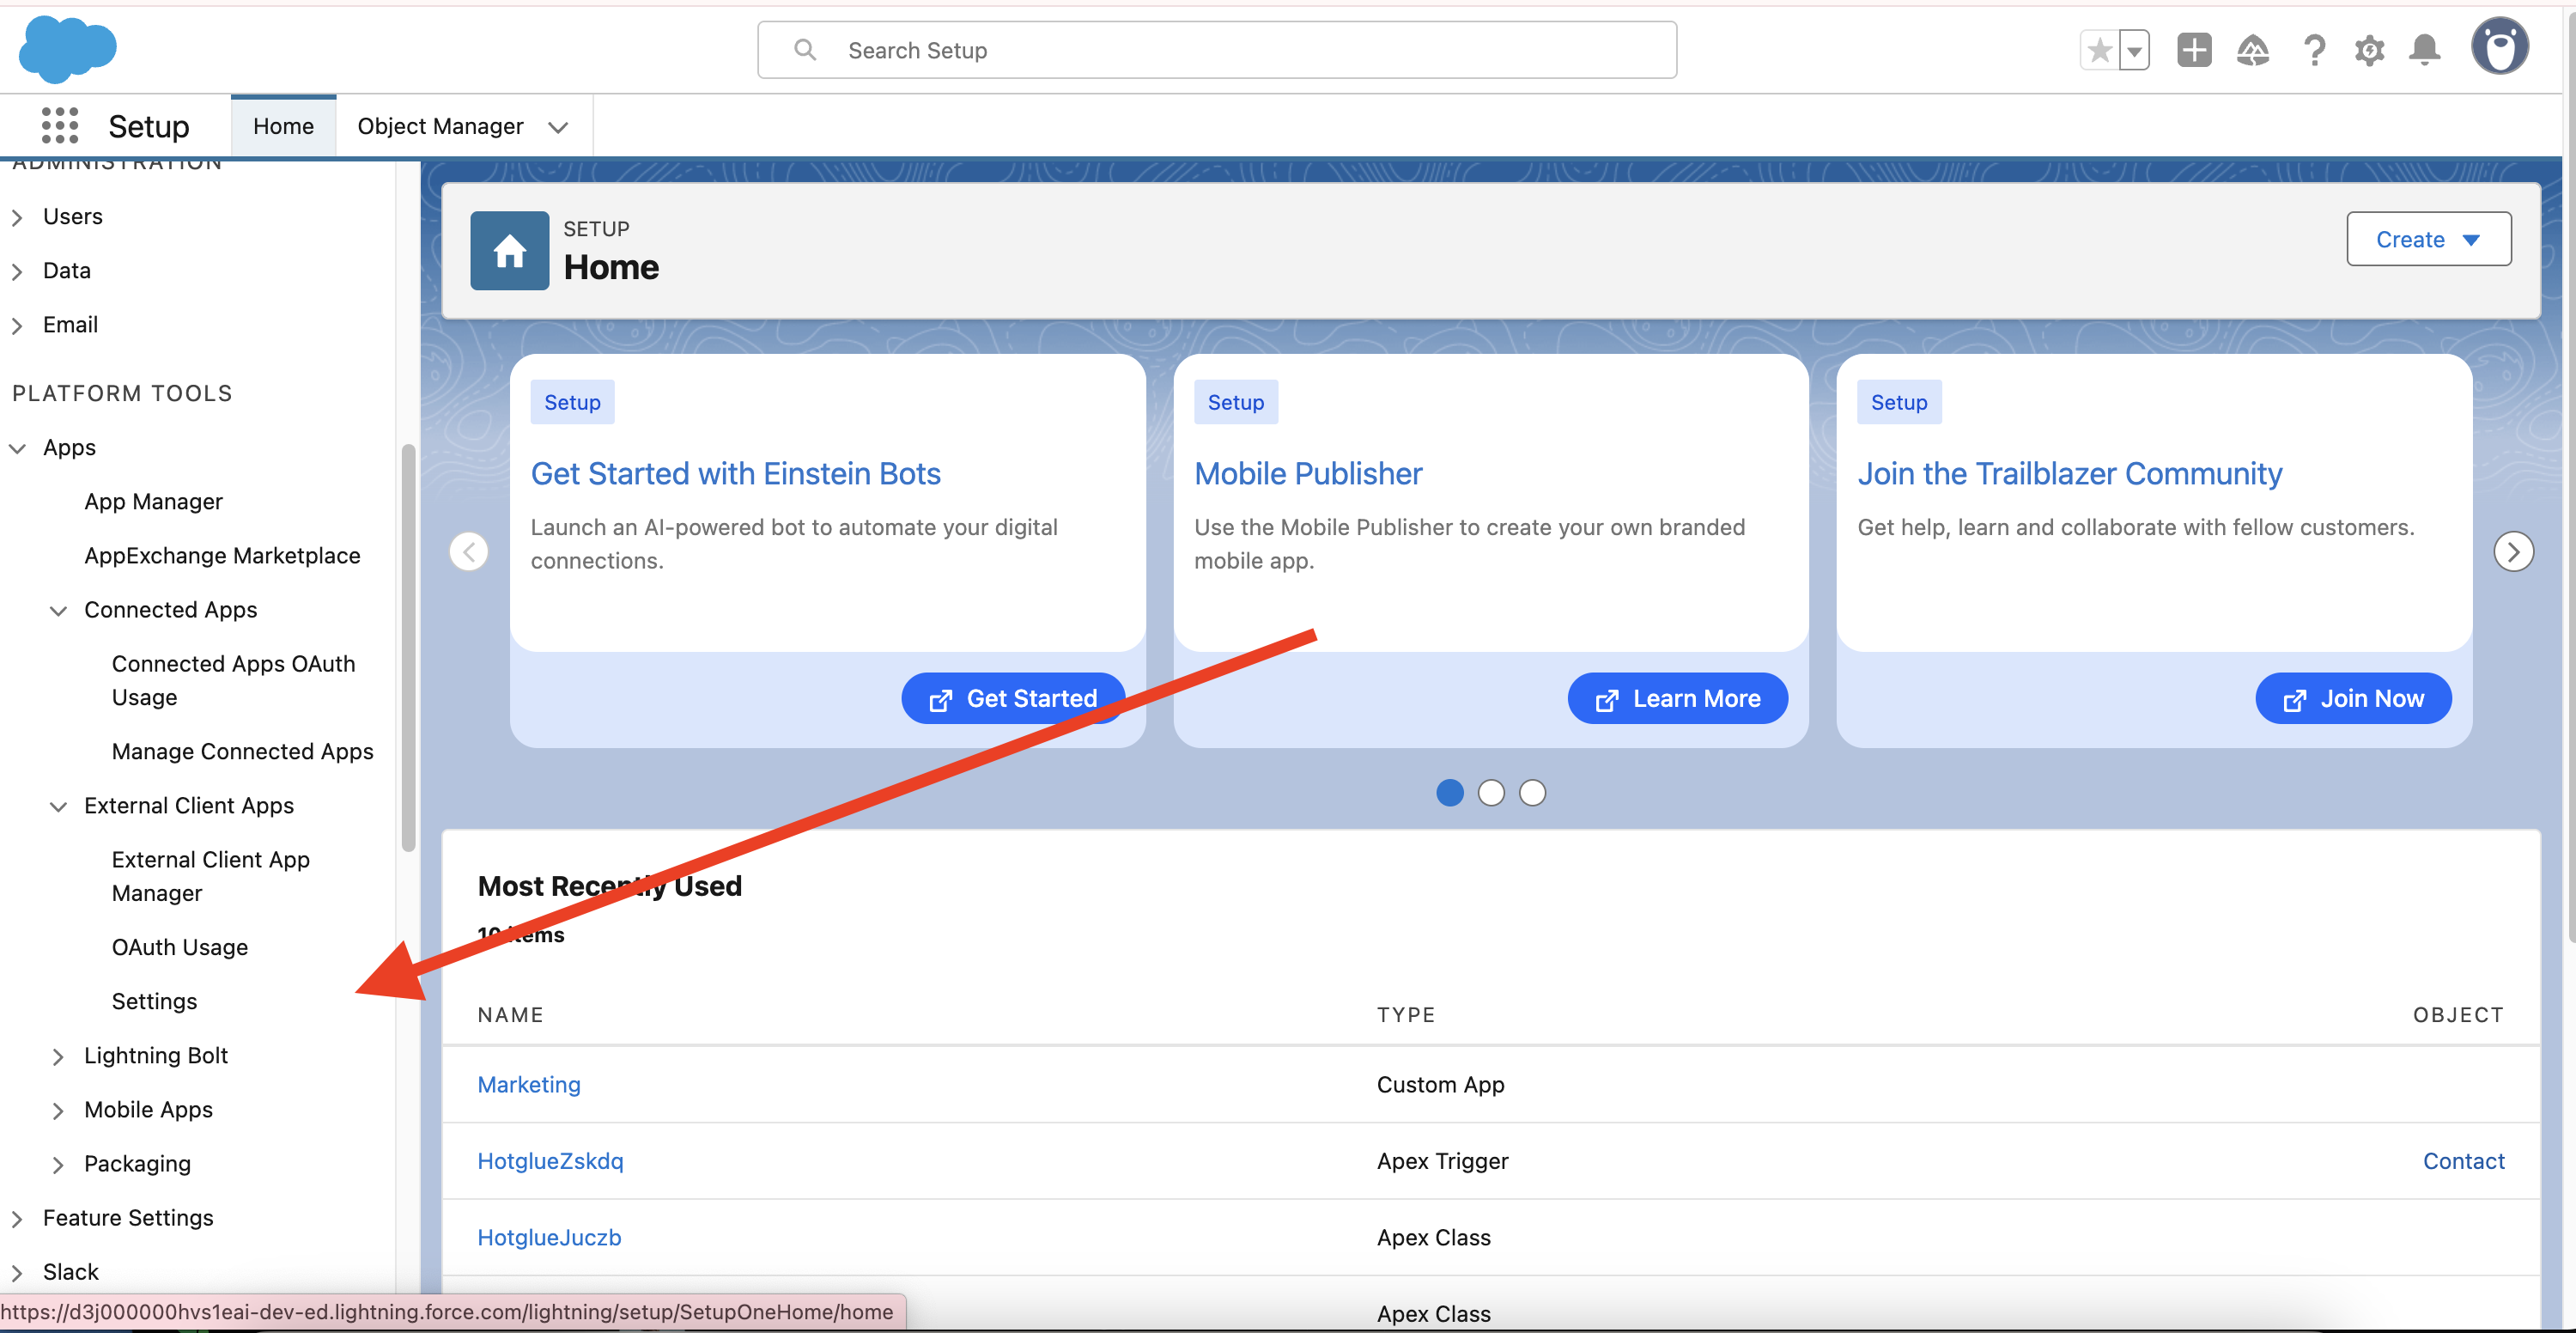
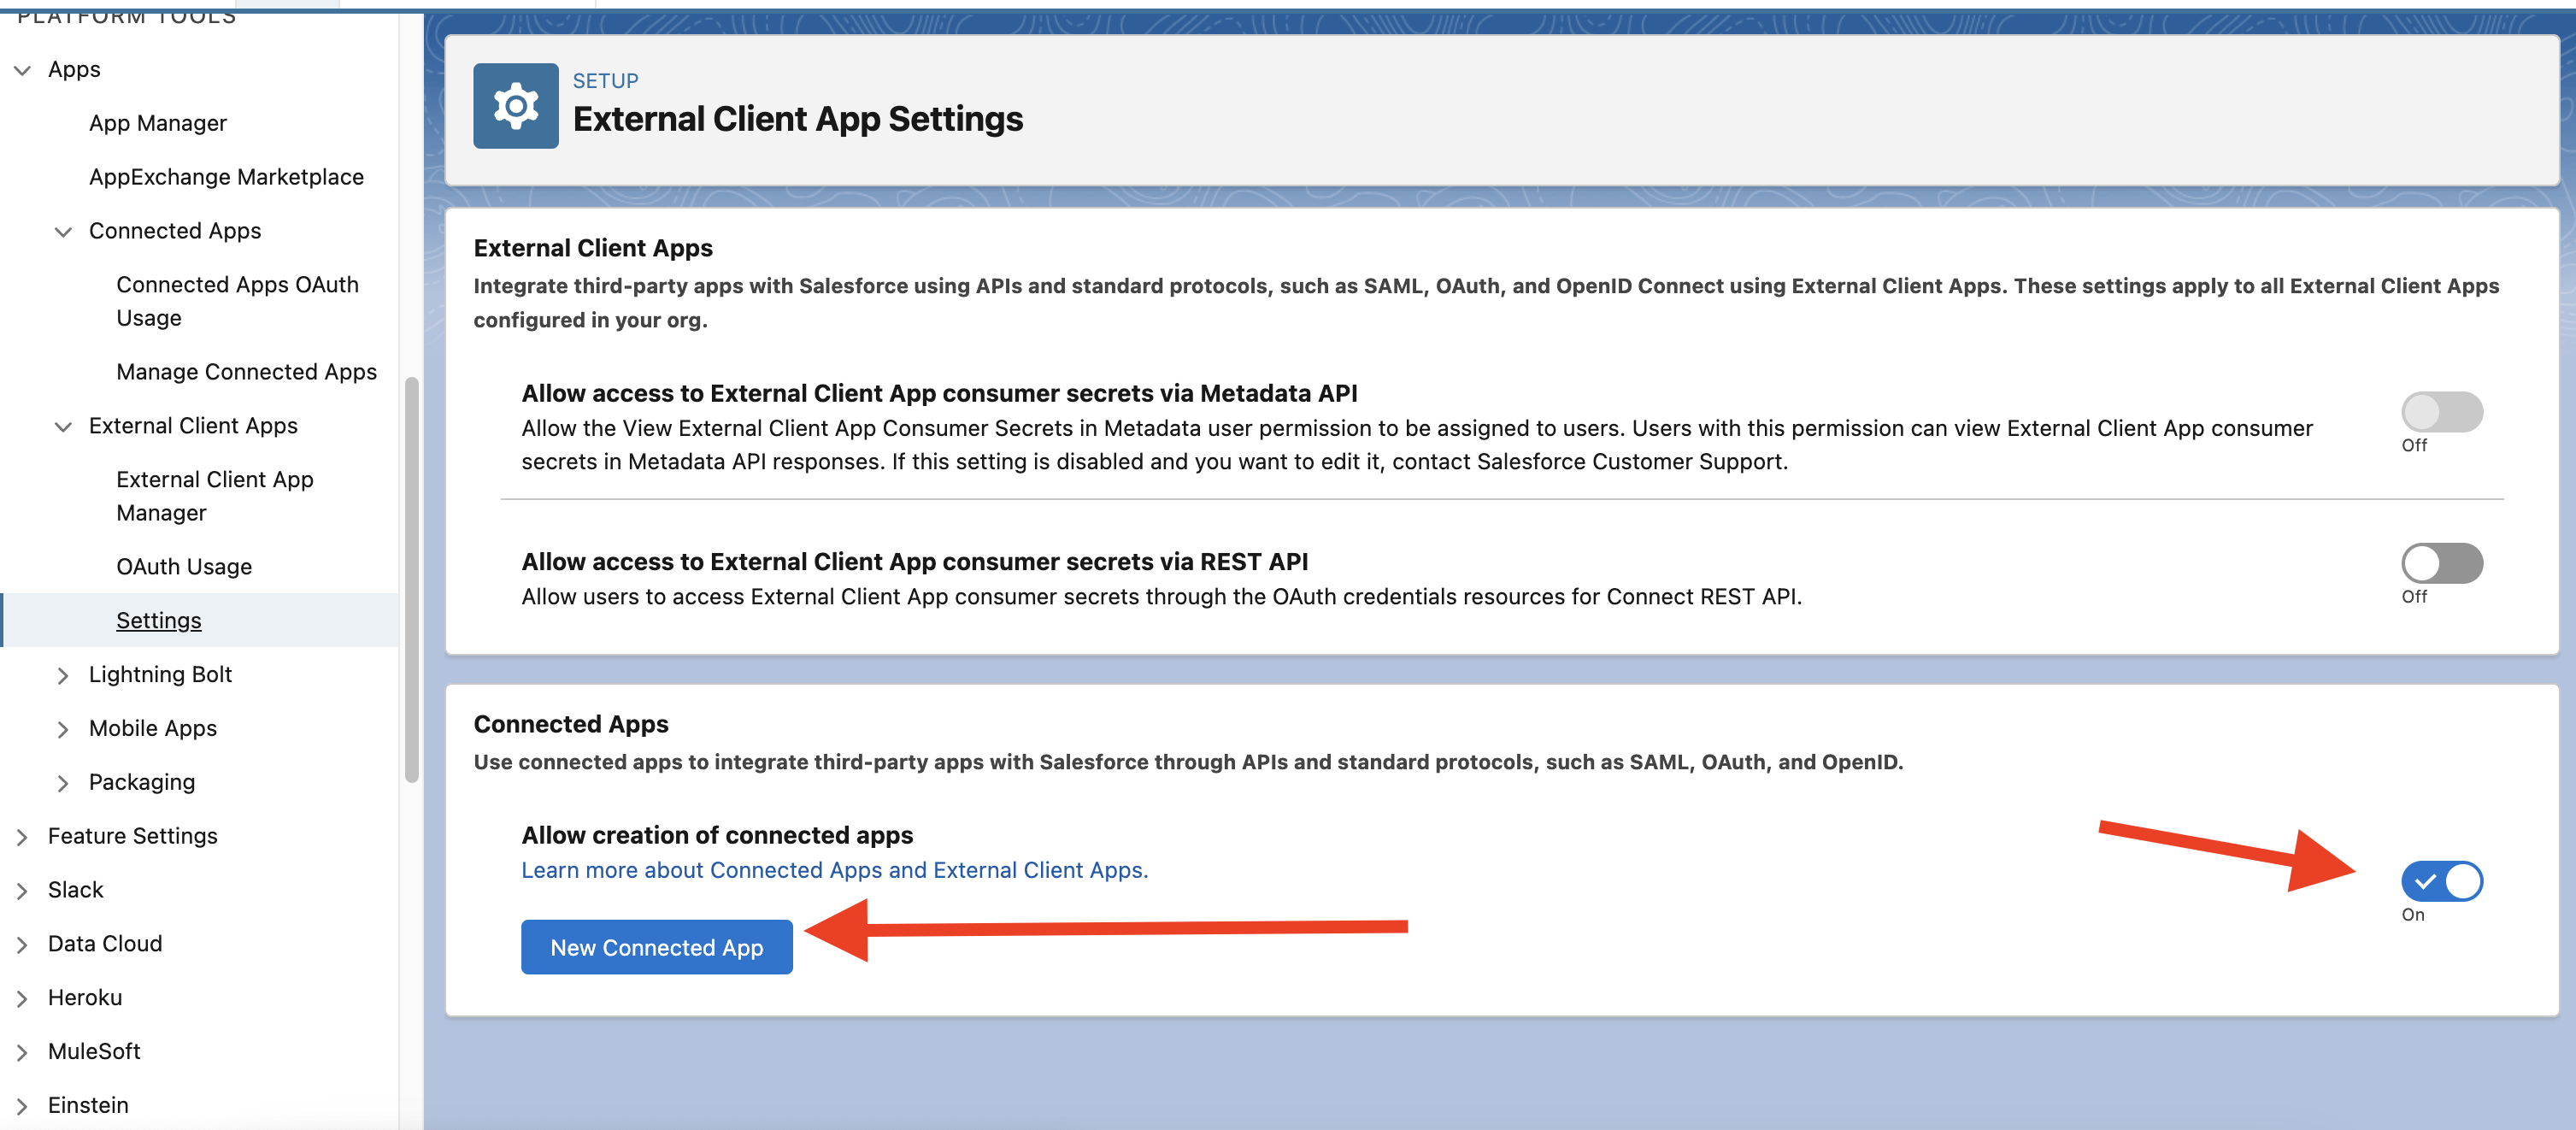
Require Proof Key for Code Exchange (PKCE) Extension for Supported Authorization Flows.
You should also make sure that for the Selected OAuth Scopes, you have enabled the scopes for:
-
Access and manage your data (api) -
Perform request on your behalf at any time (refresh\\_token, offline\\_access)
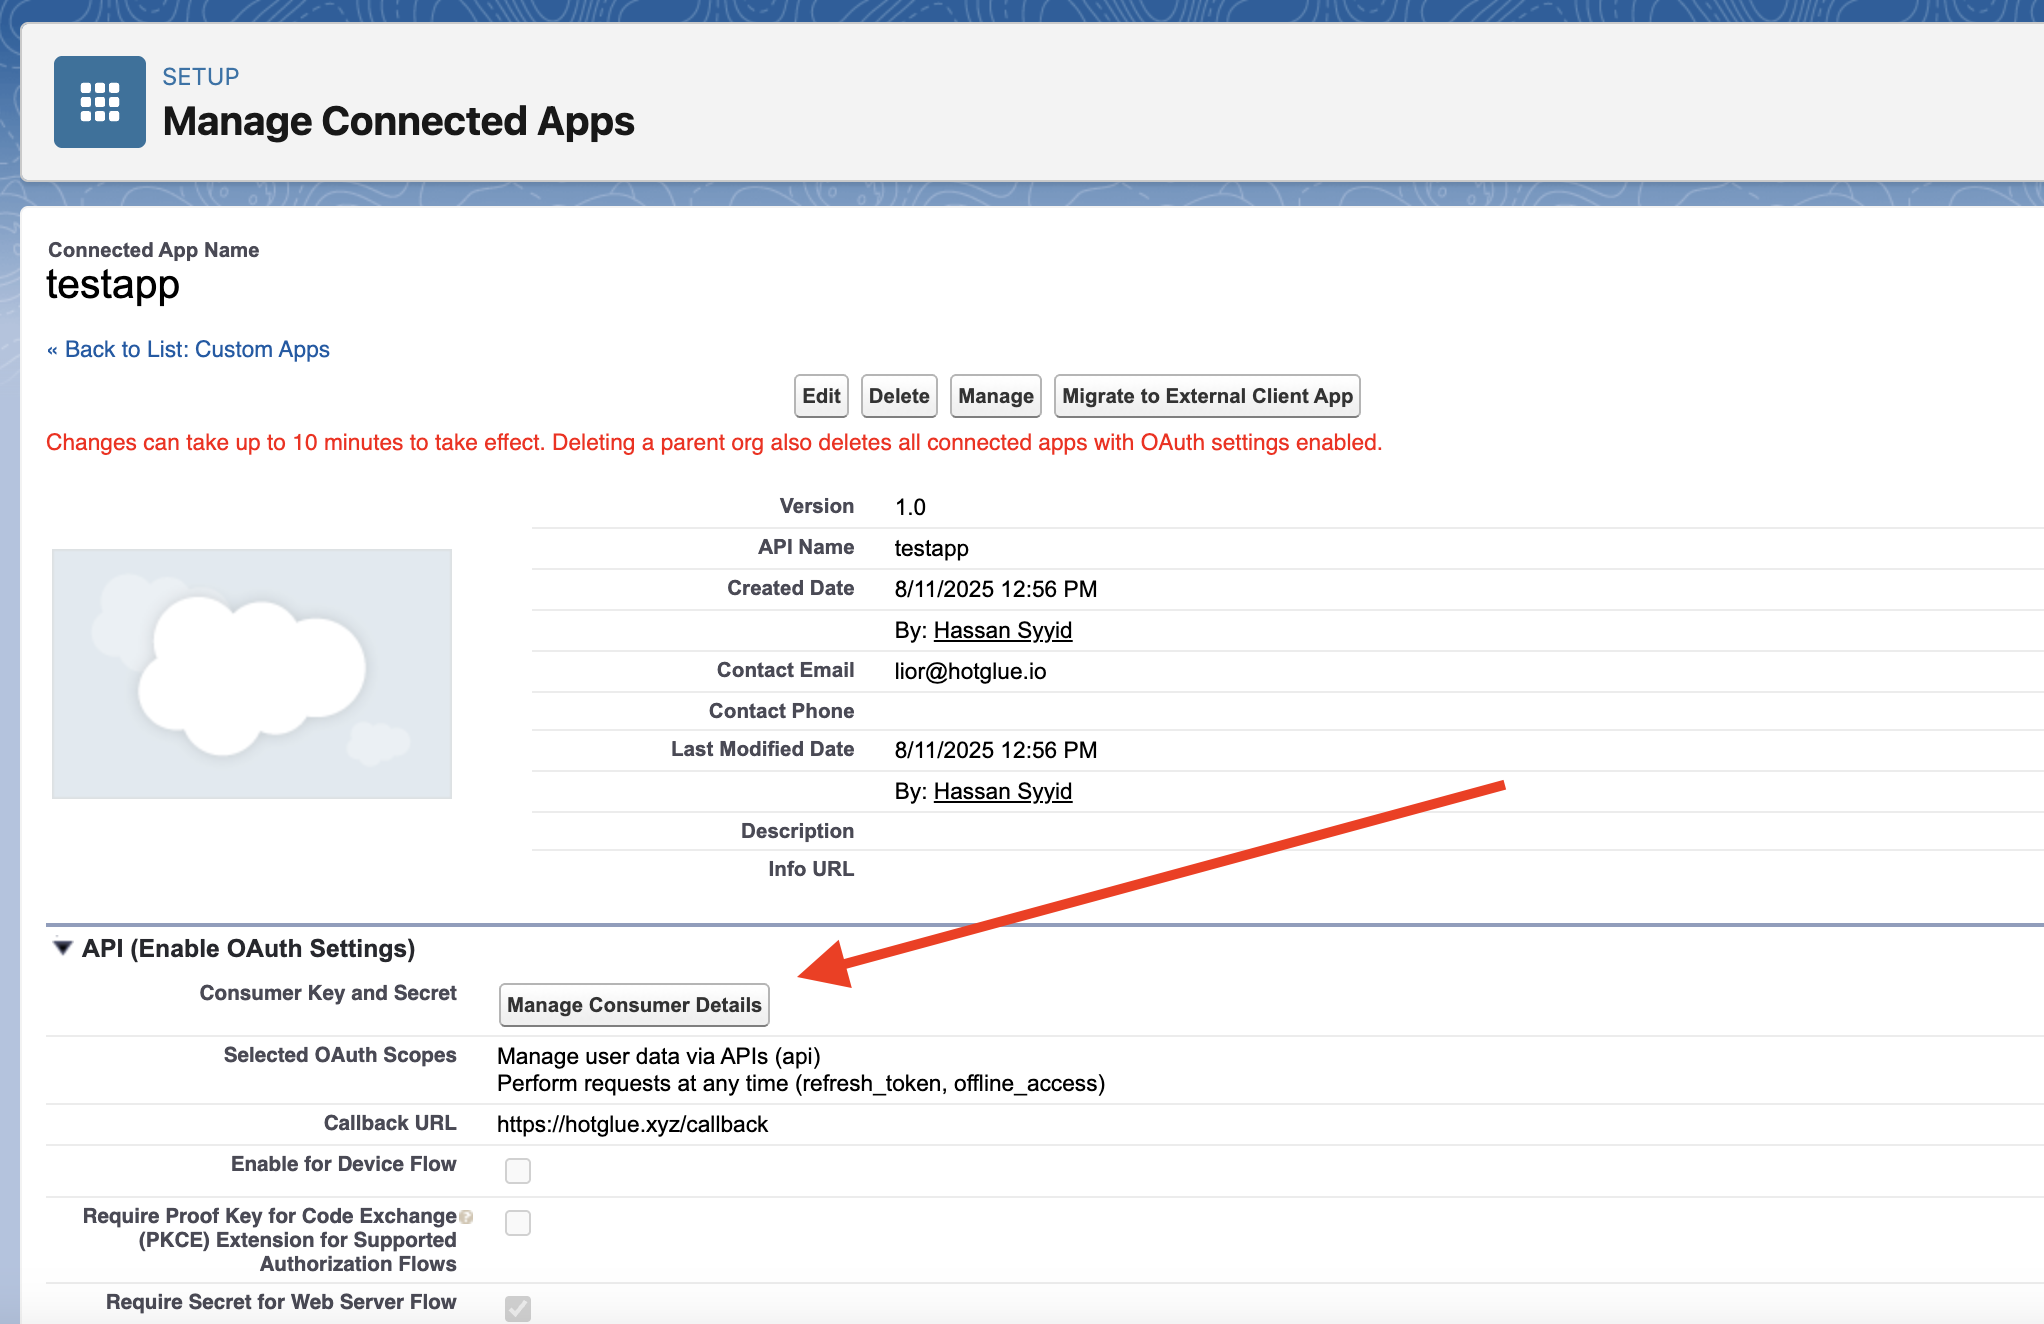
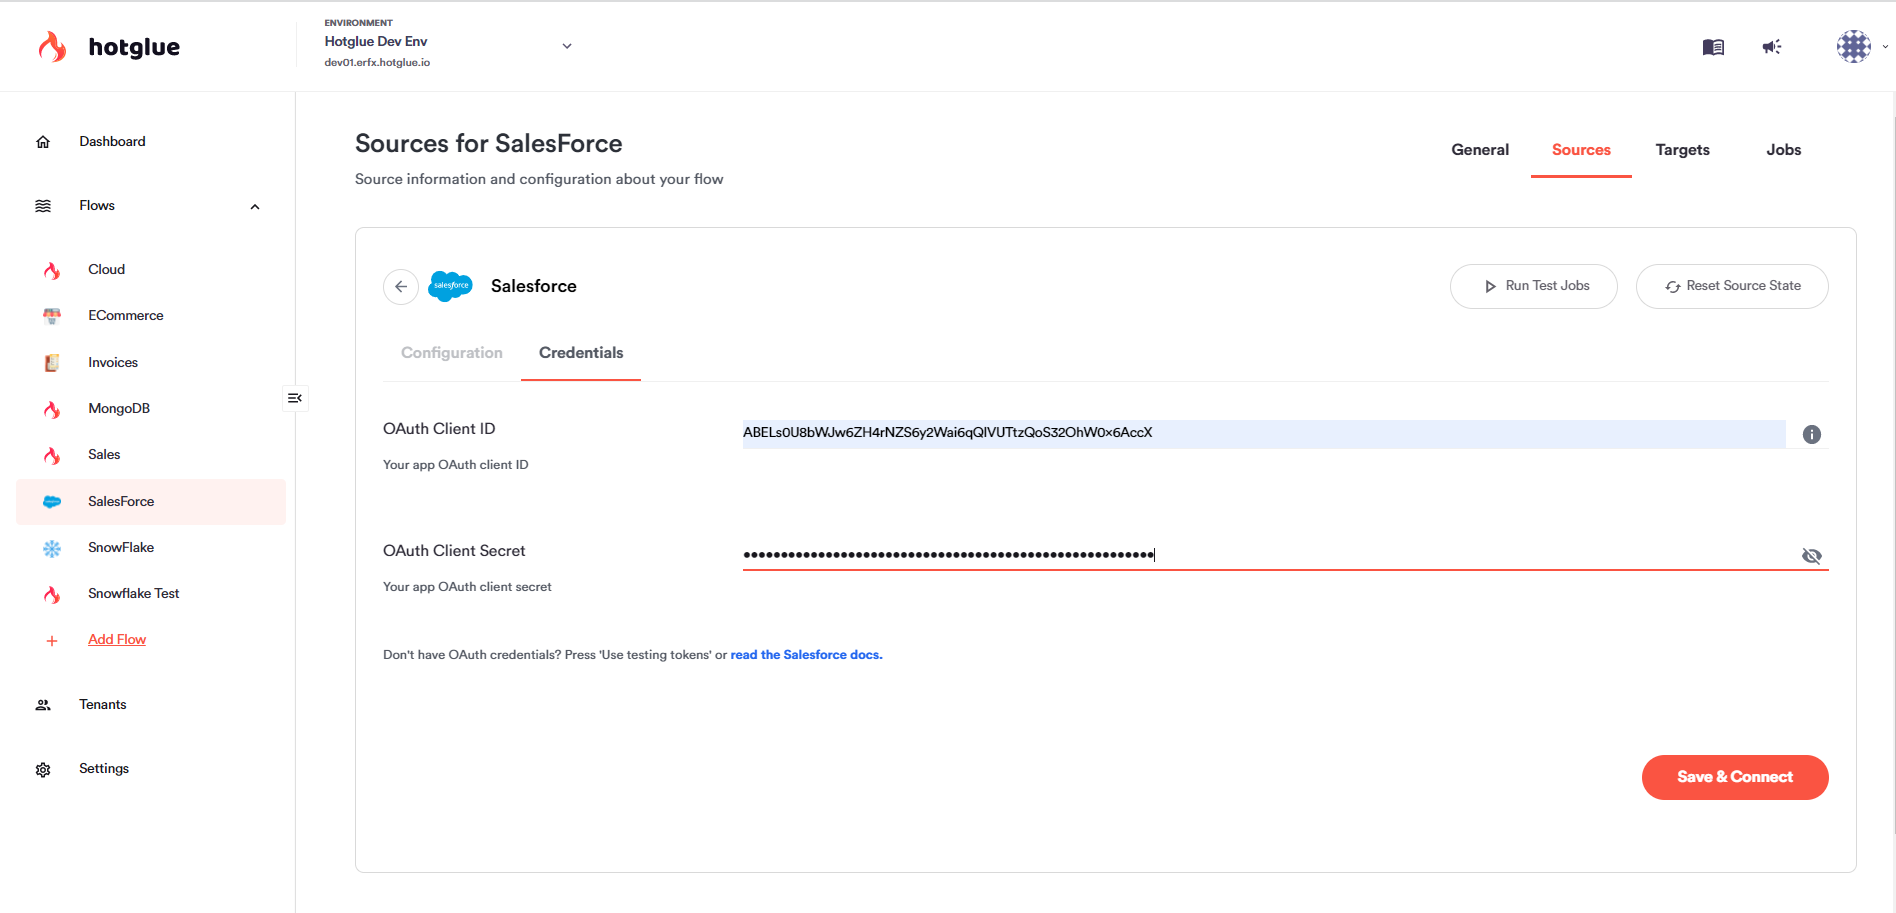 And that is it! You have now successfully linked to Salesforce!
Client Credentials flow
The Client Credentials flow signs in as the app, not a user. It doesn’t require a user login or refresh token. Unlike the OAuth flow, this involves the end user creating their own app in their Salesforce org. Steps to follow are:- Log in to Salesforce and navigate to the Setup Menu.
- Go to Platform Tools > Apps > External Client Apps > External Client App Manager and select New External Client App. To set up the flow on an app that already exists, find it in the list instead and select Edit Settings from its row dropdown.
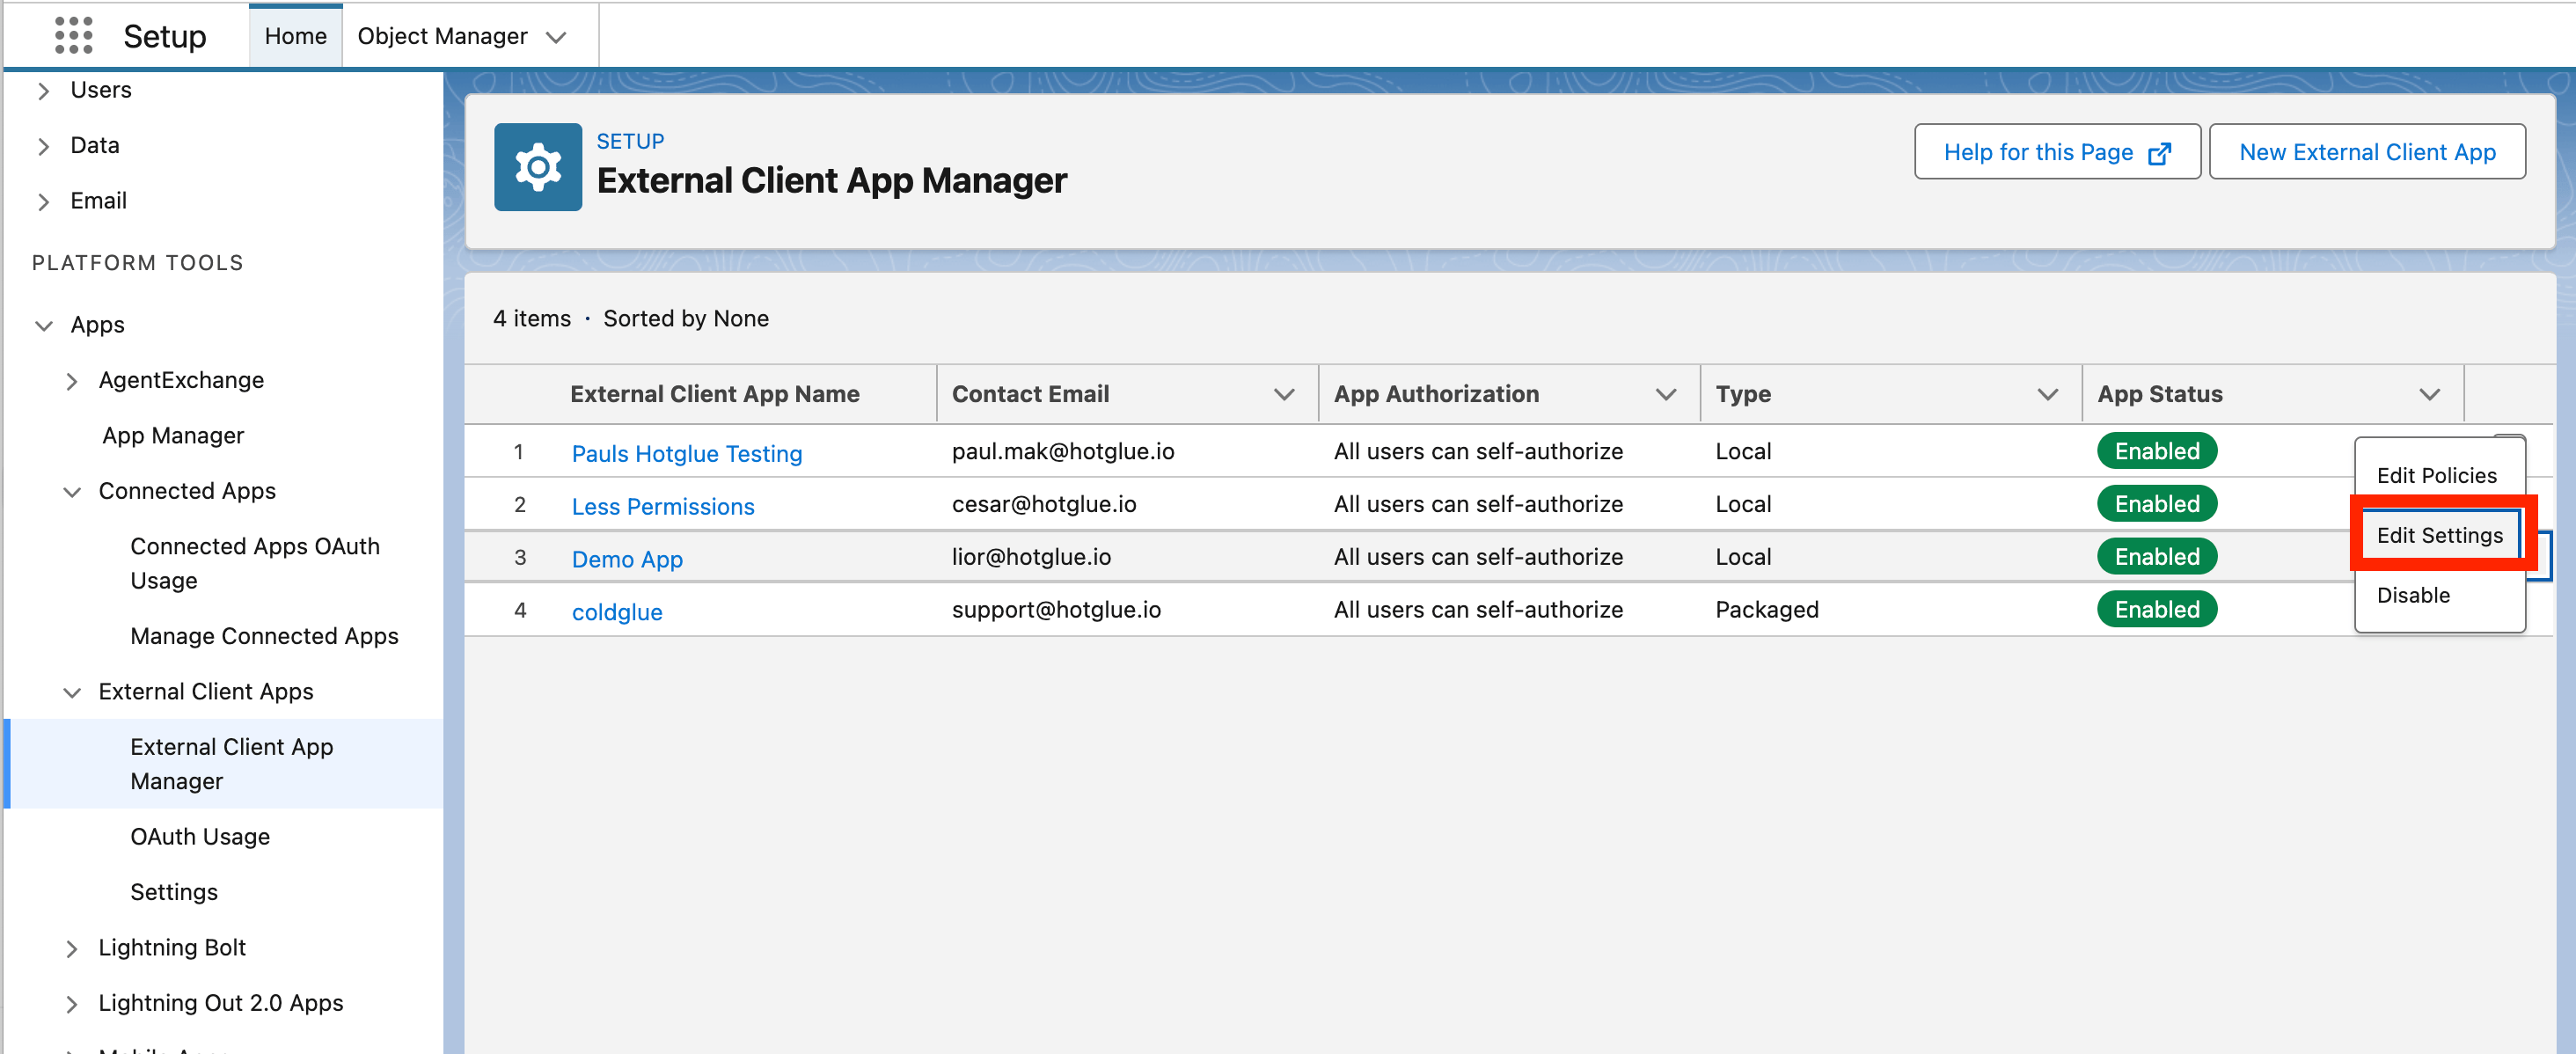
- Name the app and enter a contact email.
-
On the Settings tab, expand the OAuth Settings section and enable OAuth. Set the Callback URL to
https://hotglue.xyz/callback, and moveManage user data via APIs (api)into Selected OAuth Scopes.
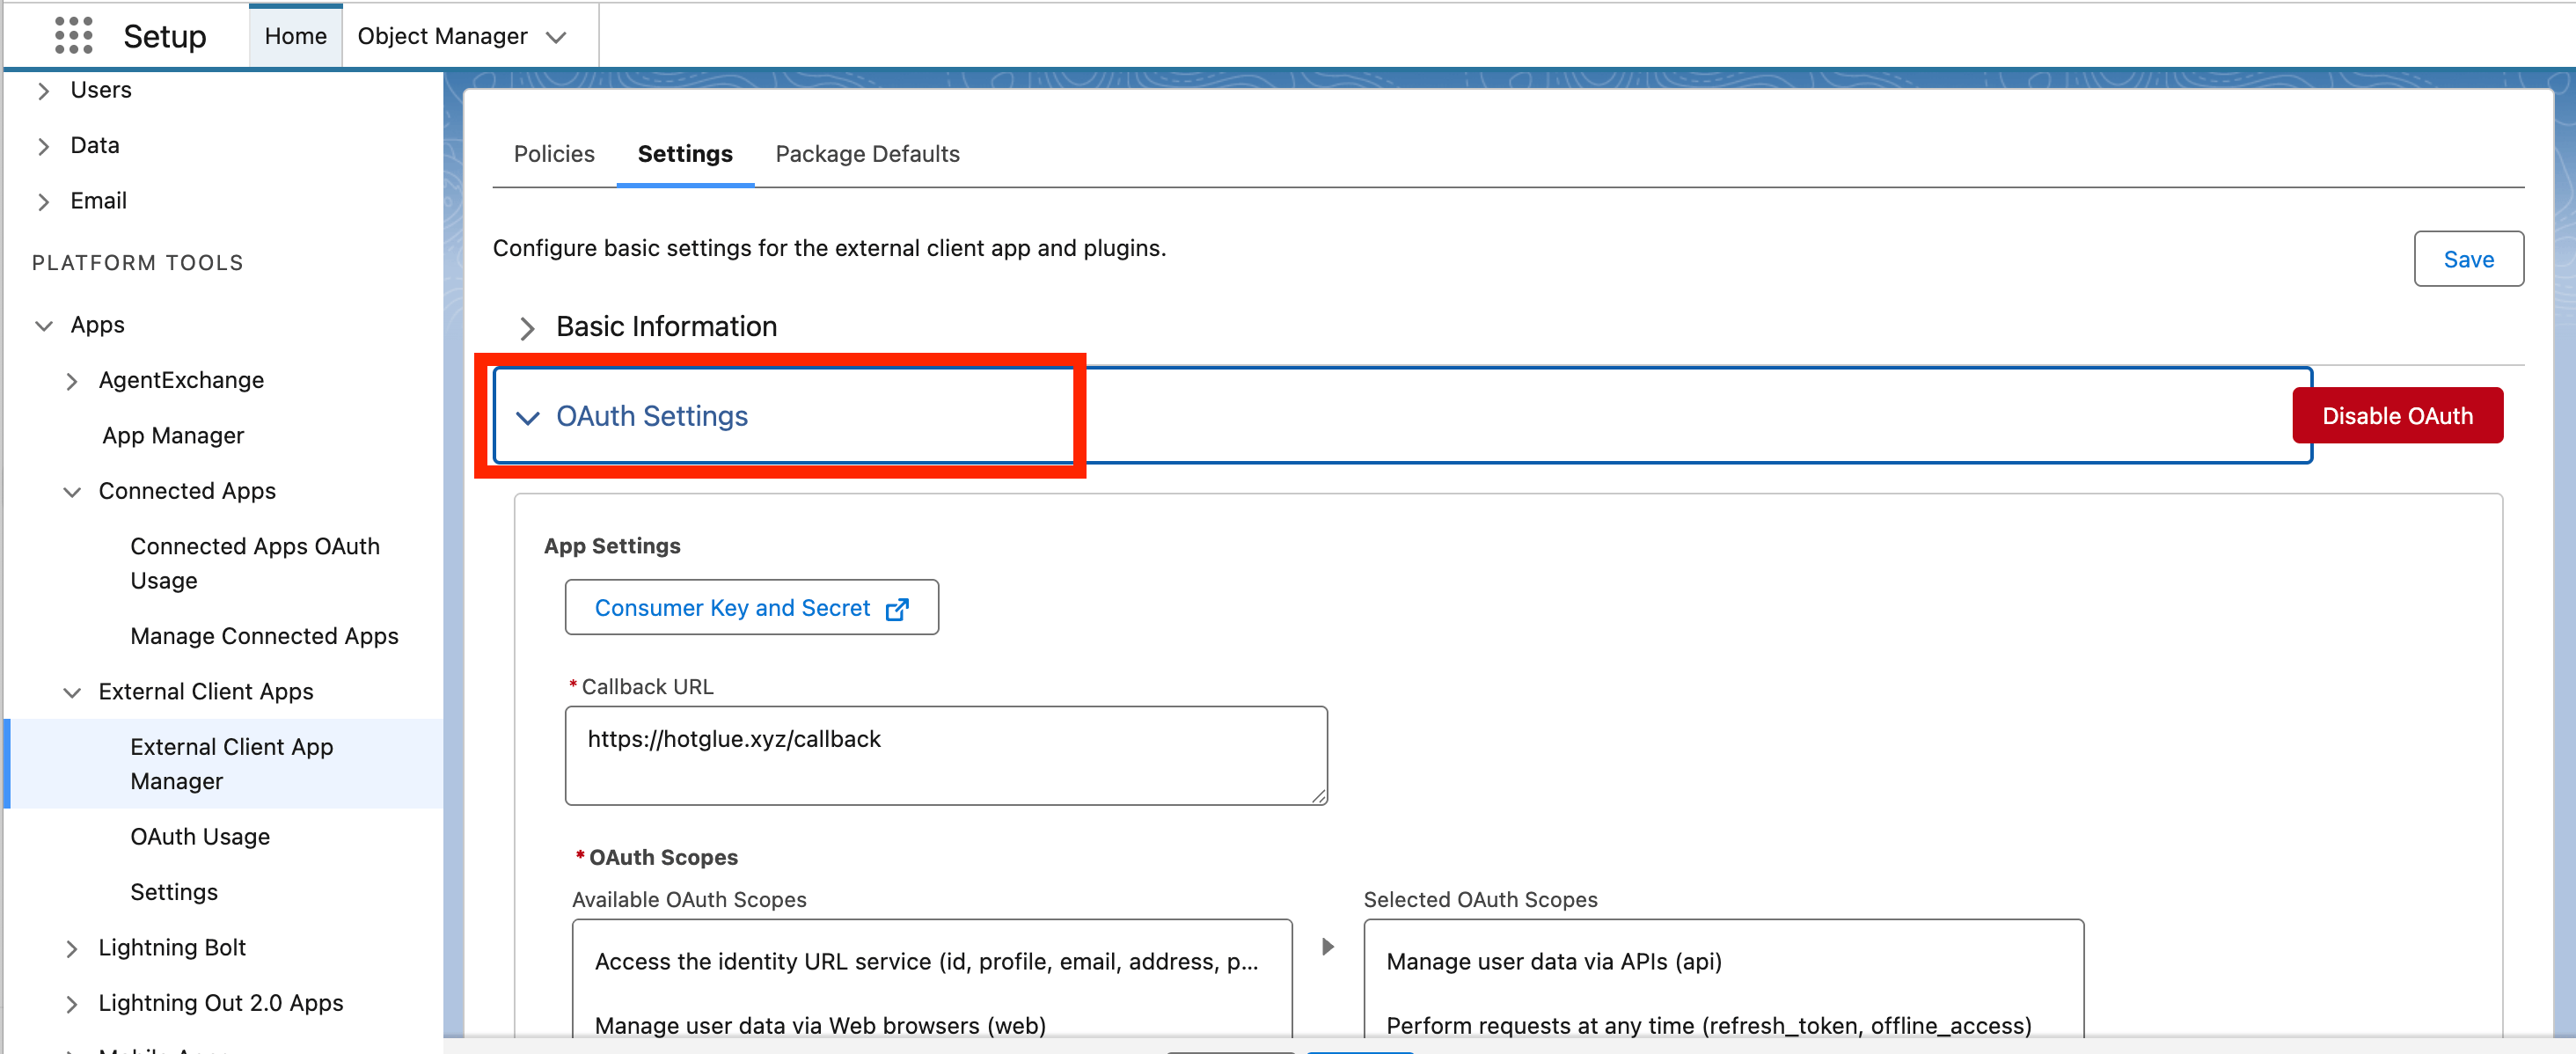
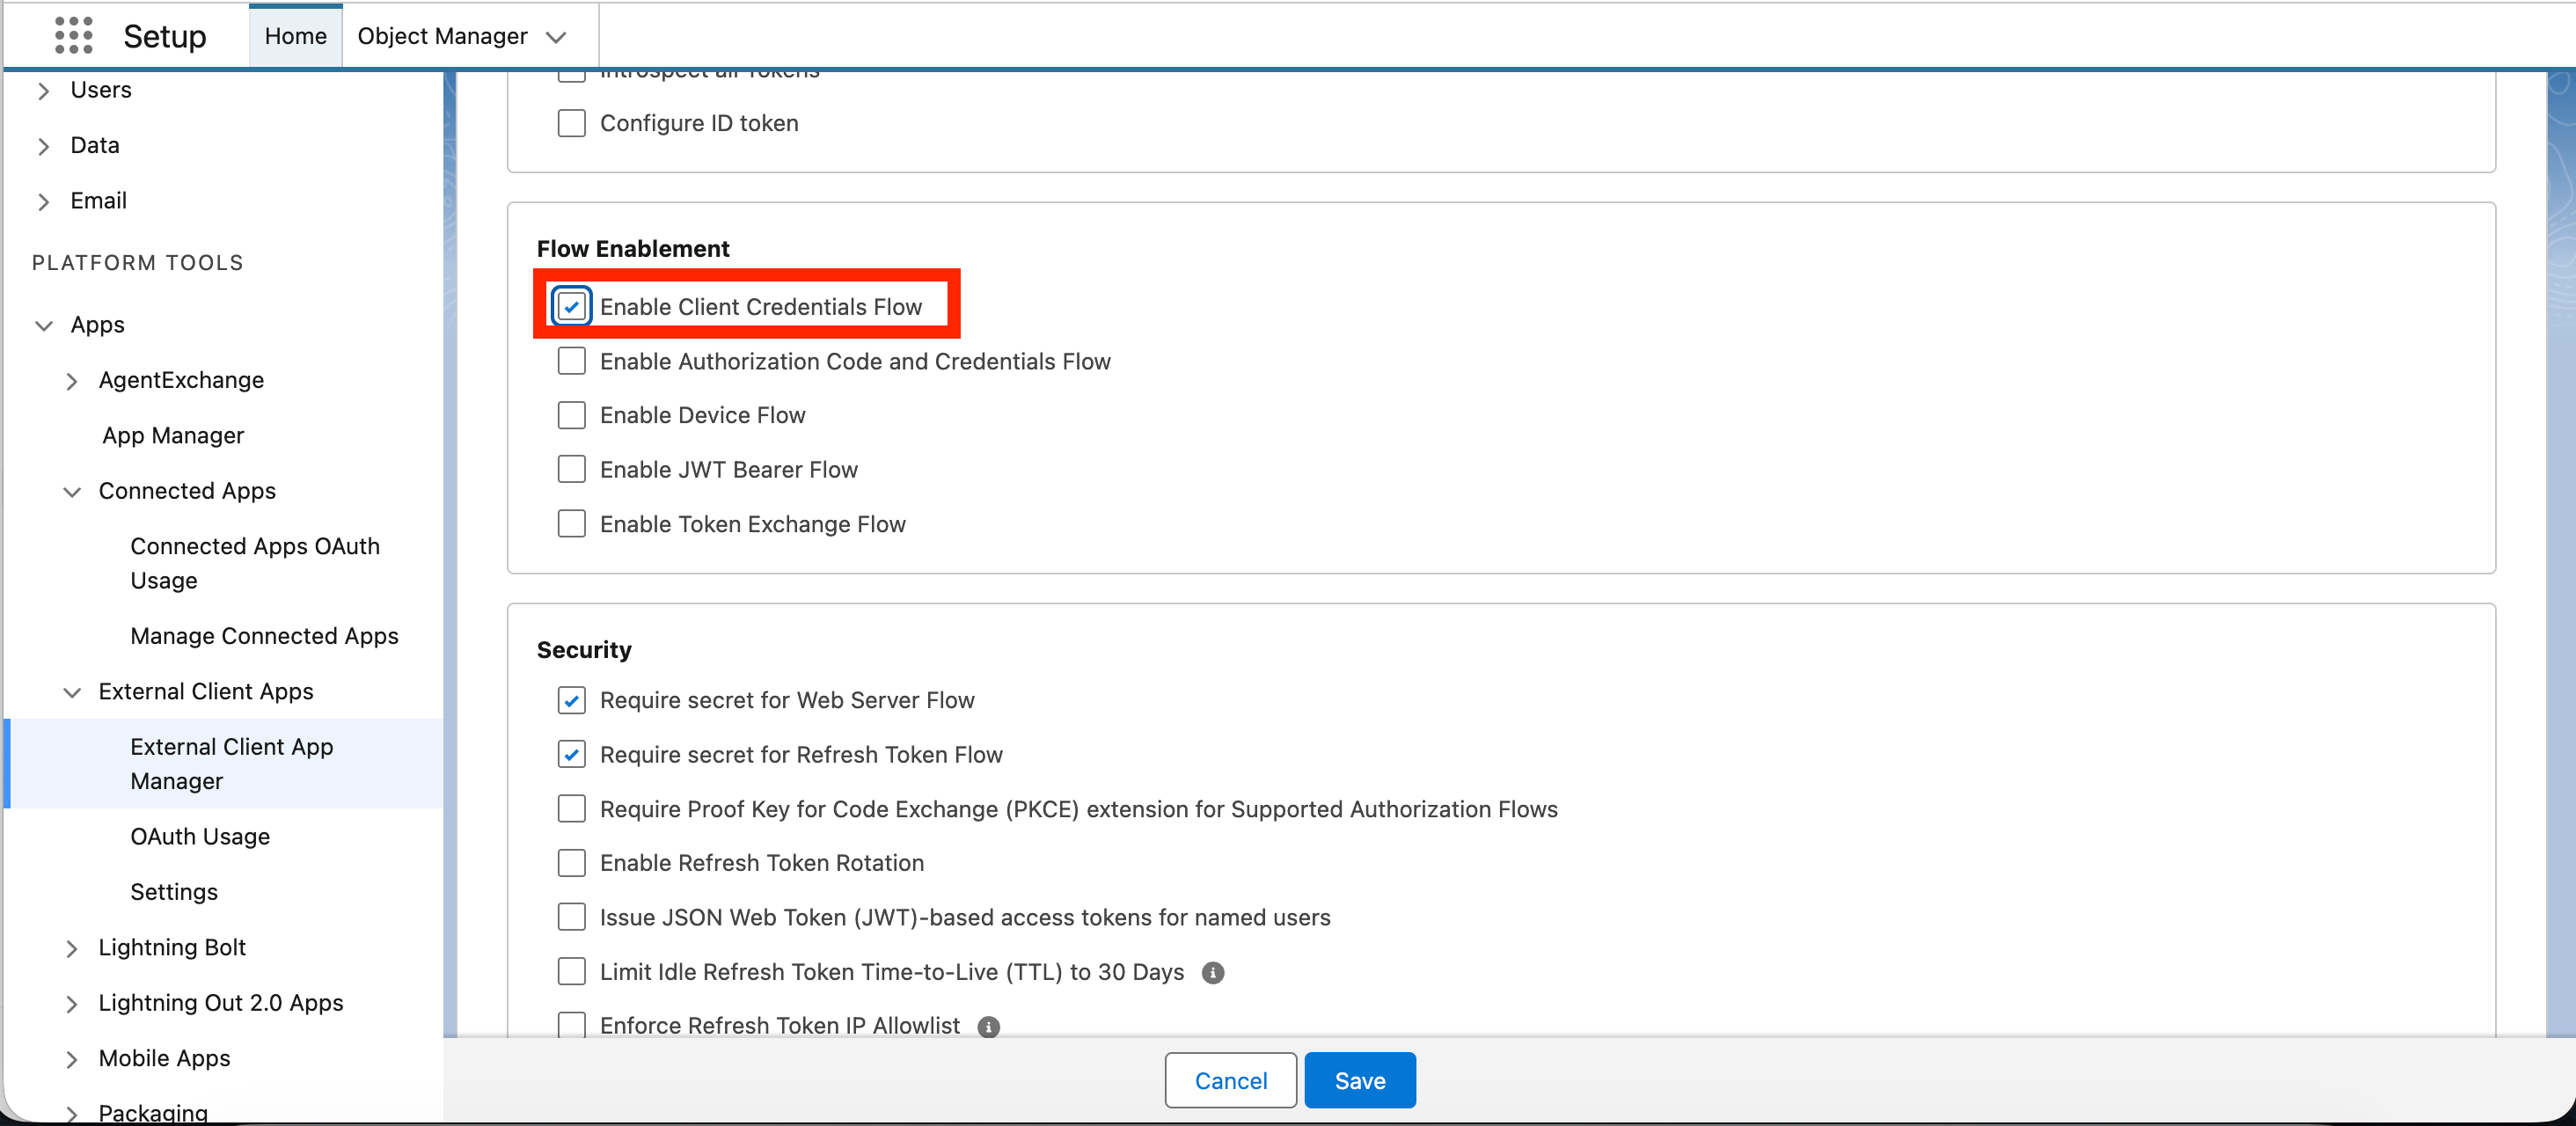
- Scroll down to Flow Enablement, check Enable Client Credentials Flow, and select Save.
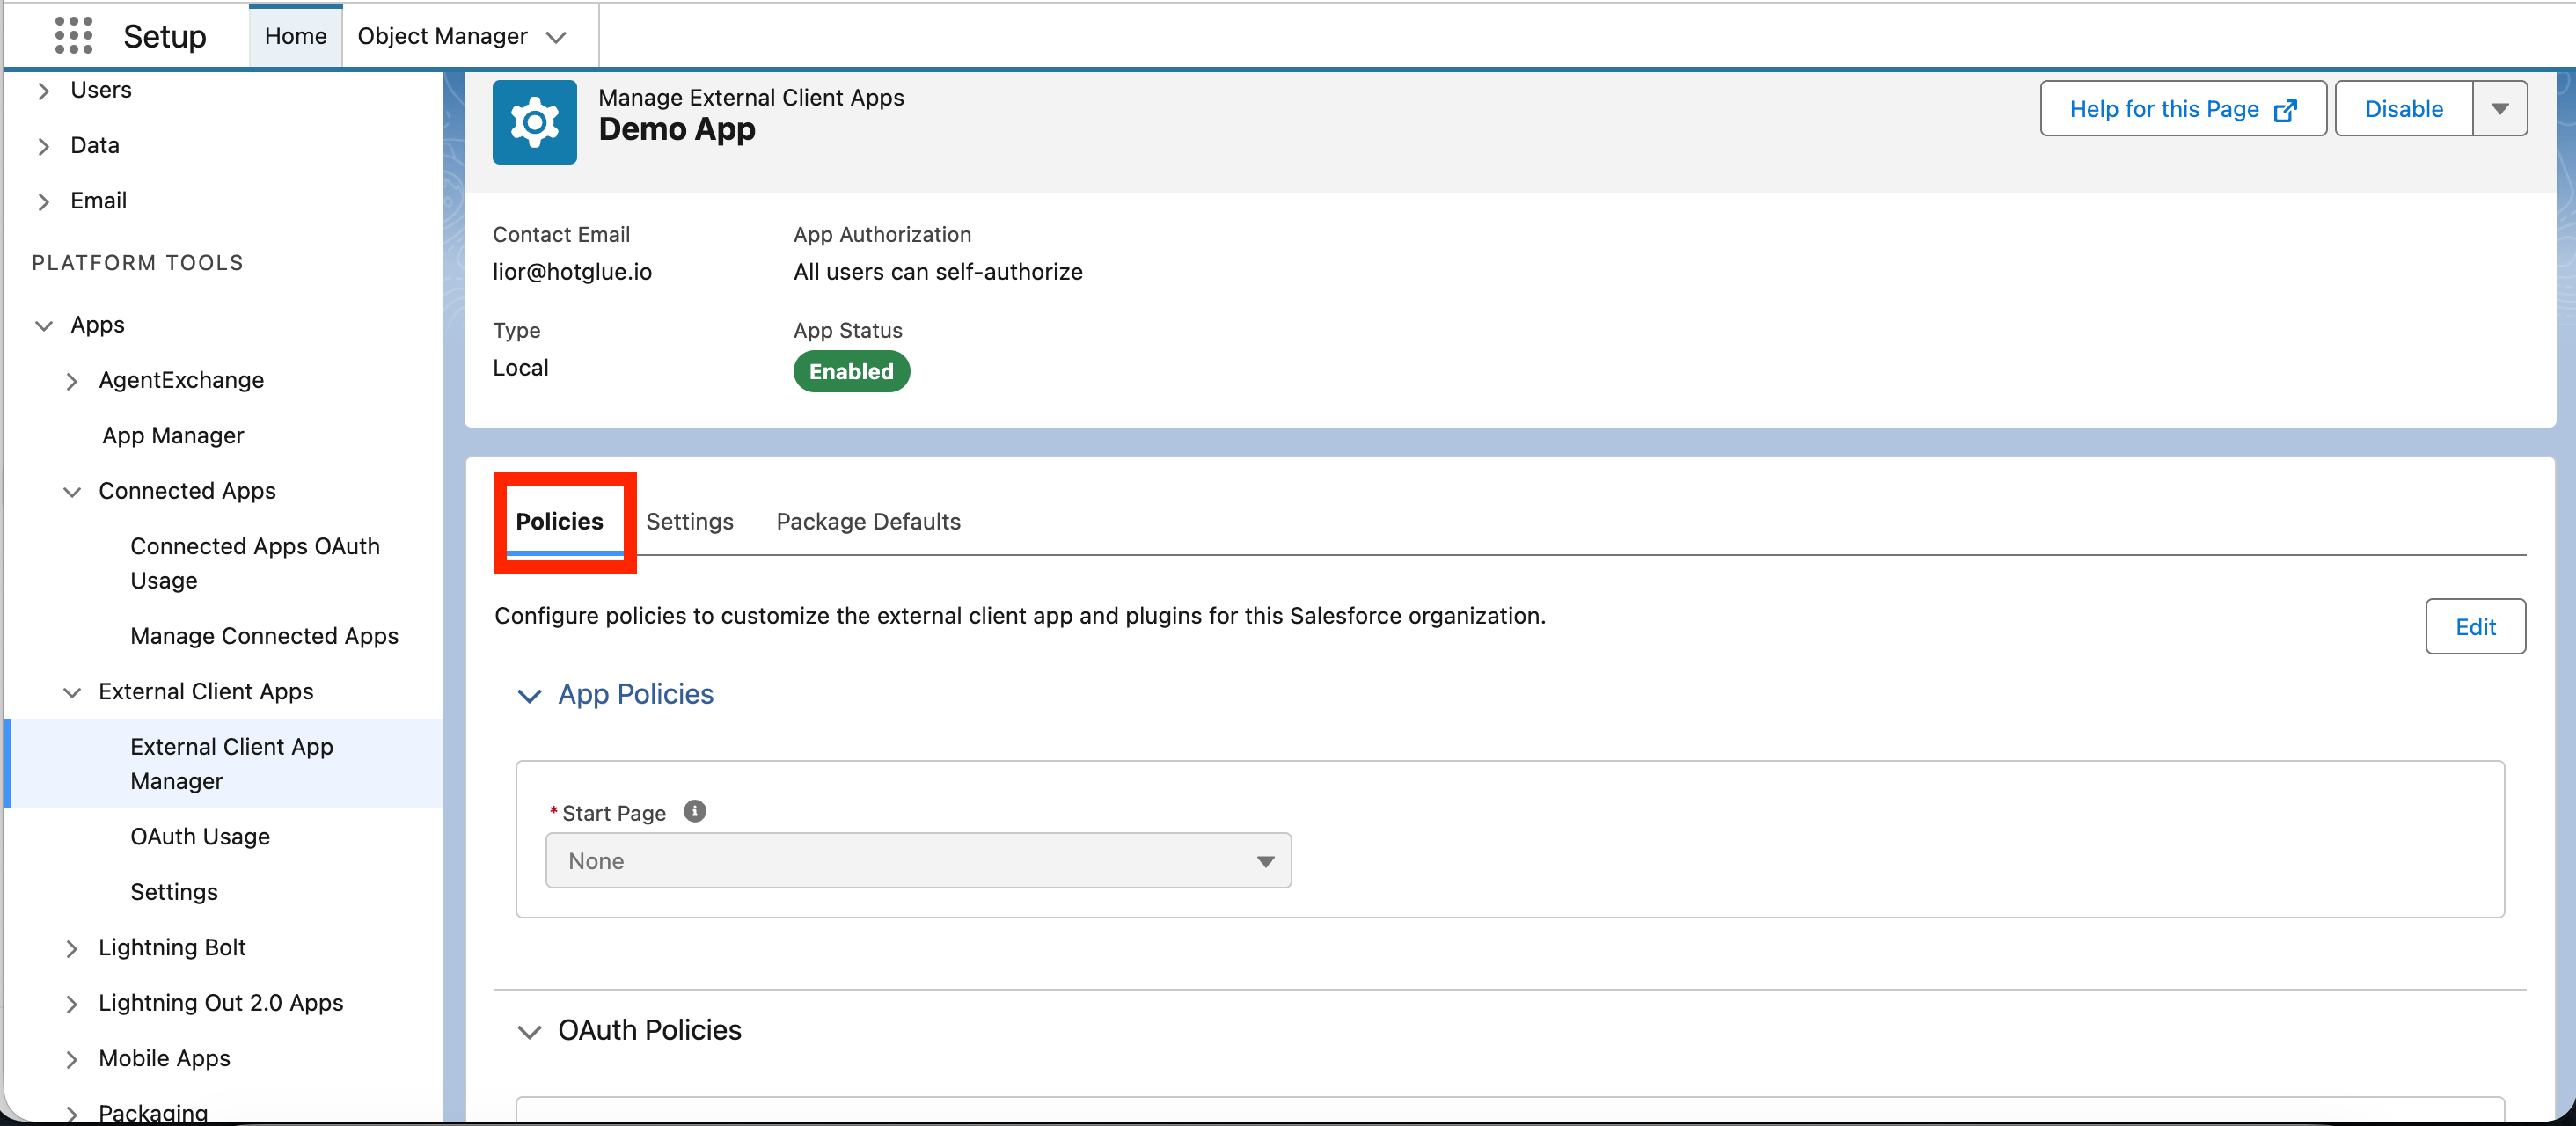
- Open the app’s Policies tab and select Edit.
- Expand OAuth Policies, and under OAuth Flows and External Client App Enhancements check Enable Client Credentials Flow and set Run As (Username) to an integration or administrator user. Select Save.
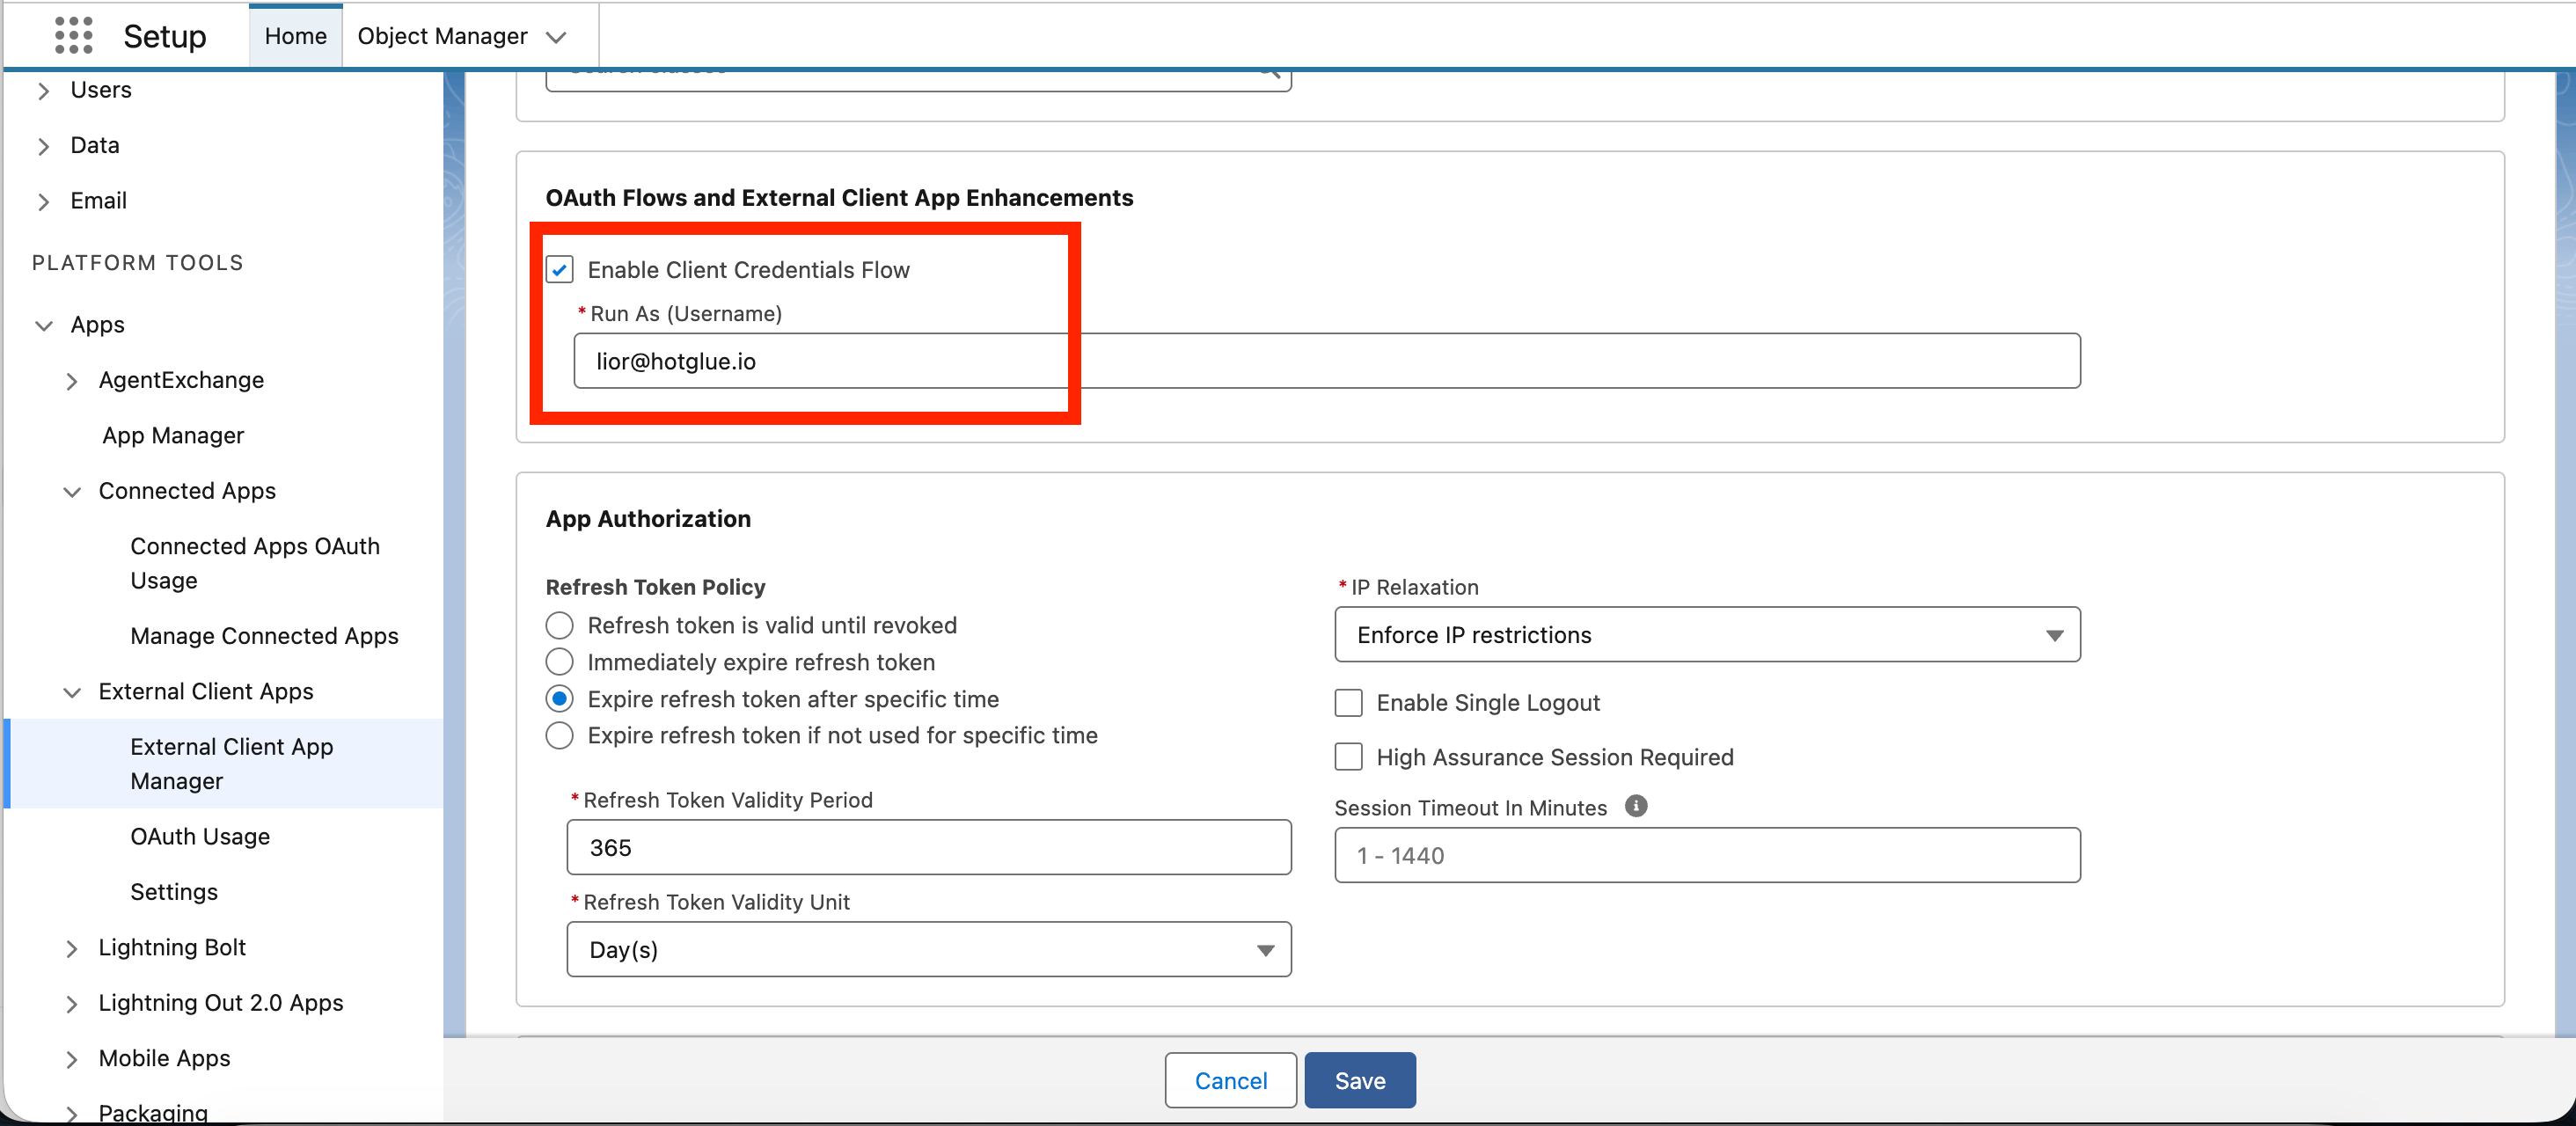
External Client Apps split these settings across two screens, and both must be set: Settings > OAuth Settings > Flow Enablement turns the flow on, and Policies > OAuth Policies turns it on again and holds the Run As (Username). Salesforce rejects the token request with
no client credentials user enabled if the Run As user is missing.The Run As user governs what the sync can see. Any object or field that user cannot read will not appear during discovery or sync, so make sure they have access to the required objects along with the Required Tenant Permissions.
- Wait a few minutes for the changes to propagate, then use Consumer Key and Secret under OAuth Settings > App Settings to copy the Consumer Key and Consumer Secret.
-
Retrieve the org’s My Domain URL from Setup > Company Settings > My Domain > Current My Domain URL. It looks like
https://mycompany.my.salesforce.com.
Enabling the Client Credentials Salesforce connector in hotglue
Add the Salesforce source to a new or existing flow. Because each tenant authenticates with their own External Client App, no partner-level credentials are needed in this step.Tenant registration with Client Credentials
When your tenants link their Salesforce accounts, they’ll need to enter the following information:Consumer Key: Use the Consumer Key from their External Client App.Consumer Secret: Use the Consumer Secret from their External Client App.Instance URL: Use the org’s Current My Domain URL, for examplehttps://mycompany.my.salesforce.com.
Required Tenant Permissions
The authenticated tenant must have the following System Permissions on their Salesforce Instance:API EnabledView Setup and Configuration
Manage Data Integrations.
Allowing tenants to link Salesforce Sandbox Instances
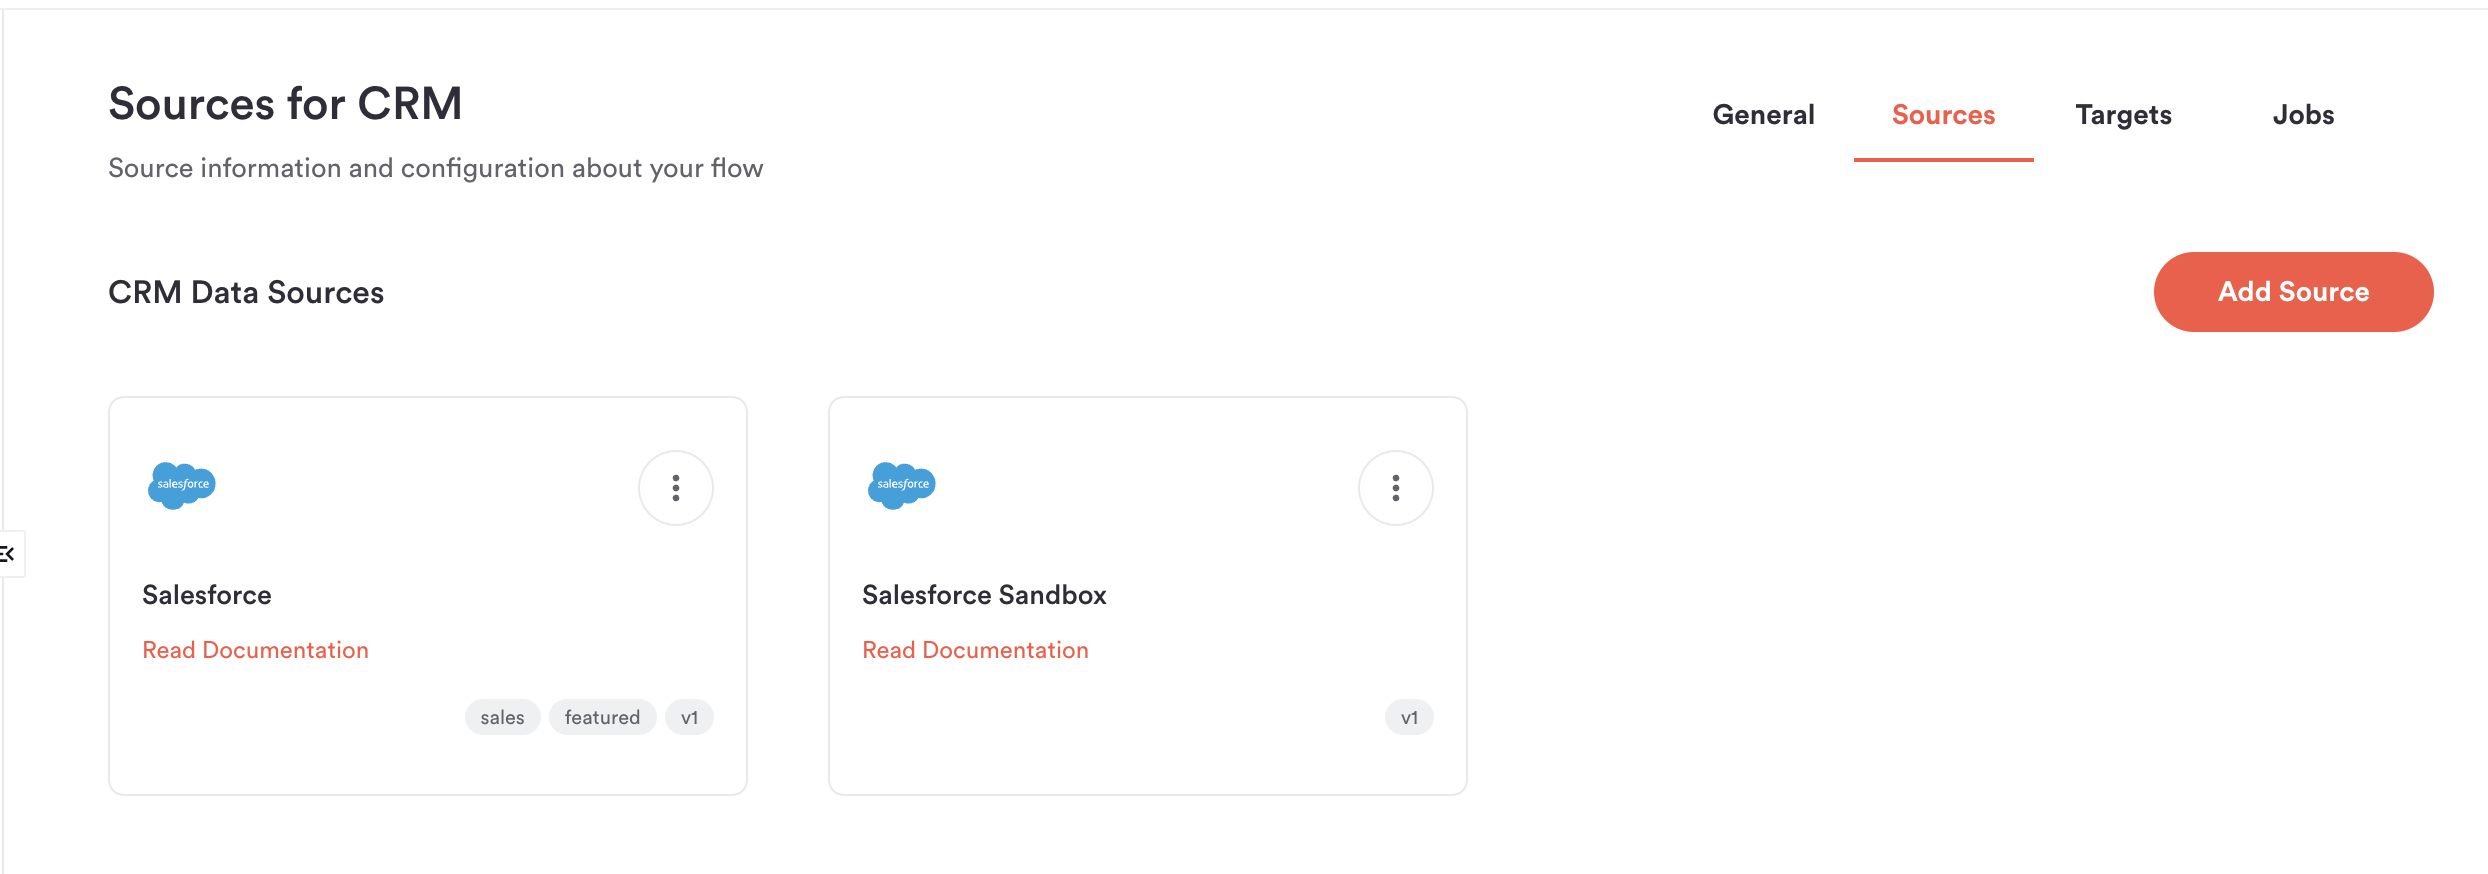
The OAuth Authentication flow for Salesforce Sandbox instances is slightly different from production Salesforce instances. As such, you’ll need to add theSalesforce:sandbox connector as a supported source to your desired flows. Tenants using sandbox Salesforce credentials must link to this source, not the normal Salesforce source.
Production Salesforce OAuth apps are compatible with sandbox credentials, so you can reuse the same client ID and secret for both supported sources.
API Quota Management
Salesforce enforces strict daily API limits for every connected Salesforce instance. While the specific request quota differs by Salesforce plan, hotglue’s Salesforce connector works around these quotas to prevent eating up your tenants’ allotments.How hotglue stops you from exceeding Salesforce quotas
By default, a single hotglue job (or discover) will never use up more than 25% of a tenant’s Salesforce API quota. Additionally, hotglue jobs will never make a request on your tenant’s Salesforce account if making that request would bring the tenant to 80% of their daily quota. These thresholds can be customized by using thequota_percent_per_run and quota_percent_total config flags respectively on a tenant’s linked Salesforce source.
Salesforce Bulk API
To further minimize Salesforce requests, you can enable the Salesforce bulk API for a tenant using the"api_type": "BULK" config flag.
Incremental Syncs
To prevent re-querying the same data, hotglue’s Salesforce connector will only sync data that has been changed since the last successful hotglue job.Usage Logging
After making a request, hotglue’s Salesforce connector will log how many remaining requests are in a tenant’s daily allotment. You can check the usage logs on the hotglue dashboard’s job page.Campaign, ListView, and Report Filtering
Your tenants may be interested in only syncing Contacts and Leads that belong to certain Campaigns, Listviews, or Reports. If so, you can add any of the followingfilters to your Salesforce available source:
Tap Changelog
Tap Changelog
Tap Changelog