Connector Details
| Name | Value |
|---|---|
| Platform | Microsoft Dynamics 365 |
| Auth Type | OAuth |
| Direction | Bidirectional |
| Tap Repo | https://github.com/hotgluexyz/tap-dynamics |
| Target Repo | https://gitlab.com/hotglue/target-dynamics |
| Tap Metrics | Usage: |
| Target Metrics | Usage: |
| Unified Schema |
Credentials Setup
Follow the steps below to get the credentials you need to use the Microsoft Dynamics 365 connector. The first thing that you need to do to get your Microsoft Dynamics 365 CRM OAuth credentials is to login to the Azure portal using an account with administrator permission. If you do not have an Azure account, you can create learn how to create one here.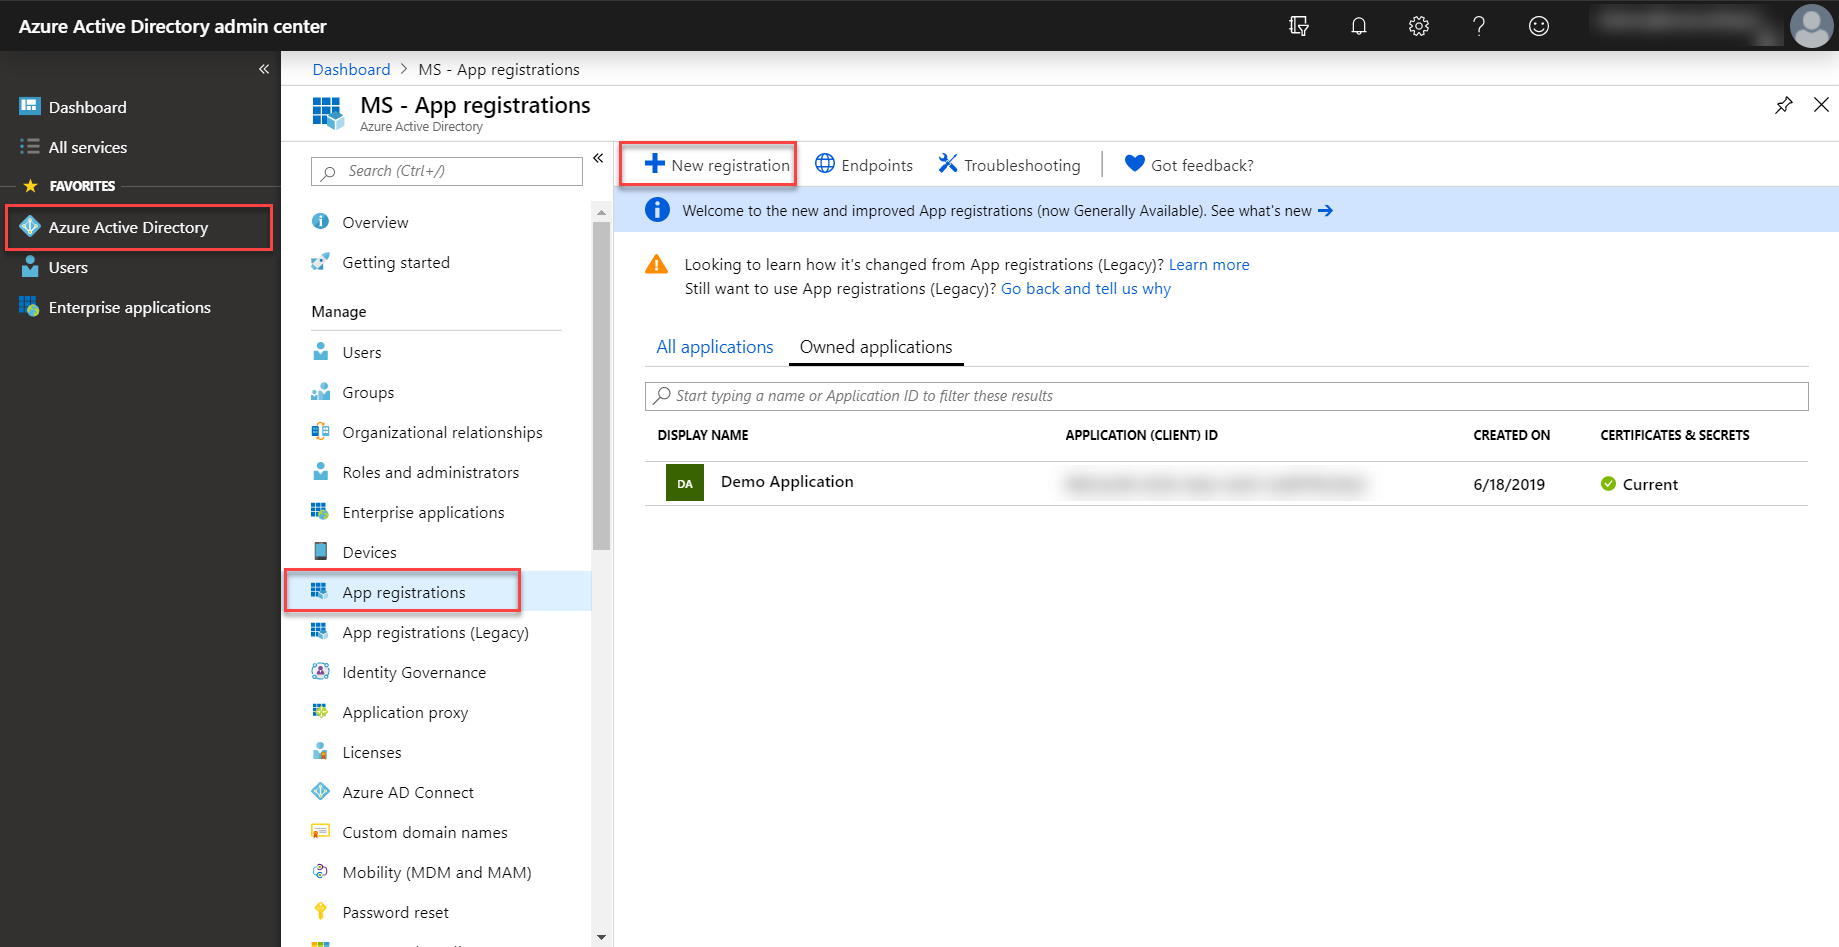 Once in the Azure Portal, select the Azure Active Directory in the left pane and select App registrations and click on New registration.
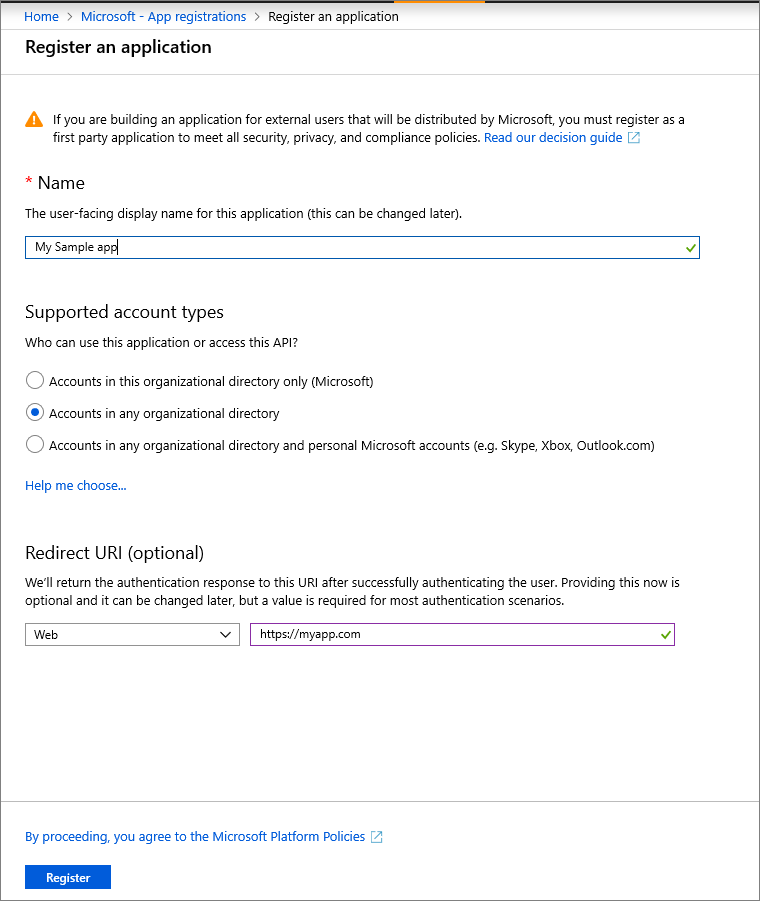 In the Register an application page, enter your application’s registration information!
Firstly, in the name Section enter your company’s name. Then select Accounts in any organizational directory option from the Supported account types section.
Set the Redirect URI to
 On the app Overview page, hover over Application (client) ID value, and select the Copy icon to copy the value as you’ll need to specify this in your application’s authentication code or app.config file where appropriate.
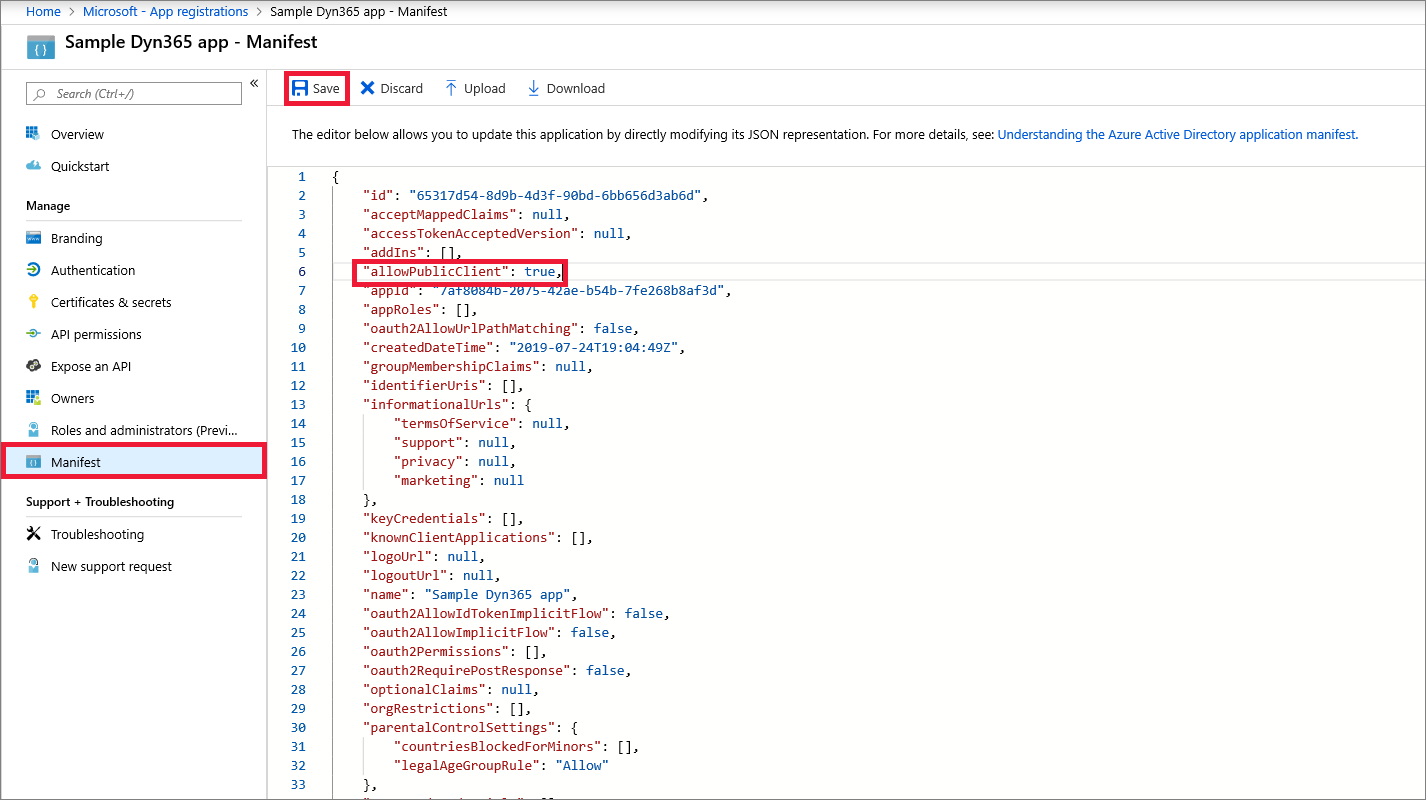 Select Manifest tab, in the manifest editor, set the allowPublicClient* property to true and click on Save.
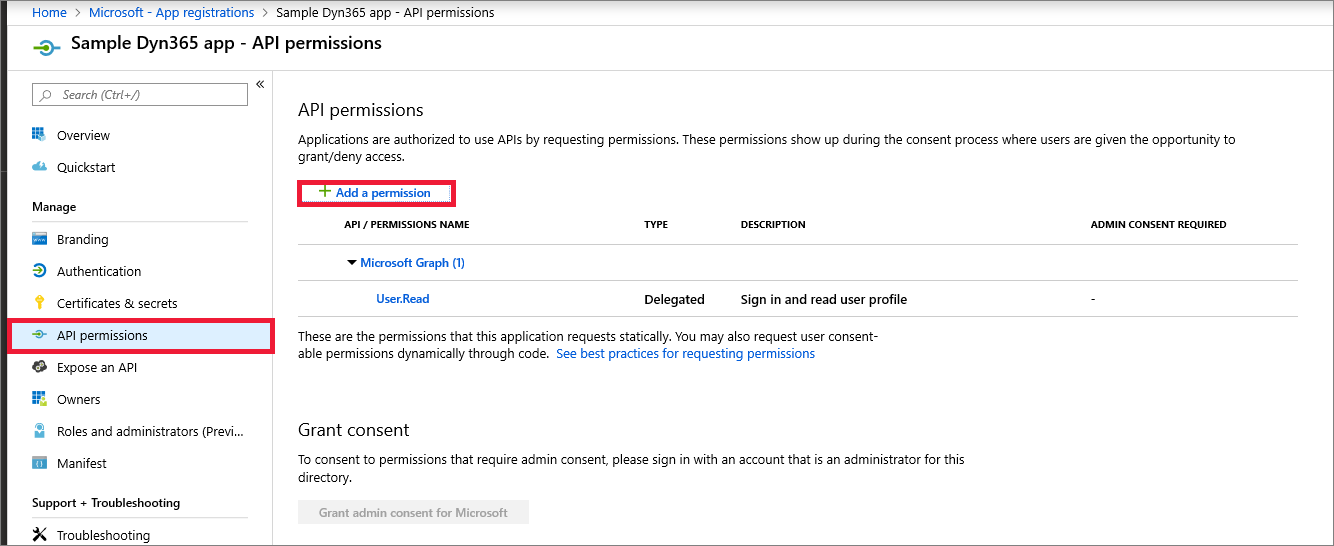 Select the API permissions tab and then go ahead and click on the Add a permission button.
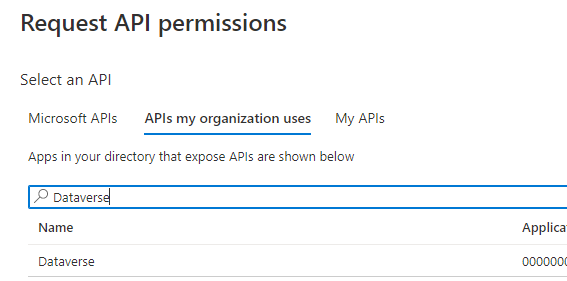 Search for and choose Dataverse under the APIs my organization uses tab. If Dataverse is not found, then search for Common Data Service”.
📘 Tip If you are presented with more than one Common Data Service item in the search list, choose any one of them. In the next step the service name and URL will be shown. At that point you can go back to the API search and choose a different Dataverse list item if needed.
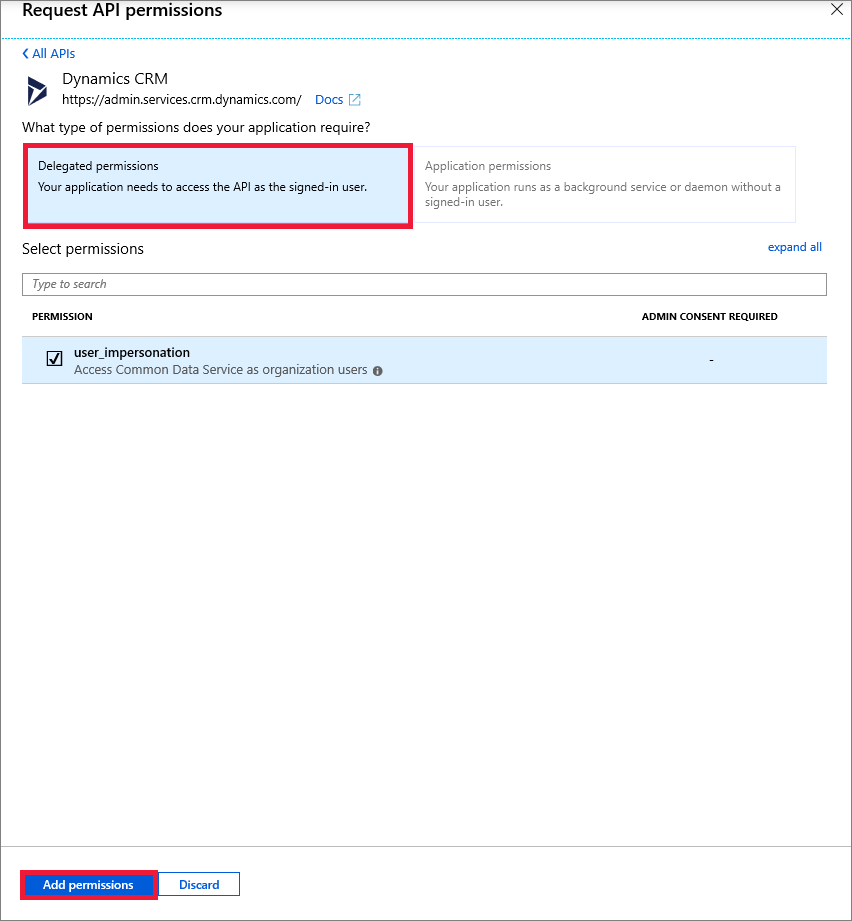 Click on Delegated permissions and check the options and click on Add permissions. This will wrap up registering your app in the Azure Active Directory!
Now you can insert the client id and client secret pair into your hotglue Microsoft Dynamics 365 source settings.
Tap Changelog
Tap Changelog
Tap Changelog
| Version | Notes |
|---|---|
| v0.1.6 | fixes |
| v0.1.5 | bug fixes |
| v0.1.3 | |
| v0.1.1 - Rename domain field to org | - Renamed domain field to org- Changed catalog generation to available |