Connector Details
| Name | Value |
|---|---|
| Platform | Sage Intacct |
| Auth Type | API Keys |
| Direction | Bidirectional |
| Tap Repo | https://github.com/hotgluexyz/tap-intacct |
| Target Repo | https://gitlab.com/hotglue/target-intacct-v2 |
| Tap Metrics | Usage: |
| Target Metrics | Usage: |
| Unified Schema |
Credentials Setup
Follow the steps below to get the credentials you need to use the Sage Intacct connector. The Sage Intacct tap requires the following fields:| Field Name | Description |
|---|---|
| Company Id | Your Sage Intacct Company Id |
| Sender Id | Your Sage Intacct Sender Id |
| Sender Password | Your Sage Intacct Sender Password |
| User Id | Your Sage Intacct User Id |
| User Password | Your Sage Intacct User Password |
1. Enable Web Services
To enable Web Services, go to Company > Admin > Subscriptions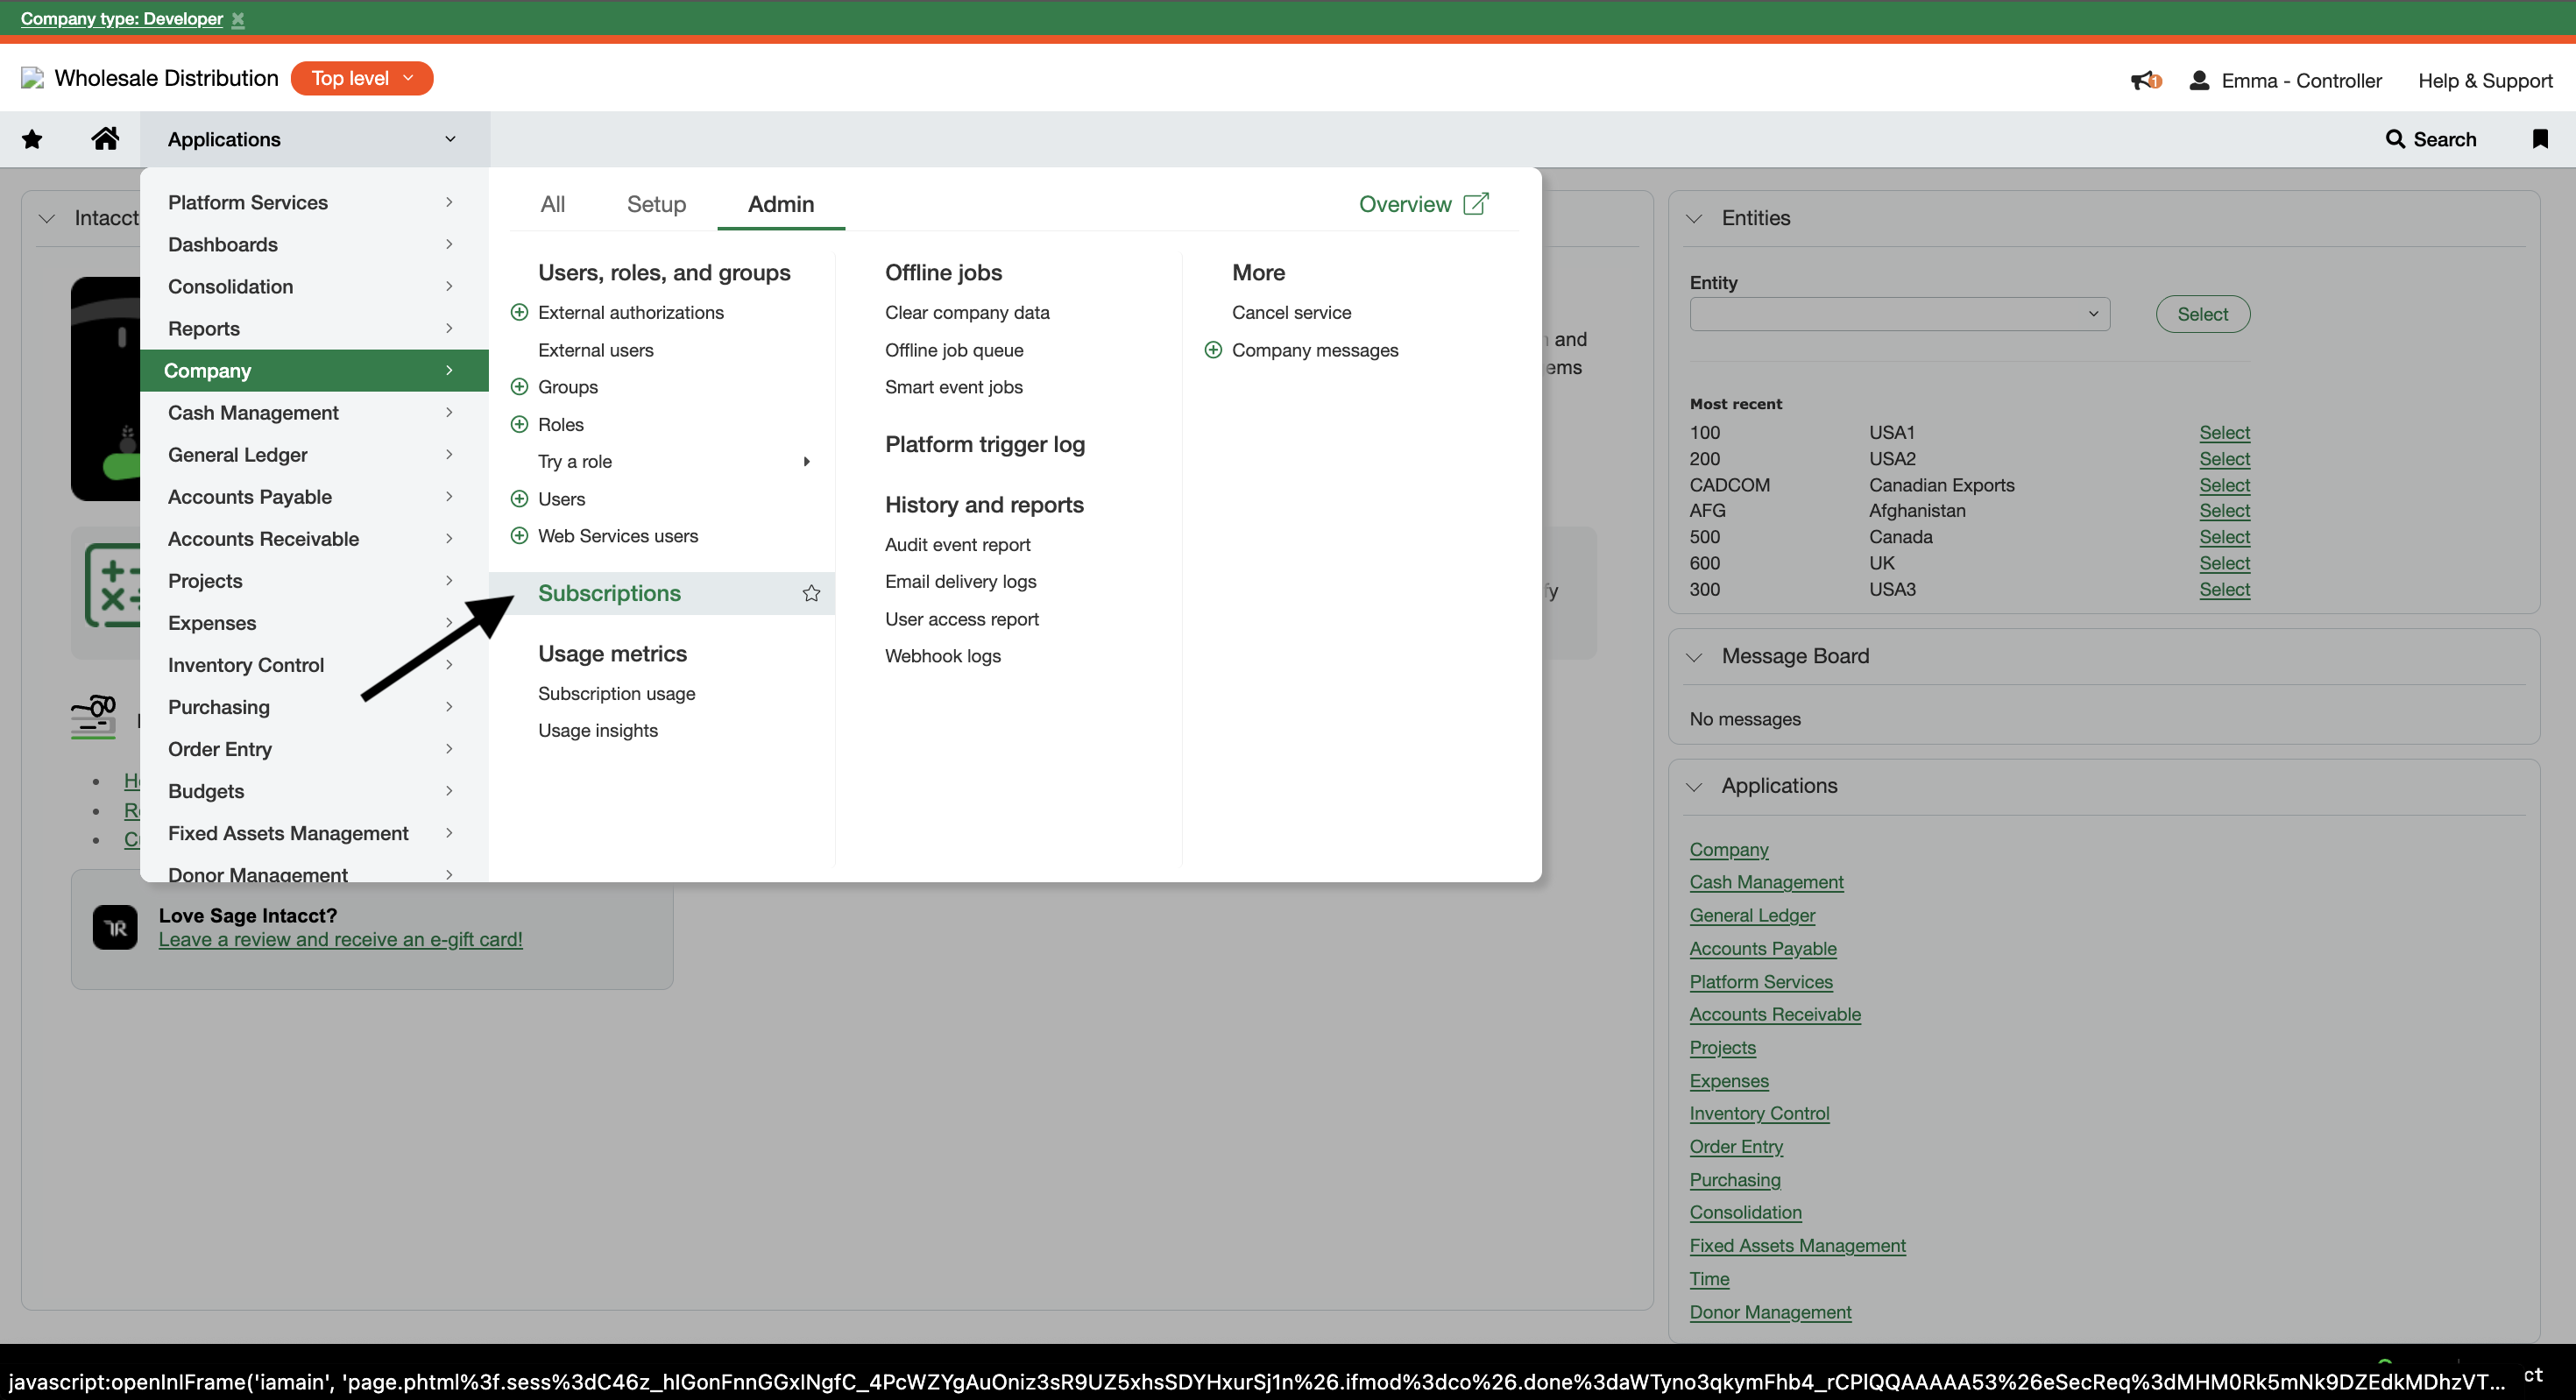

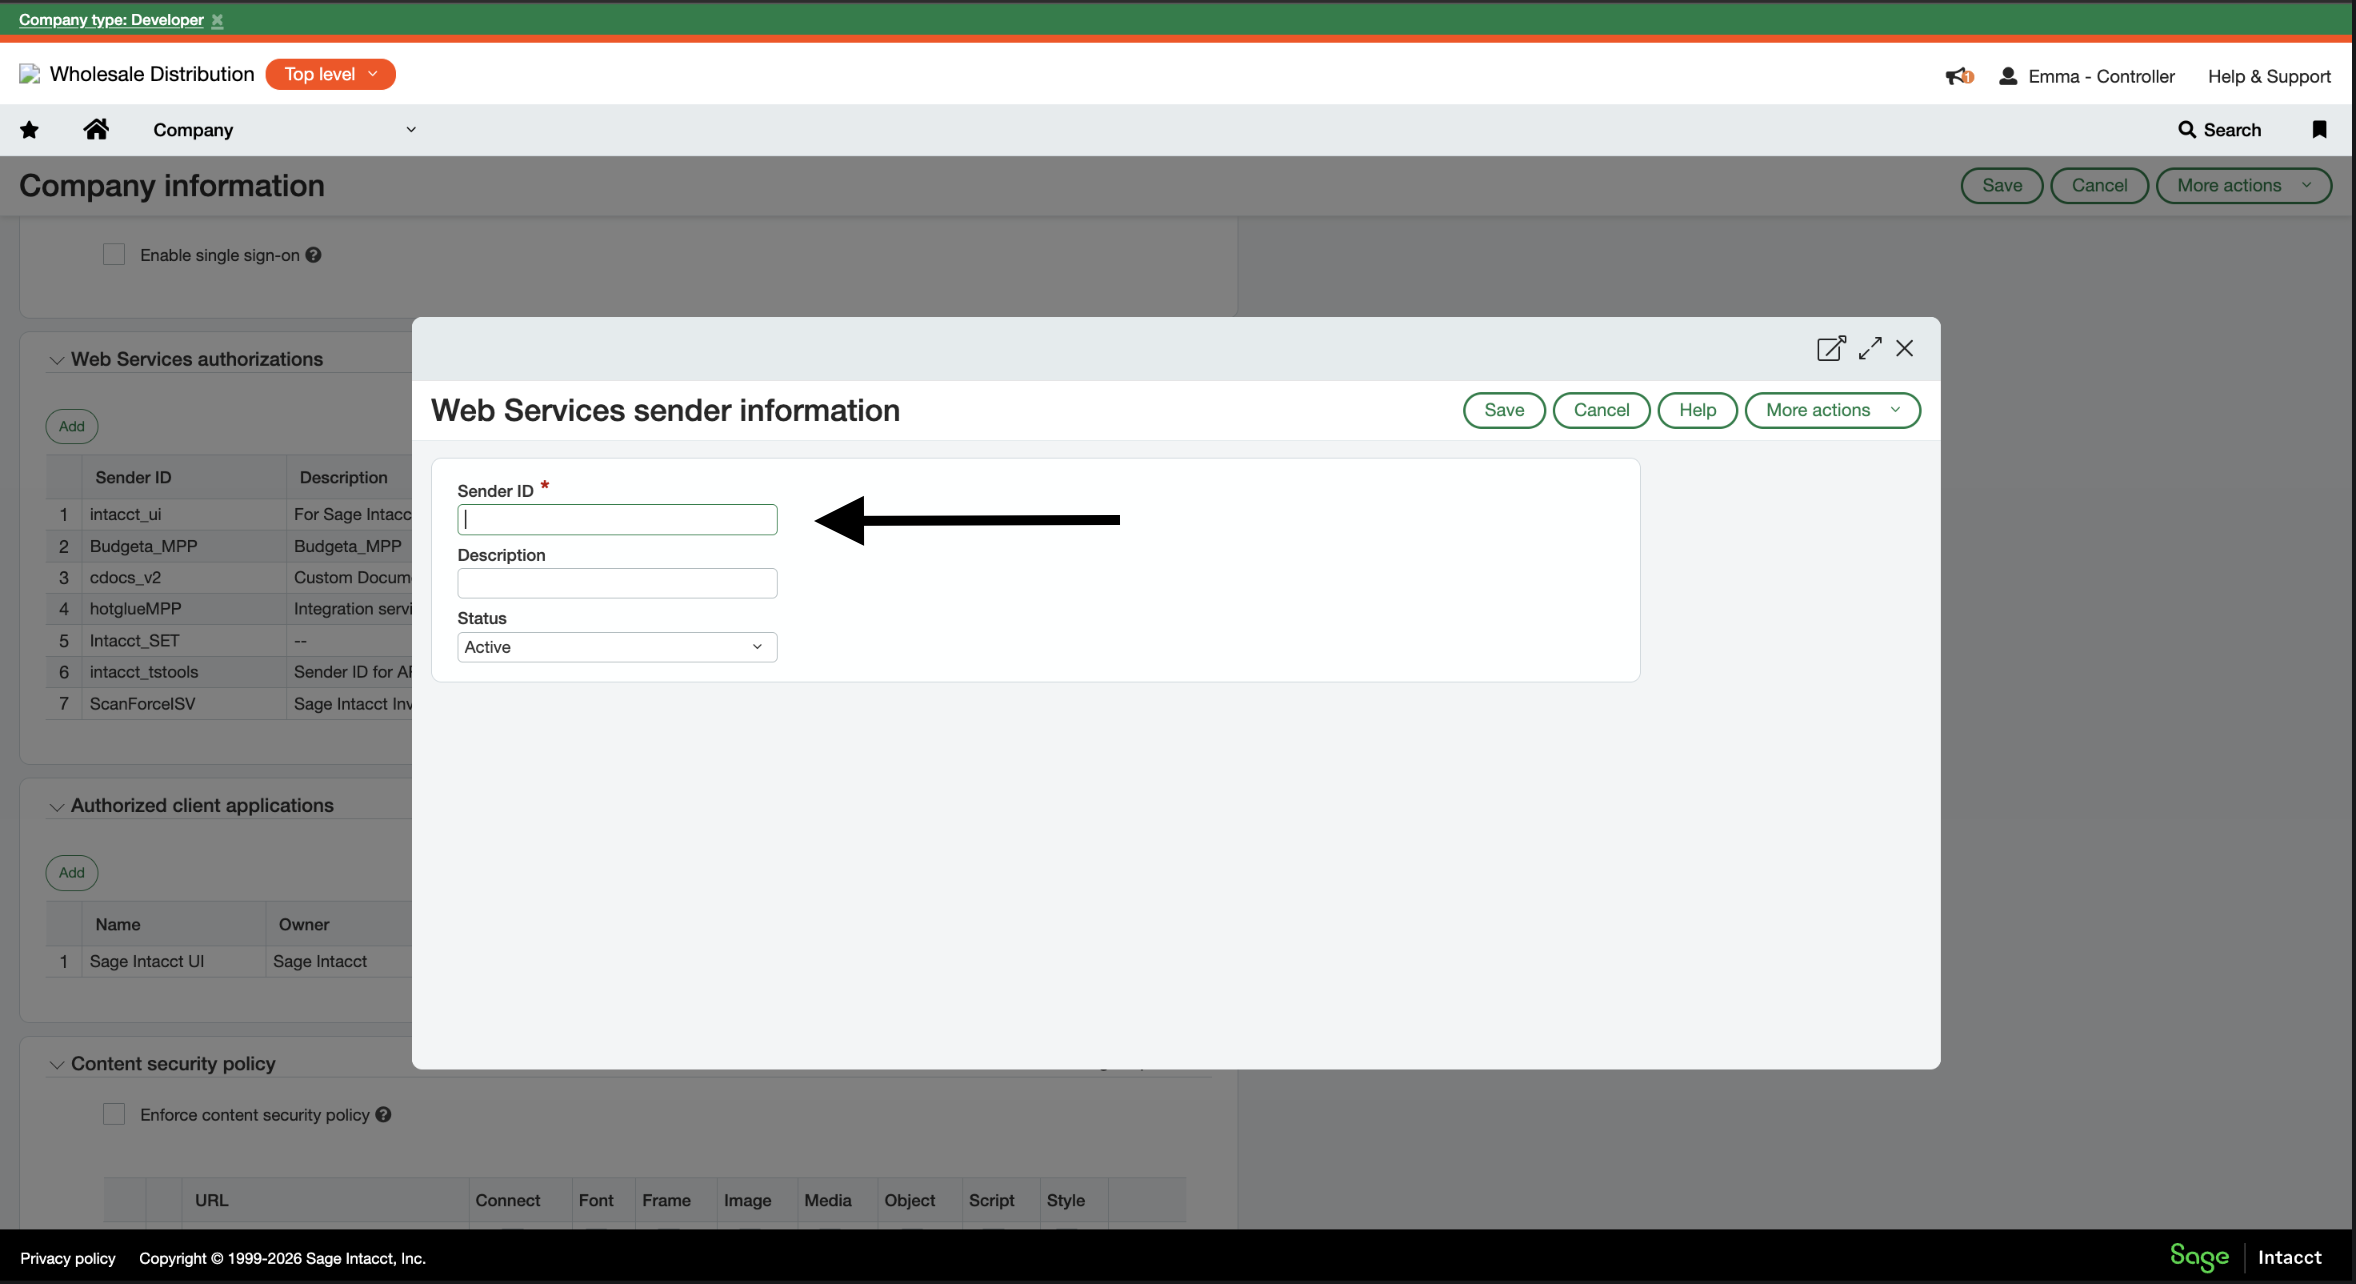
2. Generate a Sender ID and password
The Intacct Sender credentials are used to validate your API access. Unfortunately, Intacct does not provide API access to all users by default. You have two options for obtaining developer credentials.- You (the hotglue customer) can register as an Intacct Marketplace partner (link to Intacct page of applying to be a marketplace partner). This involves an approval process that typically takes a couple of months. hotglue can then use your Sender credentials to interact with your tenants’ Intacct instances. (More Information)
- Your tenant can obtain a developer license, which includes sender credentials. This is paid, however does not involve a lengthy approval process. (More information)
3. Authorize the Sender ID
Go to Company > Setup > Company > Security, and select Edit

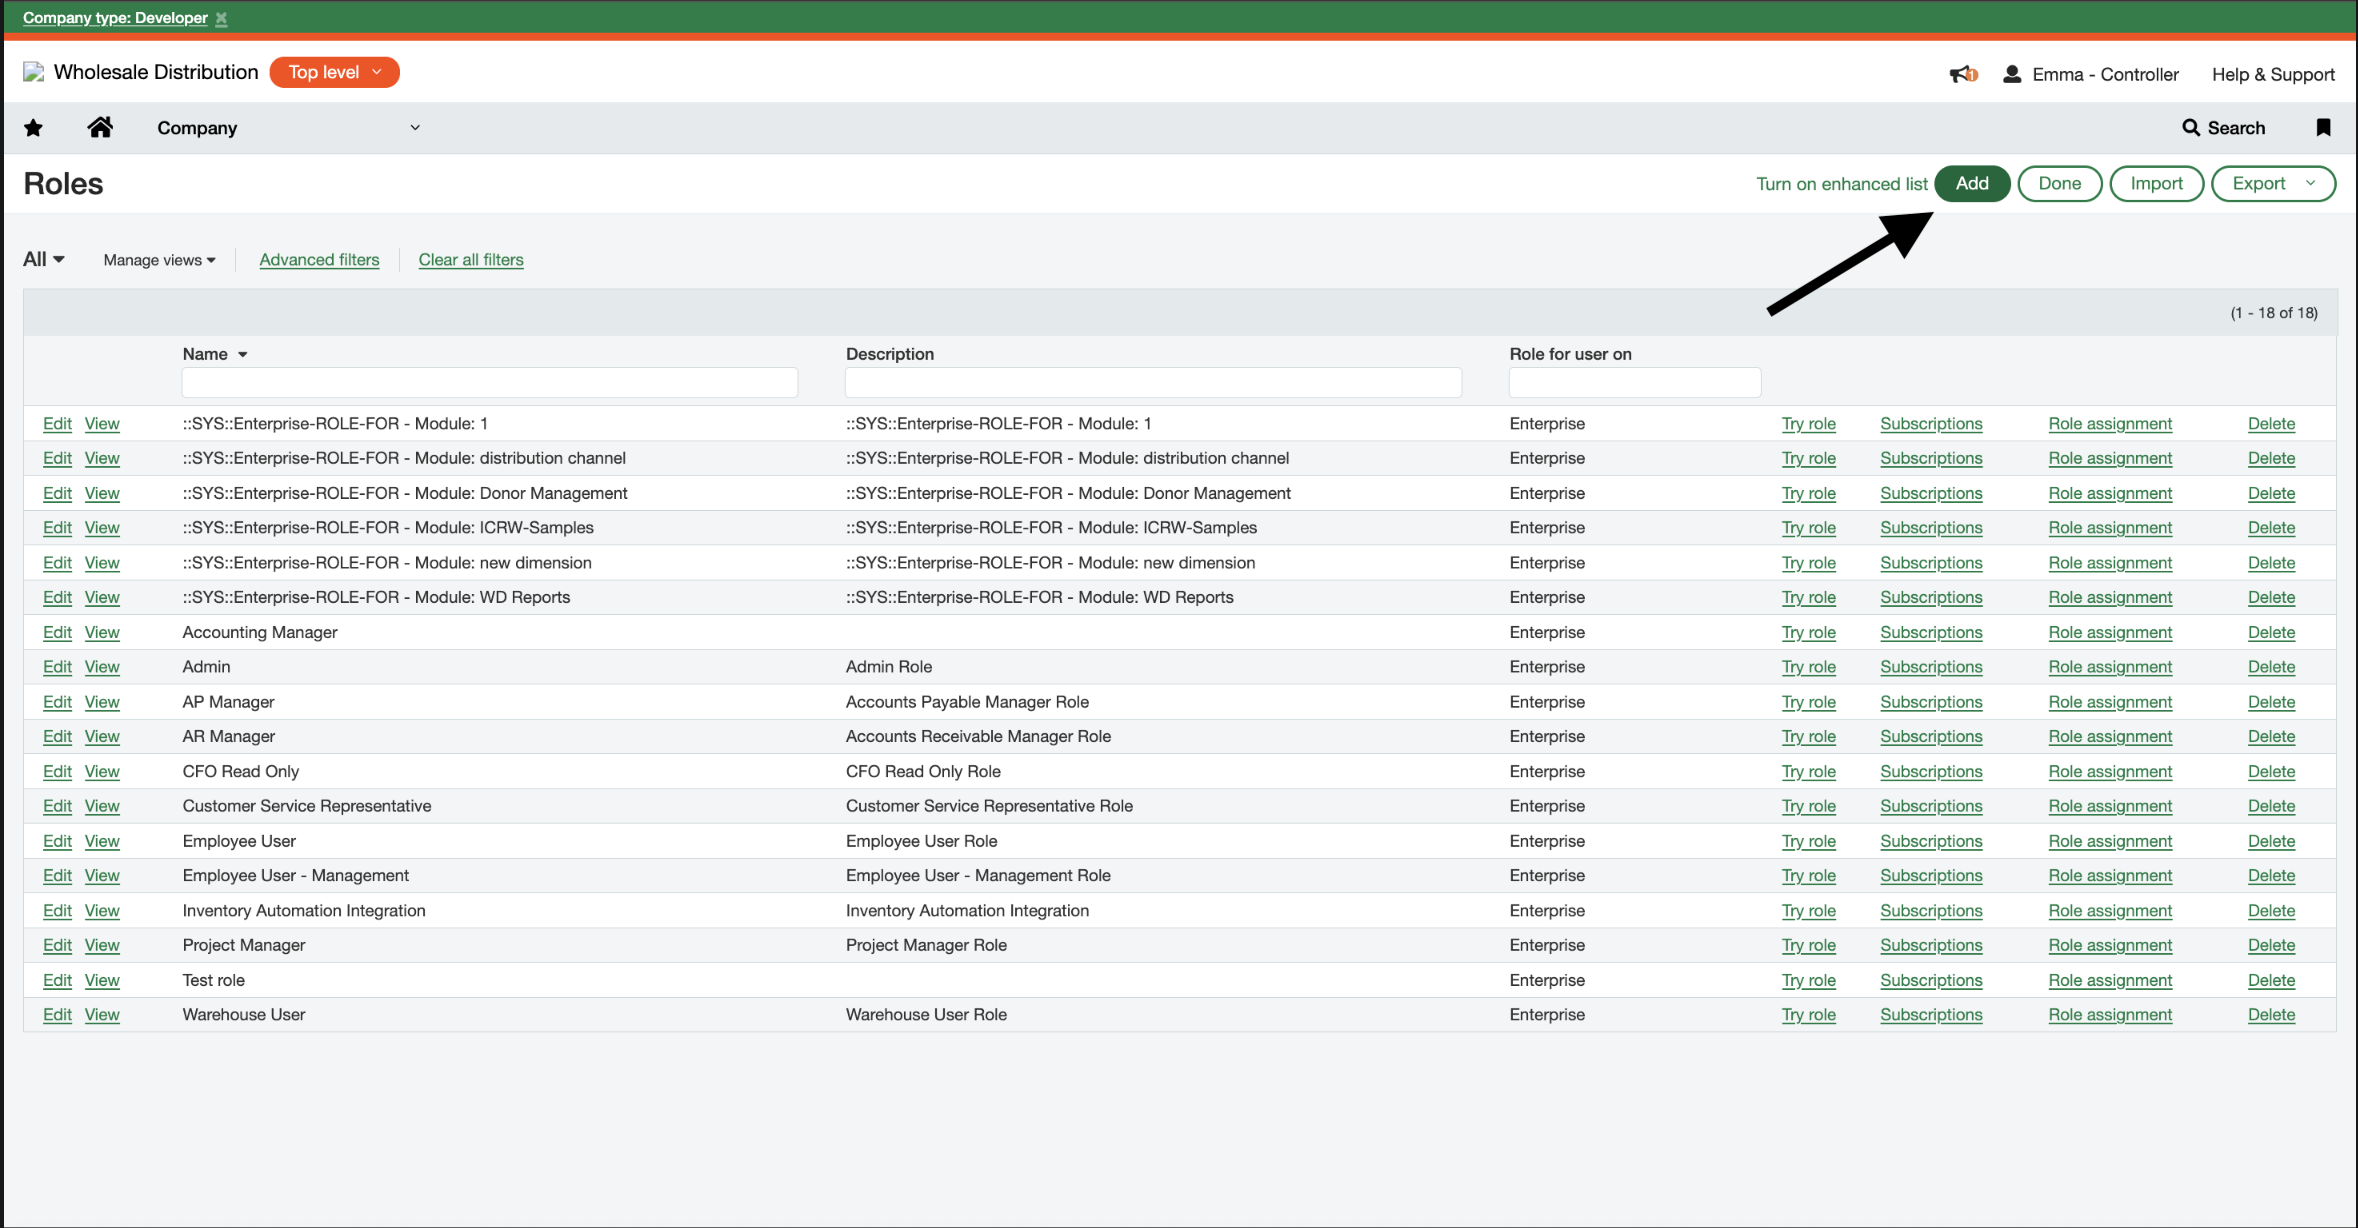
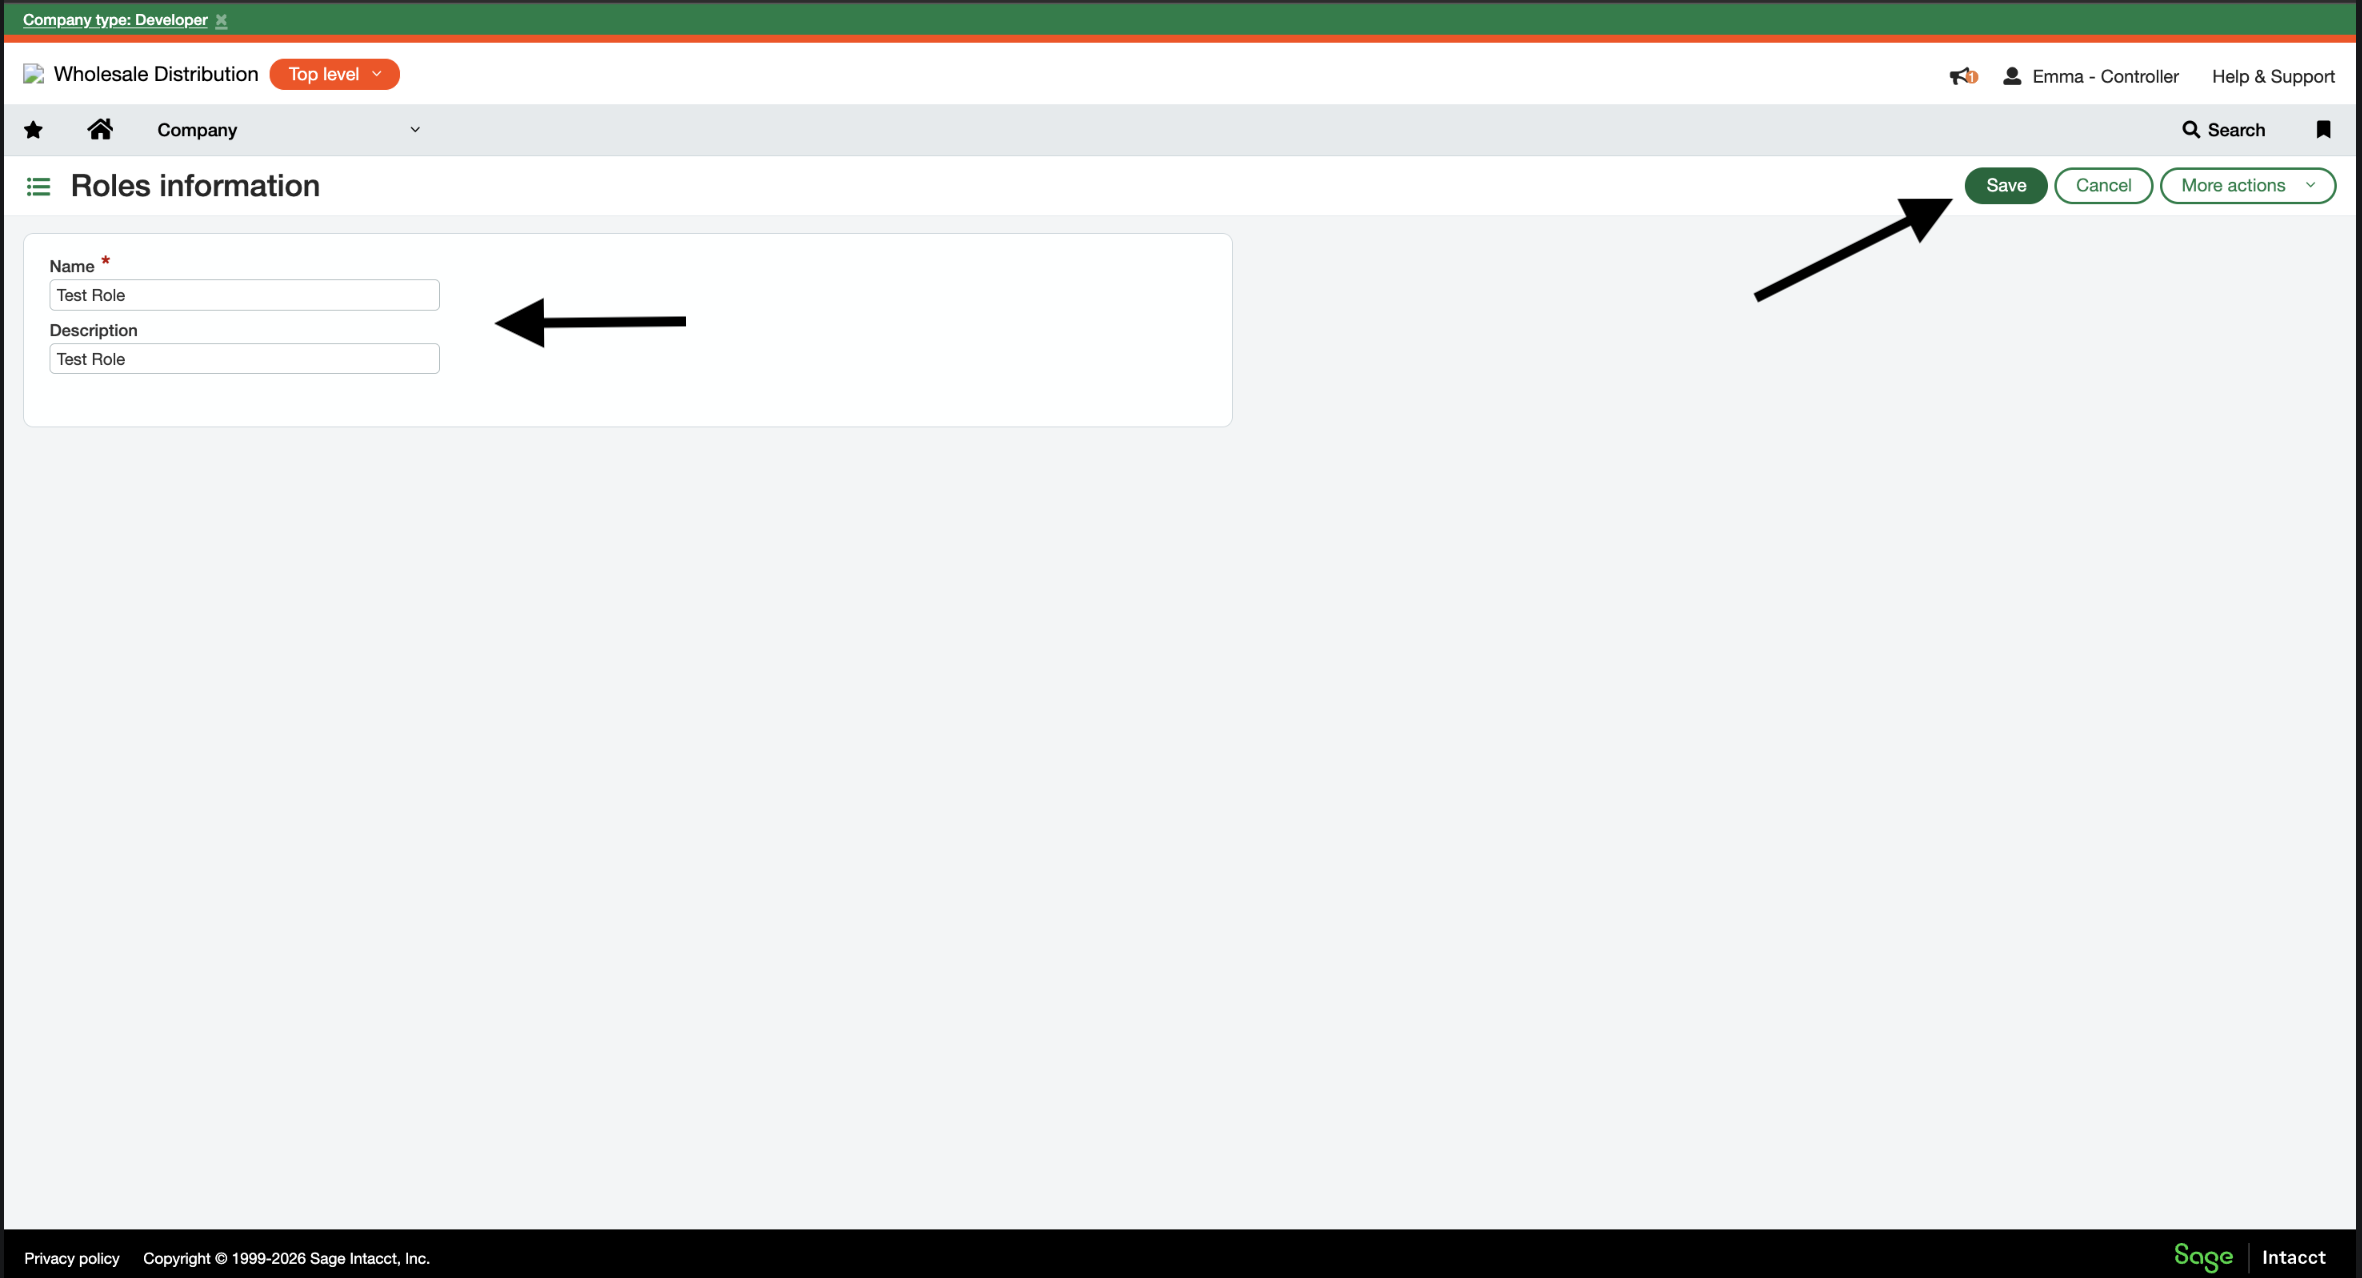
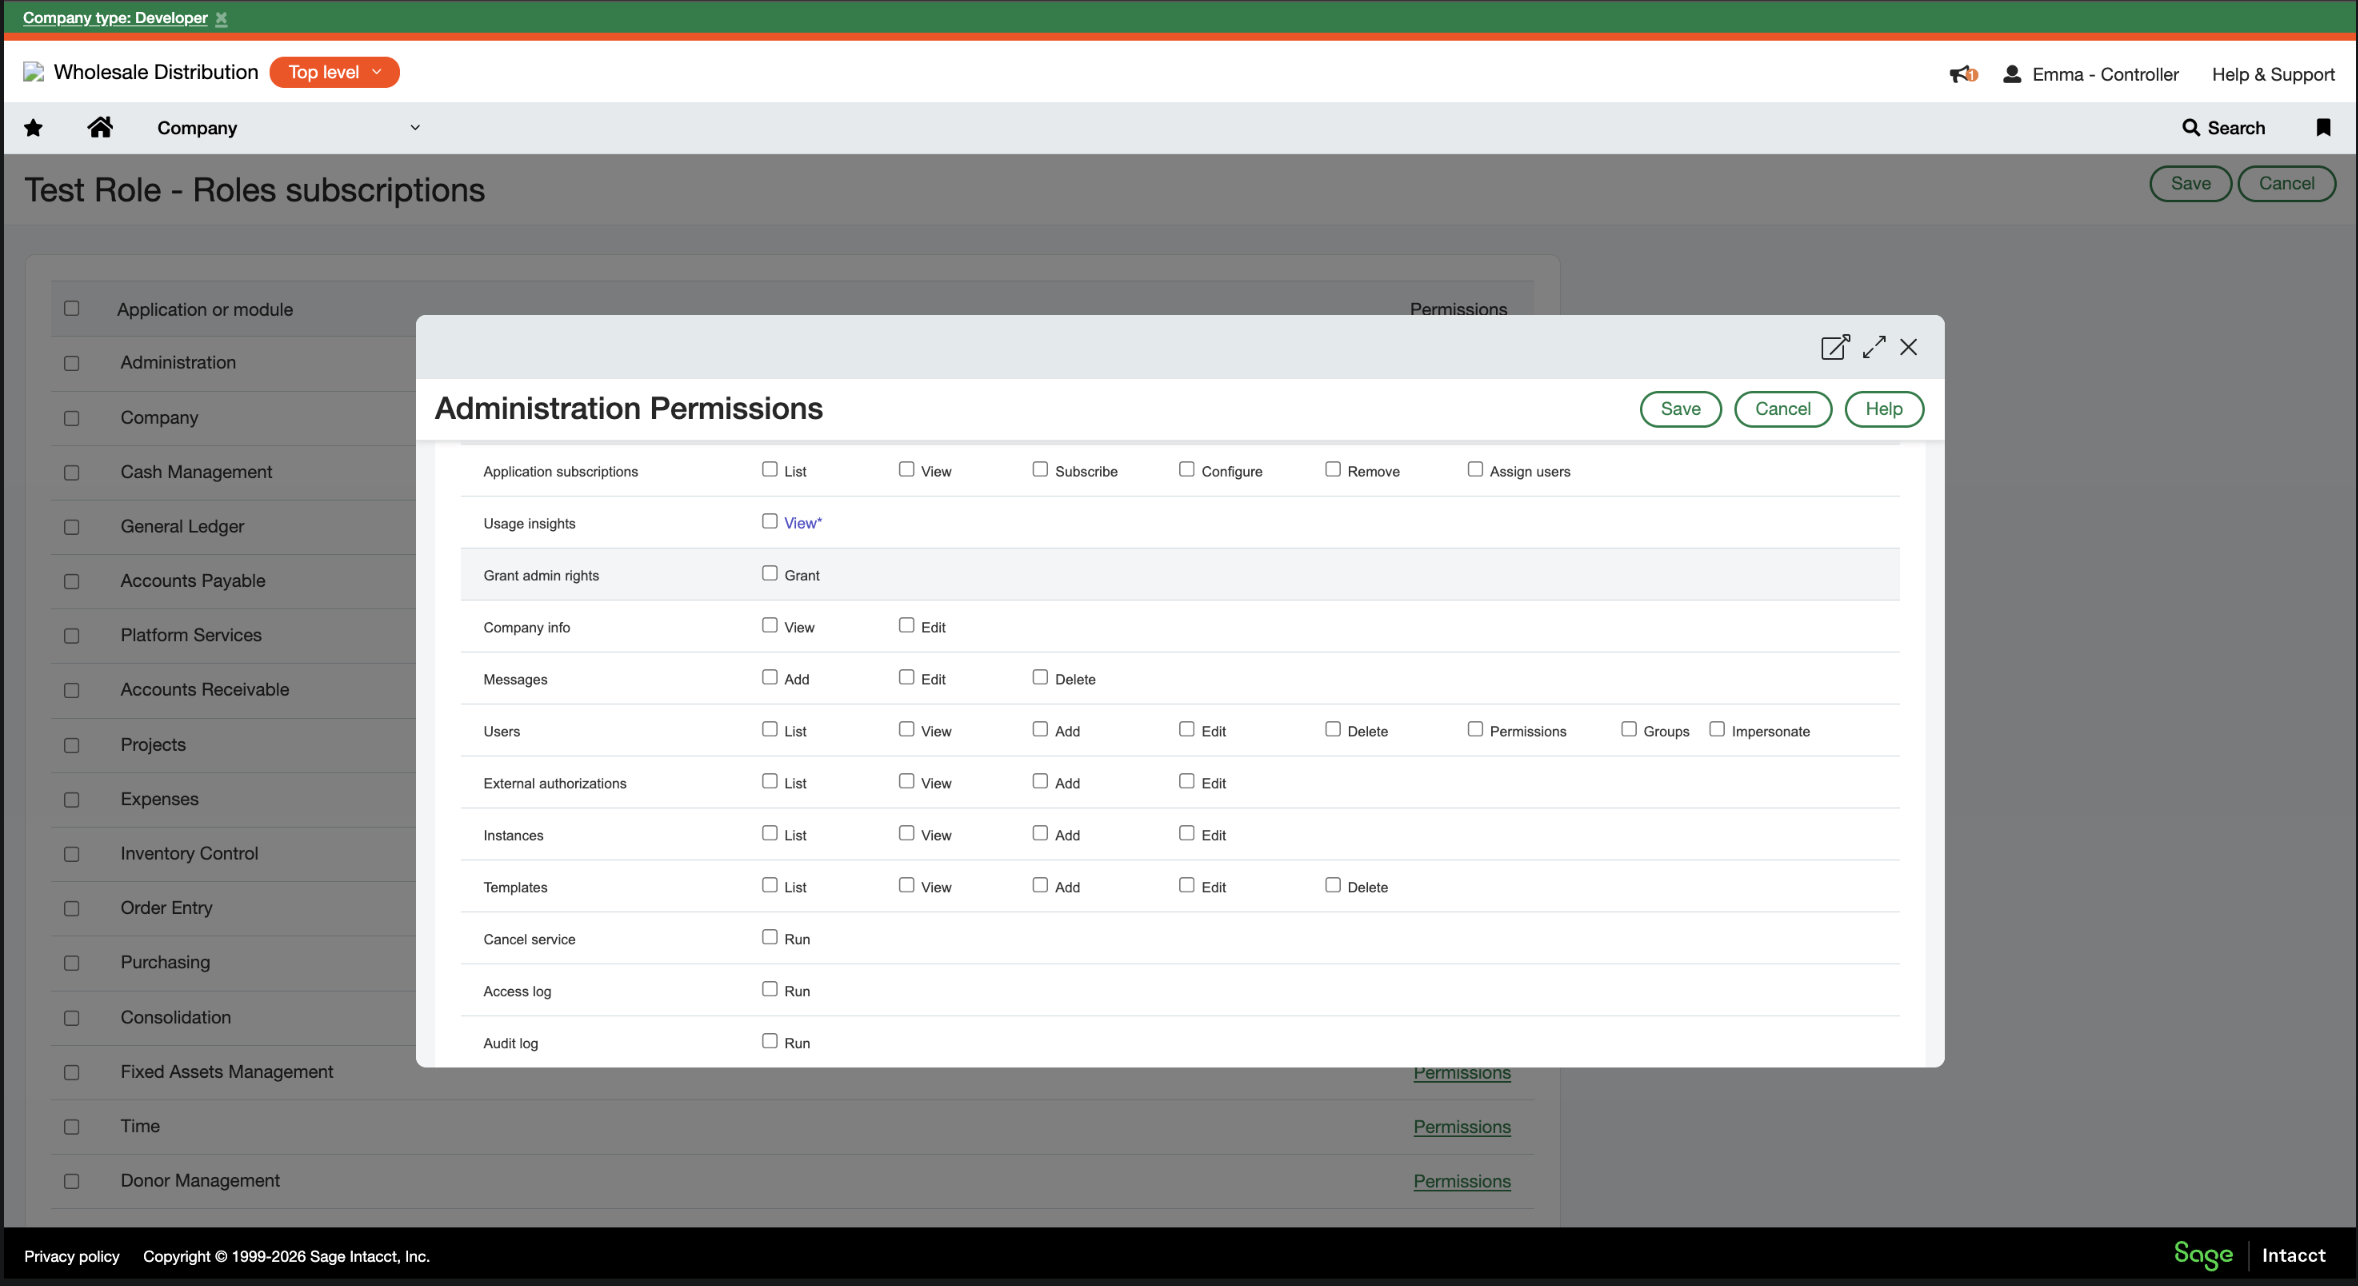
4. Create a role to be used by the hotglue integration
Navigate to Company > Admin > Roles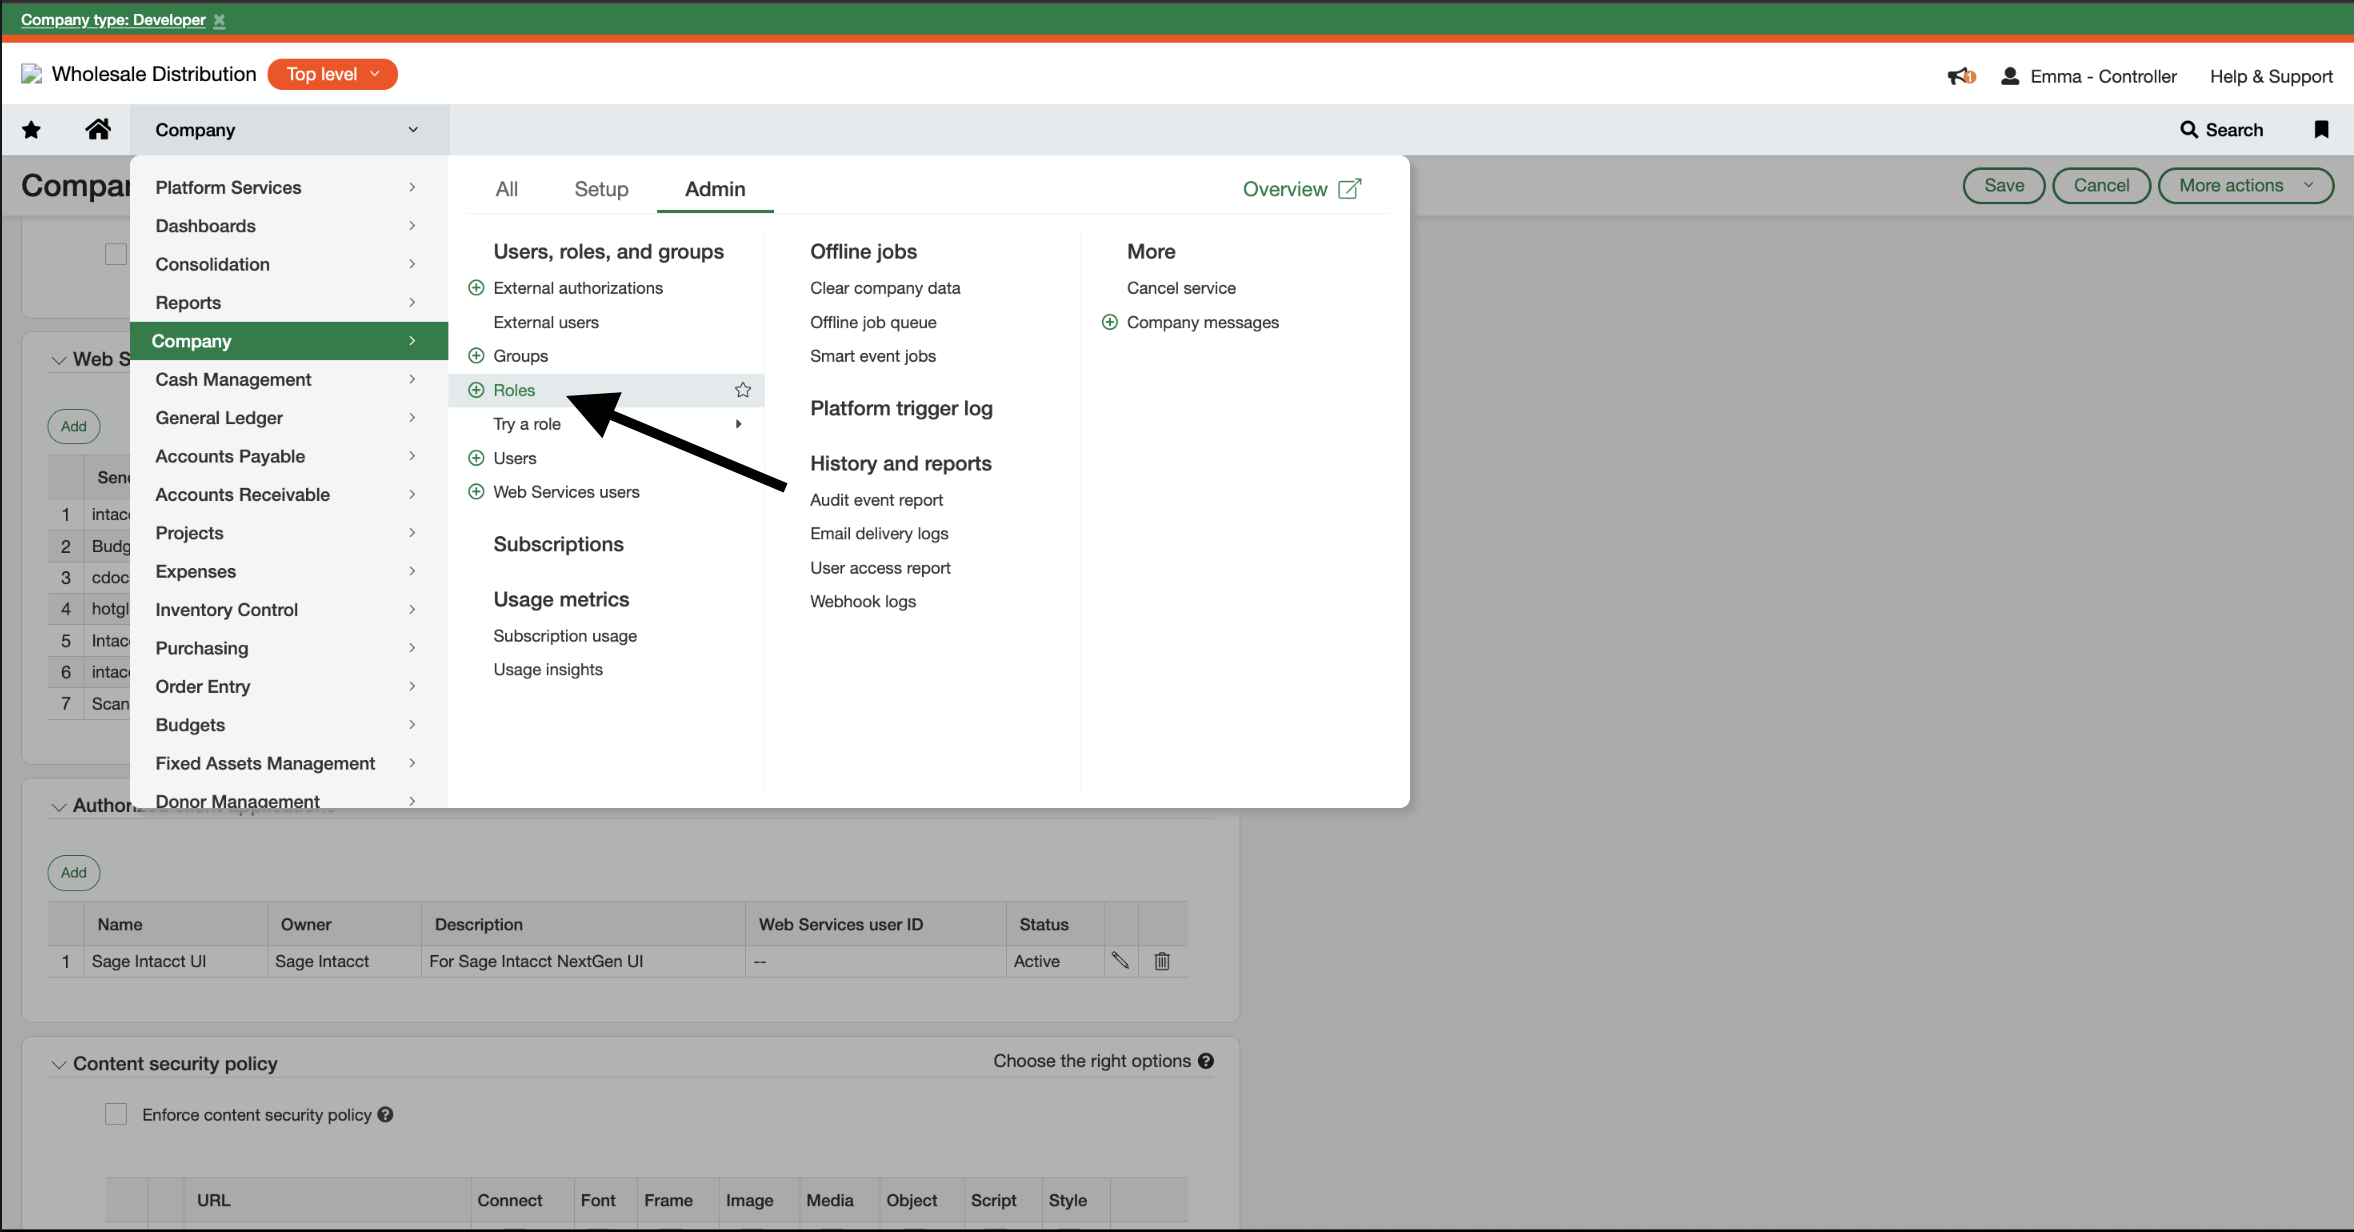
4. Create the Intacct user to be used by the hotglue integration
Go to Company > Admin > Users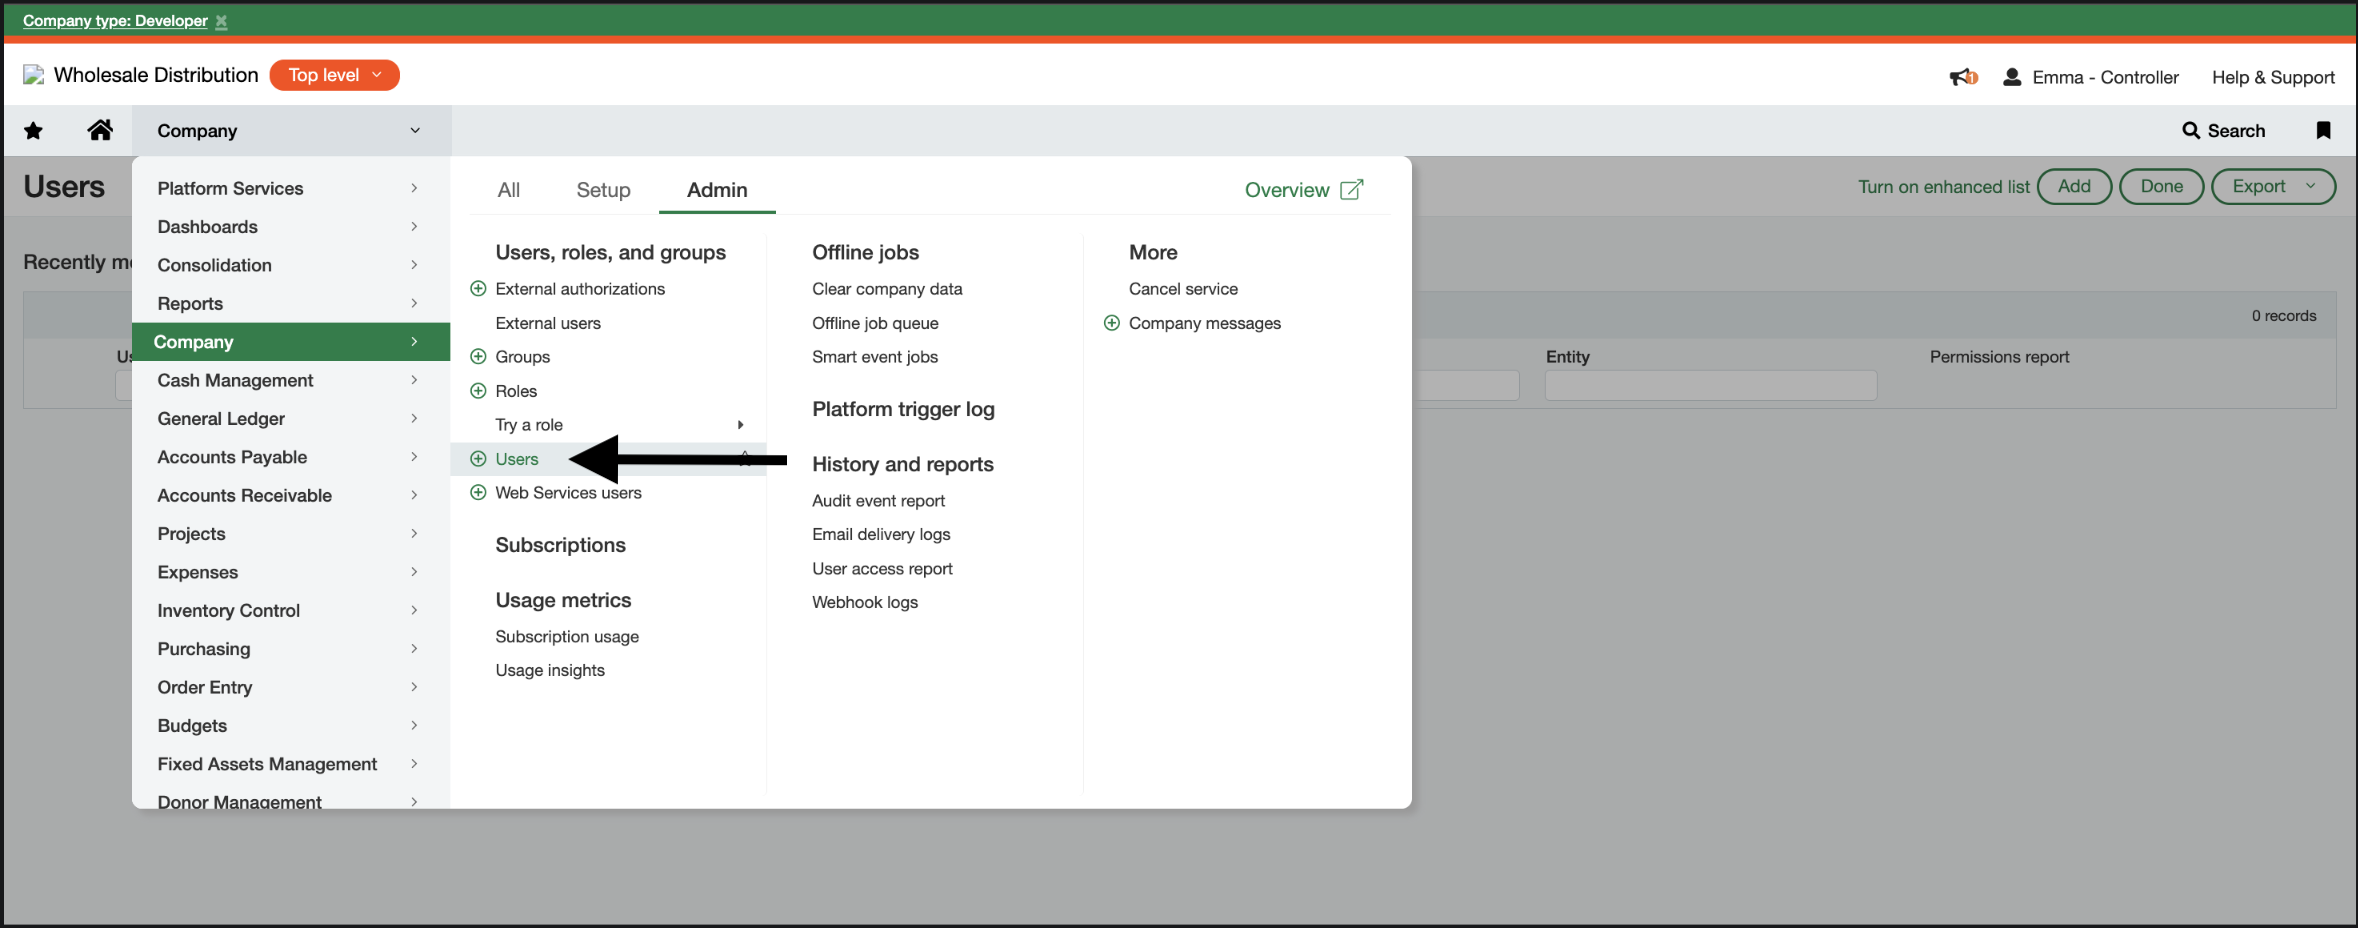
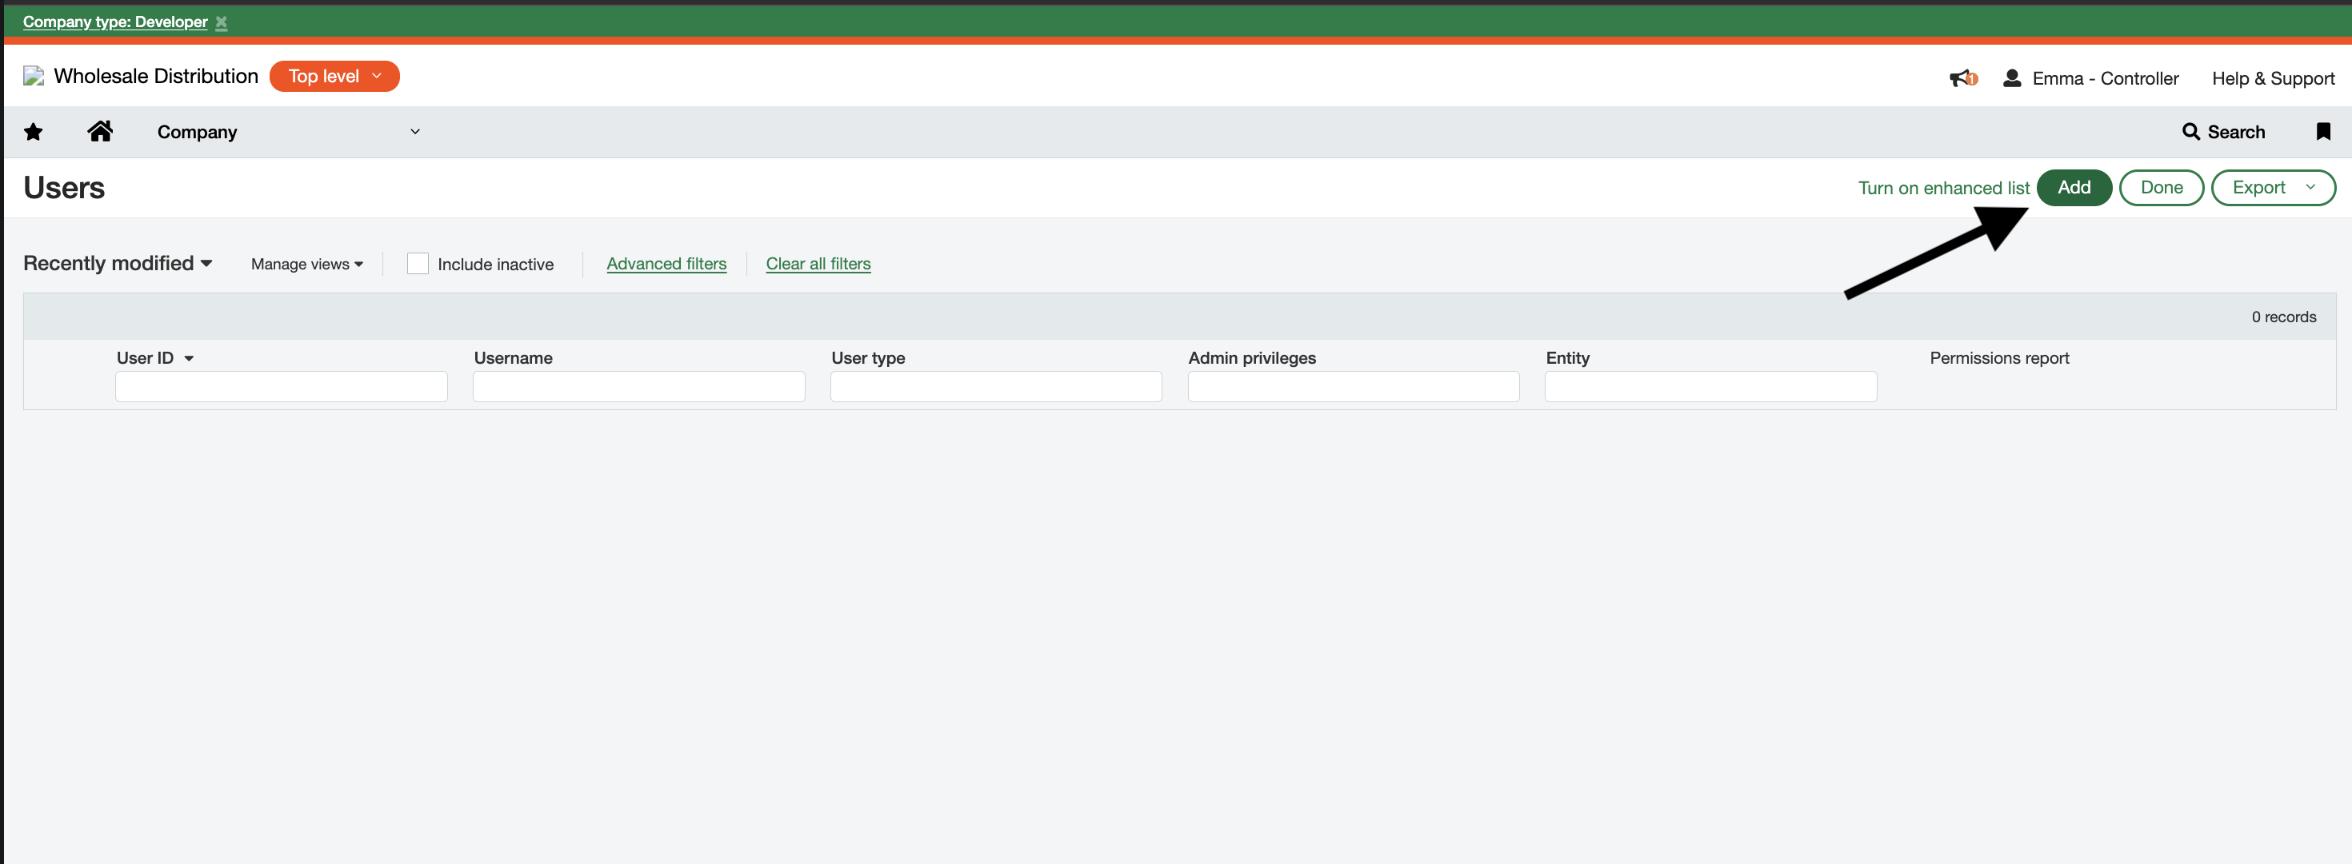
-
User ID: (this becomes the
user_idfield) - Username/email
-
Set password (this becomes the
user_password)
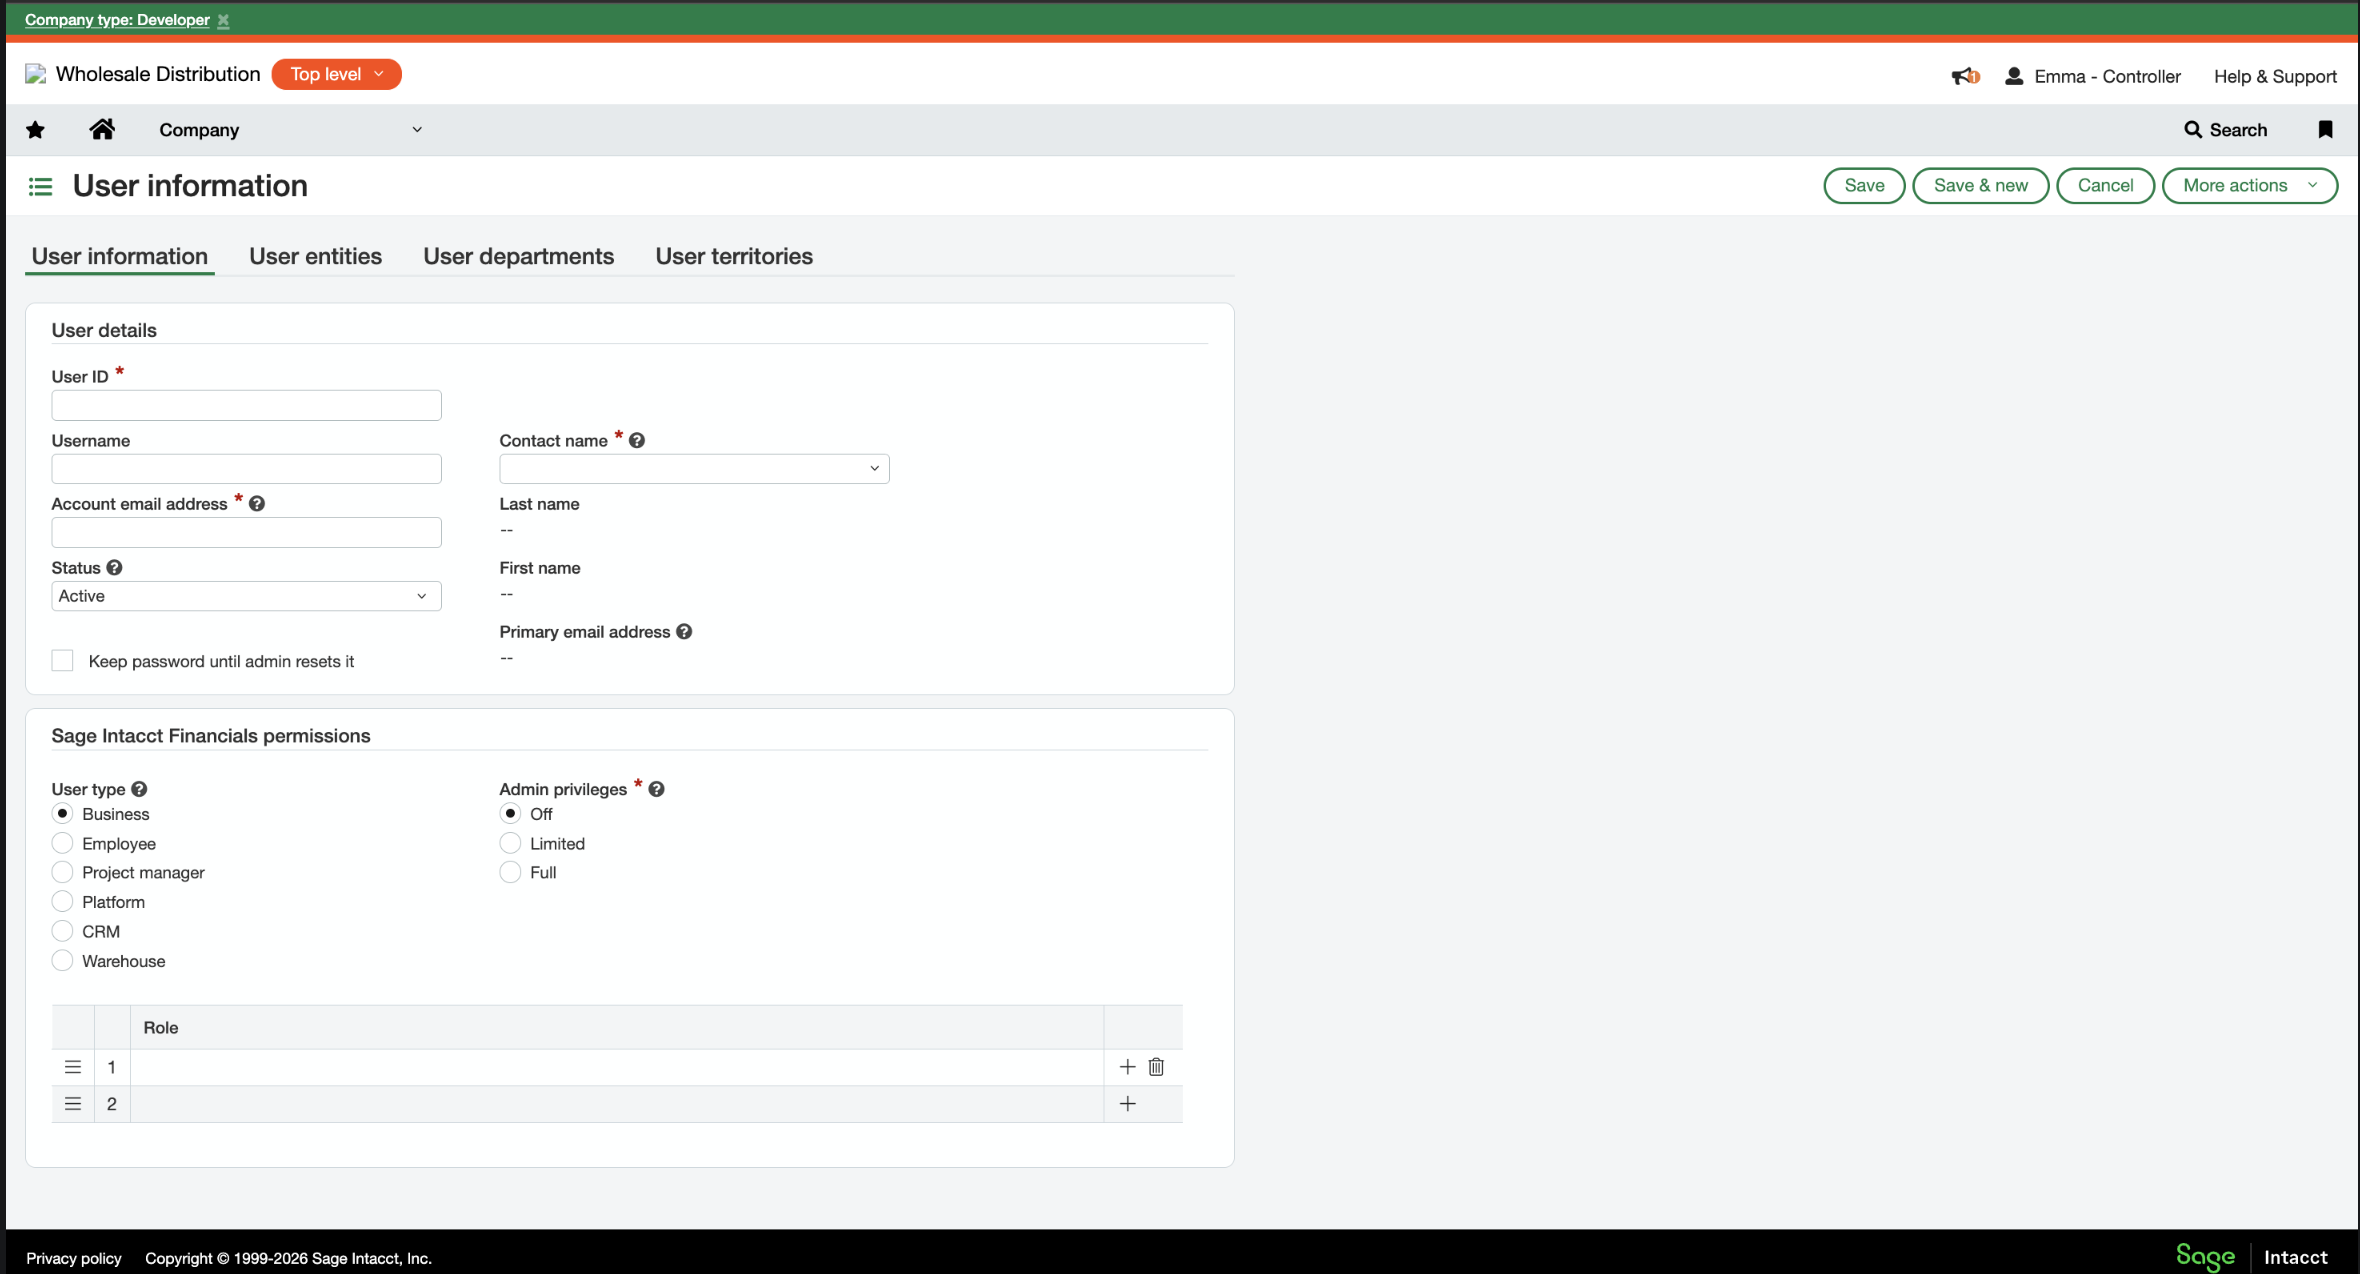
5. Assign the role to the user
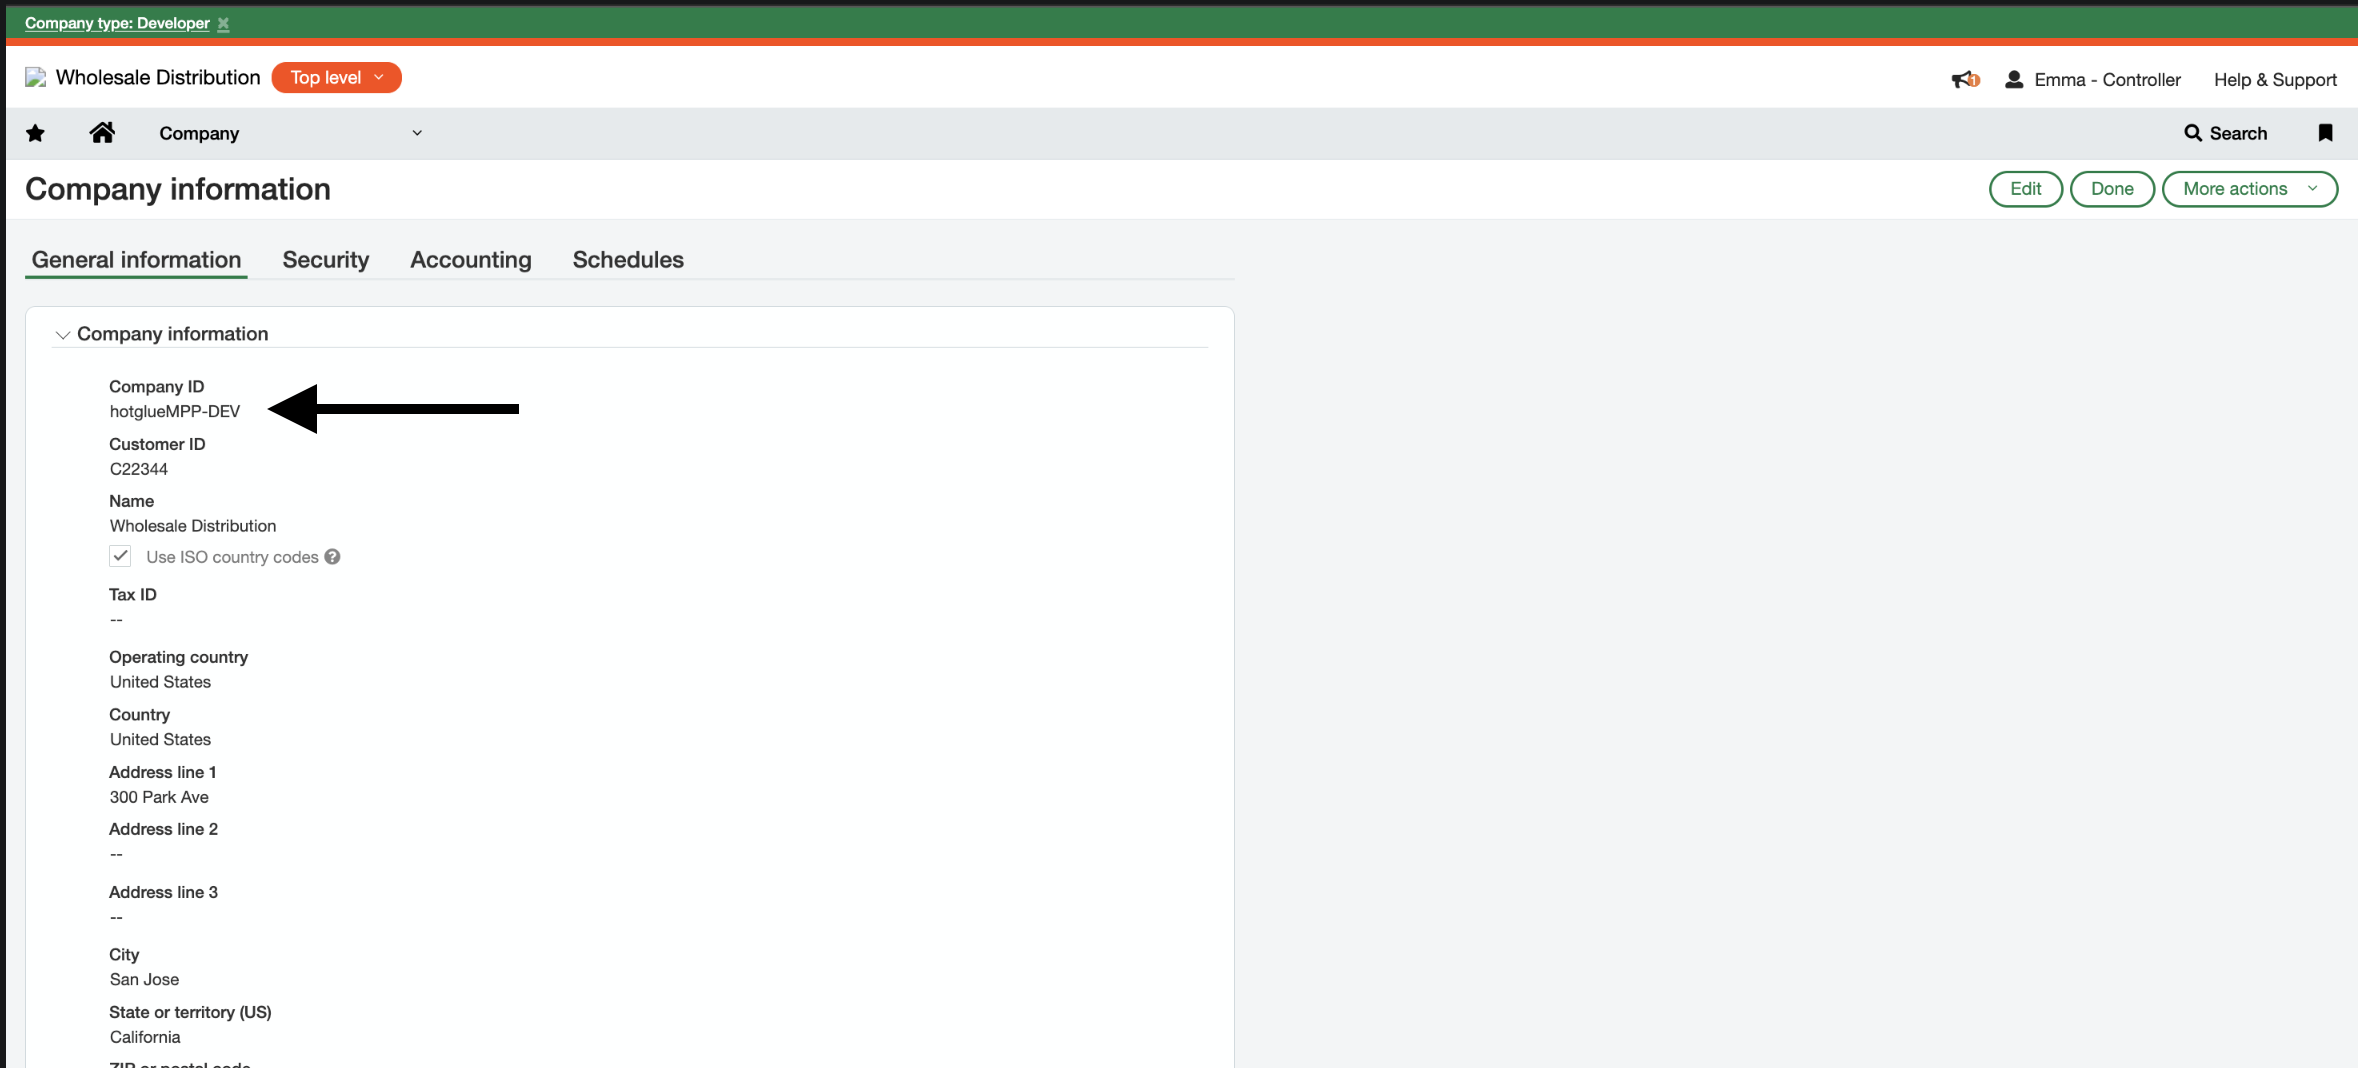
Go to Company → Admin → Users. Open the integration user you created and select Edit. Scroll down to the Roles section on the user record. Select Add. Choose the integration role you created earlier. Select Save on the user record. Note: The Company > Admin > Roles > Role assignment screen only shows assignments; you cannot add users there.6. Find the Company ID
Finally, open Company > Setup > Company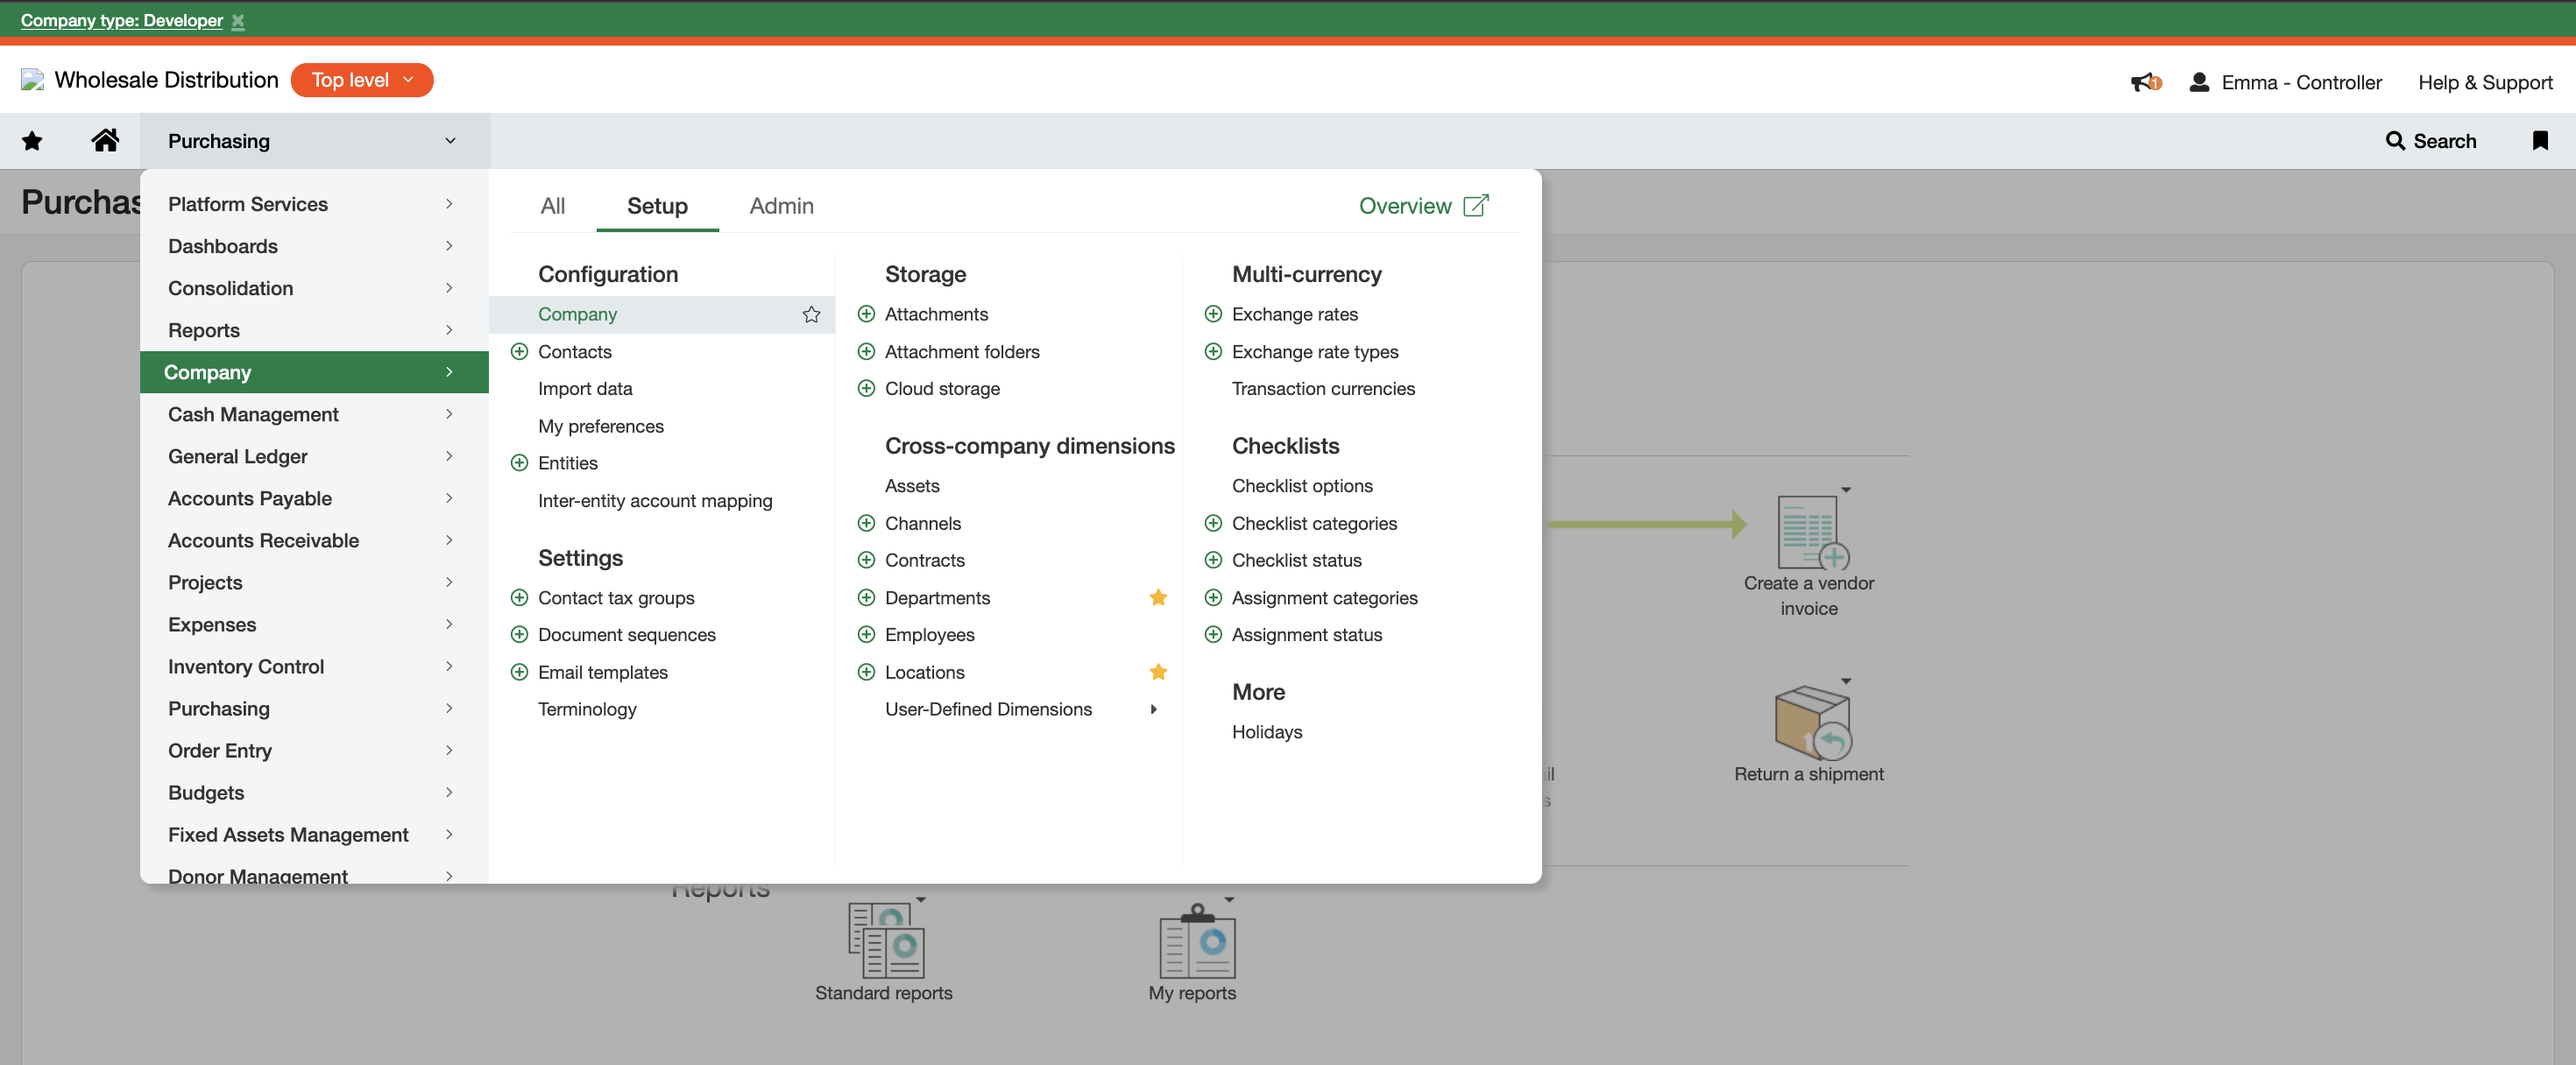
company_id)
Tap Changelog
Tap Changelog
Tap Changelog
| Version | Notes |
|---|---|
| v0.1.7 | |
| v0.1.6 | |
| v0.1.5 | |
| v0.1.4 | |
| v0.1.3 - Dynamic catalog generation | - Handle generating catalog dynamically |
| v0.1.2 - Add support for support ARINVOICE, ARADJUSTMENT, CUSTOMER & ITEM | Added support for ARINVOICE, ARADJUSTMENT, CUSTOMER & ITEM objects |
| Change name to tap-intacct | This is a fork of original tap-intacct-api - hotglue is maintaining this fork. |