Connector Details
Credentials Setup
Follow the steps below to get the credentials you need to use the NetSuite connector.1
Step 1: Create a new Integration in NetSuite.
Head to Setup > Integration > Manage Integrations > New.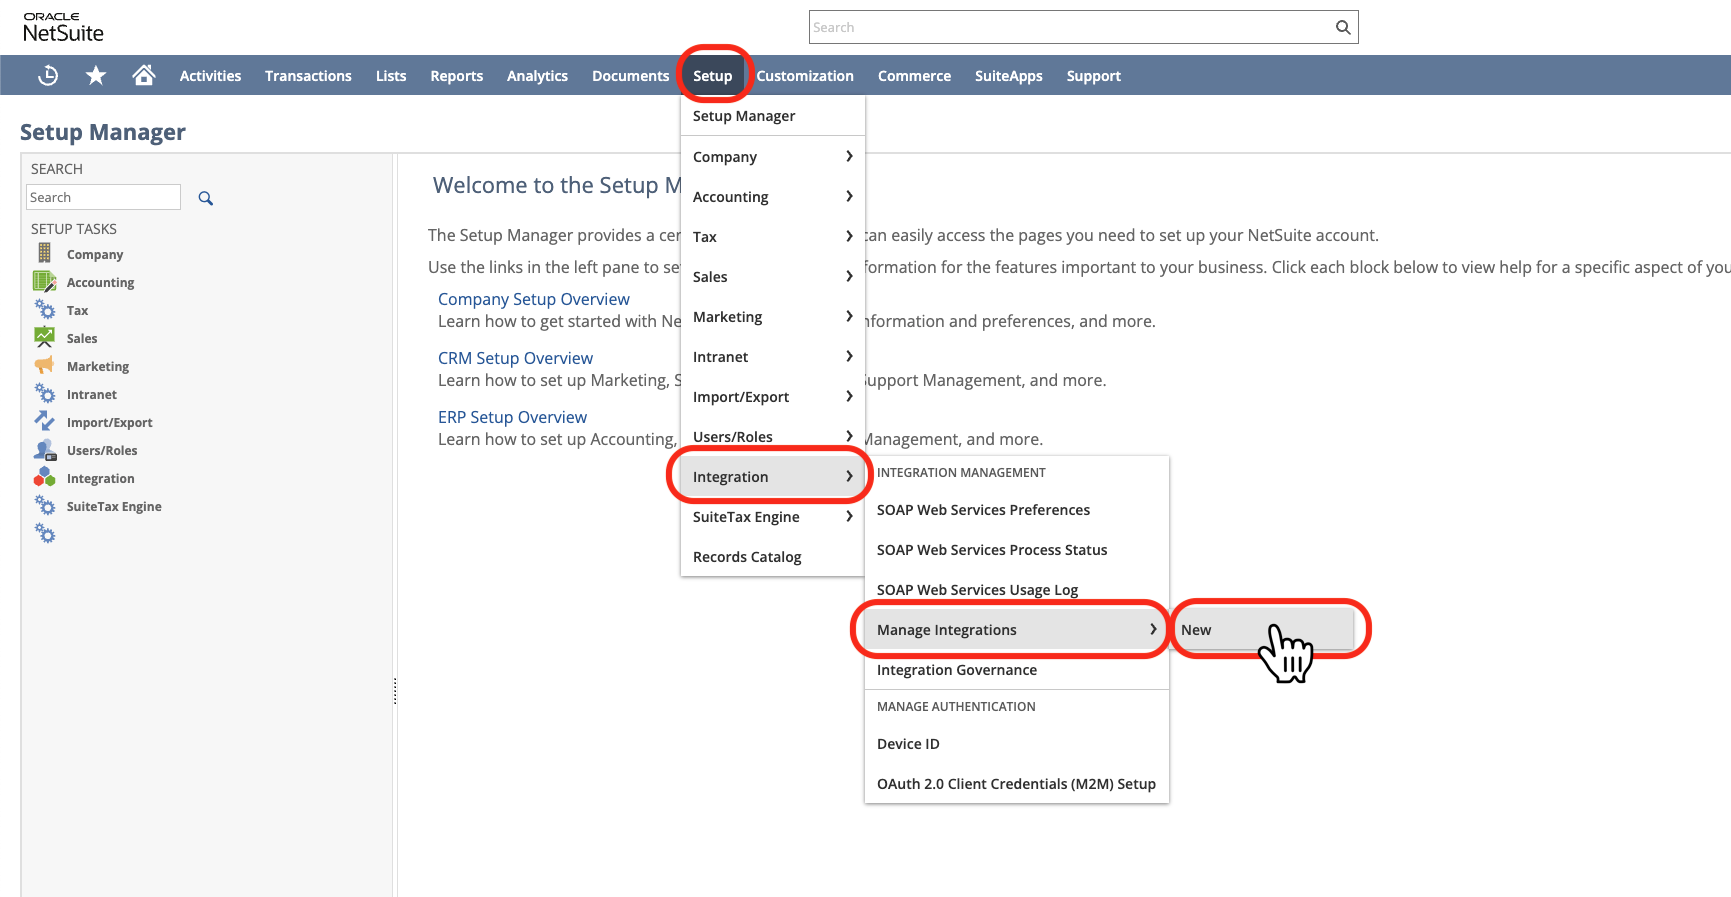
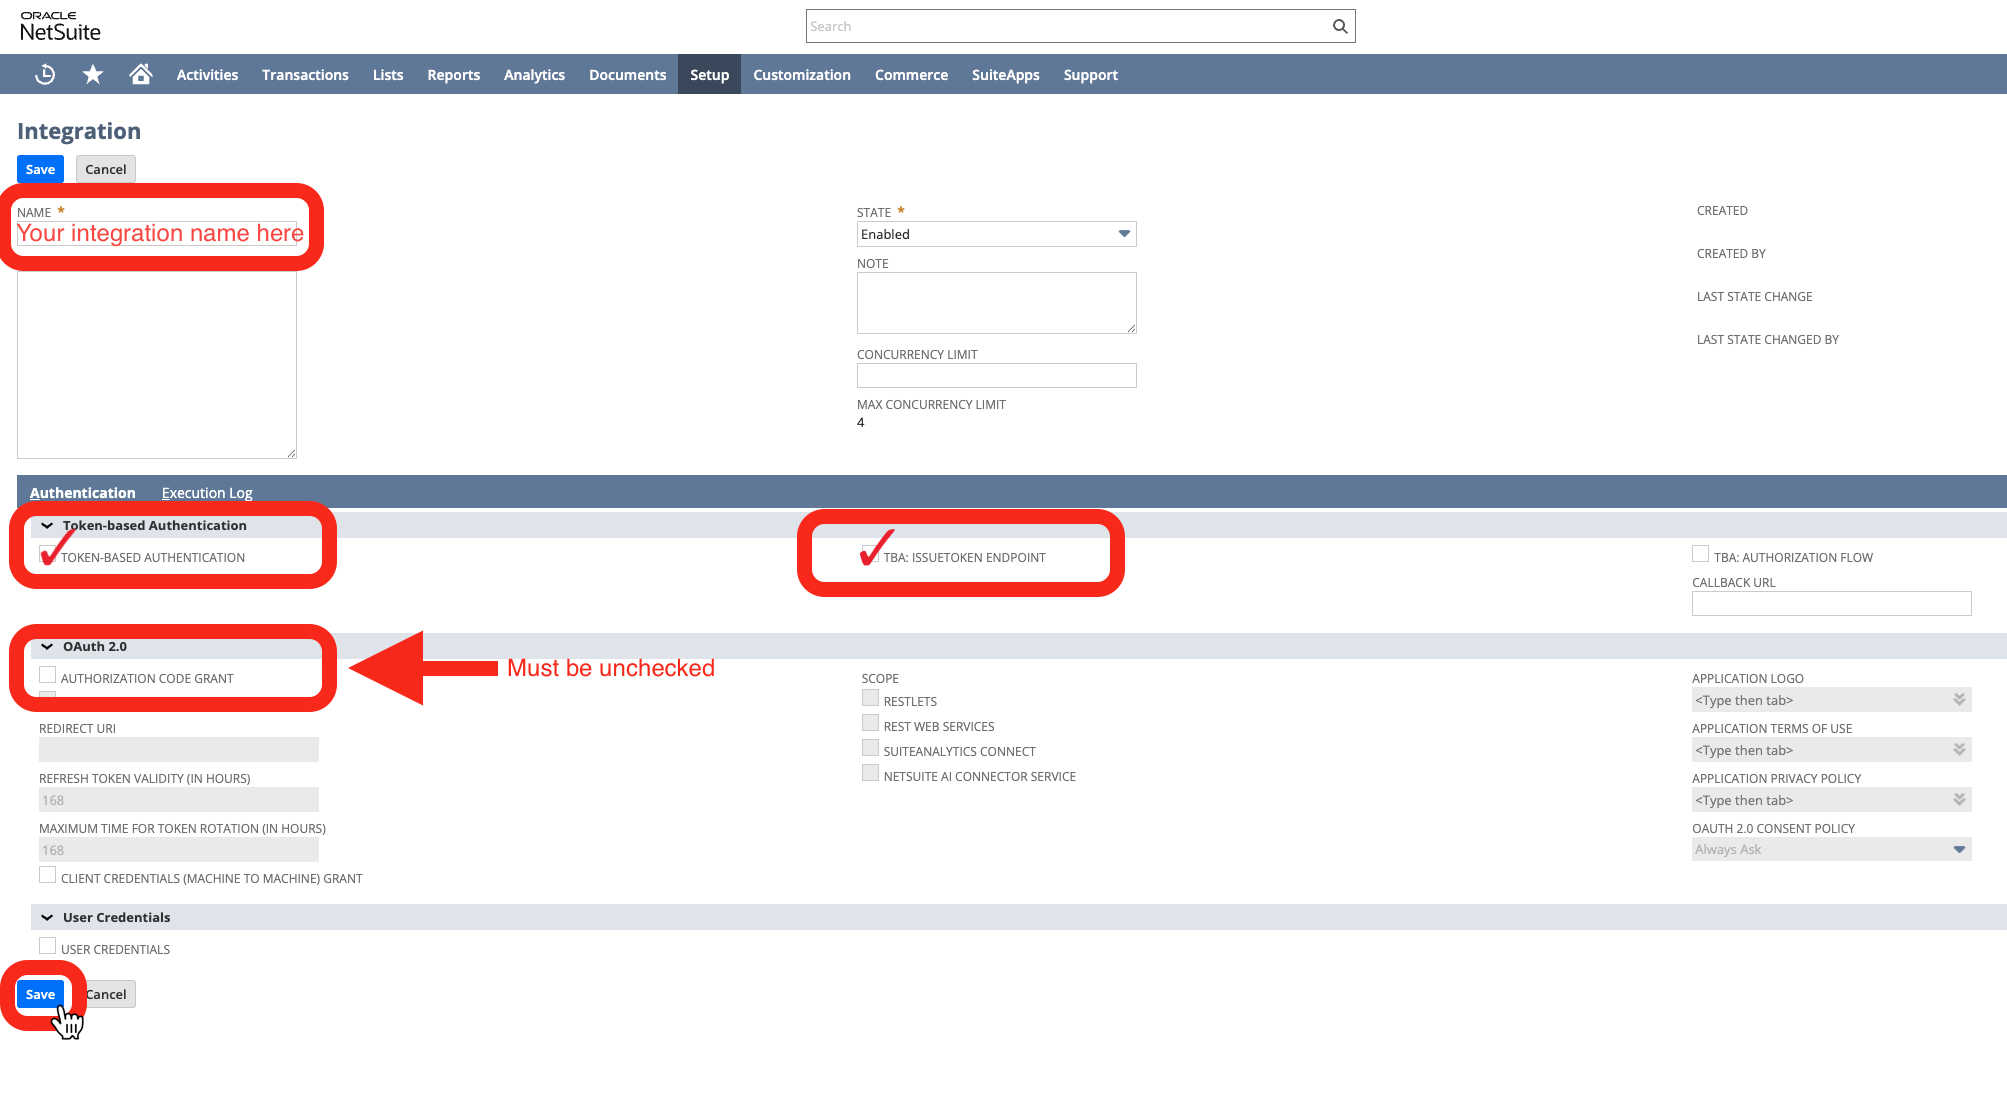
- Choose an integration name of your choice.
- You must select Token Based Authentication and TBA: Issuetoken Endpoint
- You must NOT select Authorization Code Grant
2
Step 2A (Easy): Create a NetSuite Role with the appropriate permissions.
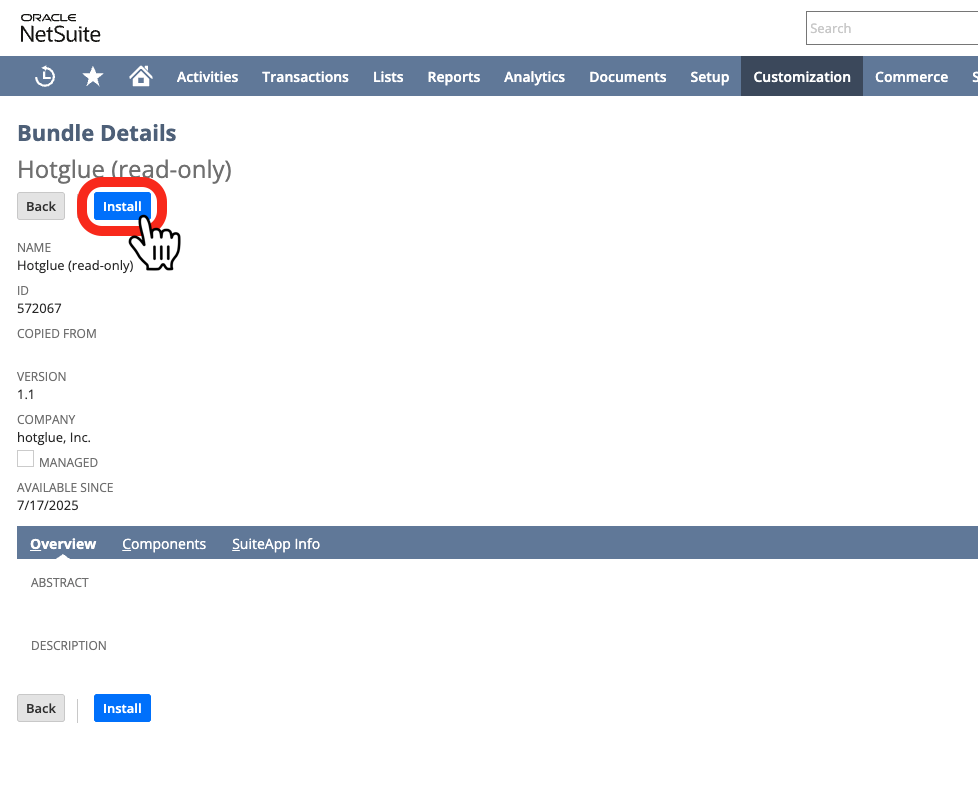
This is the easiest way to setup a NetSuite Role with the appropriate permissions for Hotglue.Head to Customization > SuiteBundler > Search & Install Bundles
If you want write permission given to Hotglue, you can type in 572066. Make sure the package says Hotglue (read+write).

Step 2B (Hard): Create a NetSuite Role with the appropriate permissions.
It is recommended that you follow Step 2A (Easy):Head to Setup > Users/Roles > Manage Roles > New Choose a new role name of your choice and go to Permissions - Setup on the bottom of the page.
- User Access Token (Full)
- SOAP Web Services (Full)
- Log in using Access Tokens (Full)
- Integration Application (Full)
- REST Web Services (Full)
- Access Token Management (Full)
 Add the permissions you need to access relevant data in the Transactions, Reports, and Lists sections.
See a full list of available objects in the NetSuite docs
Add the permissions you need to access relevant data in the Transactions, Reports, and Lists sections.
See a full list of available objects in the NetSuite docs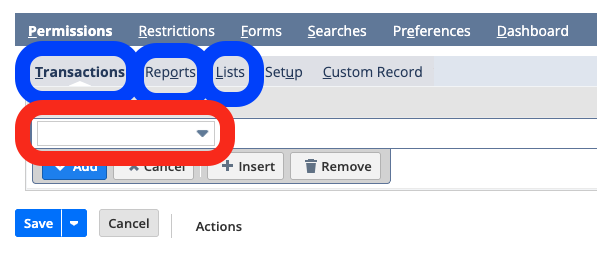
3
Step 3: Assign NetSuite Role to NetSuite User
If you want to assign the Integration Token a New User, head to Lists > Employees > Employees > New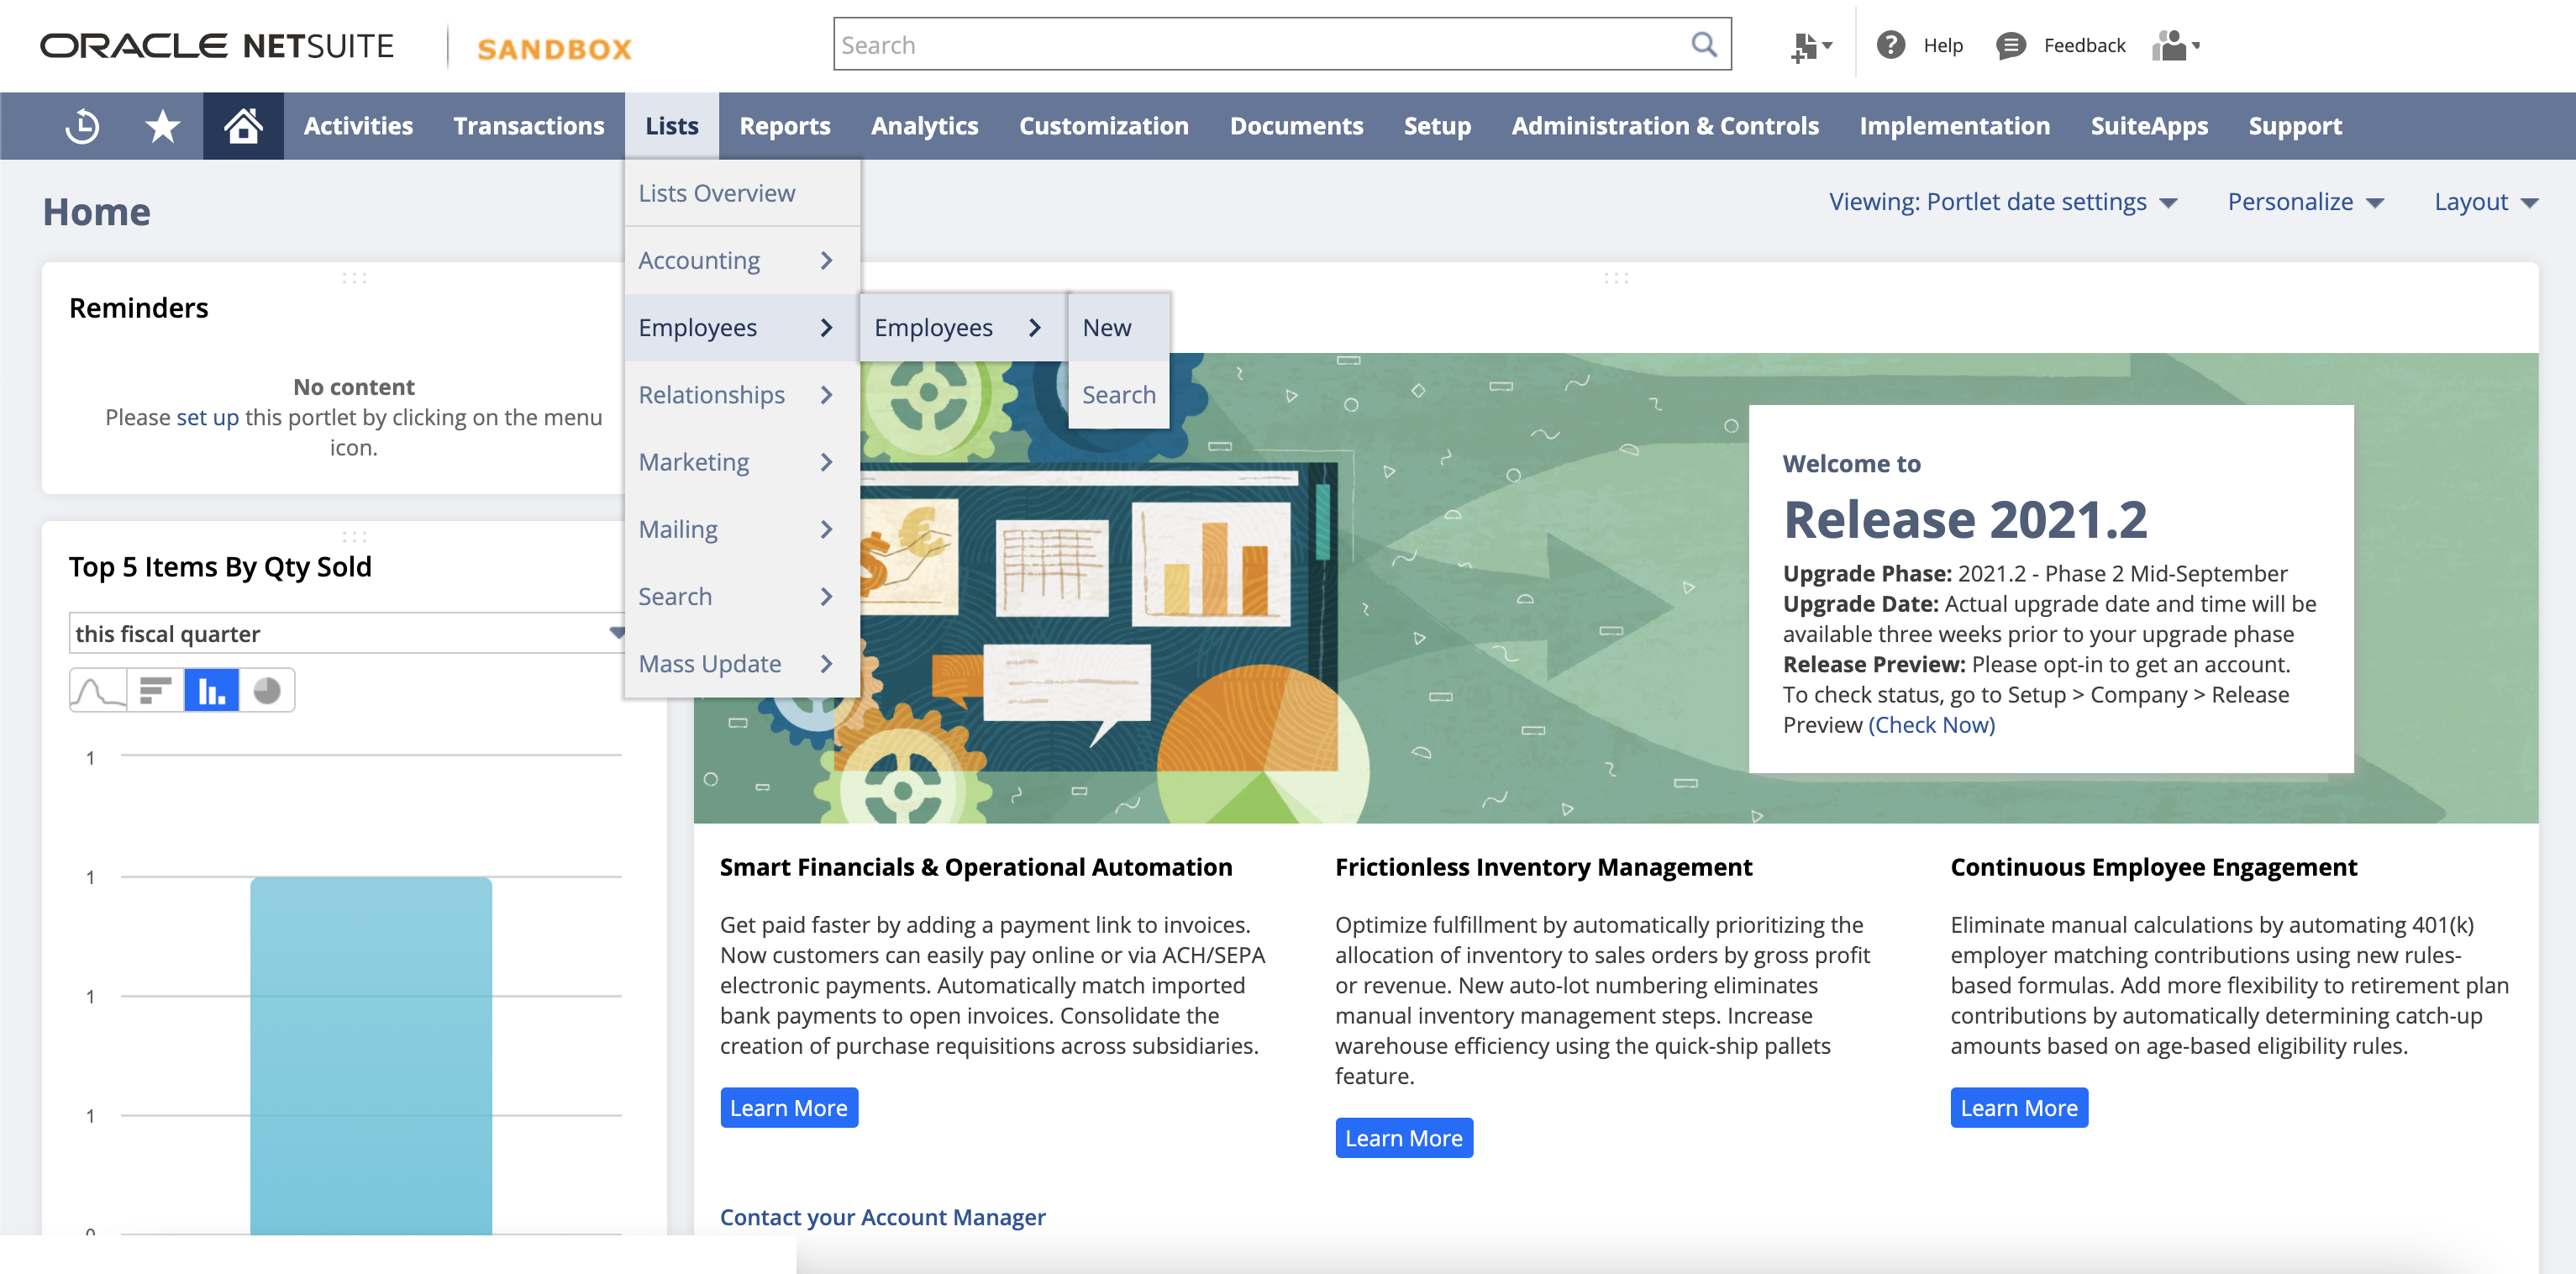 Alternatively, if you already have a User you’d like to use ready, head to Lists > Employees > Employees > Search and open the user.
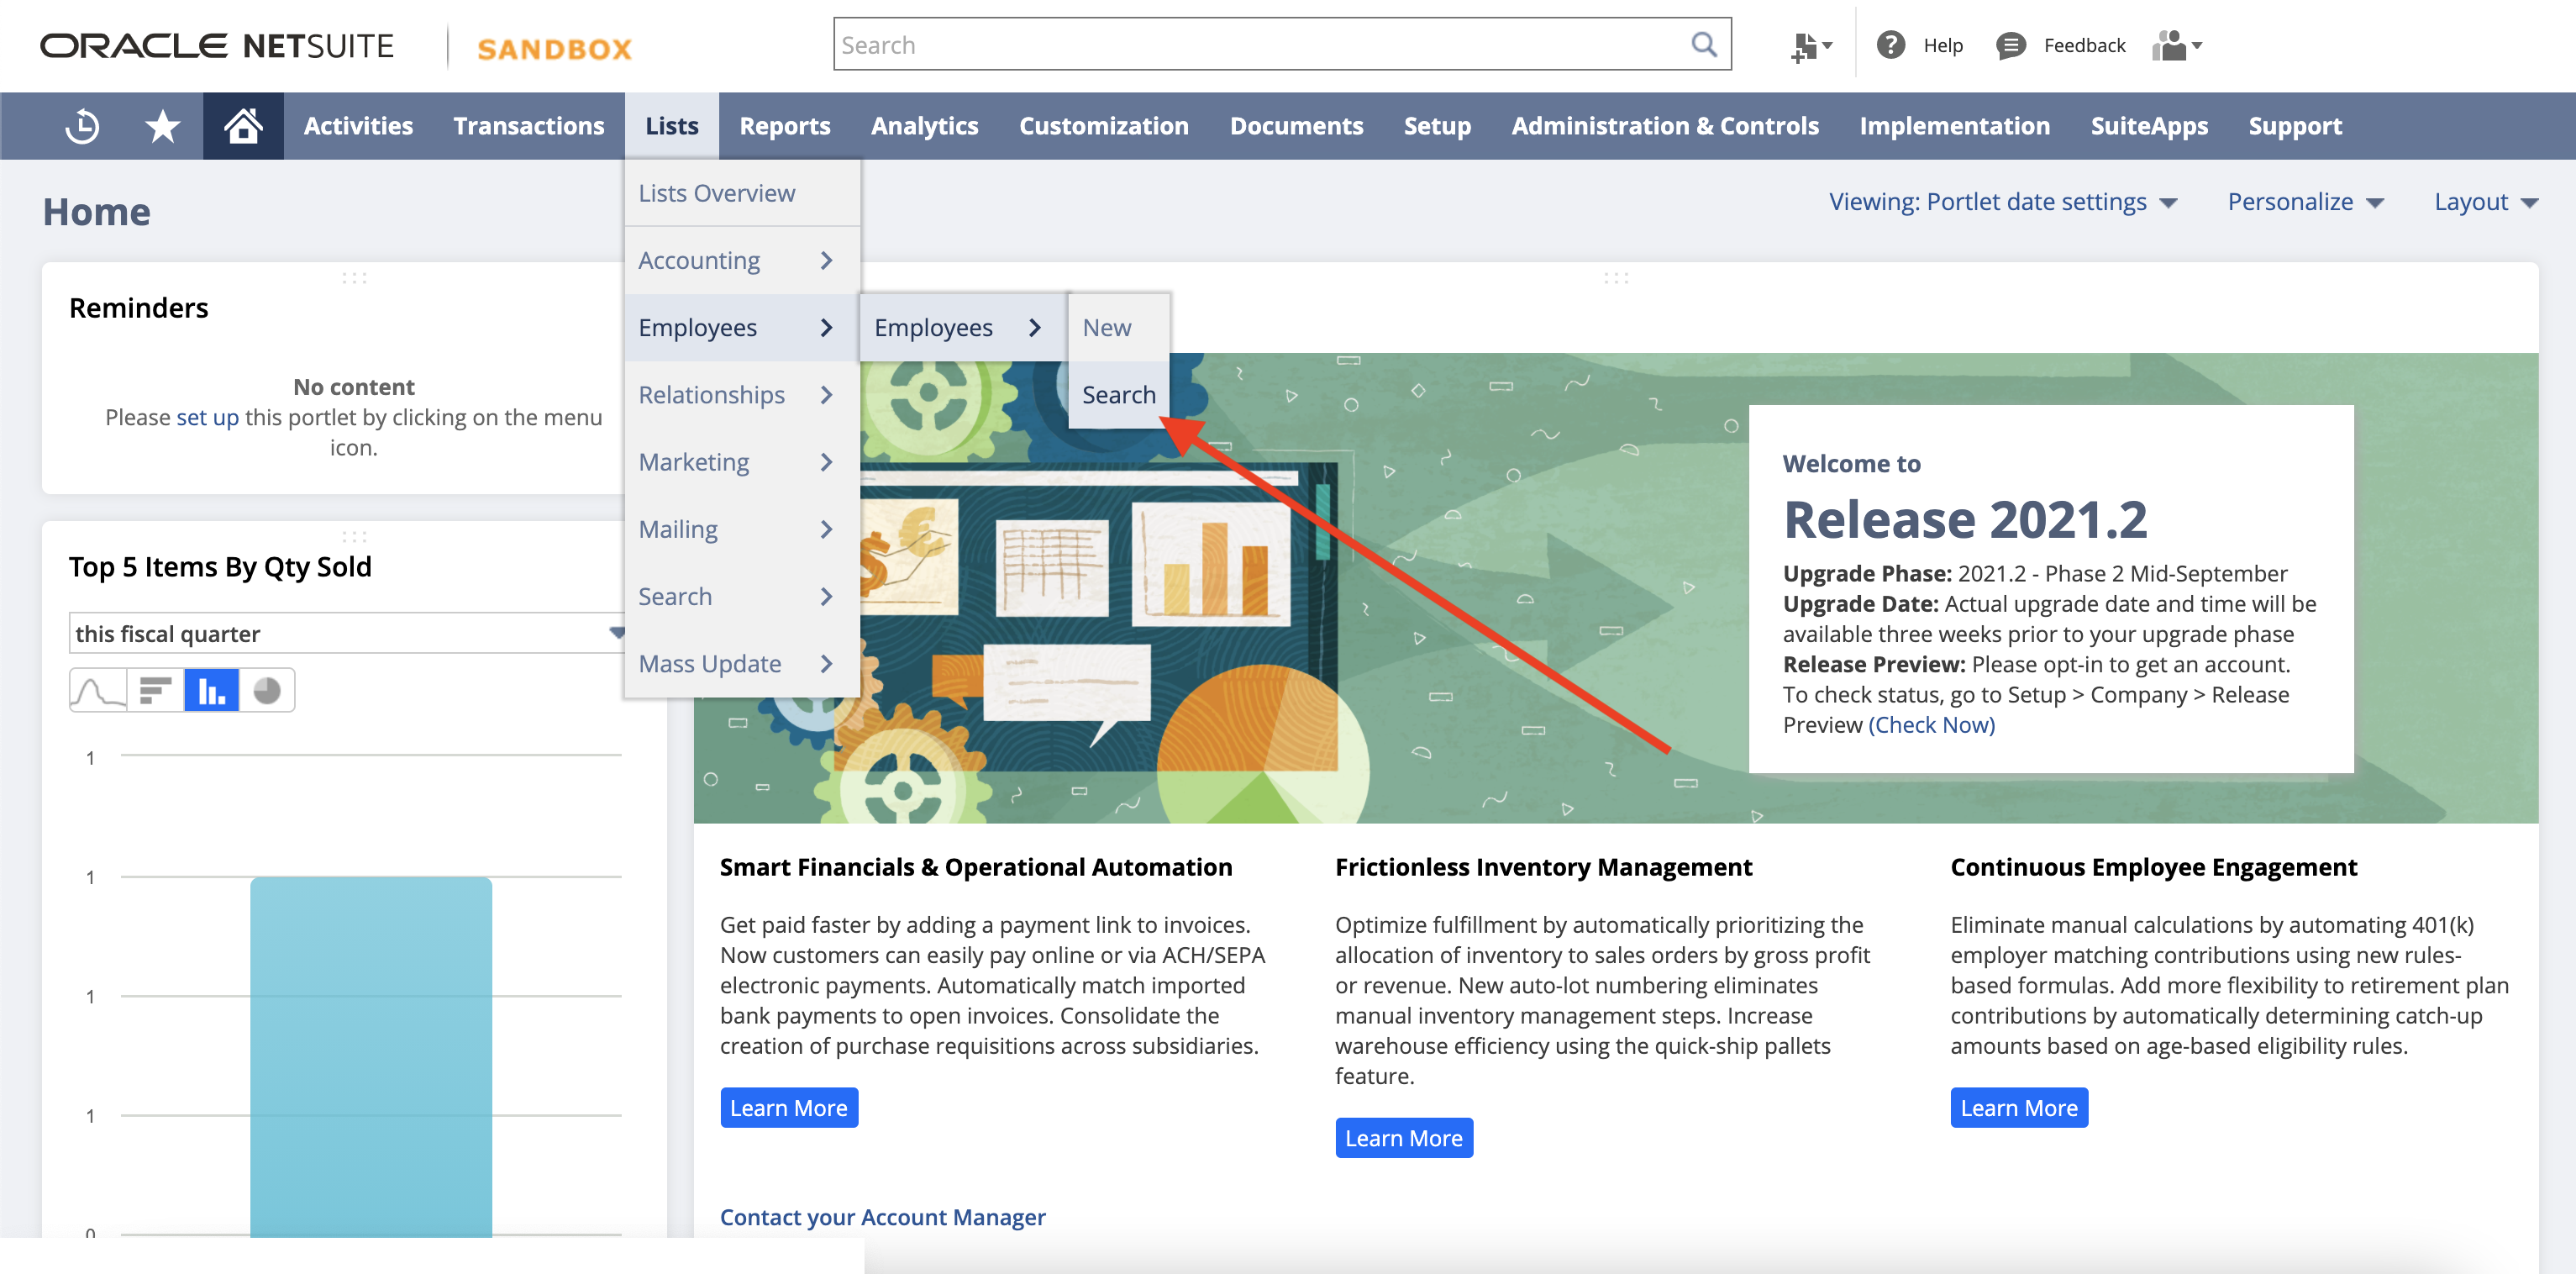 Once you have opened the relevant user, and select Edit
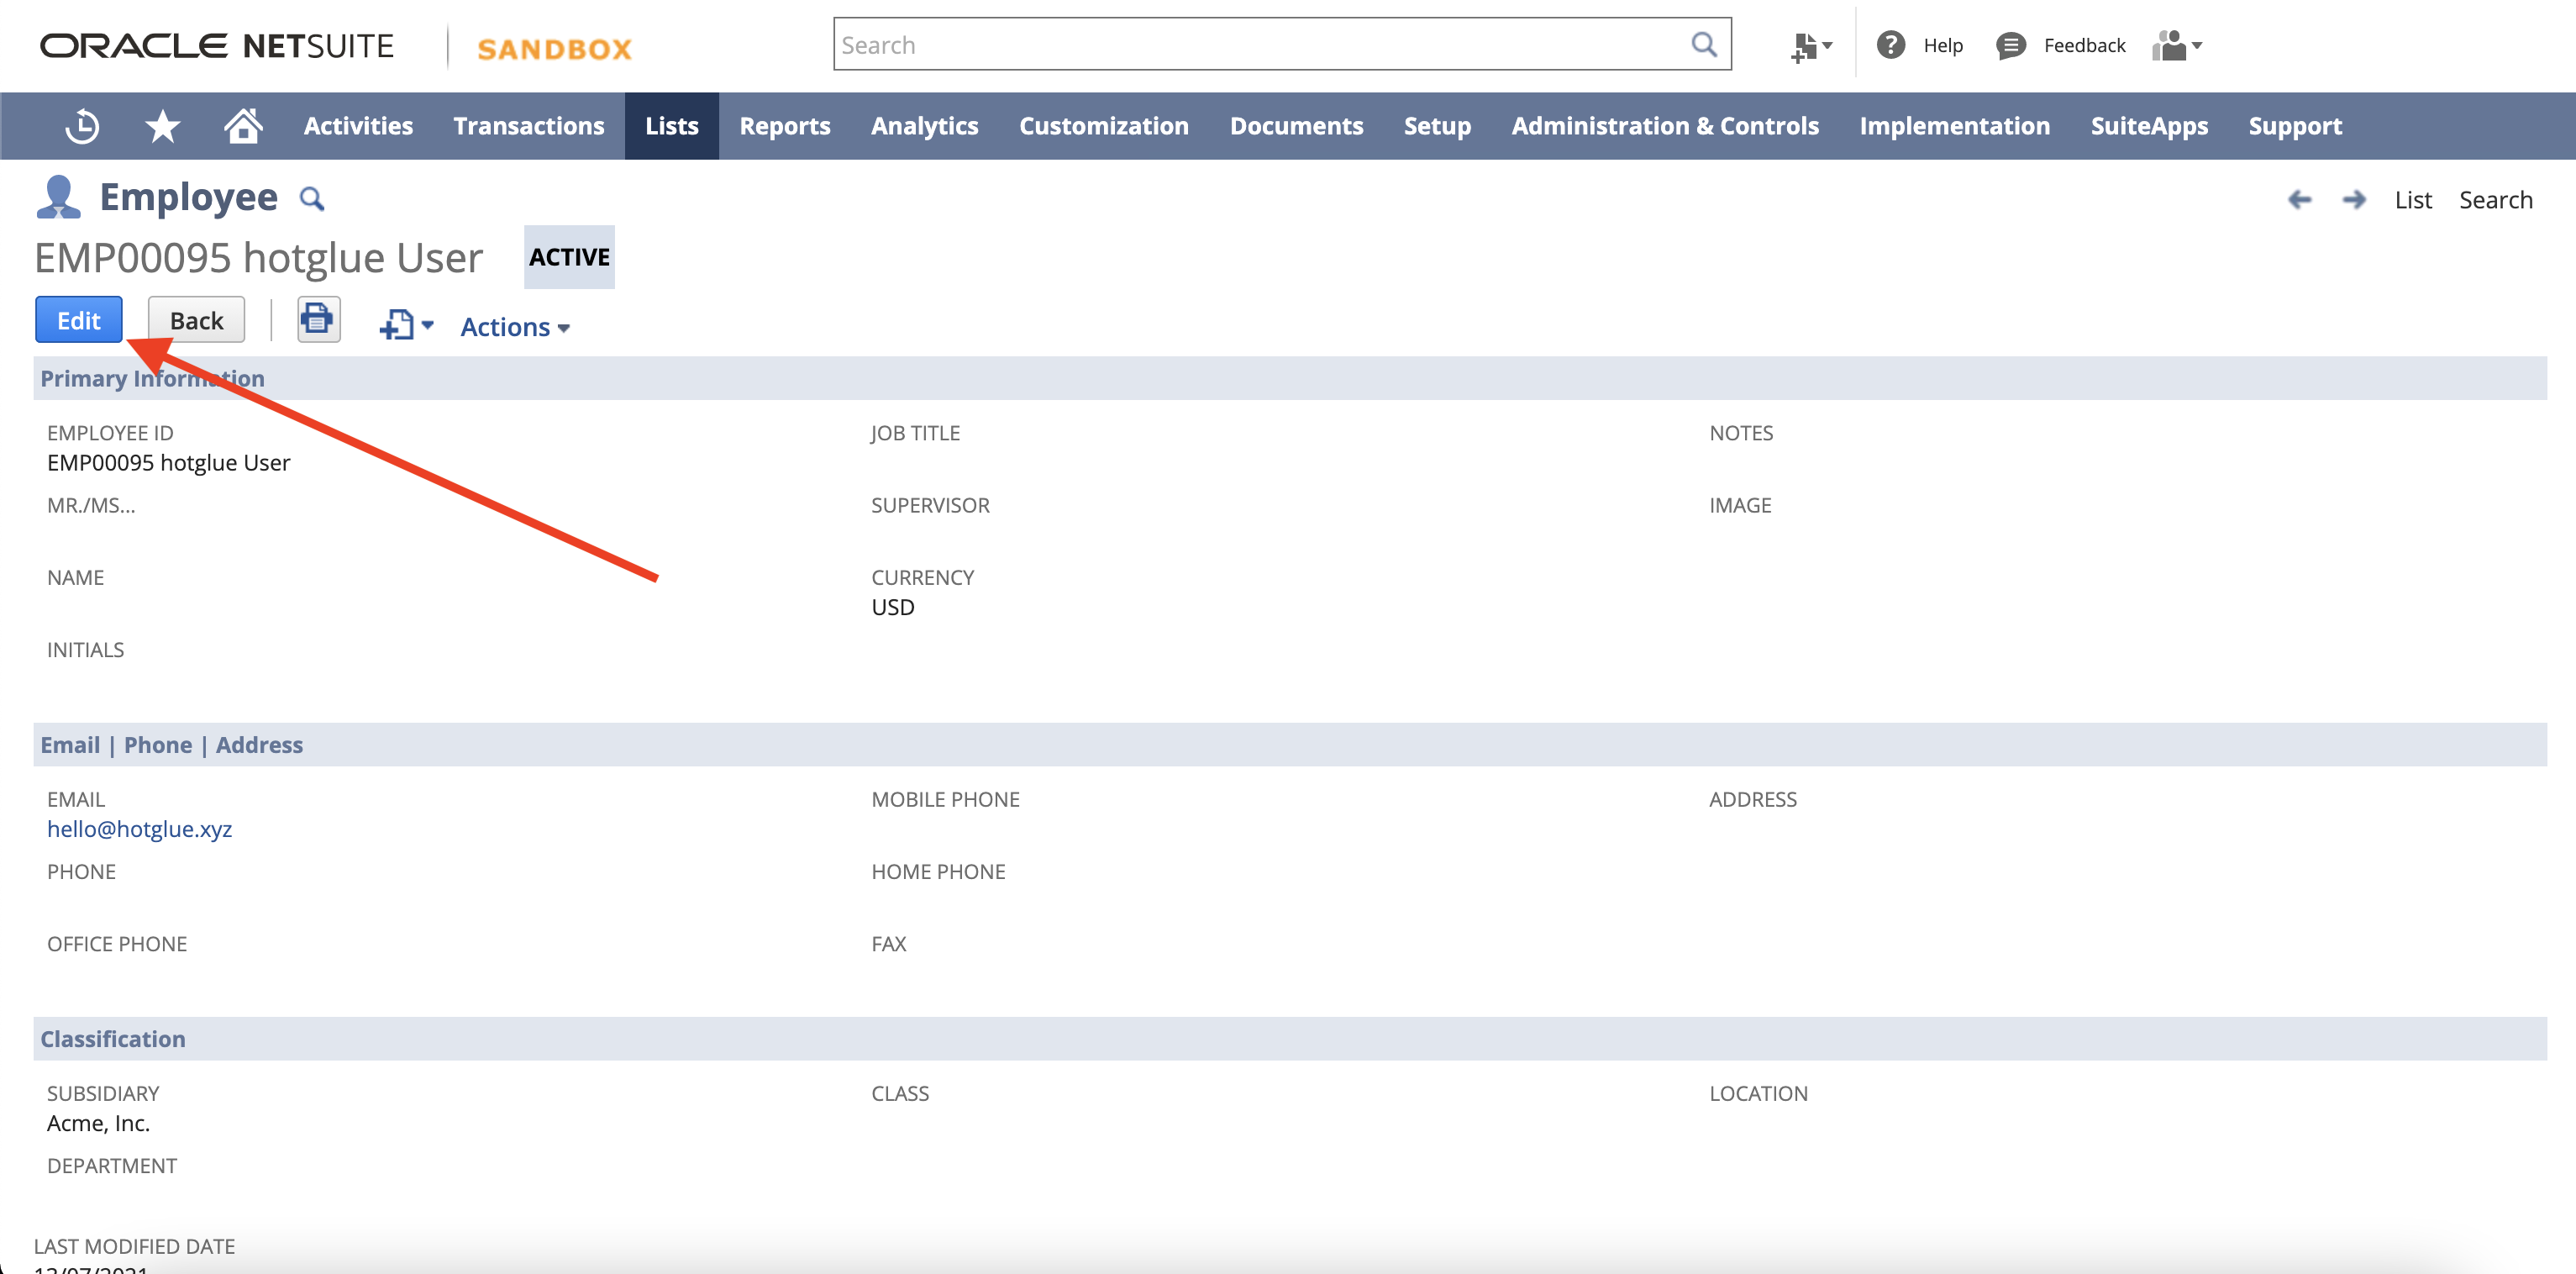 Edit EmployeeScroll down to the Access > Roles tab, and add our new Integration Role to the list
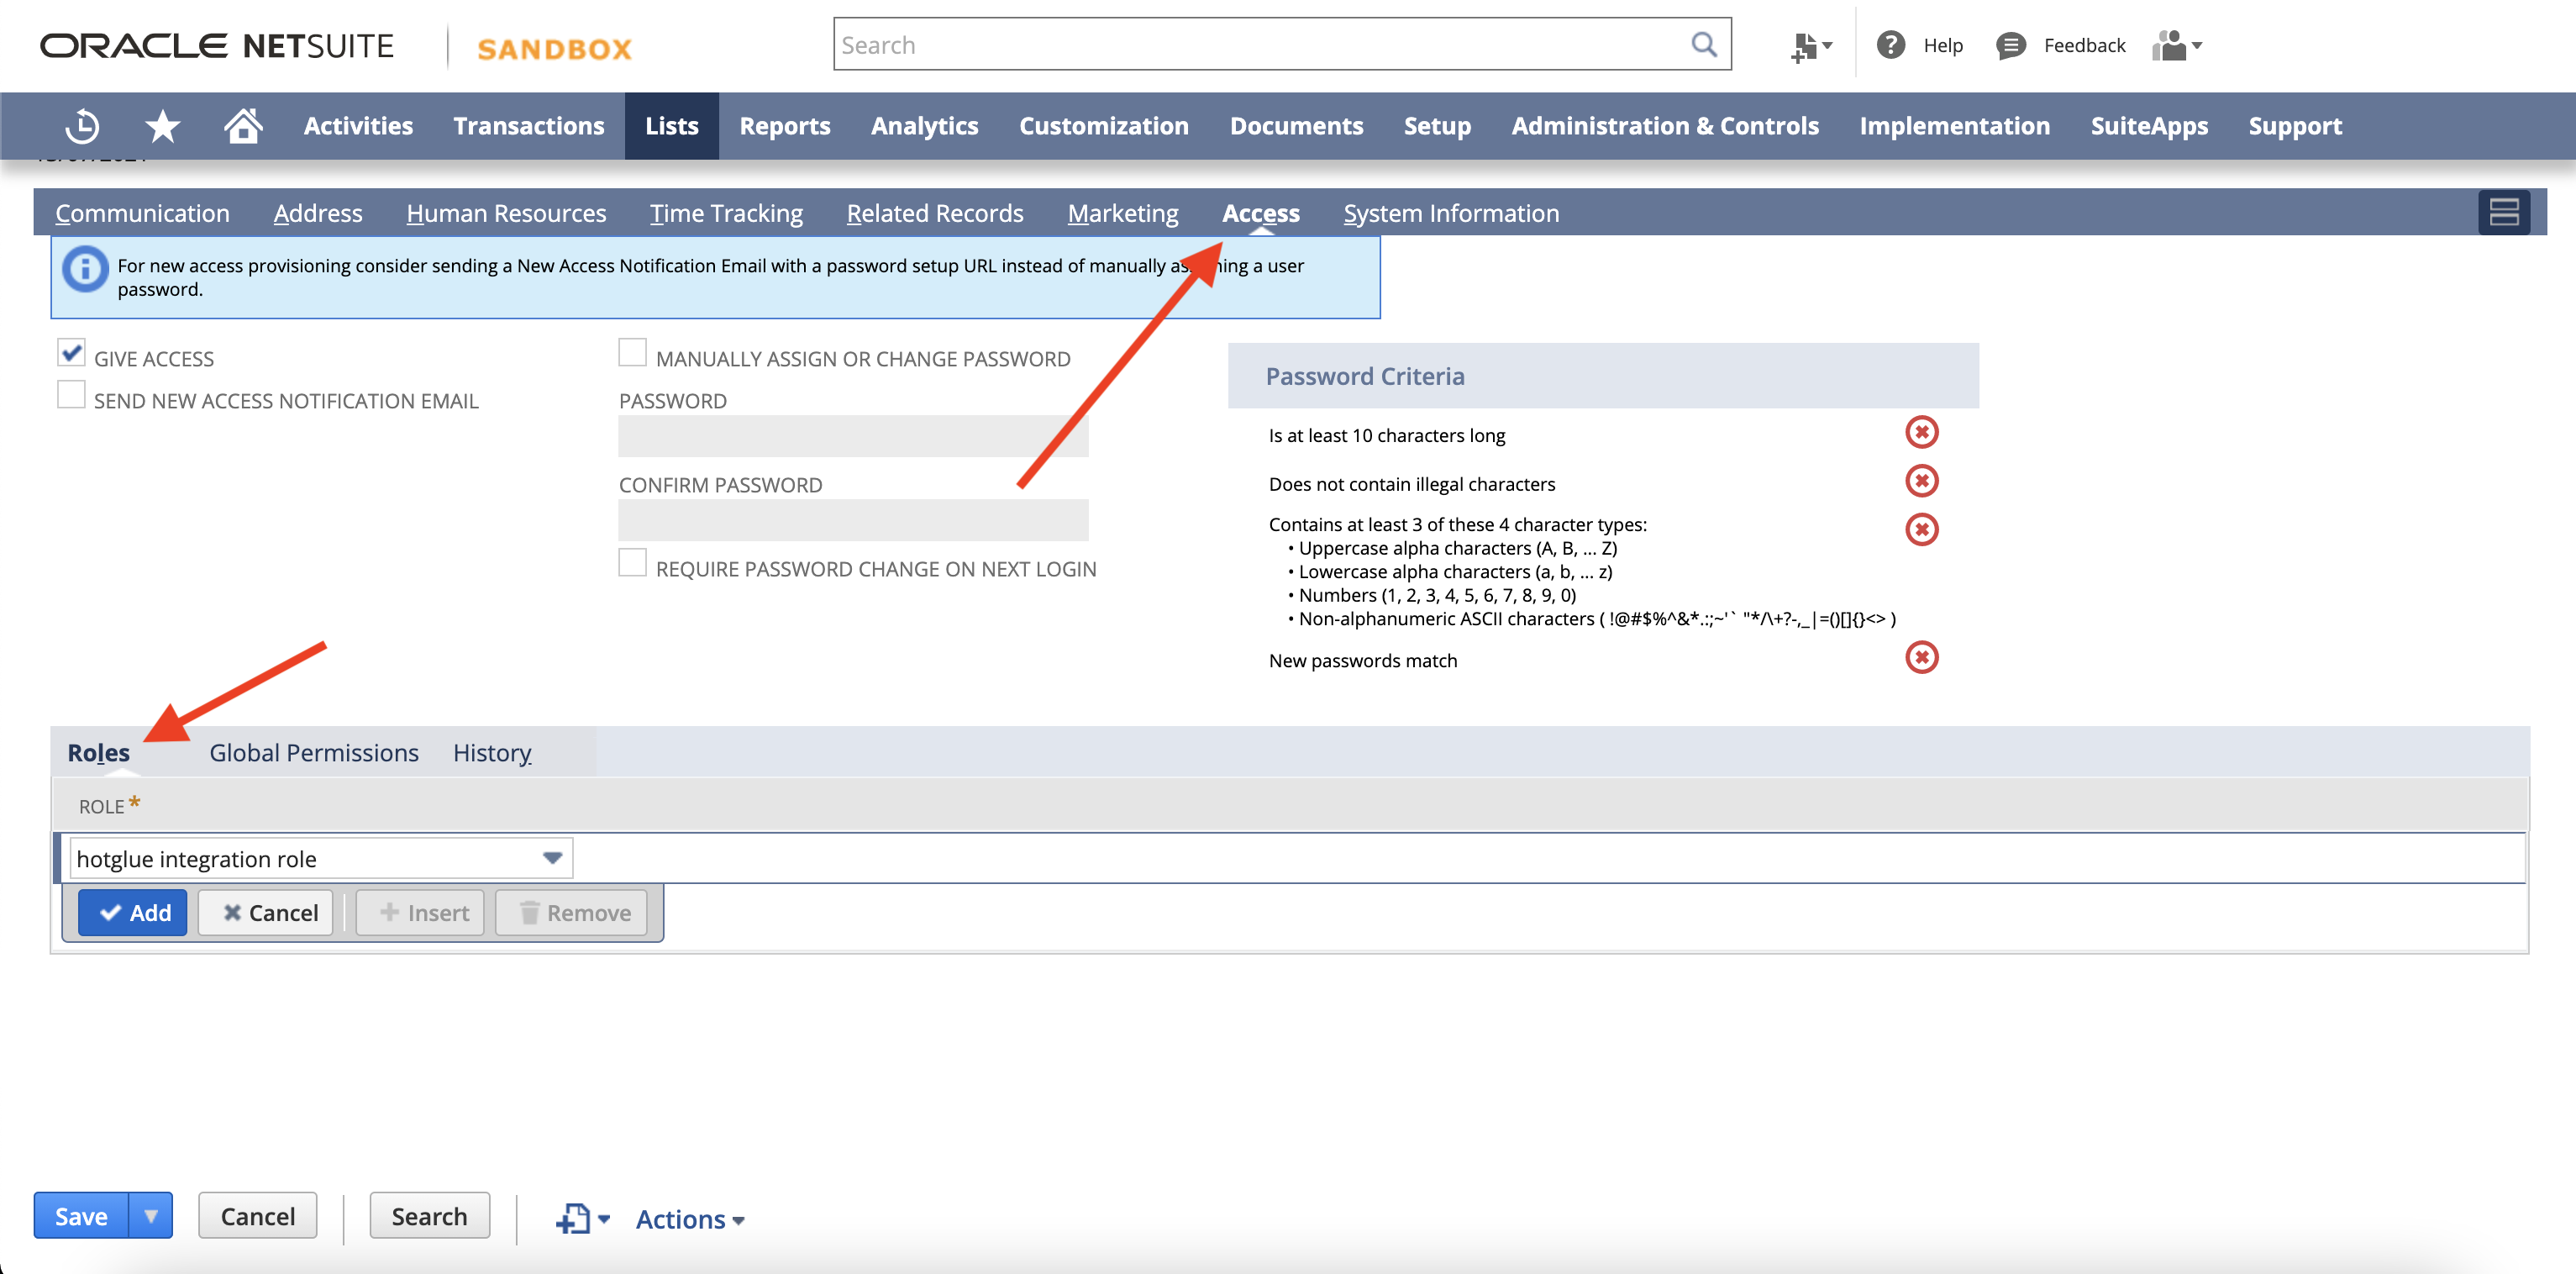 Add Integration Role to UserPress Save
4
Step 4: Generate NetSuite Access Token / Secret
Head to Setup > Users/Roles > Access Tokens > New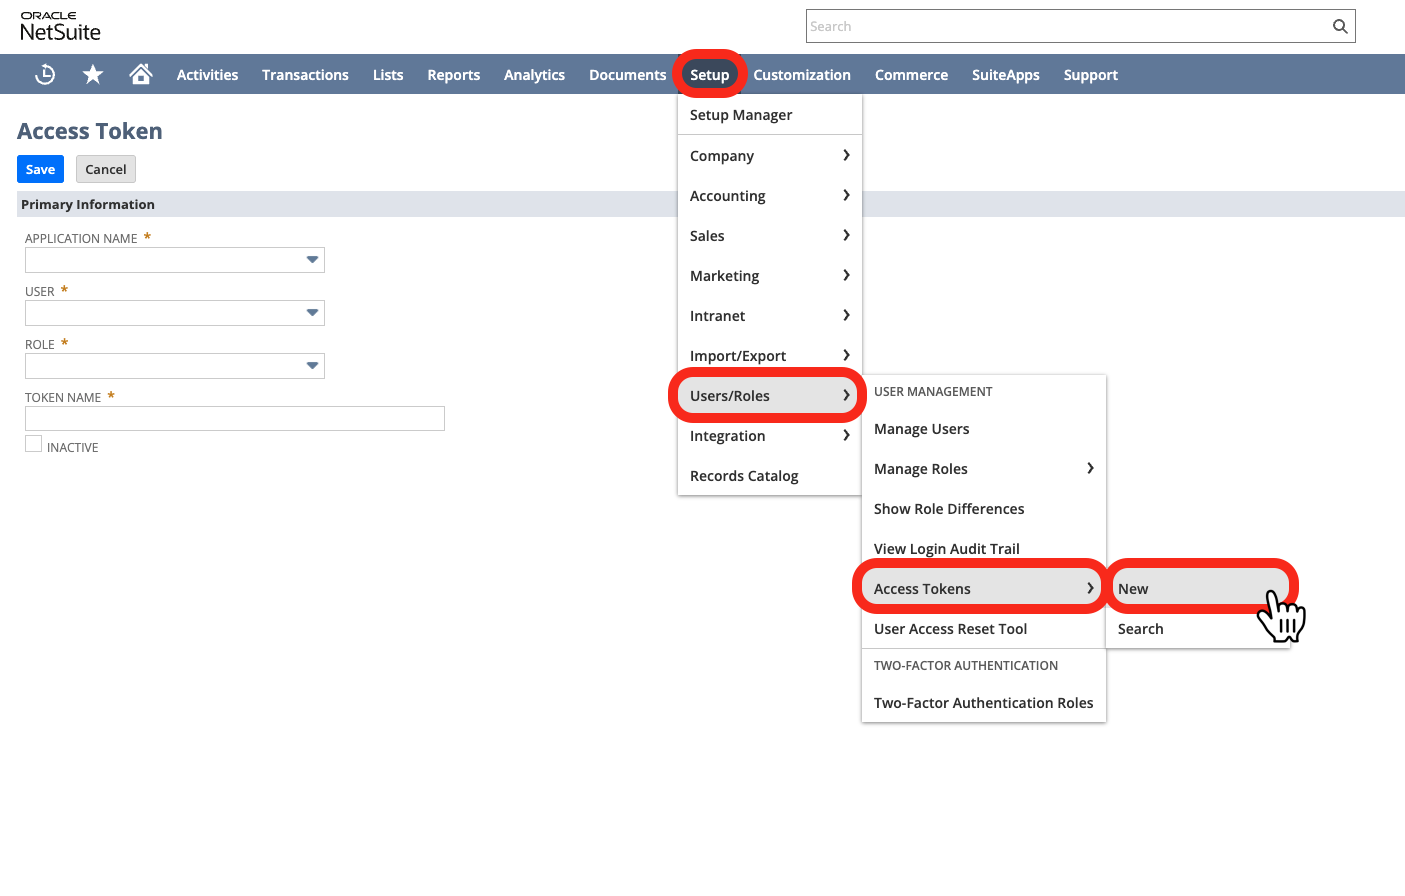

5
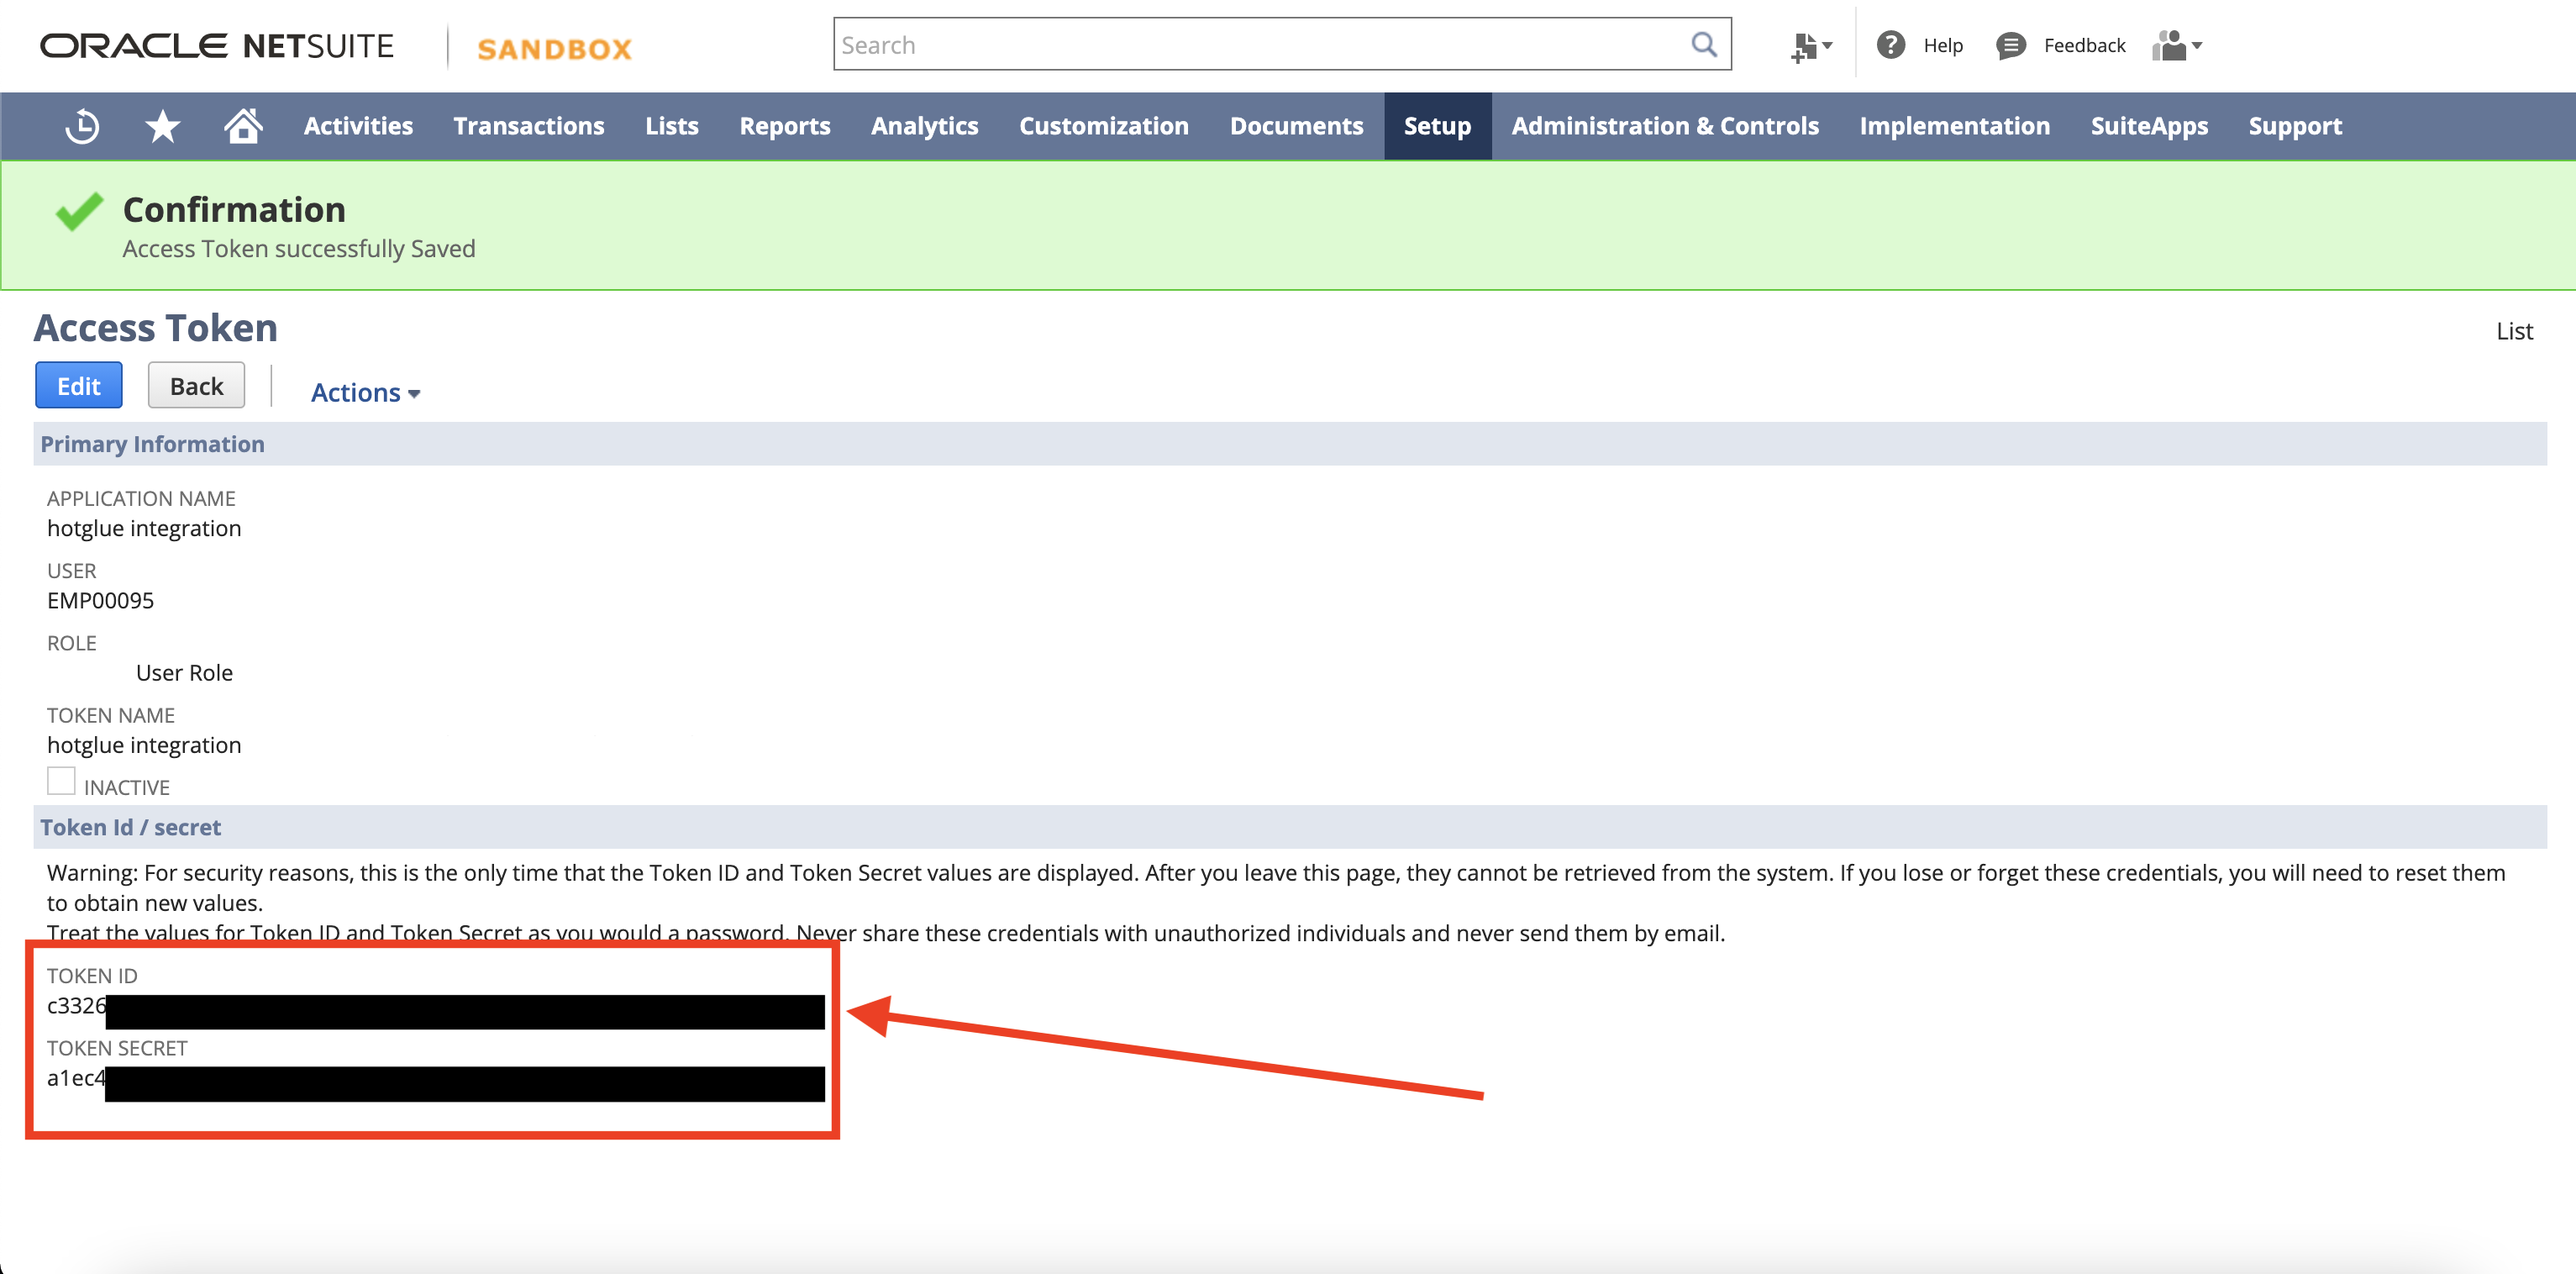
Step 5: Add the credentials to Hotglue
We’re done! You’re ready to use the NetSuite integration in Hotglue.To find your account ID, you can either search NetSuite for Account ID, or you can take the first number in your URL for NetSuite.Tap Changelog
Tap Changelog
Tap Changelog