Connector Details
| Name | Value |
|---|---|
| Platform | GitLab |
| Auth Type | API Keys |
| Direction | Read |
| Tap Repo | https://gitlab.com/hotglue/tap-gitlab |
| Tap Metrics | Usage: |
Credentials Setup
Follow the steps below to get the credentials you need to use the GitLab connector. The first thing you must do is log in to your Gitlab account. If you have a Gitlab account, you can login here. If you do not have an account, you can create one here.Gitlab API URL
Usually, you Gitlab API URL will behttps://gitlab.com/api/v4
Access Token
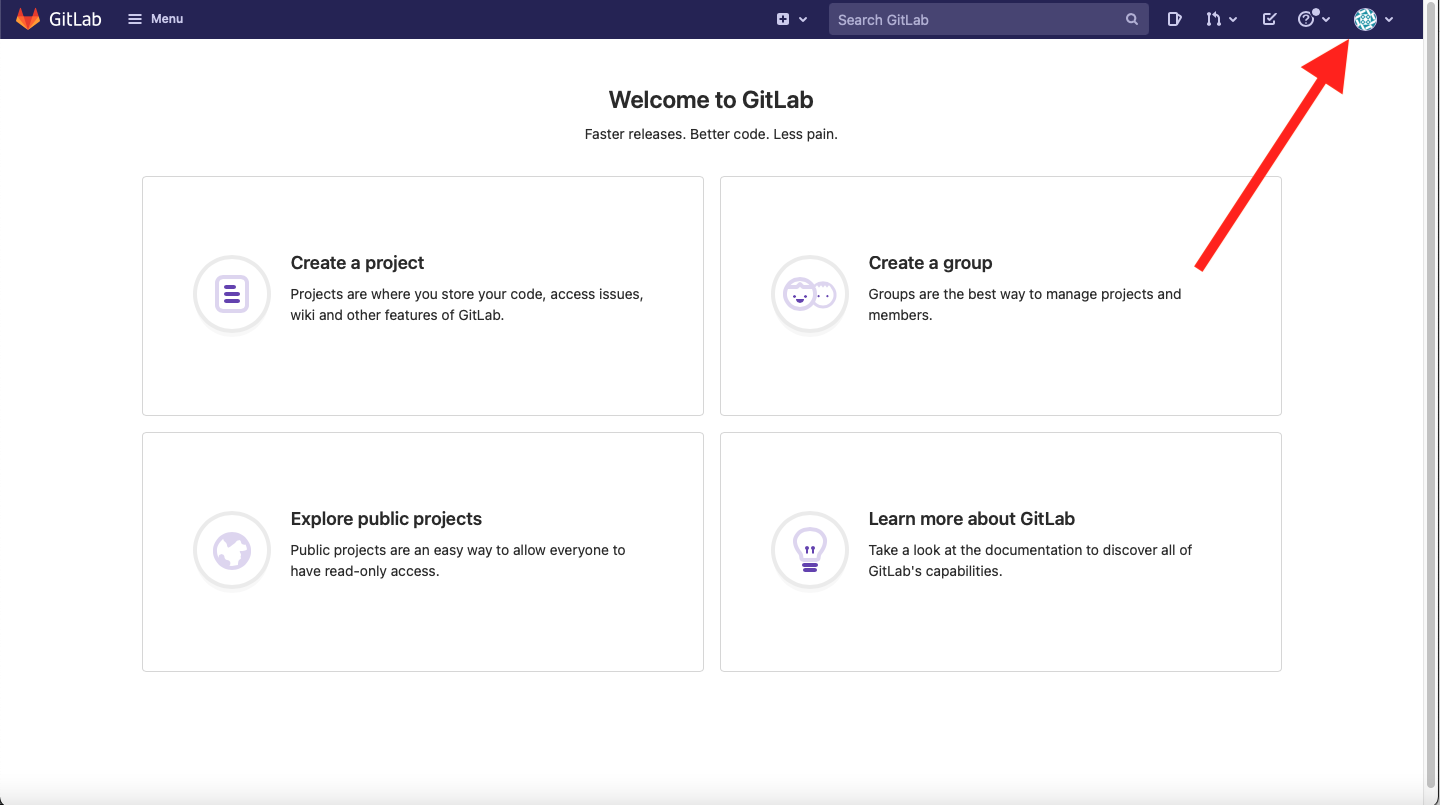 Now that you have logged in to Gitlab, your home page should look something like this. Go ahead to the top right corner and click the circular icon.
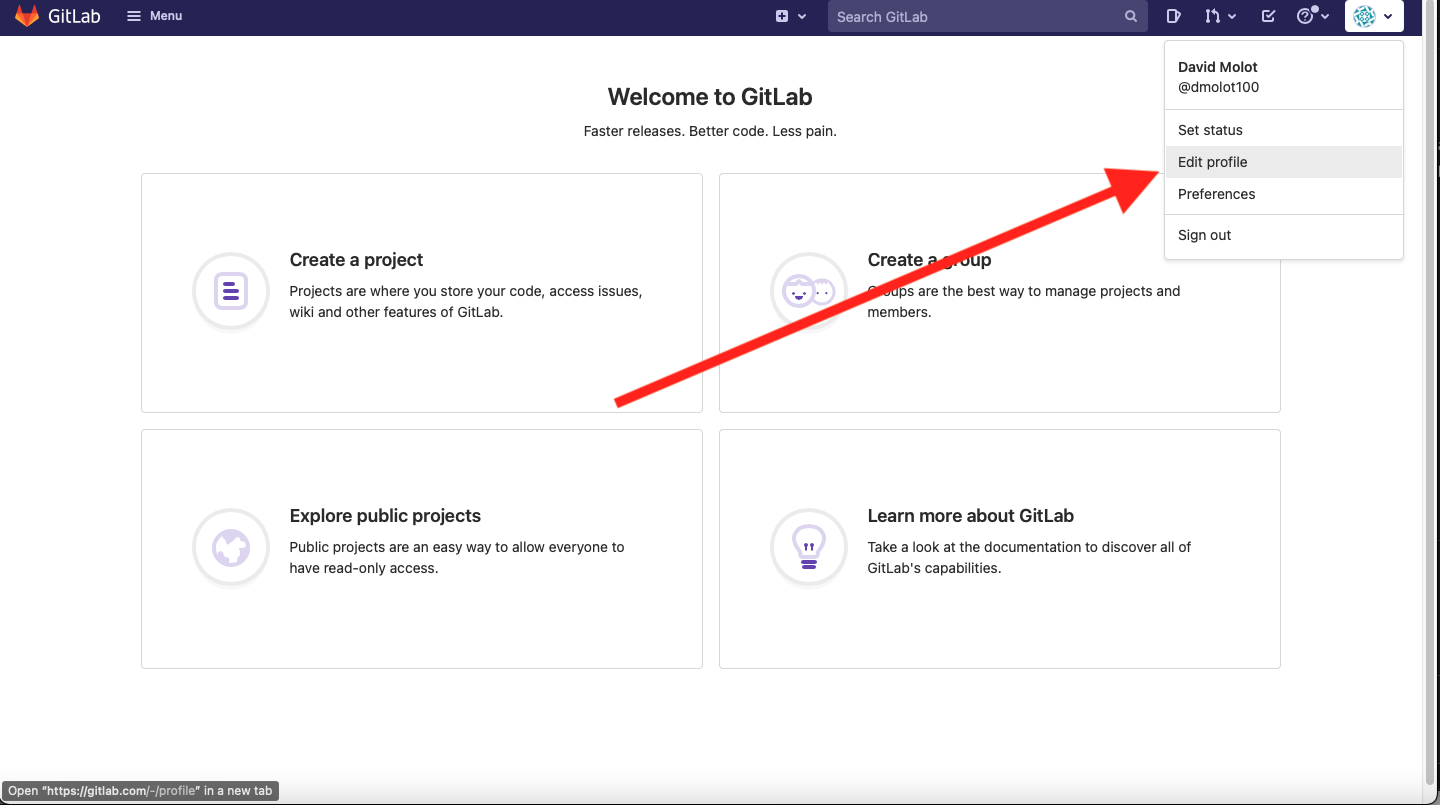 From the resulting drop down, you should click the Edit Profile option.
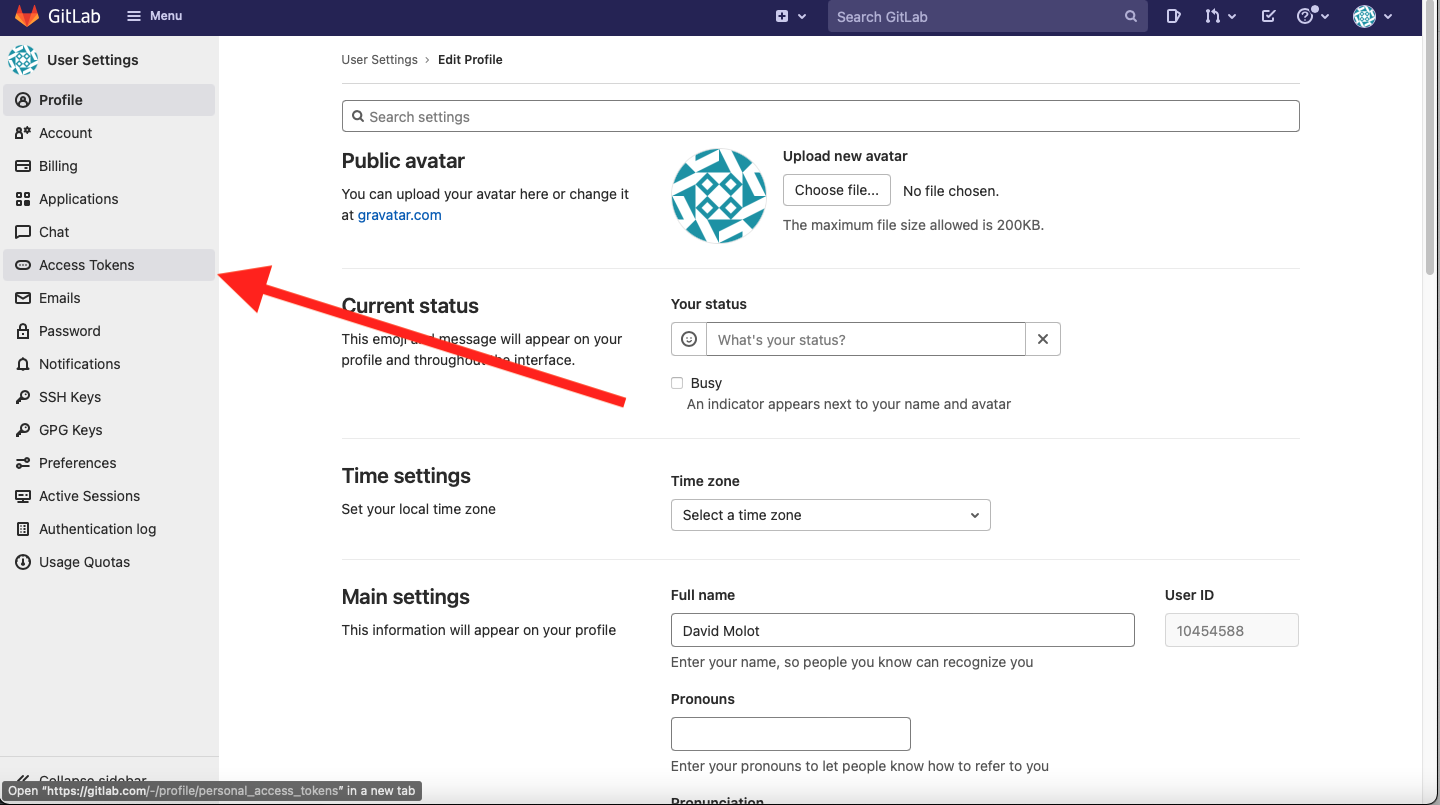 From this page, you should go ahead and select the Access Tokens tab.
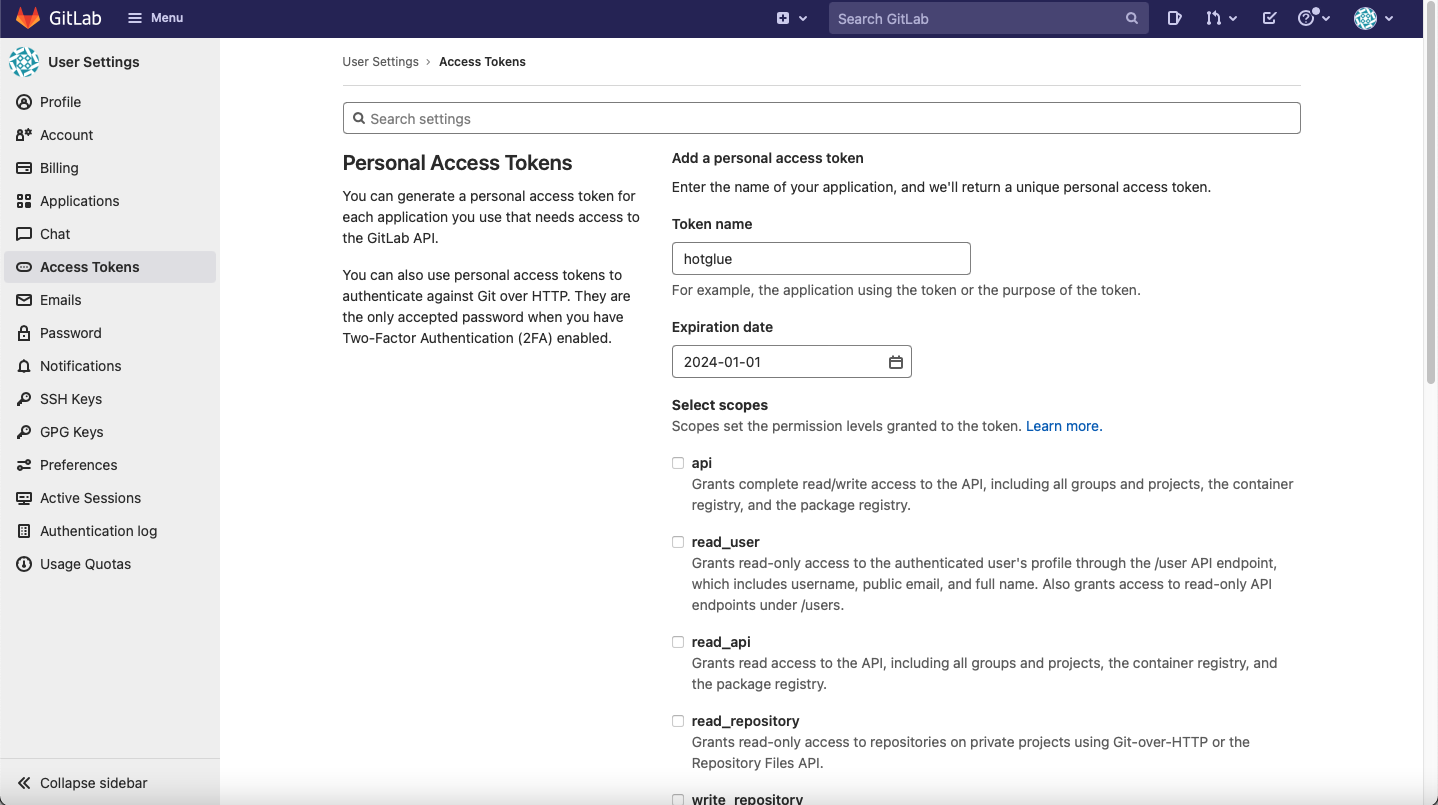 You should now be on a page where you can create your own access token. Go ahead and title your access token “hotglue” and give it an expiration date.
Now we need to set the scopes for the access token. The gitlab tap expects the following scopes:
read_userread_apiread_repositoryread_registry
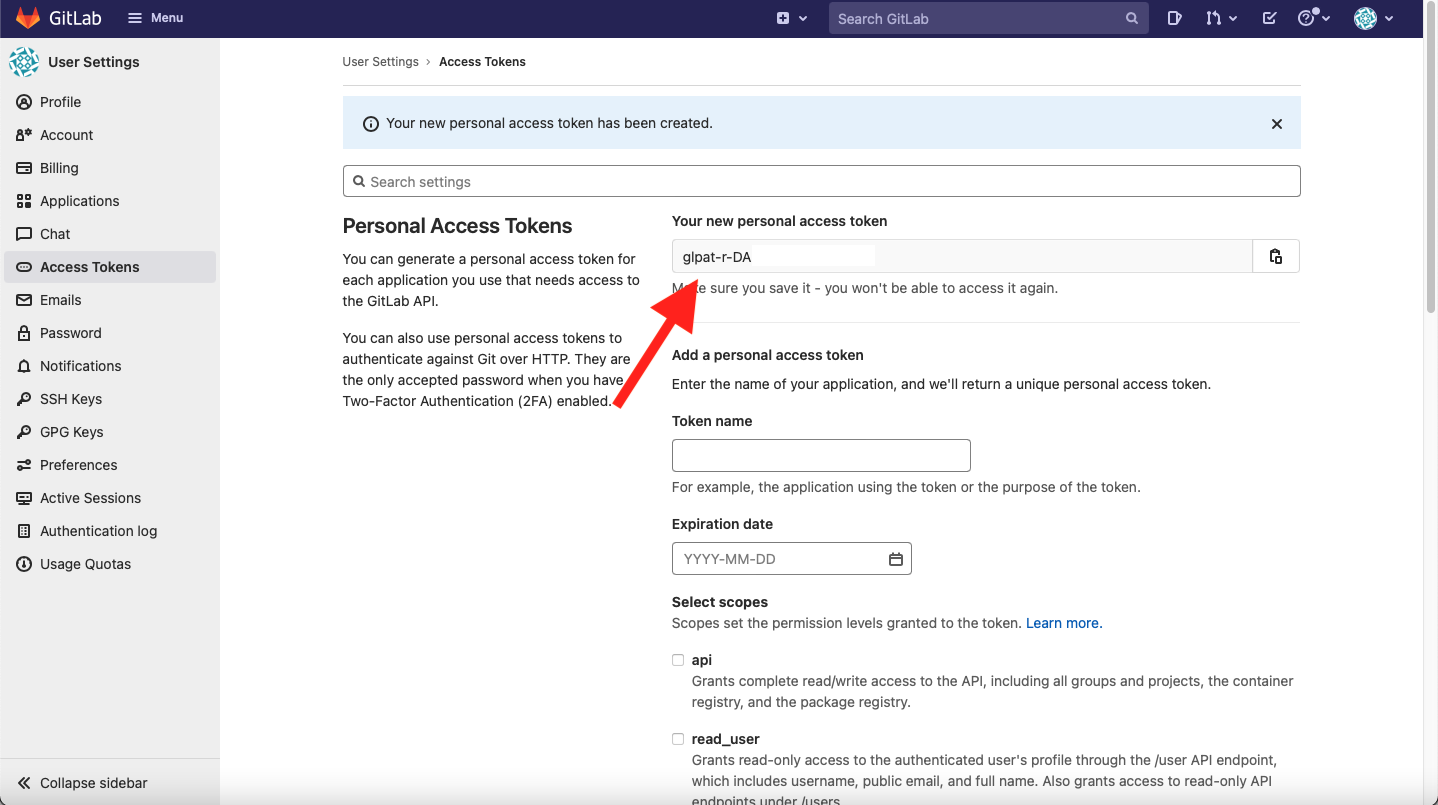 You now have your personal access token! Go ahead and copy it into hotglue.
Your Groups (Optional)
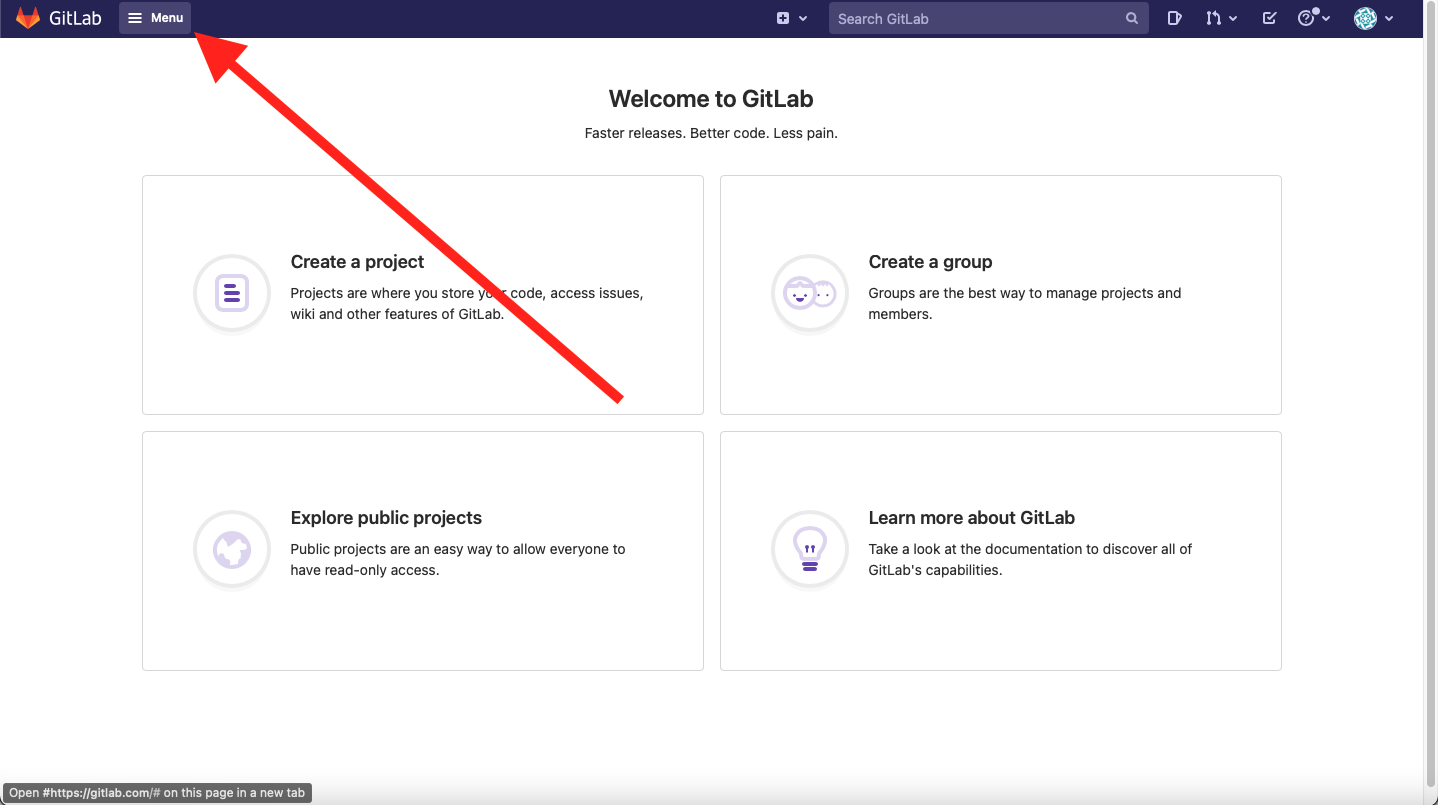 To find your groups, head to Menu option on the top left of the page.
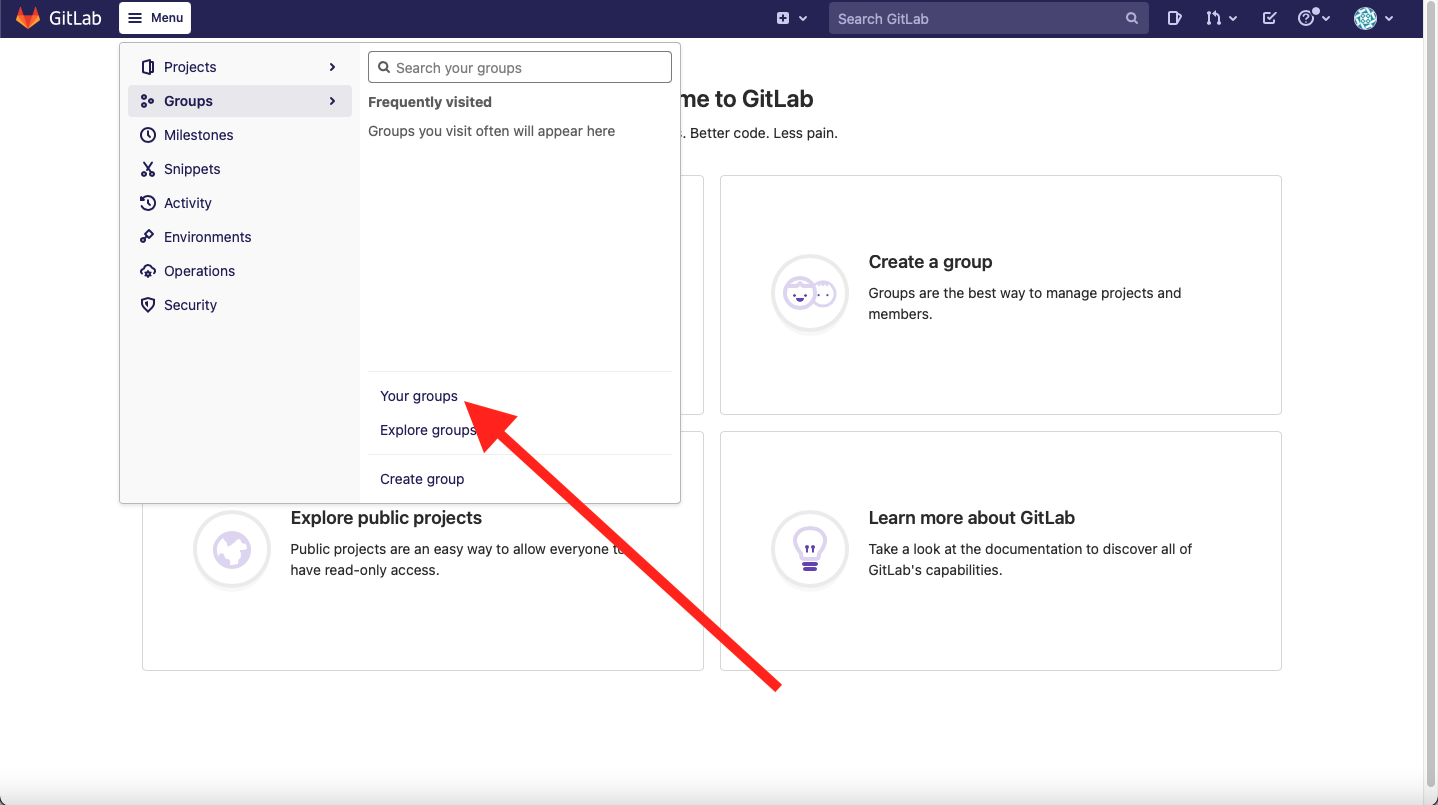 Then, you should navigate to the Groups tab, and within the Groups tab, head to the Your groups tab.
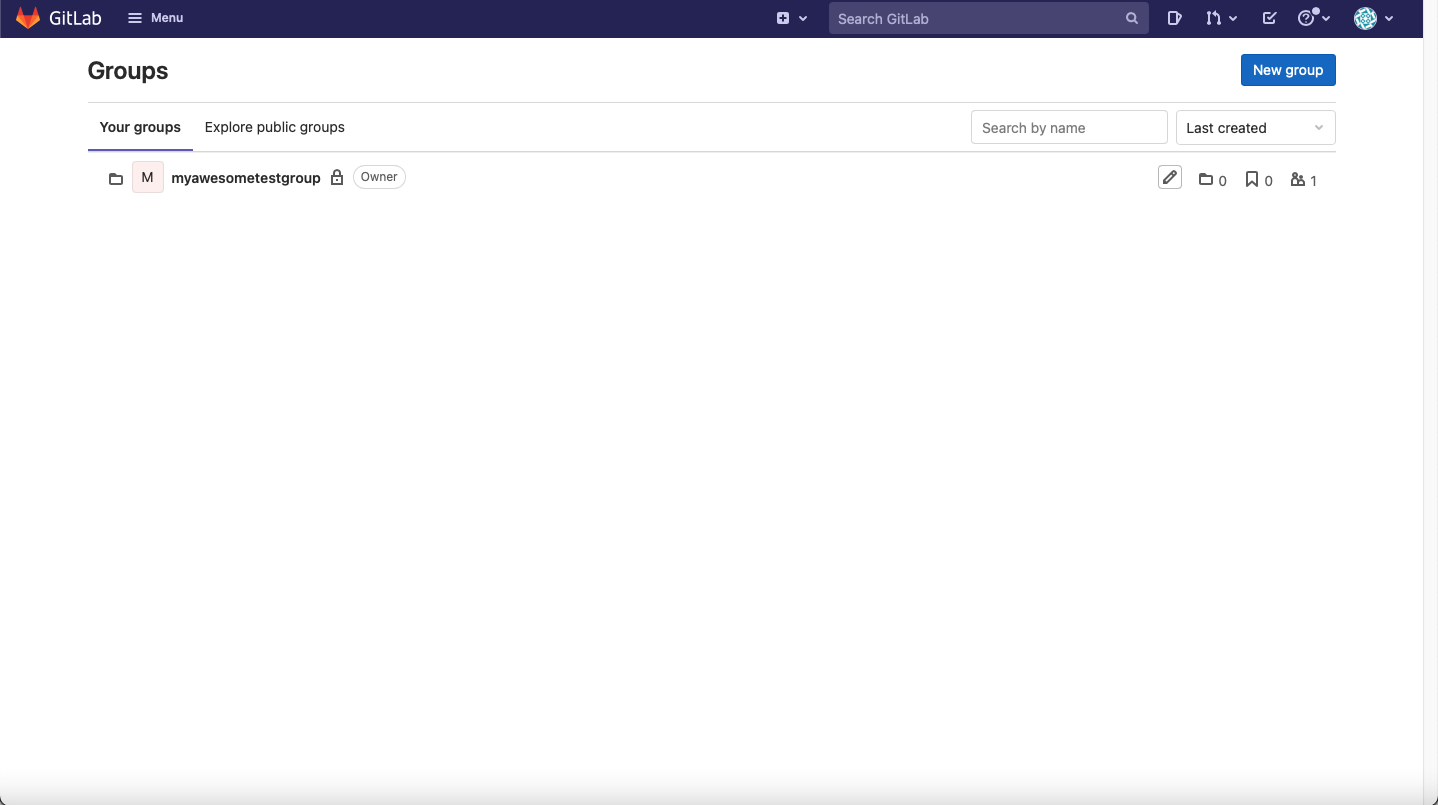 I have a test group here titled myawesometestgroup. So in hotglue, I will put myawesometestgroup in the Groups entry.
Your Projects
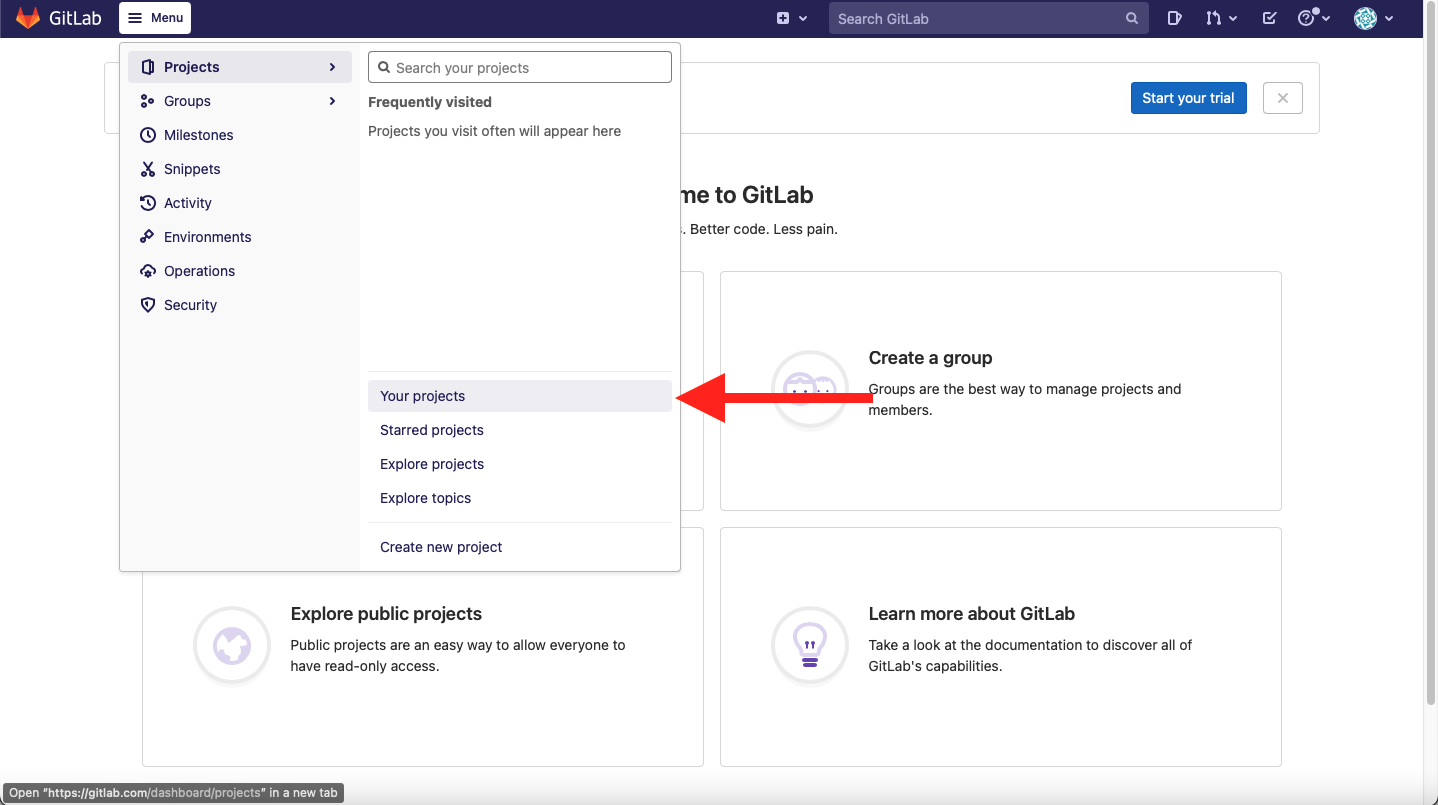 Using the menu, head to the Projects tab. You should then navigate to the Your projects.
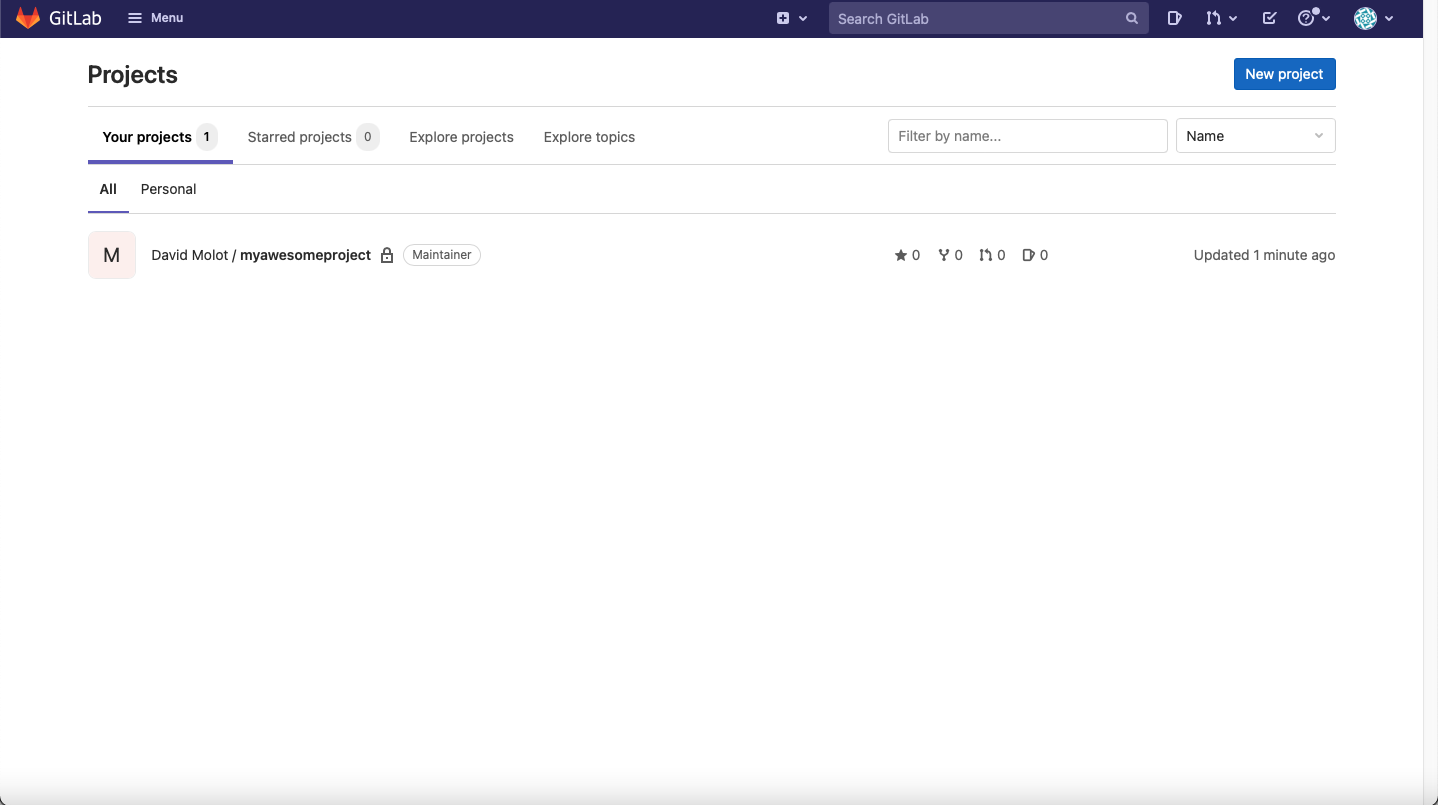 As you can see, I have a test project. In hotglue, I would input myorg/myawesomeproject into hotglue.