

Connector Details
Credentials Setup
The Blackbaud connector uses the SKY API OAuth 2.0 flow to read from and write to your customers’ Blackbaud environments. To use it with hotglue, you need a SKY Developer account, a SKY API subscription key, a registered SKY application, the application’s OAuth credentials, and at least one hotglue callback URL configured as a redirect URI. The person setting this up should be able to create and manage SKY applications in the Blackbaud developer portal, subscribe to the relevant SKY API product, and—if needed—have a Blackbaud user with Marketplace admin permissions connect the application to the relevant environment.1. Create a SKY Developer account
Sign in to the SKY Developer account portal. If you do not already have a Blackbaud ID, you are prompted to create one when you sign up. See the SKY API basics documentation for more background on developer accounts and Blackbaud IDs. Once signed in, you land on the Developer account page. From here, you can open My applications to create and manage your SKY applications, or My subscriptions to manage API subscription keys.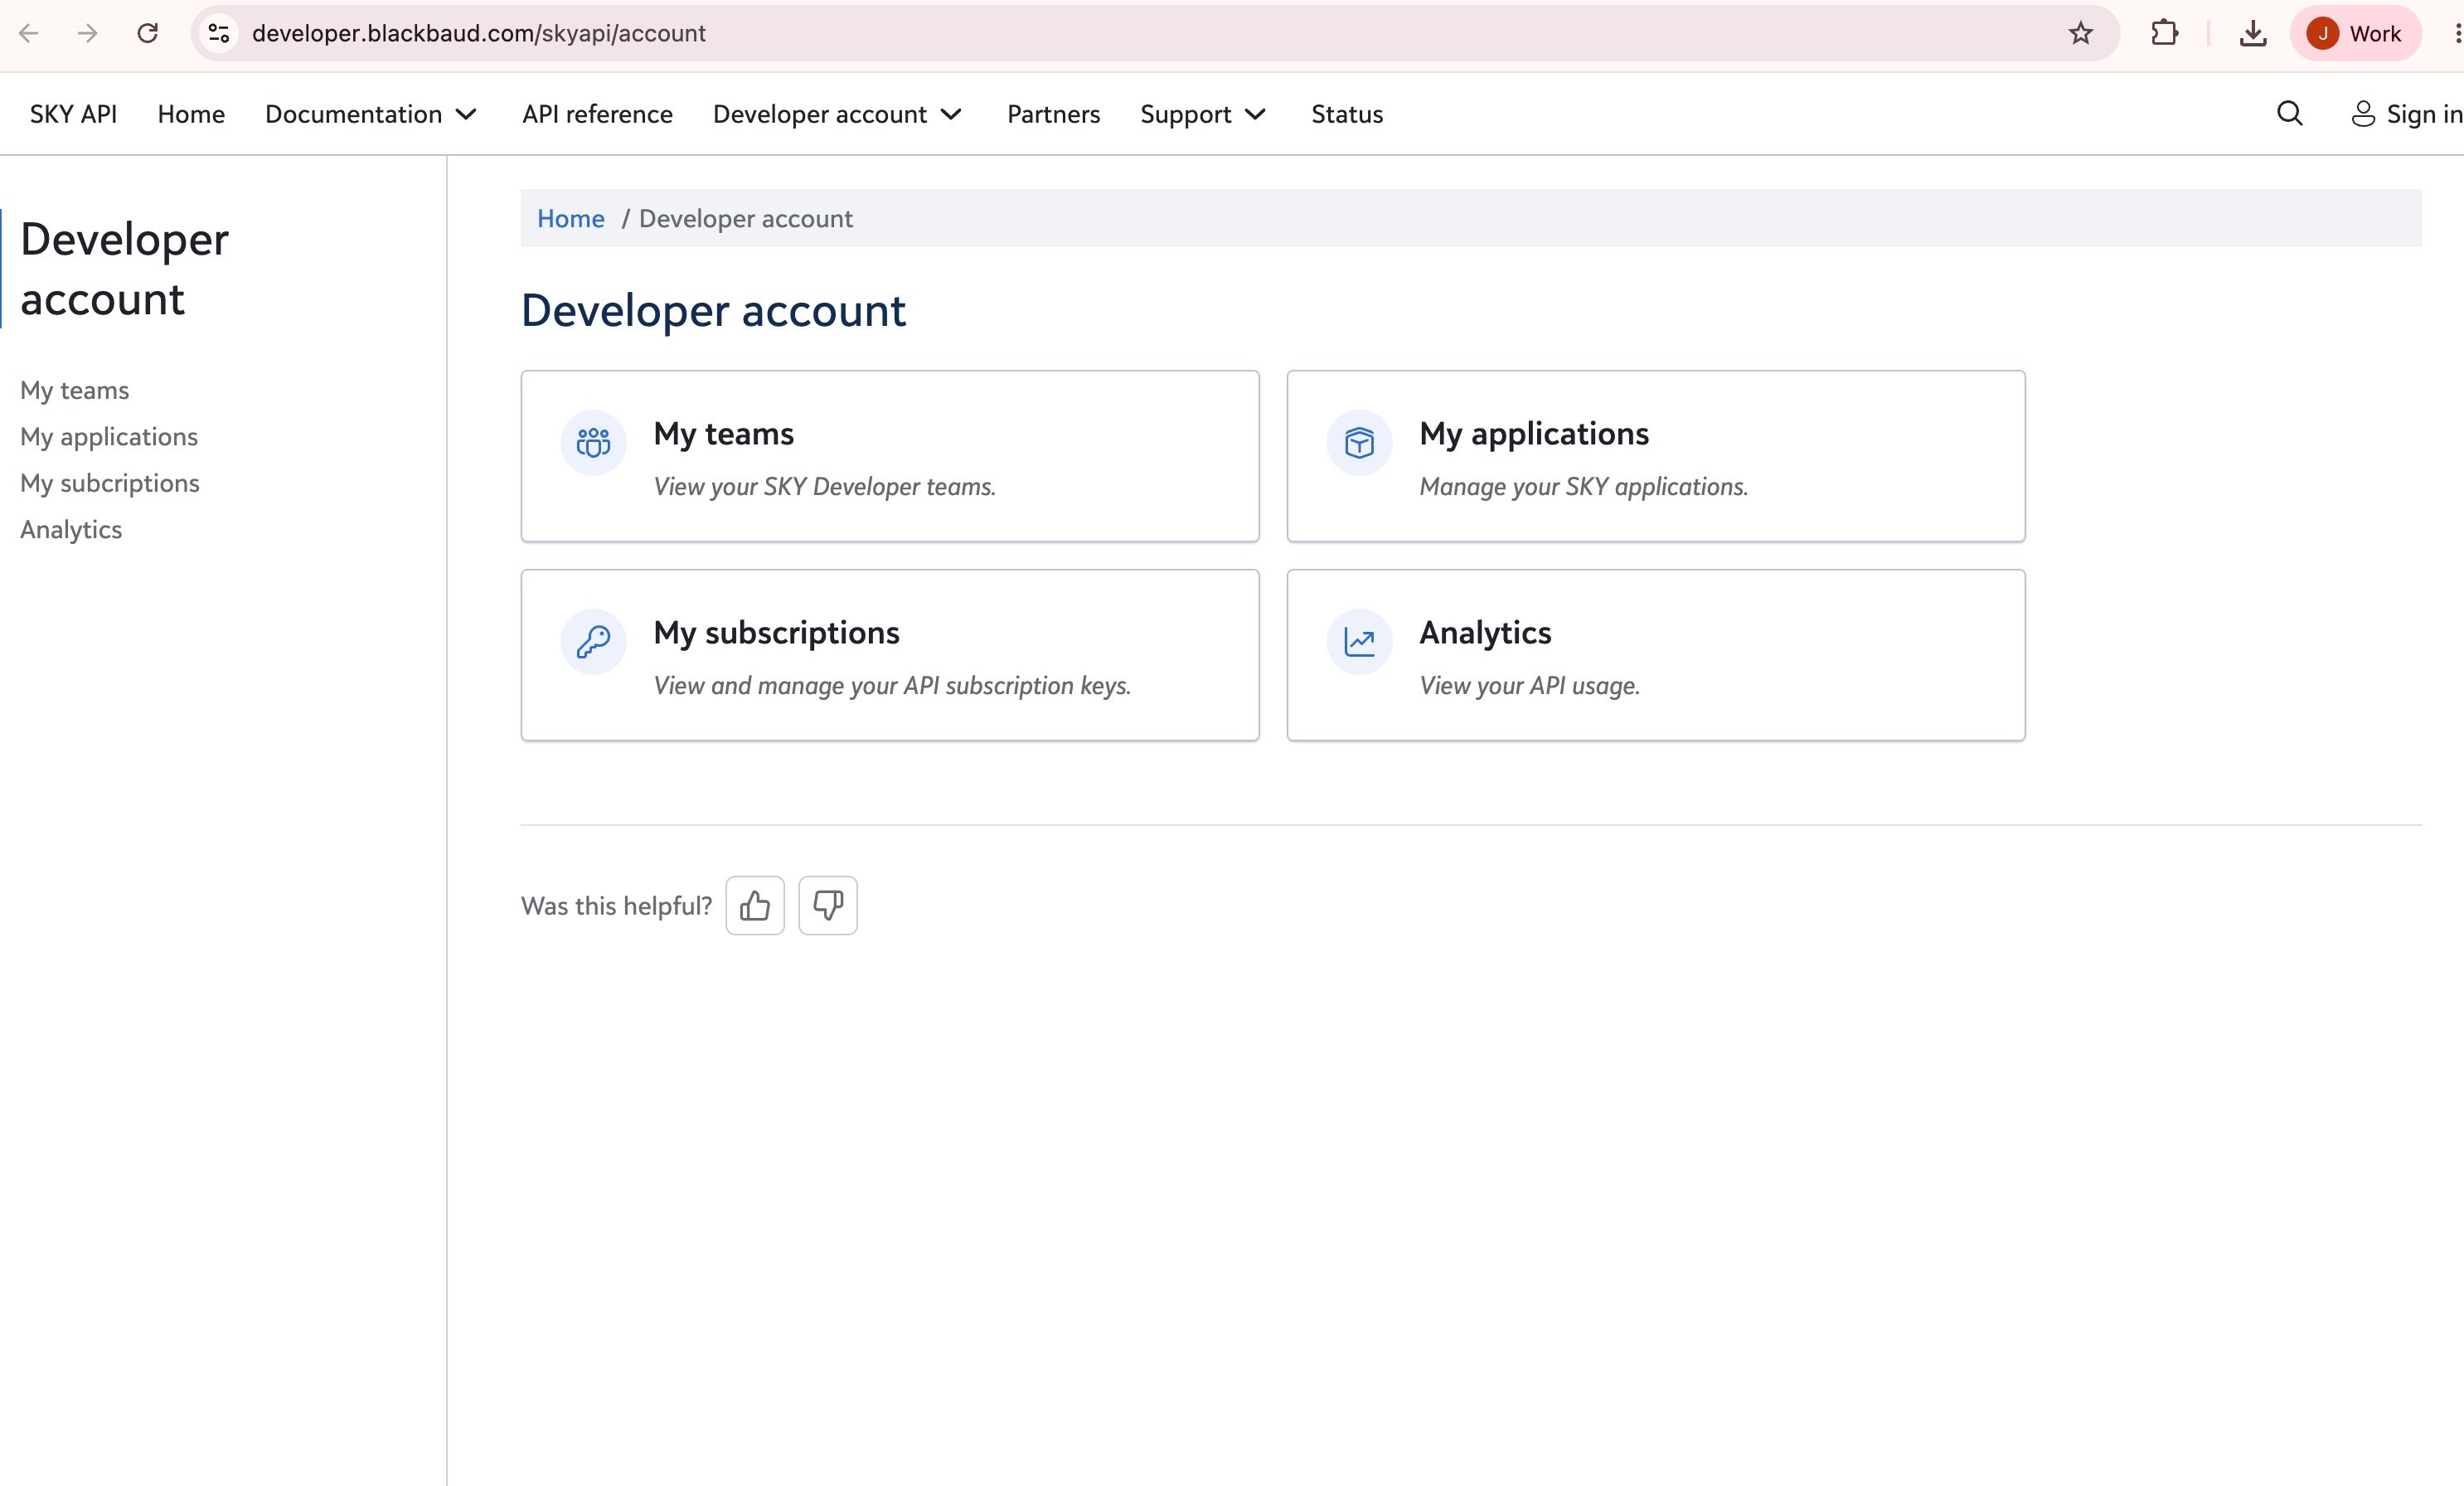
Sign in to the SKY Developer account portal, then open My applications or My subscriptions
2. Get a SKY API subscription key
Blackbaud requires a subscription key on every SKY API request. In the developer portal, open My subscriptions, subscribe to the Standard APIs product (or the API product that covers the endpoints your integration uses), and copy either the primary or secondary key. The tap expects this value assubscription_key, and Blackbaud sends it on requests as the Bb-Api-Subscription-Key header. See Blackbaud’s My subscriptions docs for details on subscribing and finding your keys.
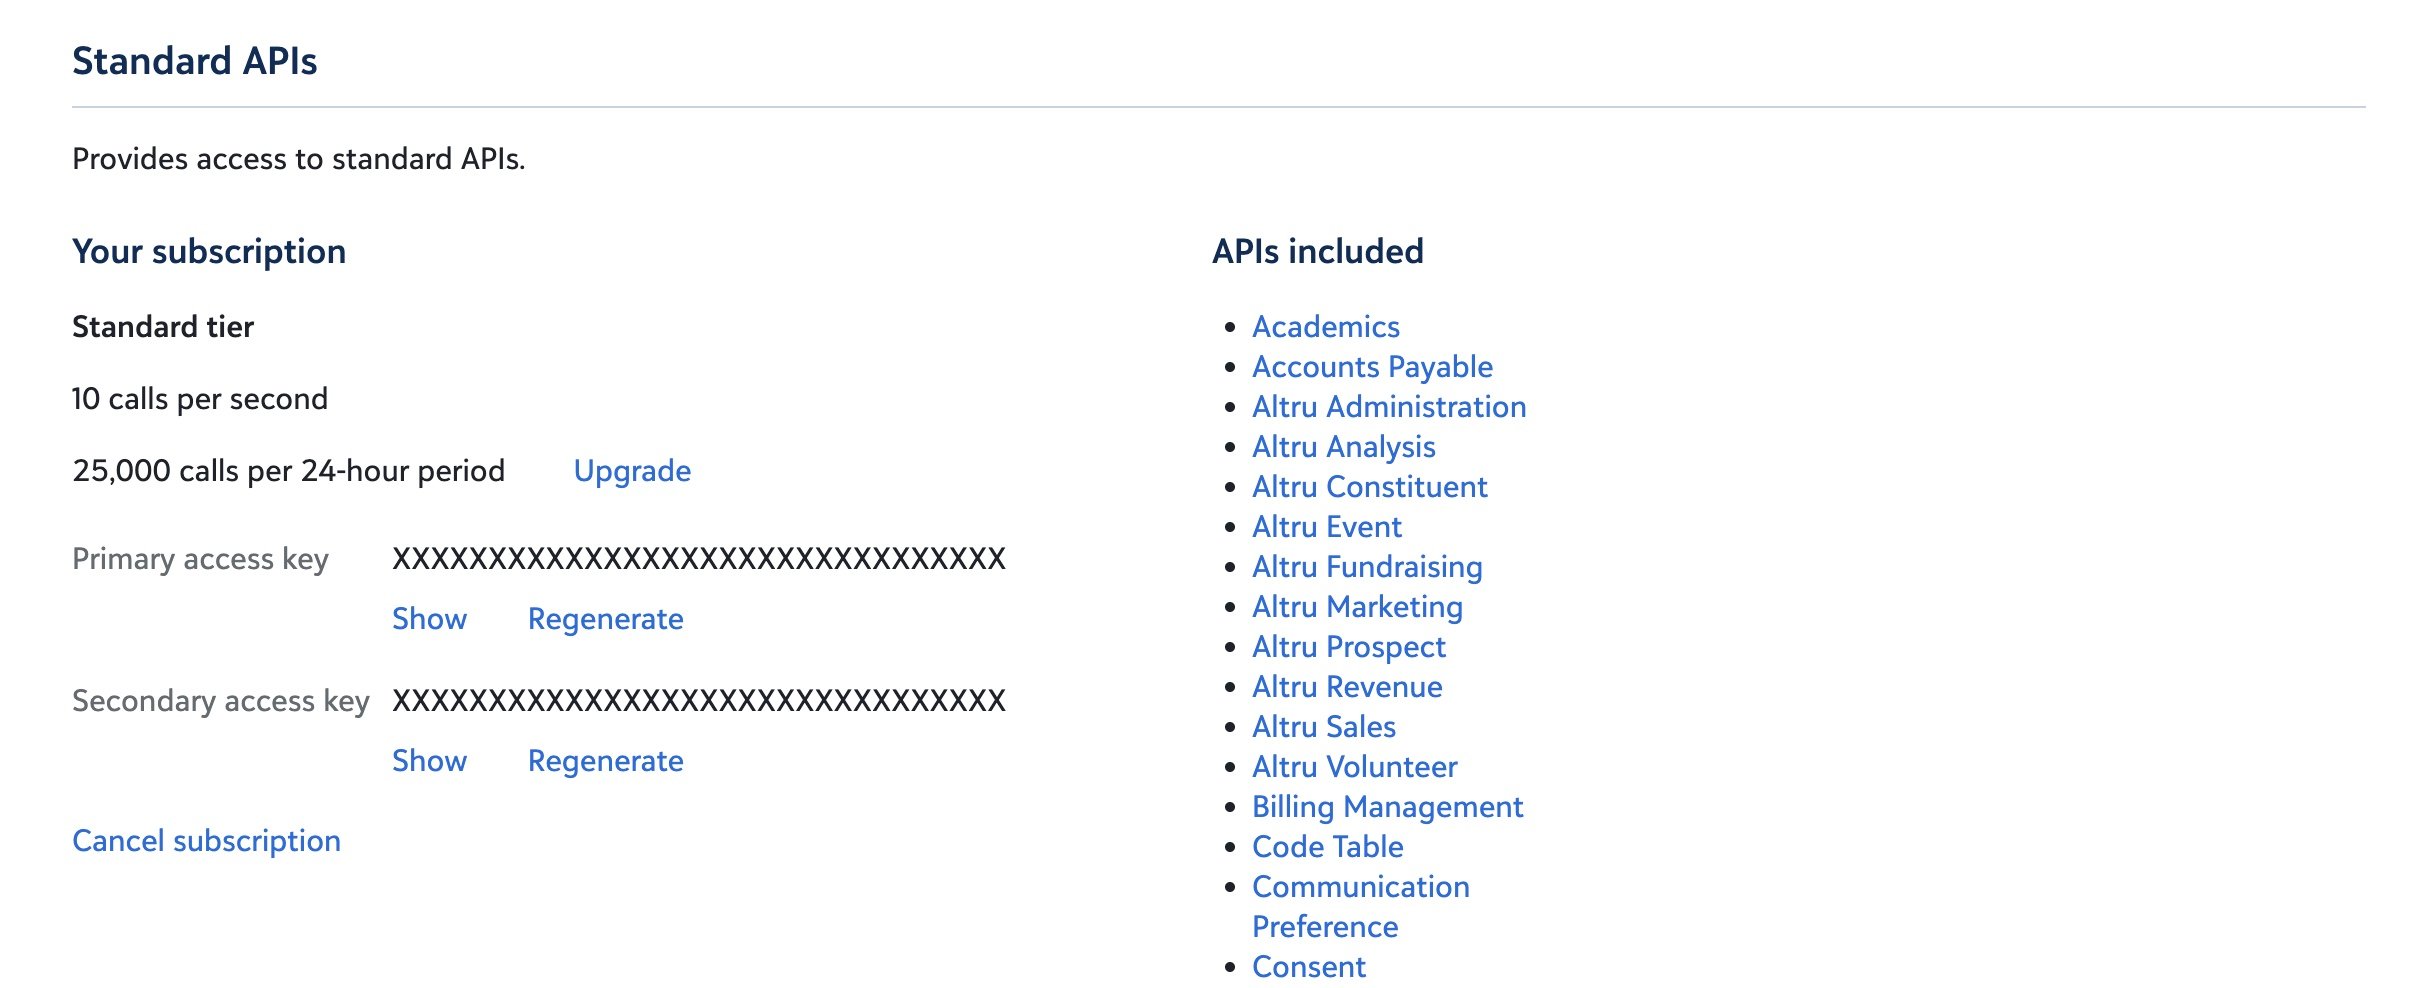
Copy the primary or secondary access key from your Standard APIs subscription
3. Create a SKY application
A SKY application represents your integration in Blackbaud and is required to make SKY API calls. Creating an application produces the OAuth credentials hotglue needs during authorization. From My applications, click + New application and fill out the required fields:- Application name
- Application details
- Publisher (public organization name)
- Application website URL
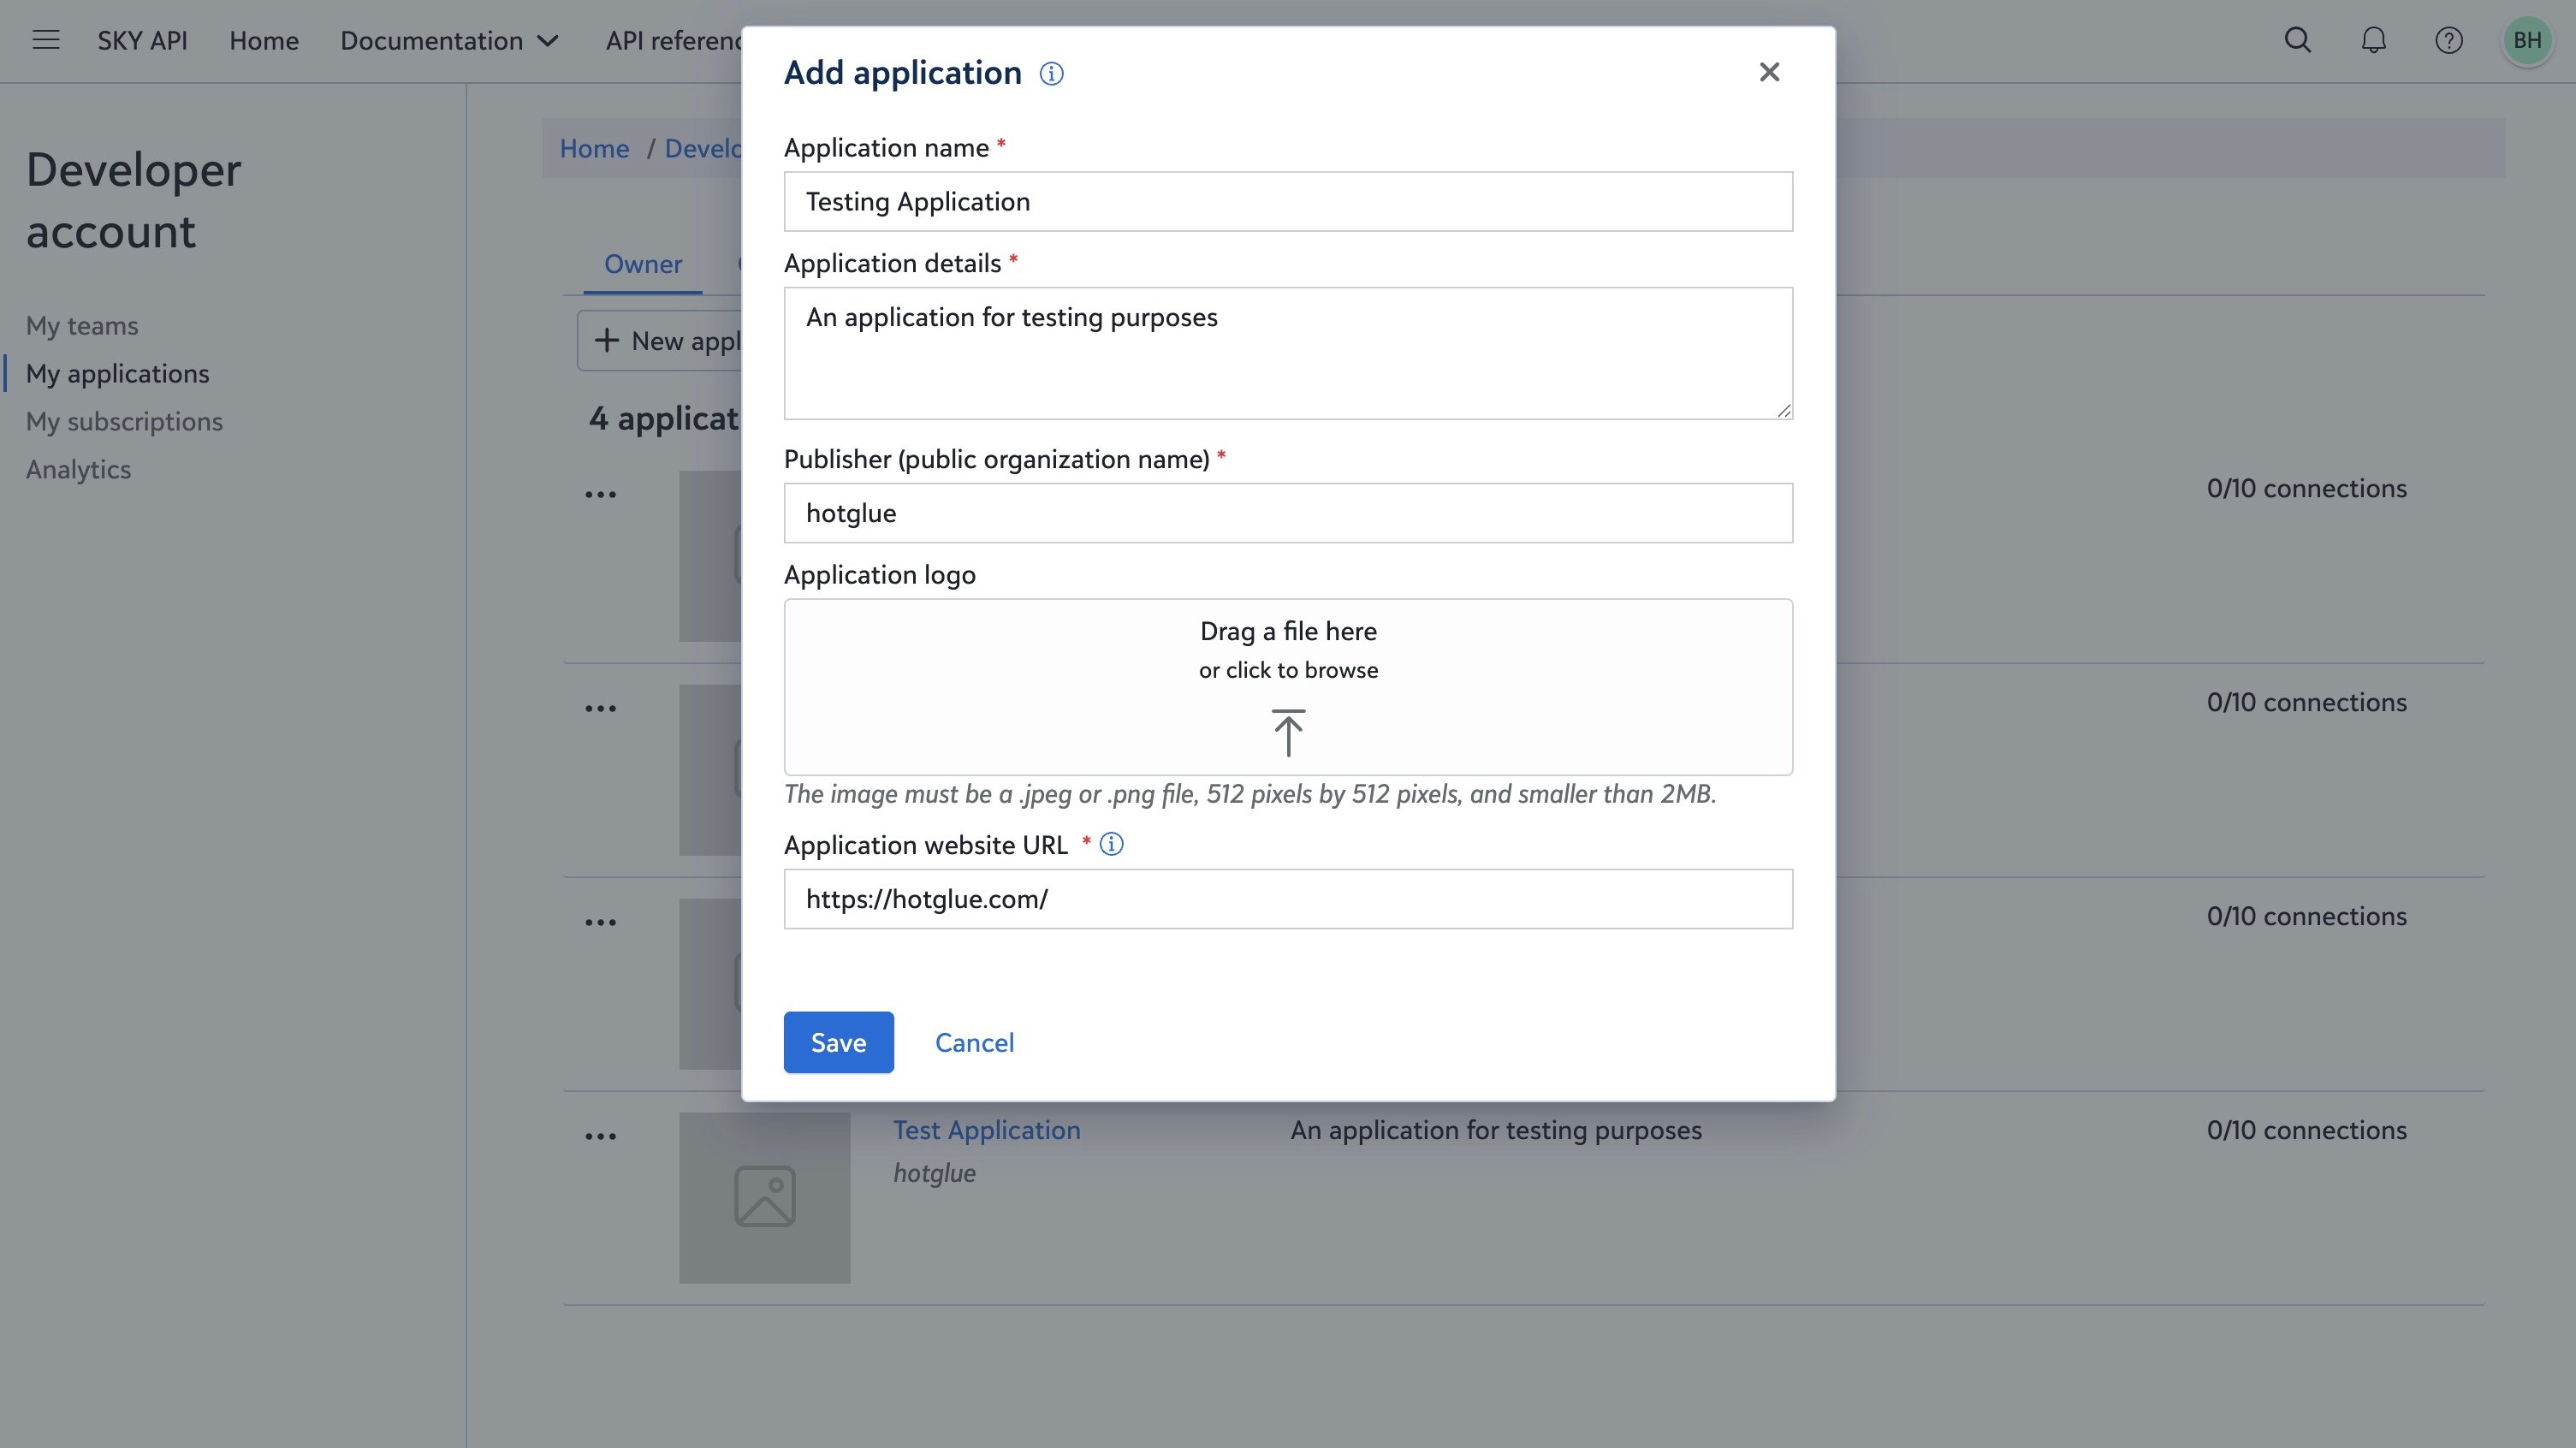
Create a new SKY application in the Blackbaud developer portal
4. Copy OAuth credentials
Open your application and copy the credentials from the application page:- Application ID → hotglue
client_id - Primary application secret → hotglue
client_secret
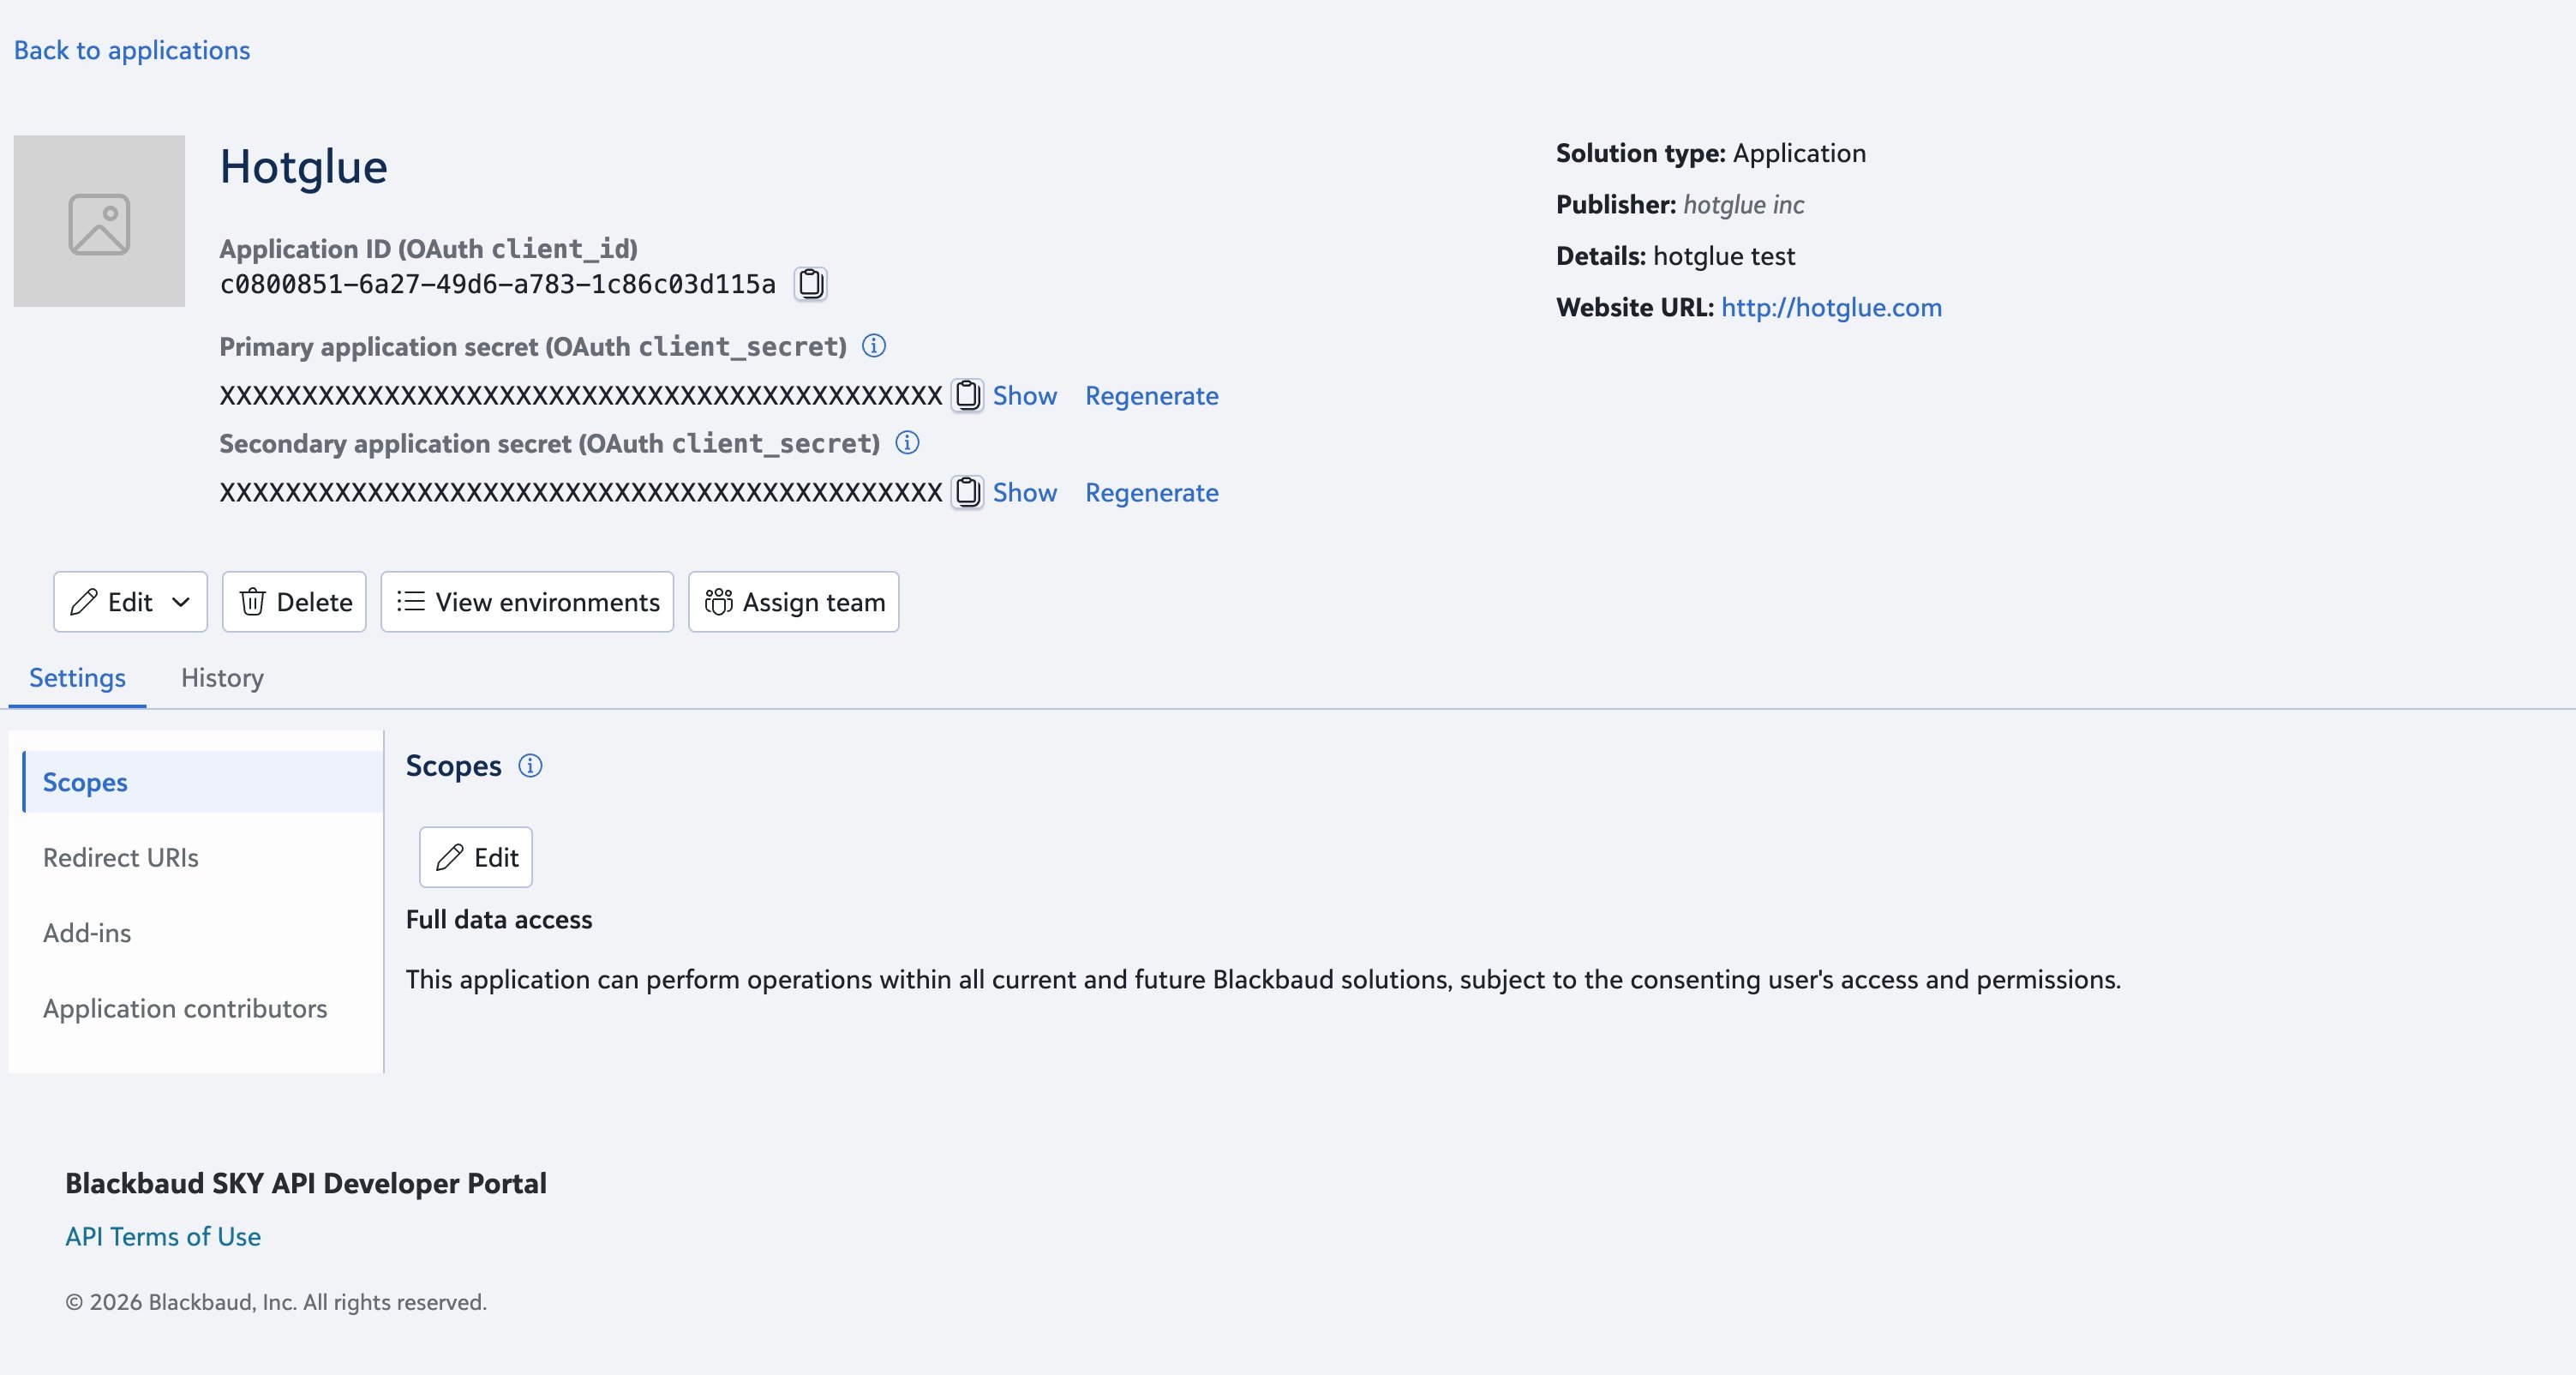
Copy the Application ID and Primary application secret for hotglue
5. Configure redirect URIs
In your application settings, open Redirect URIs and add the hotglue callback URL for your environment. Blackbaud requires the OAuthredirect_uri to match one of your registered URIs exactly, including trailing slashes. See the Authorization and Redirect URIs documentation for details.
Add the callback URL that matches where your hotglue environment runs:
hotglue.xyz, add that callback URL here as well.

Add hotglue callback URLs as redirect URIs
6. Connect the application in Blackbaud
Before your application can access data in a Blackbaud environment, it must be connected to that environment. If you are integrating with a customer’s Blackbaud organization, a user with Marketplace admin permissions must connect the app for you. To connect the application:- Open the Manage applications page in the Blackbaud Marketplace.
- Use Connect app and paste your application’s ID.
- Confirm the connection.
7. Add Blackbaud to hotglue
Once you have your subscription key, OAuth credentials, and redirect URIs configured:- Go to Settings > Connectors in your hotglue environment.
- Open Bi-Directional Connectors if you use bi-directional flows (
linkedConnectors), then search forBlackbaud. - Open Sources & Targets if you use one-way source or target flows (
linkedSources/linkedTargets), then search forBlackbaud.
- Open Bi-Directional Connectors if you use bi-directional flows (
- Add your subscription key to the Blackbaud JSON definition:
- If modifying a Connector (v2), set
options.config.subscription_keyto your Blackbaud subscription_key value. - If modifying a Source or Target (v1), set
config.subscription_keyto your Blackbaud subscription_key value.
- If modifying a Connector (v2), set
- Save the definition.
8. Authorize and enable the connector
- Add Blackbaud to your flow.
- Enter your Blackbaud Application ID as the OAuth Client ID and your Primary application secret as the OAuth Client Secret.
- Save and complete authorization with a test Blackbaud user. This enables the connector in your environment.
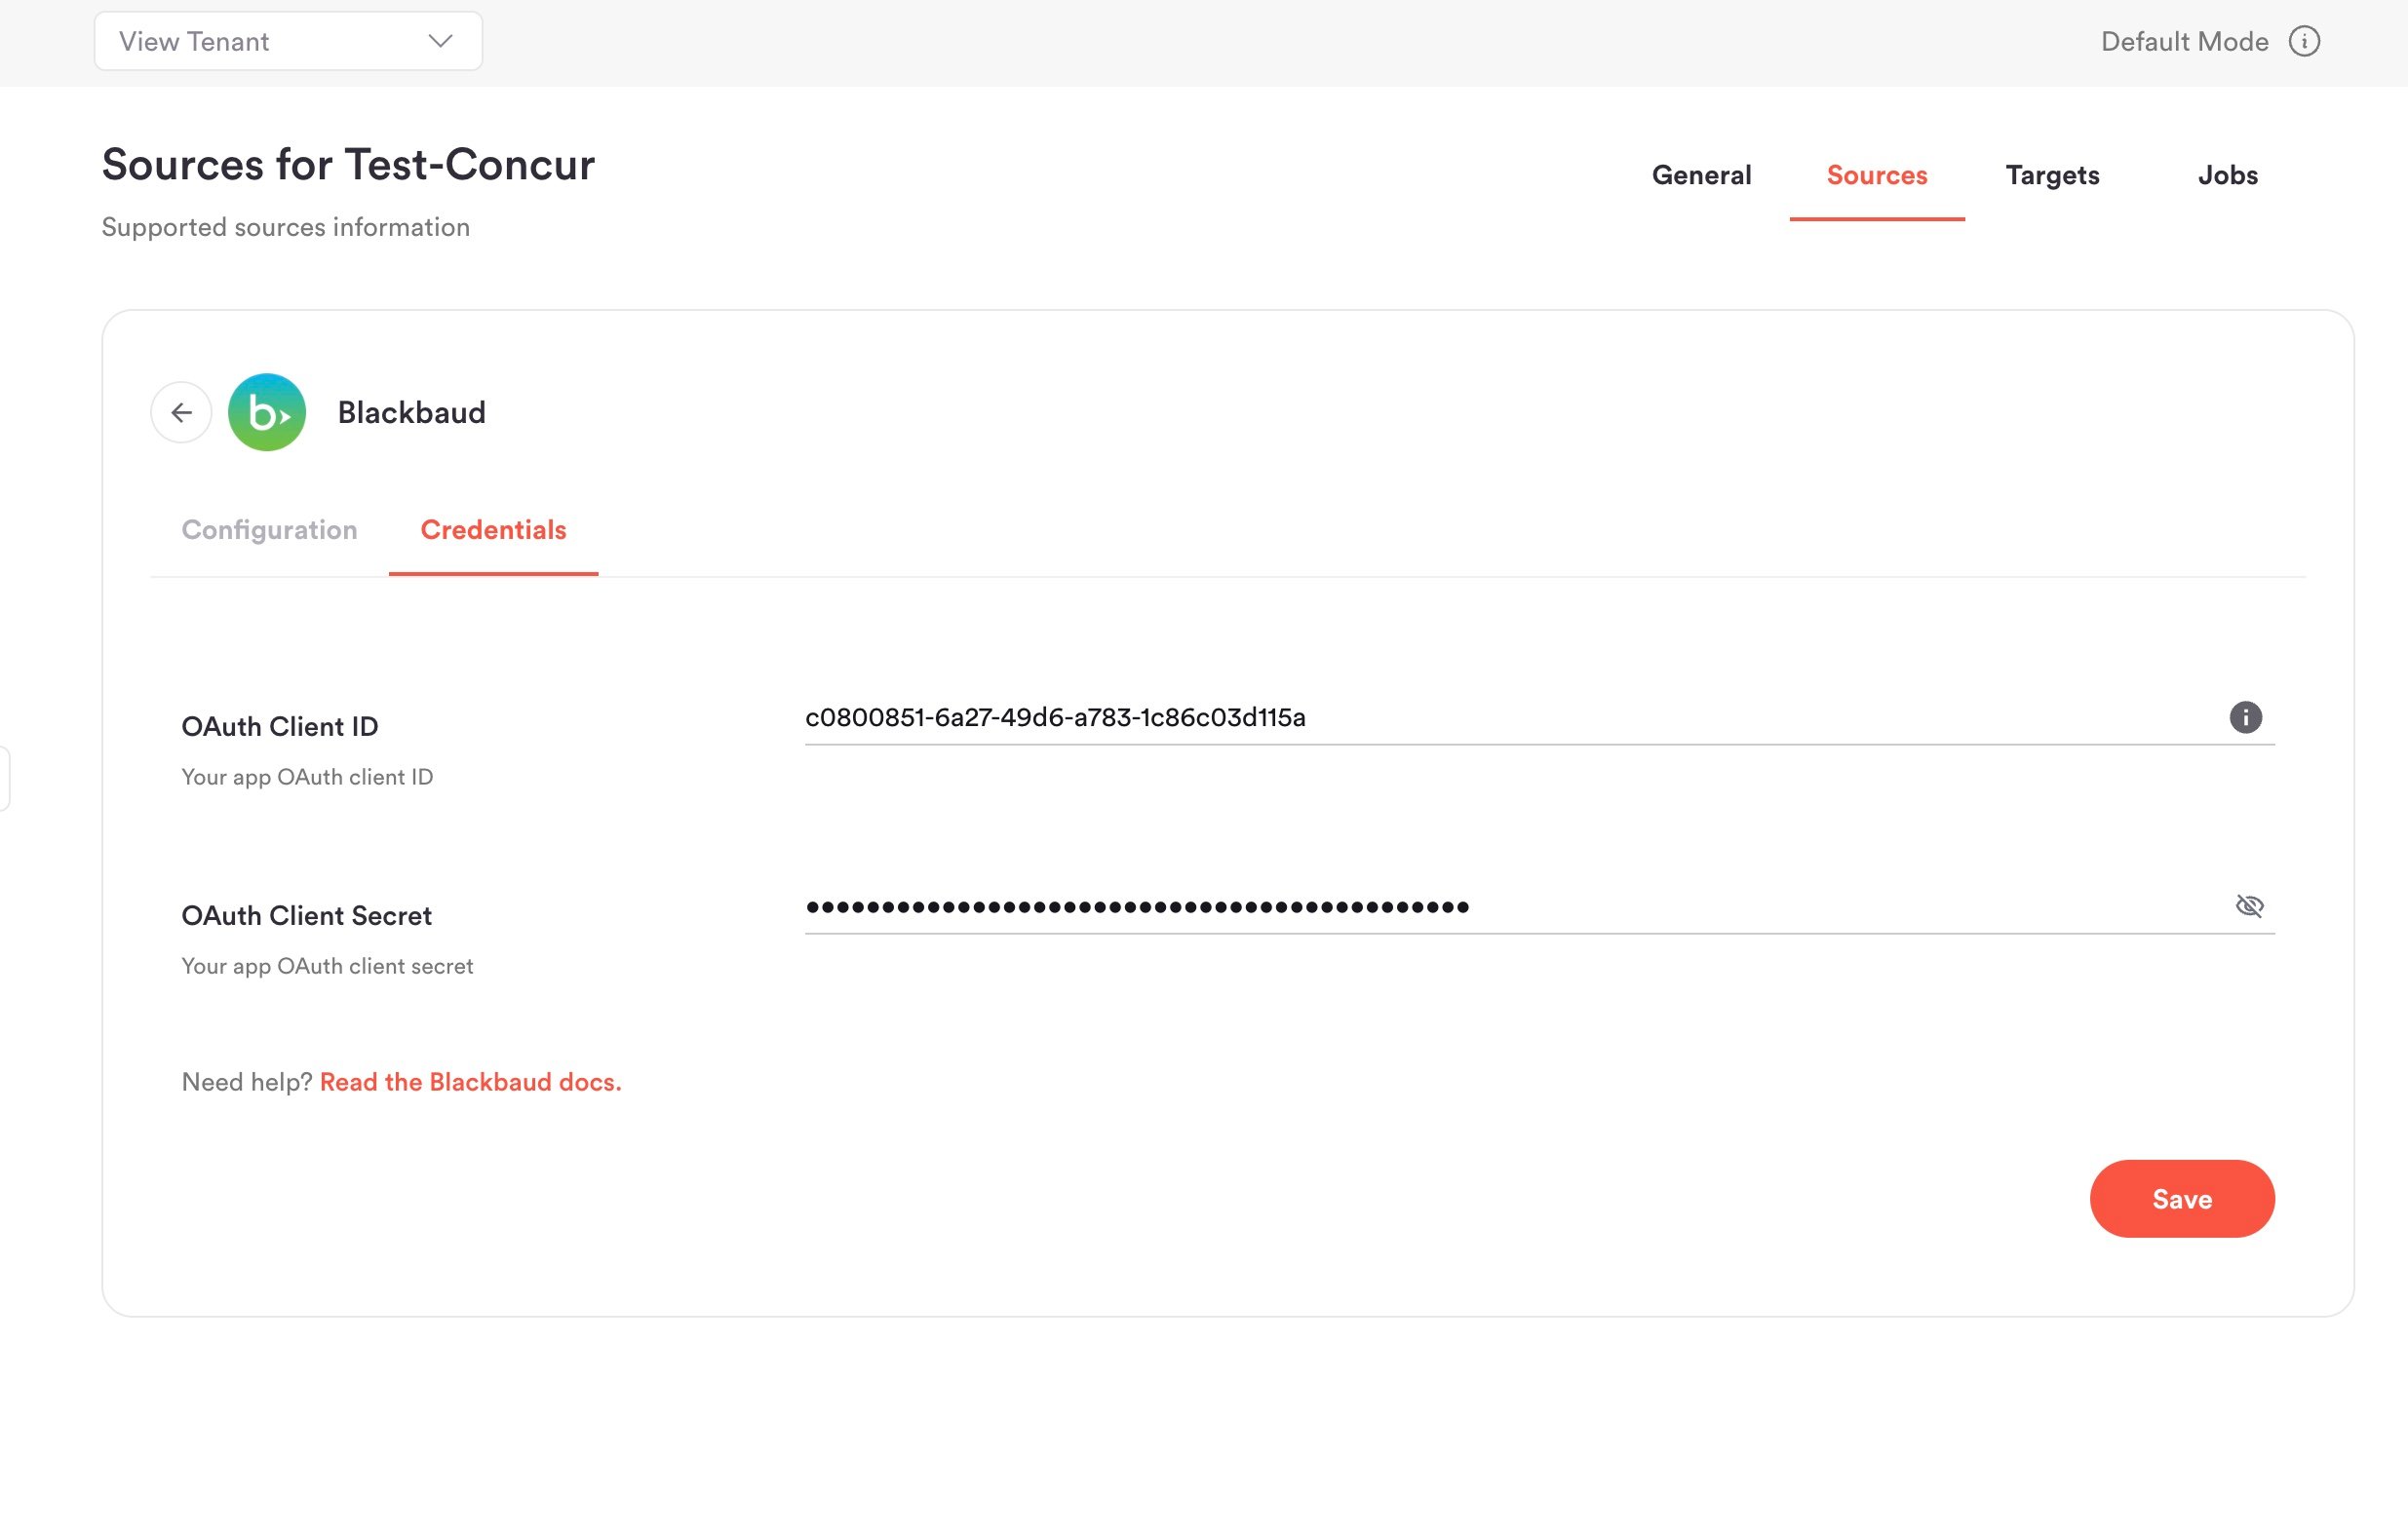
Enter your Blackbaud Application ID and application secret in the hotglue Credentials tab
refresh_token automatically after a successful authorization. You do not need to provide it manually.
After setup, your end users authorize Blackbaud through the standard OAuth consent flow when they link their account.
After this you’re all set to go!
Tap Changelog
Tap Changelog
Tap Changelog