Connector Details
| Name | Value |
|---|---|
| Platform | Zoom |
| Auth Type | OAuth |
| Direction | Read |
| Tap Repo | https://github.com/hotgluexyz/tap-zoom |
| Tap Metrics | Usage: |
Credentials Setup
Follow the steps below to get the credentials you need to use the Zoom connector. The first thing that you need to do to get your Zoom OAuth credentials is to head to the Zoom Marketplace. Make sure that you go ahead and sign into Zoom in the top right hand corner. If you do not have a Zoom account, you will be prompted to create one.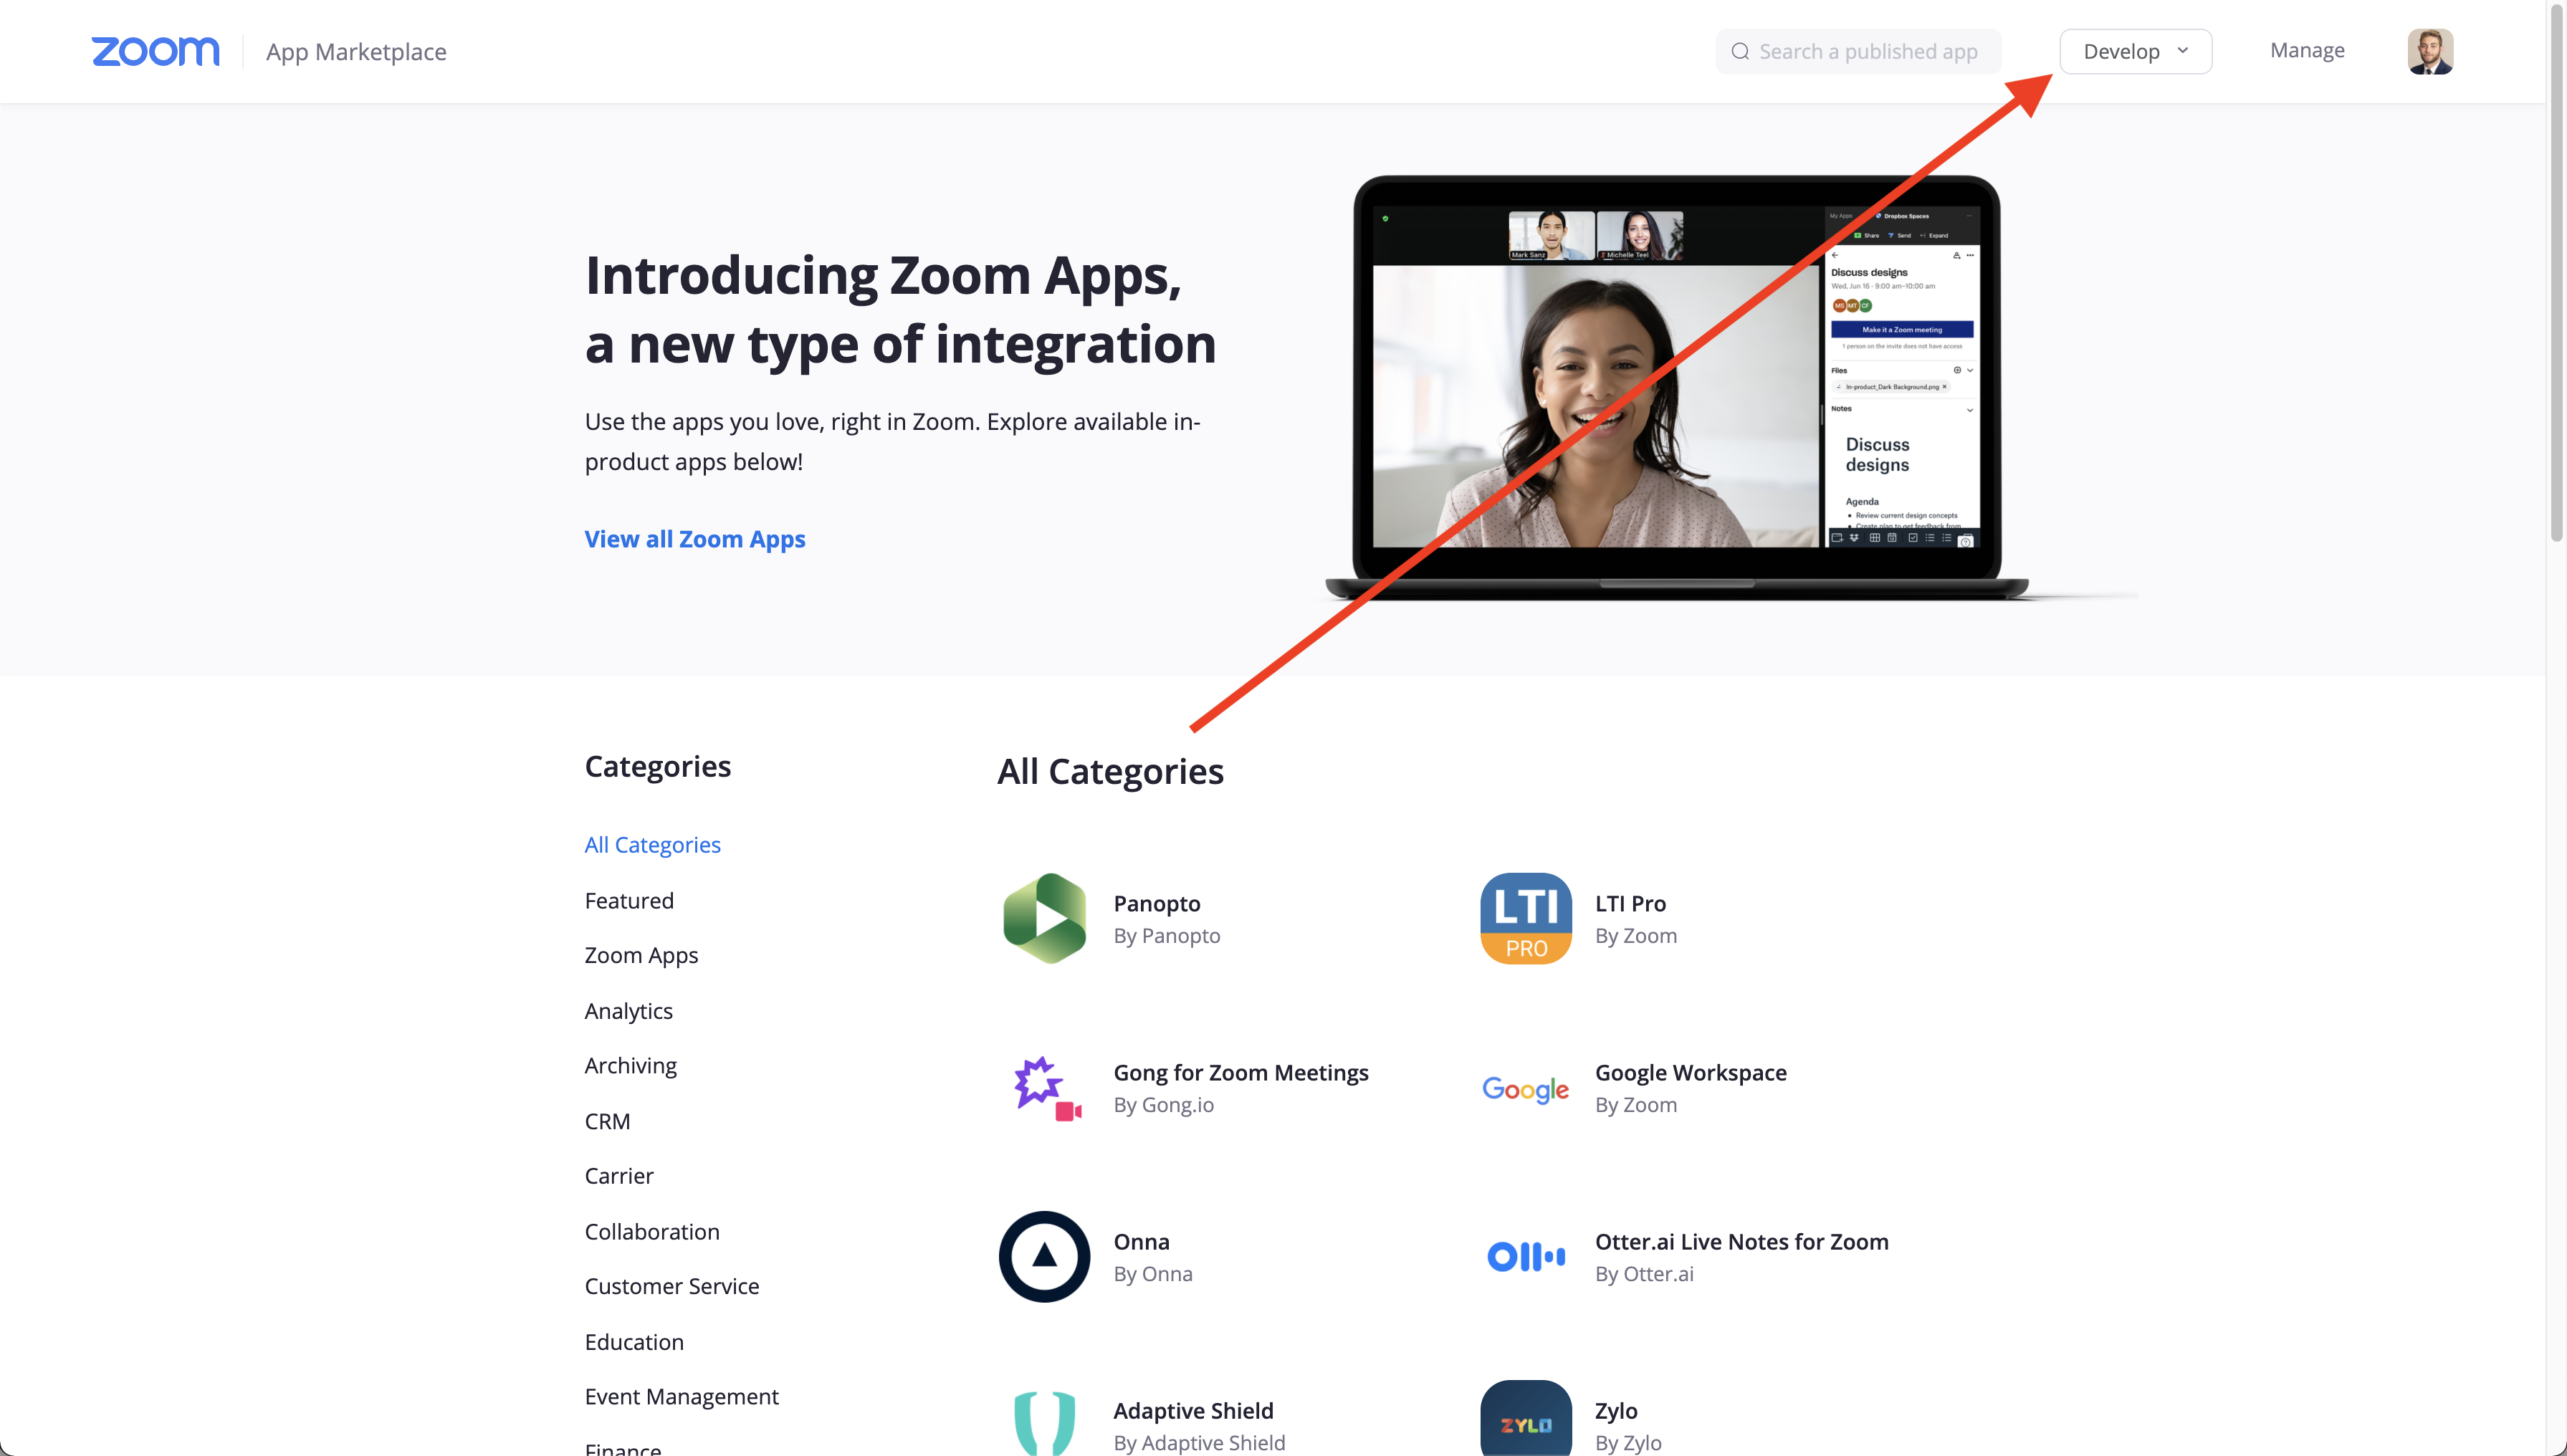 Once you’re on the Zoom Marketplace, select the develop dropdown in the top right hand corner.
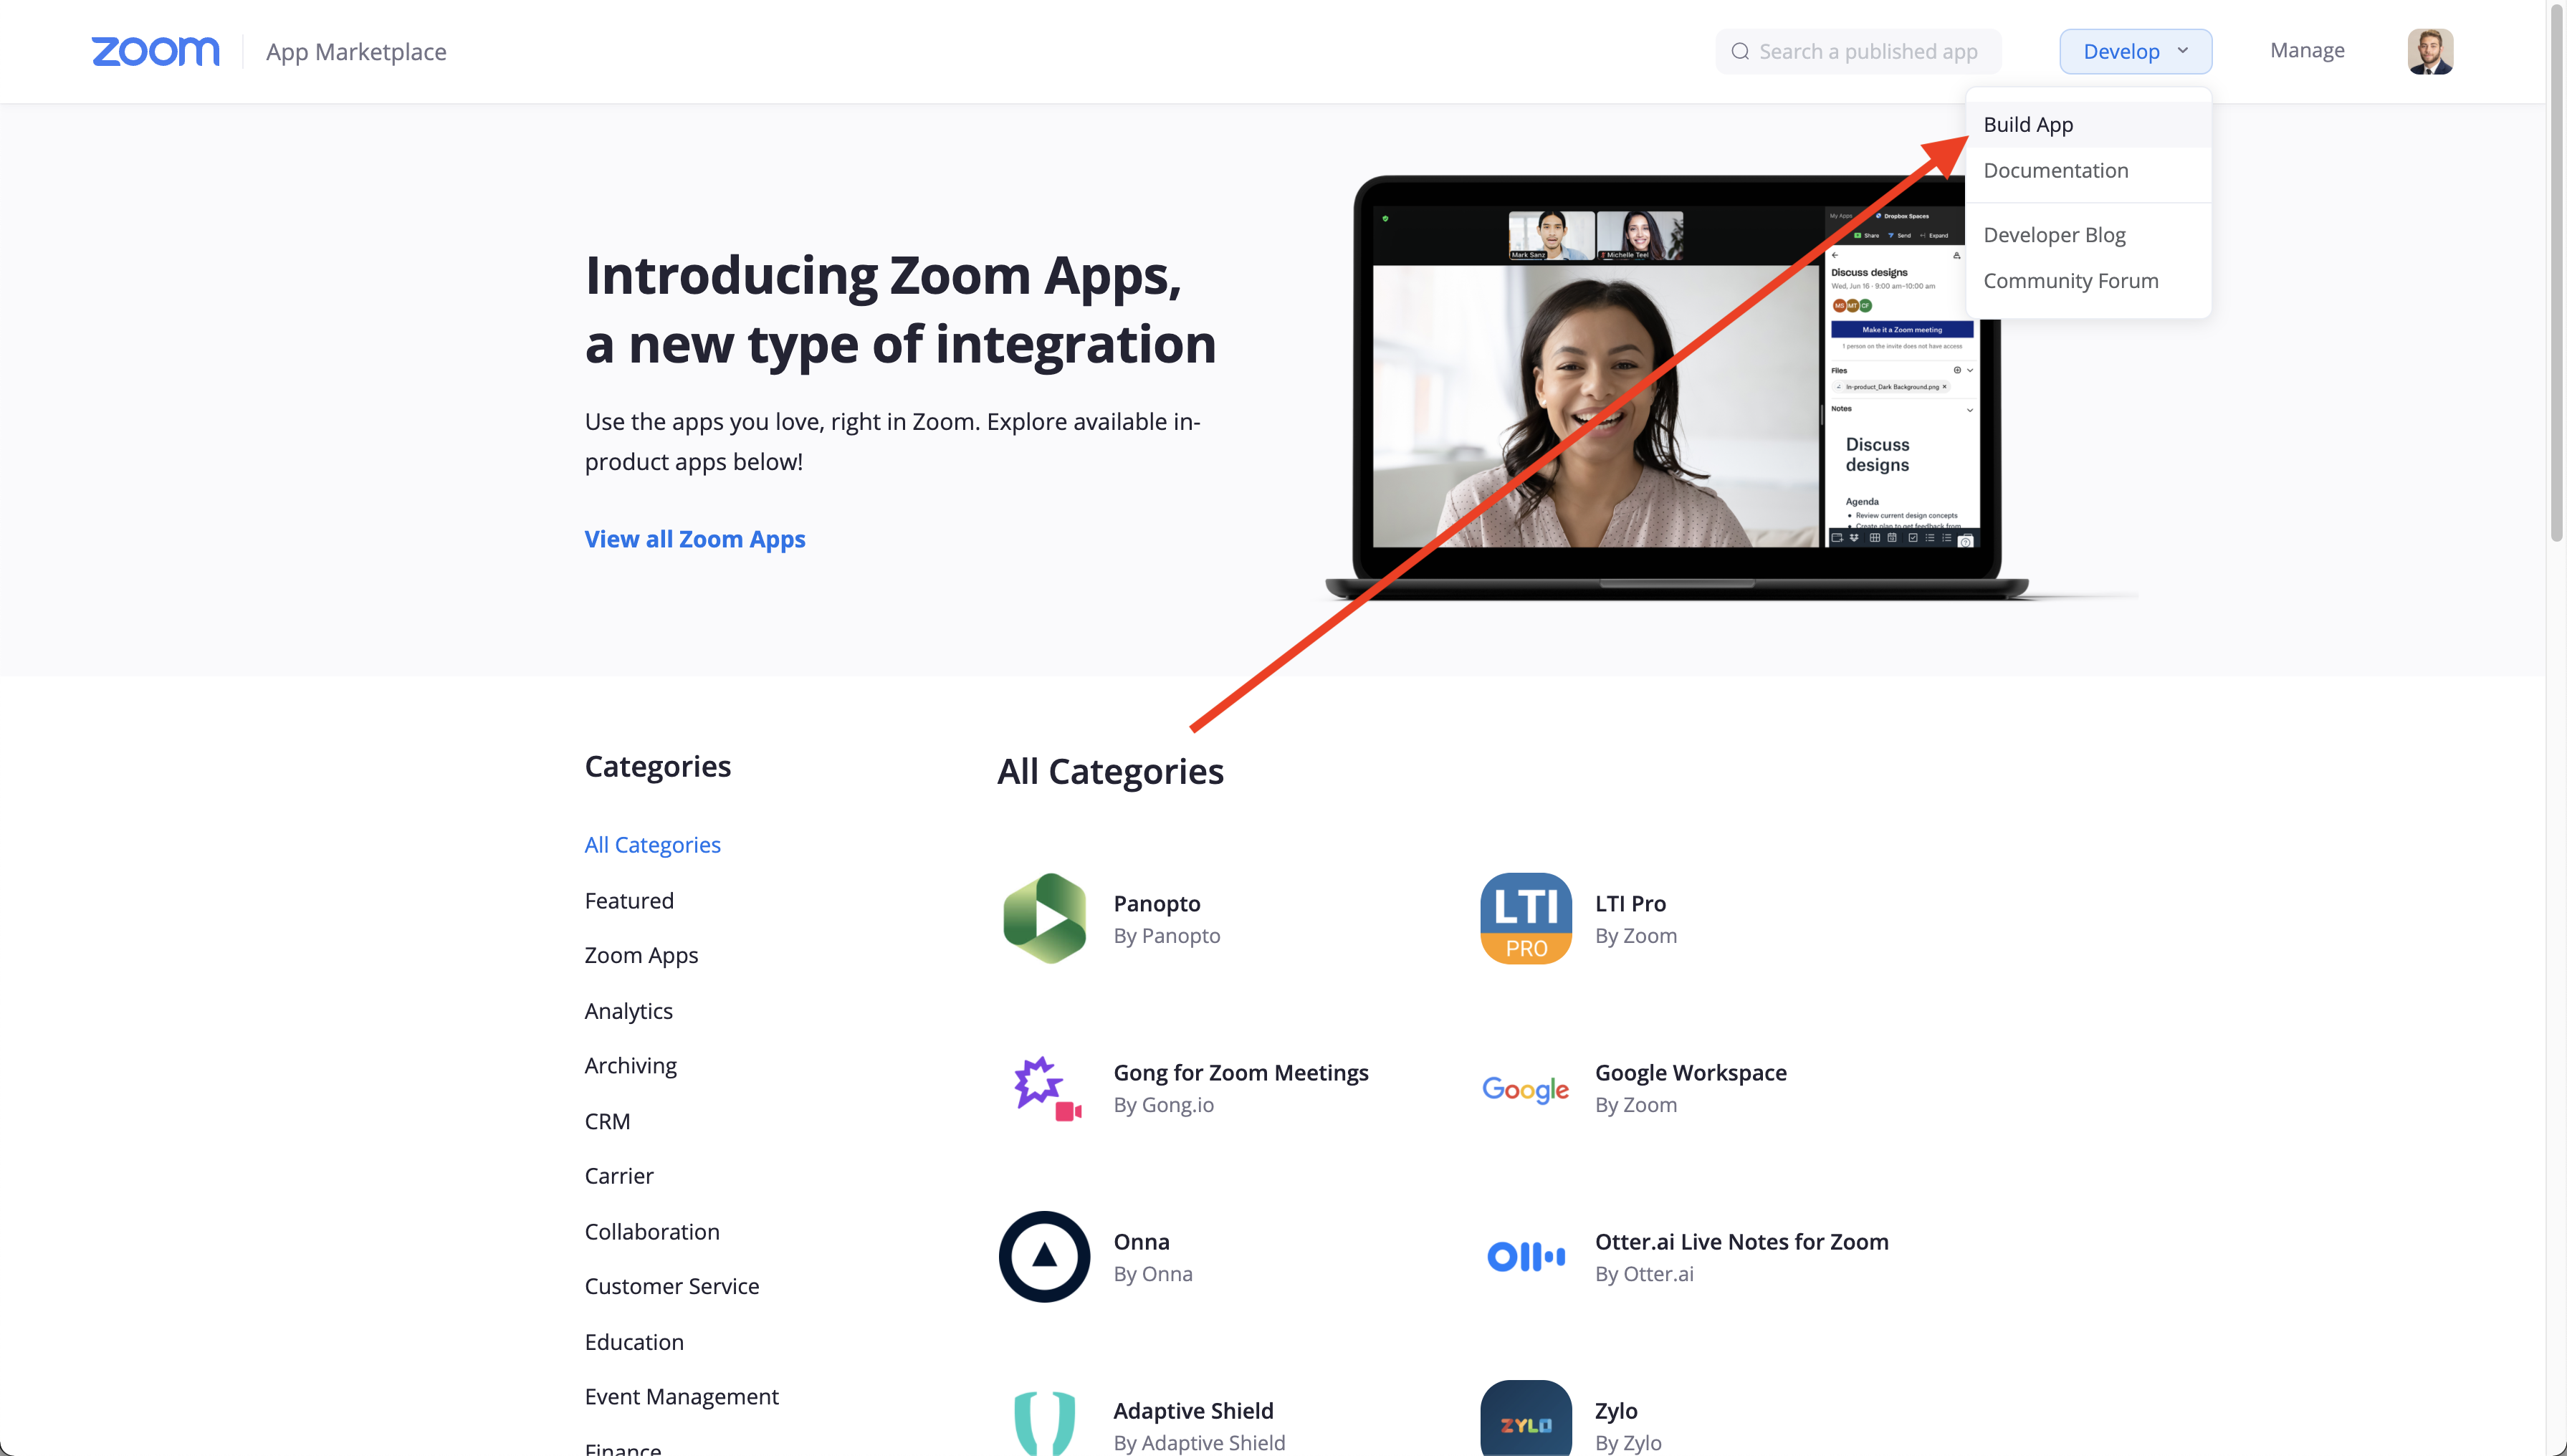 From the resulting drop down, select Build App.
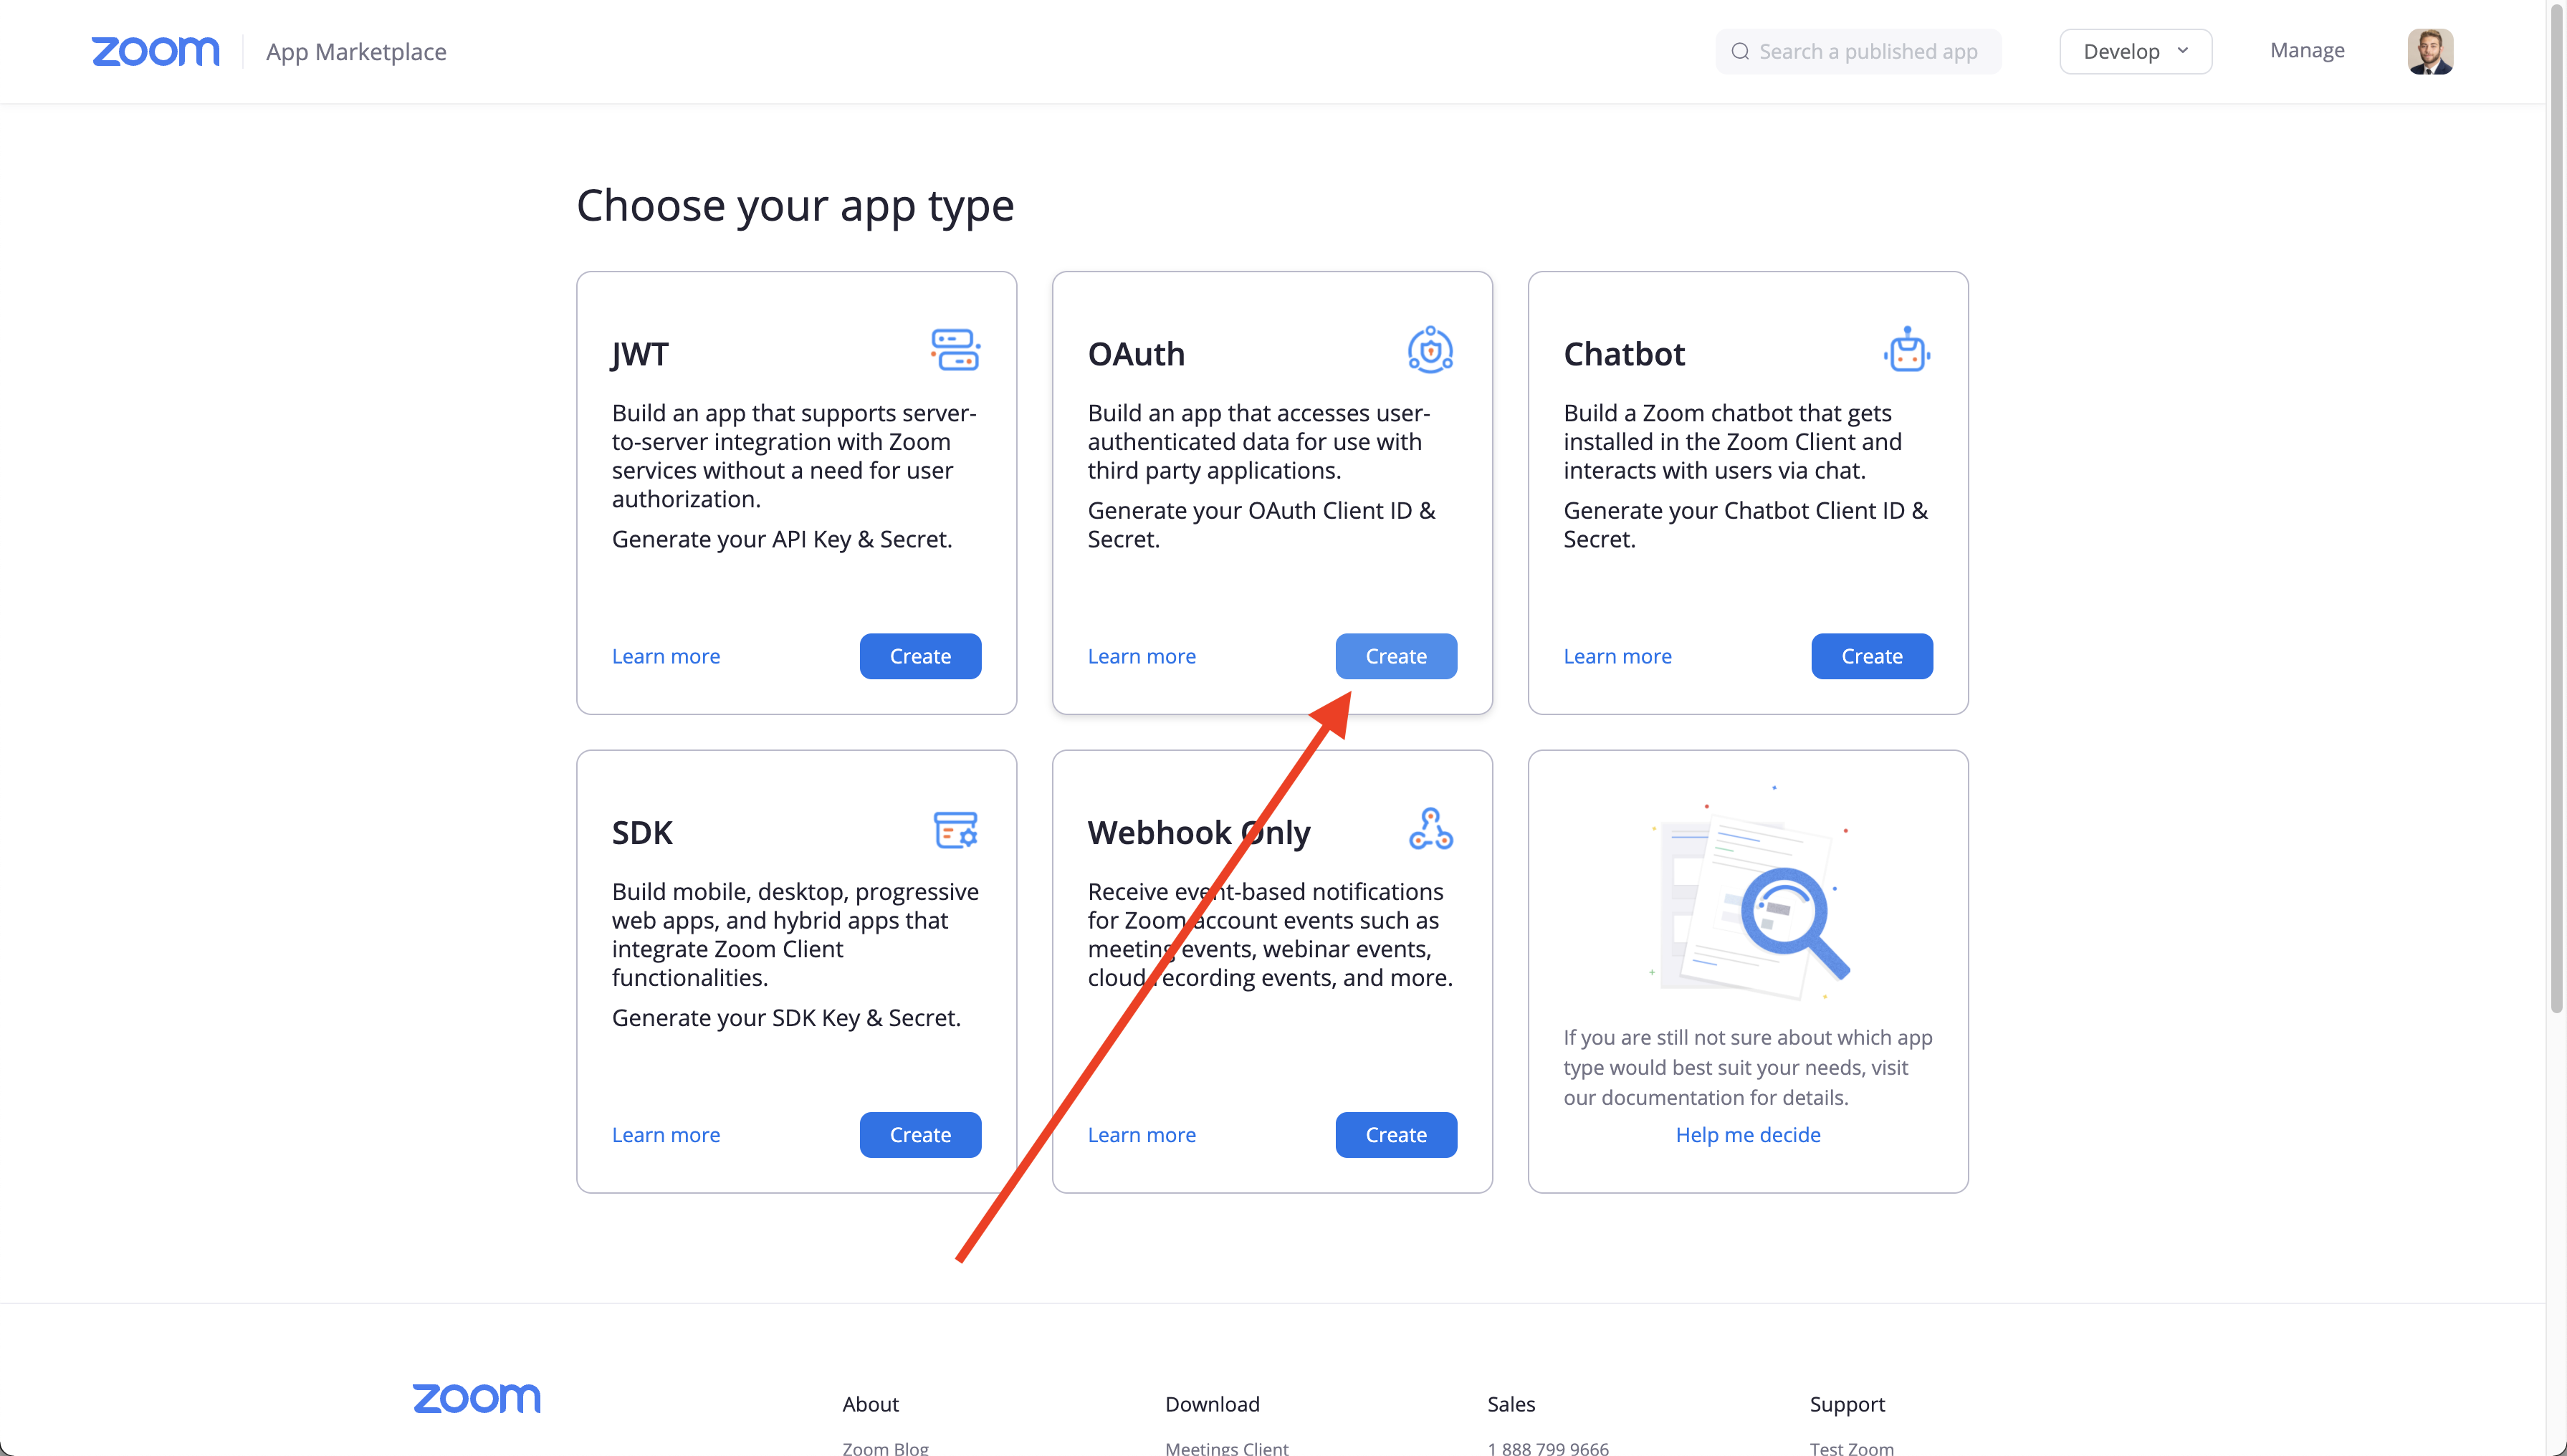 From here, go ahead and select that you want to create an OAuth app.
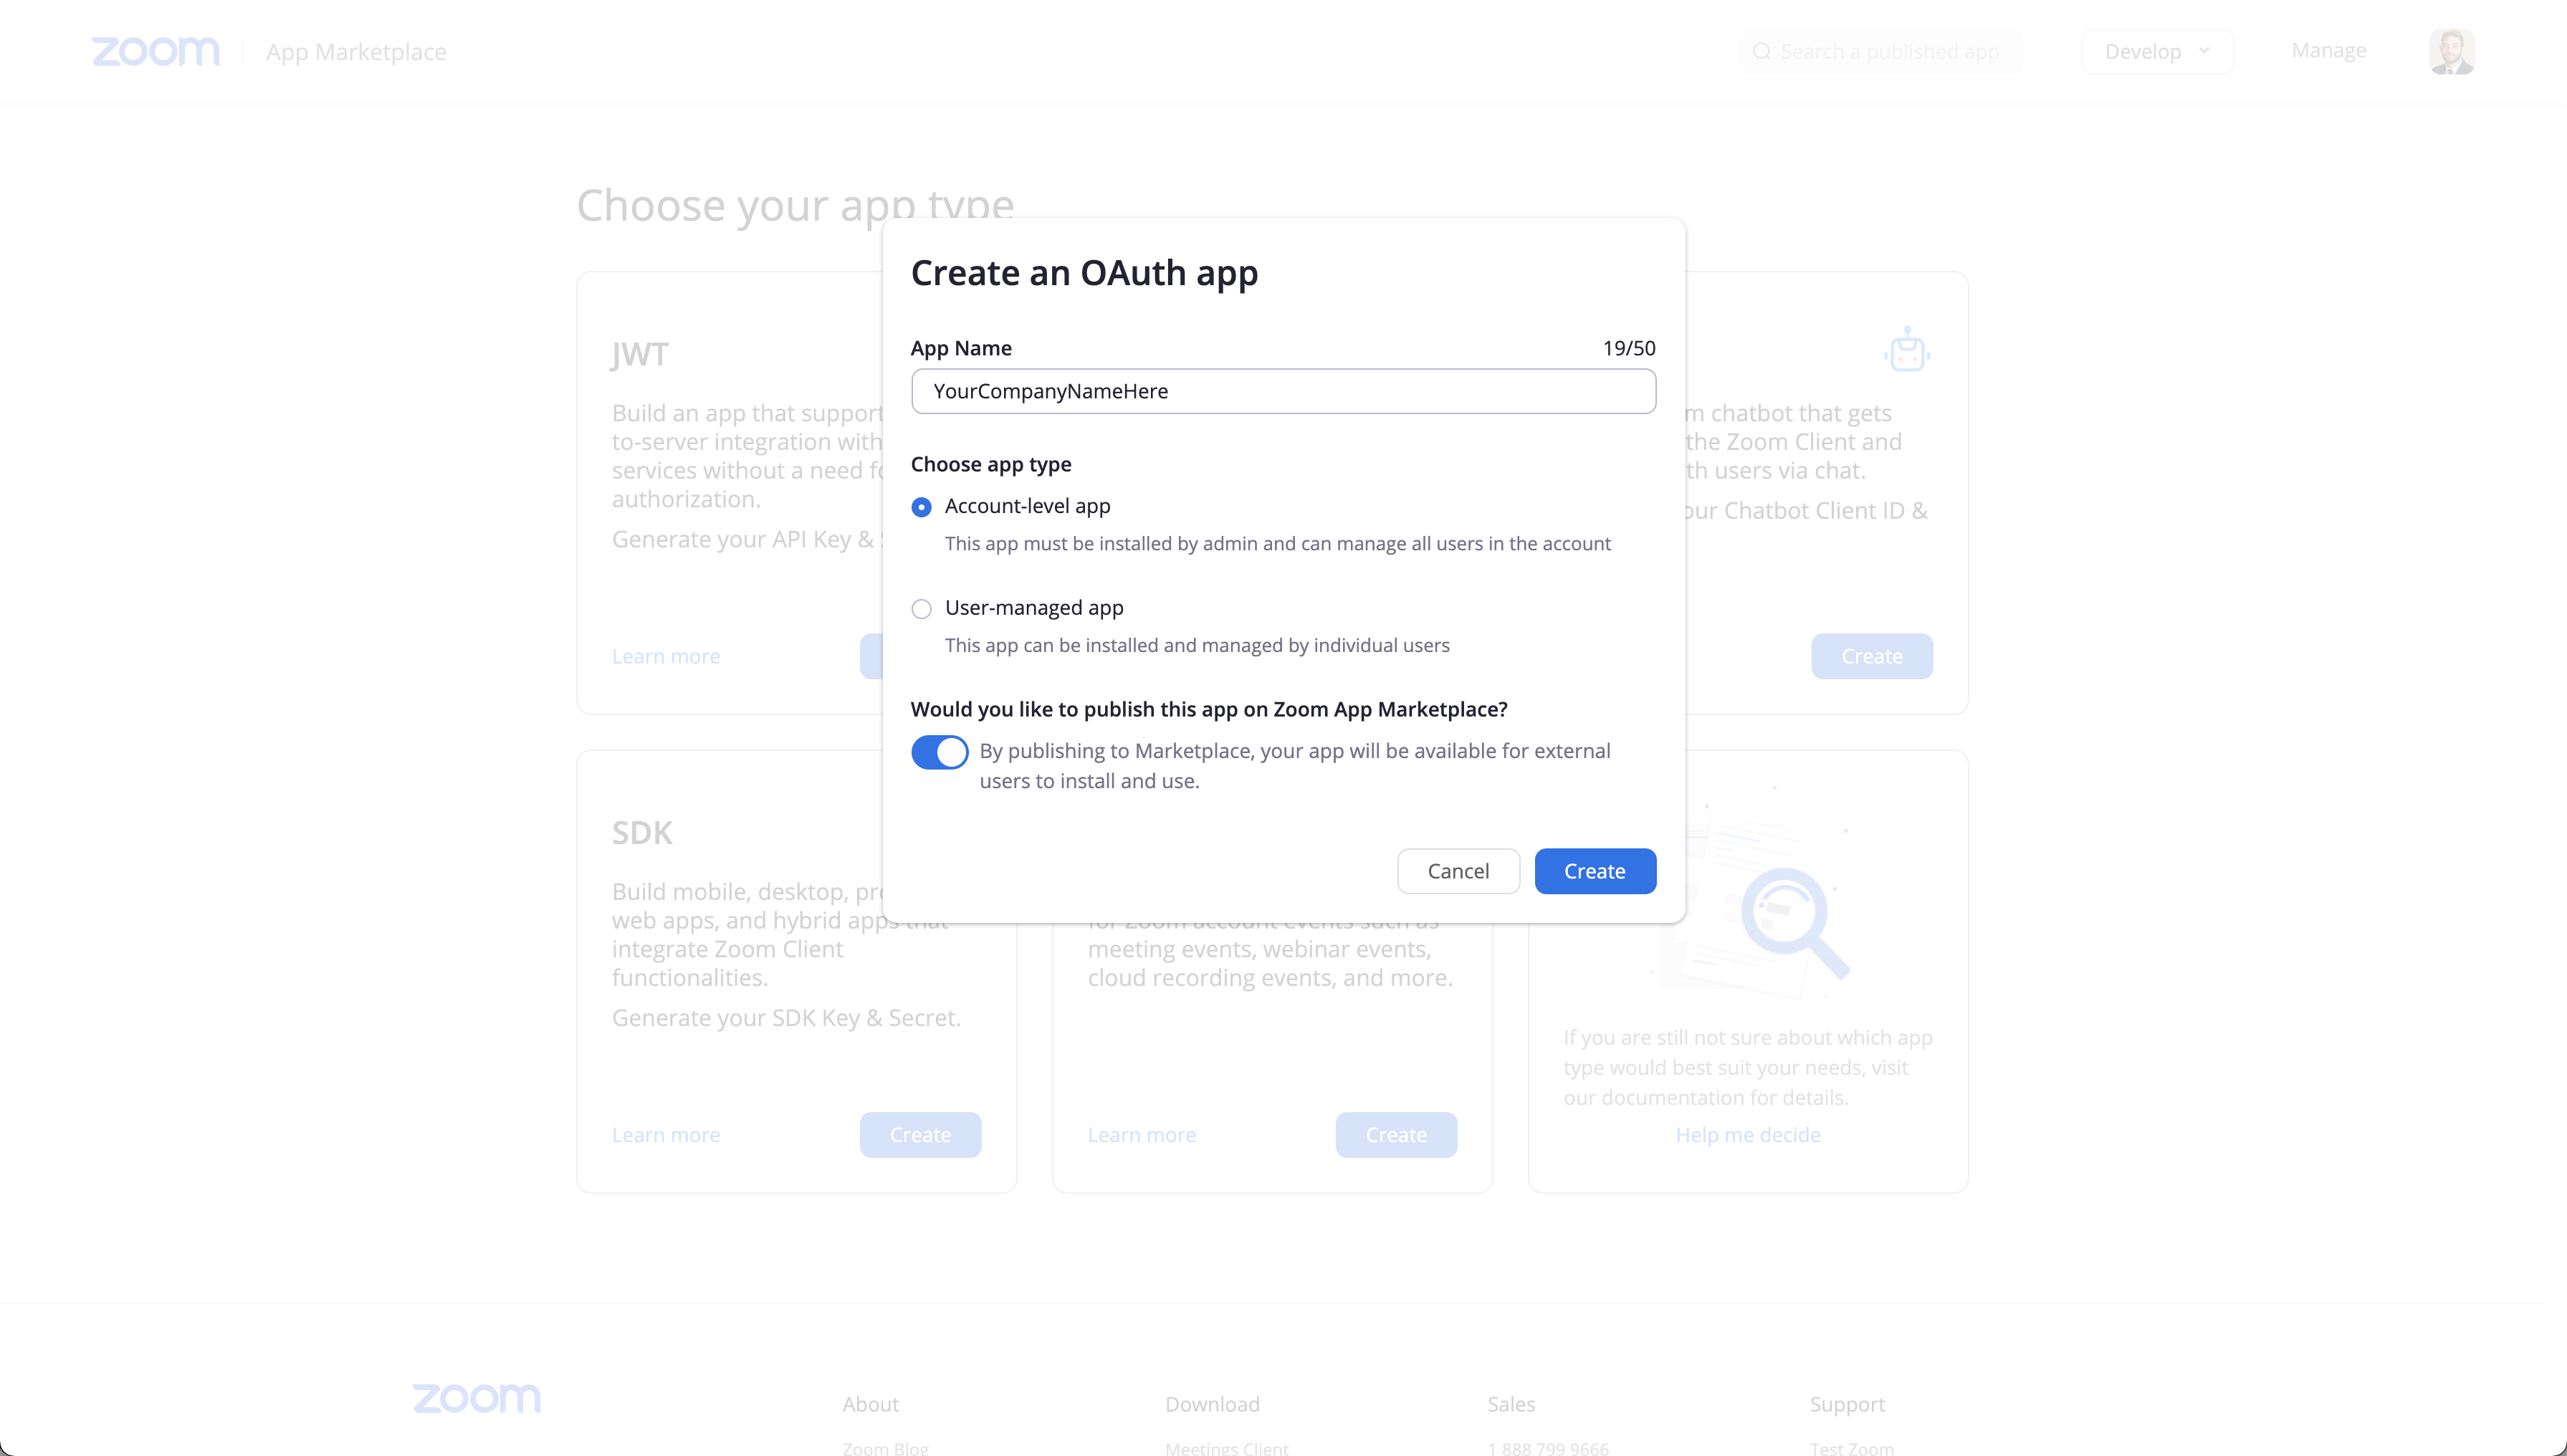 On this page, you should go ahead and name your app the name of your company or tool that you will want users to be connecting their Zoom accounts to. It is important that you make your app type Account-level app. For the last toggle, if you want your app to be on the Zoom App Marketplace, leave the toggle on!
Once done, click the Create button.
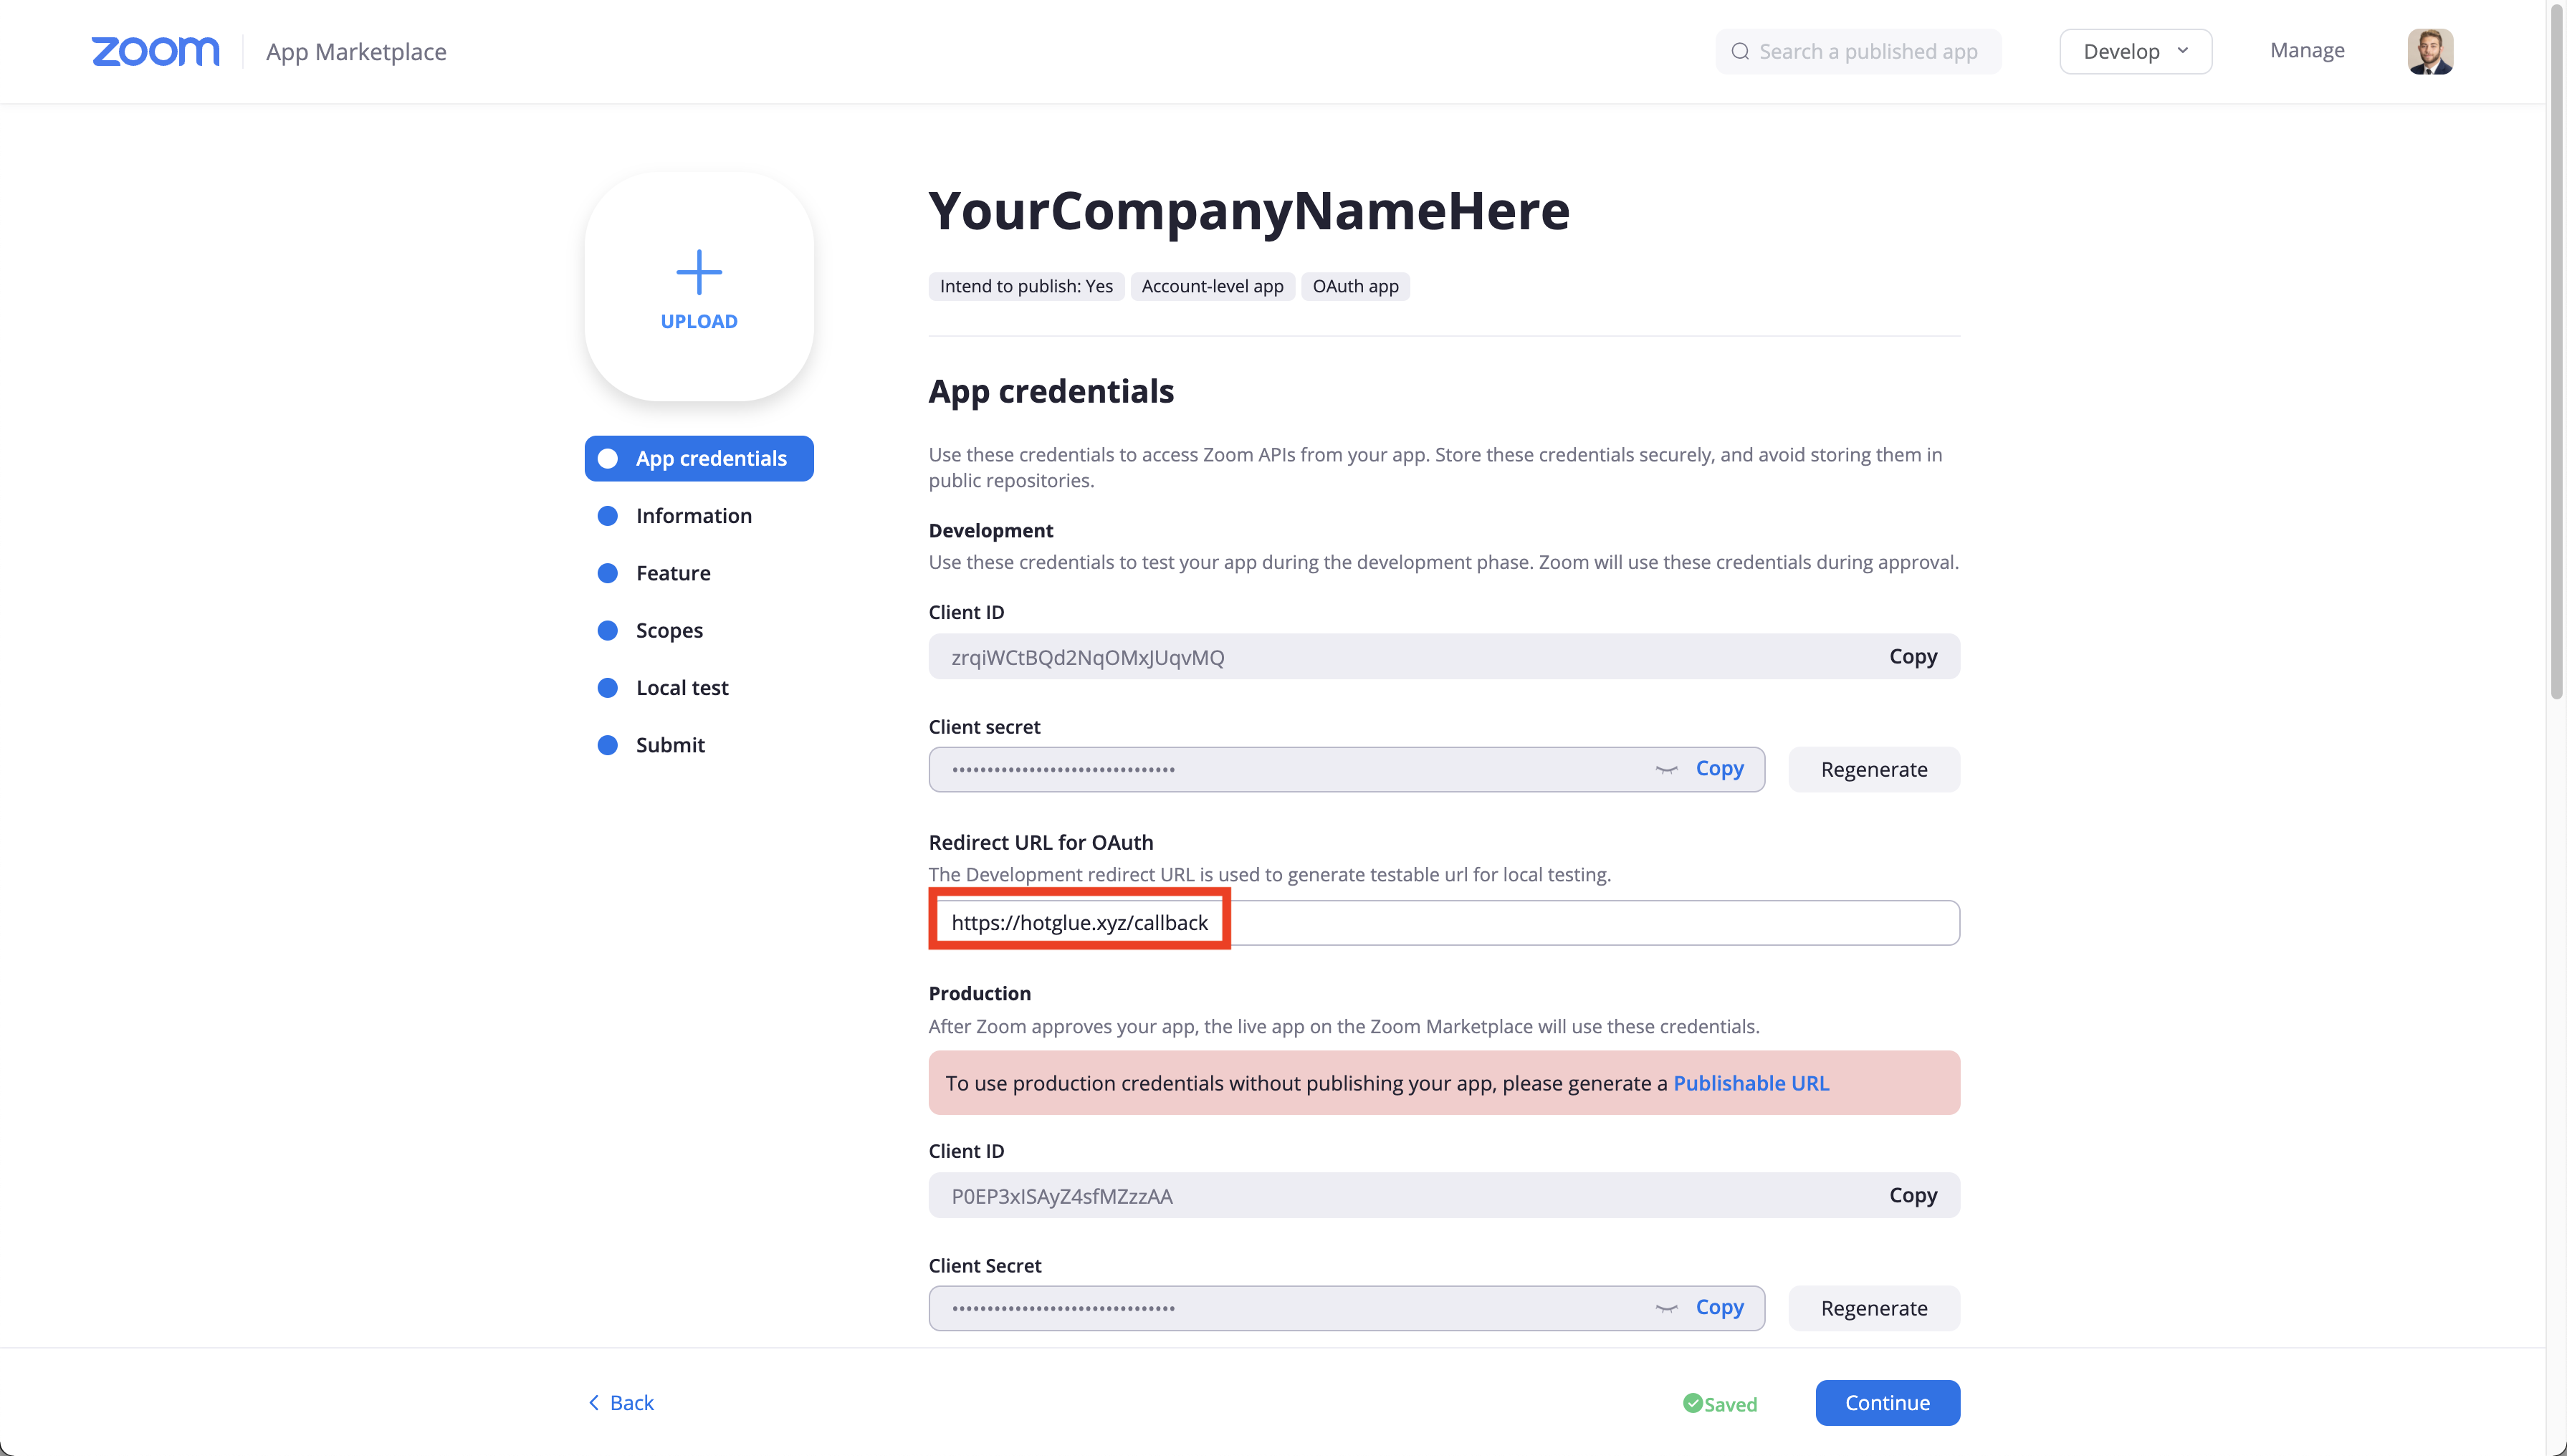 You will now be on this page. The next thing you need to do is put
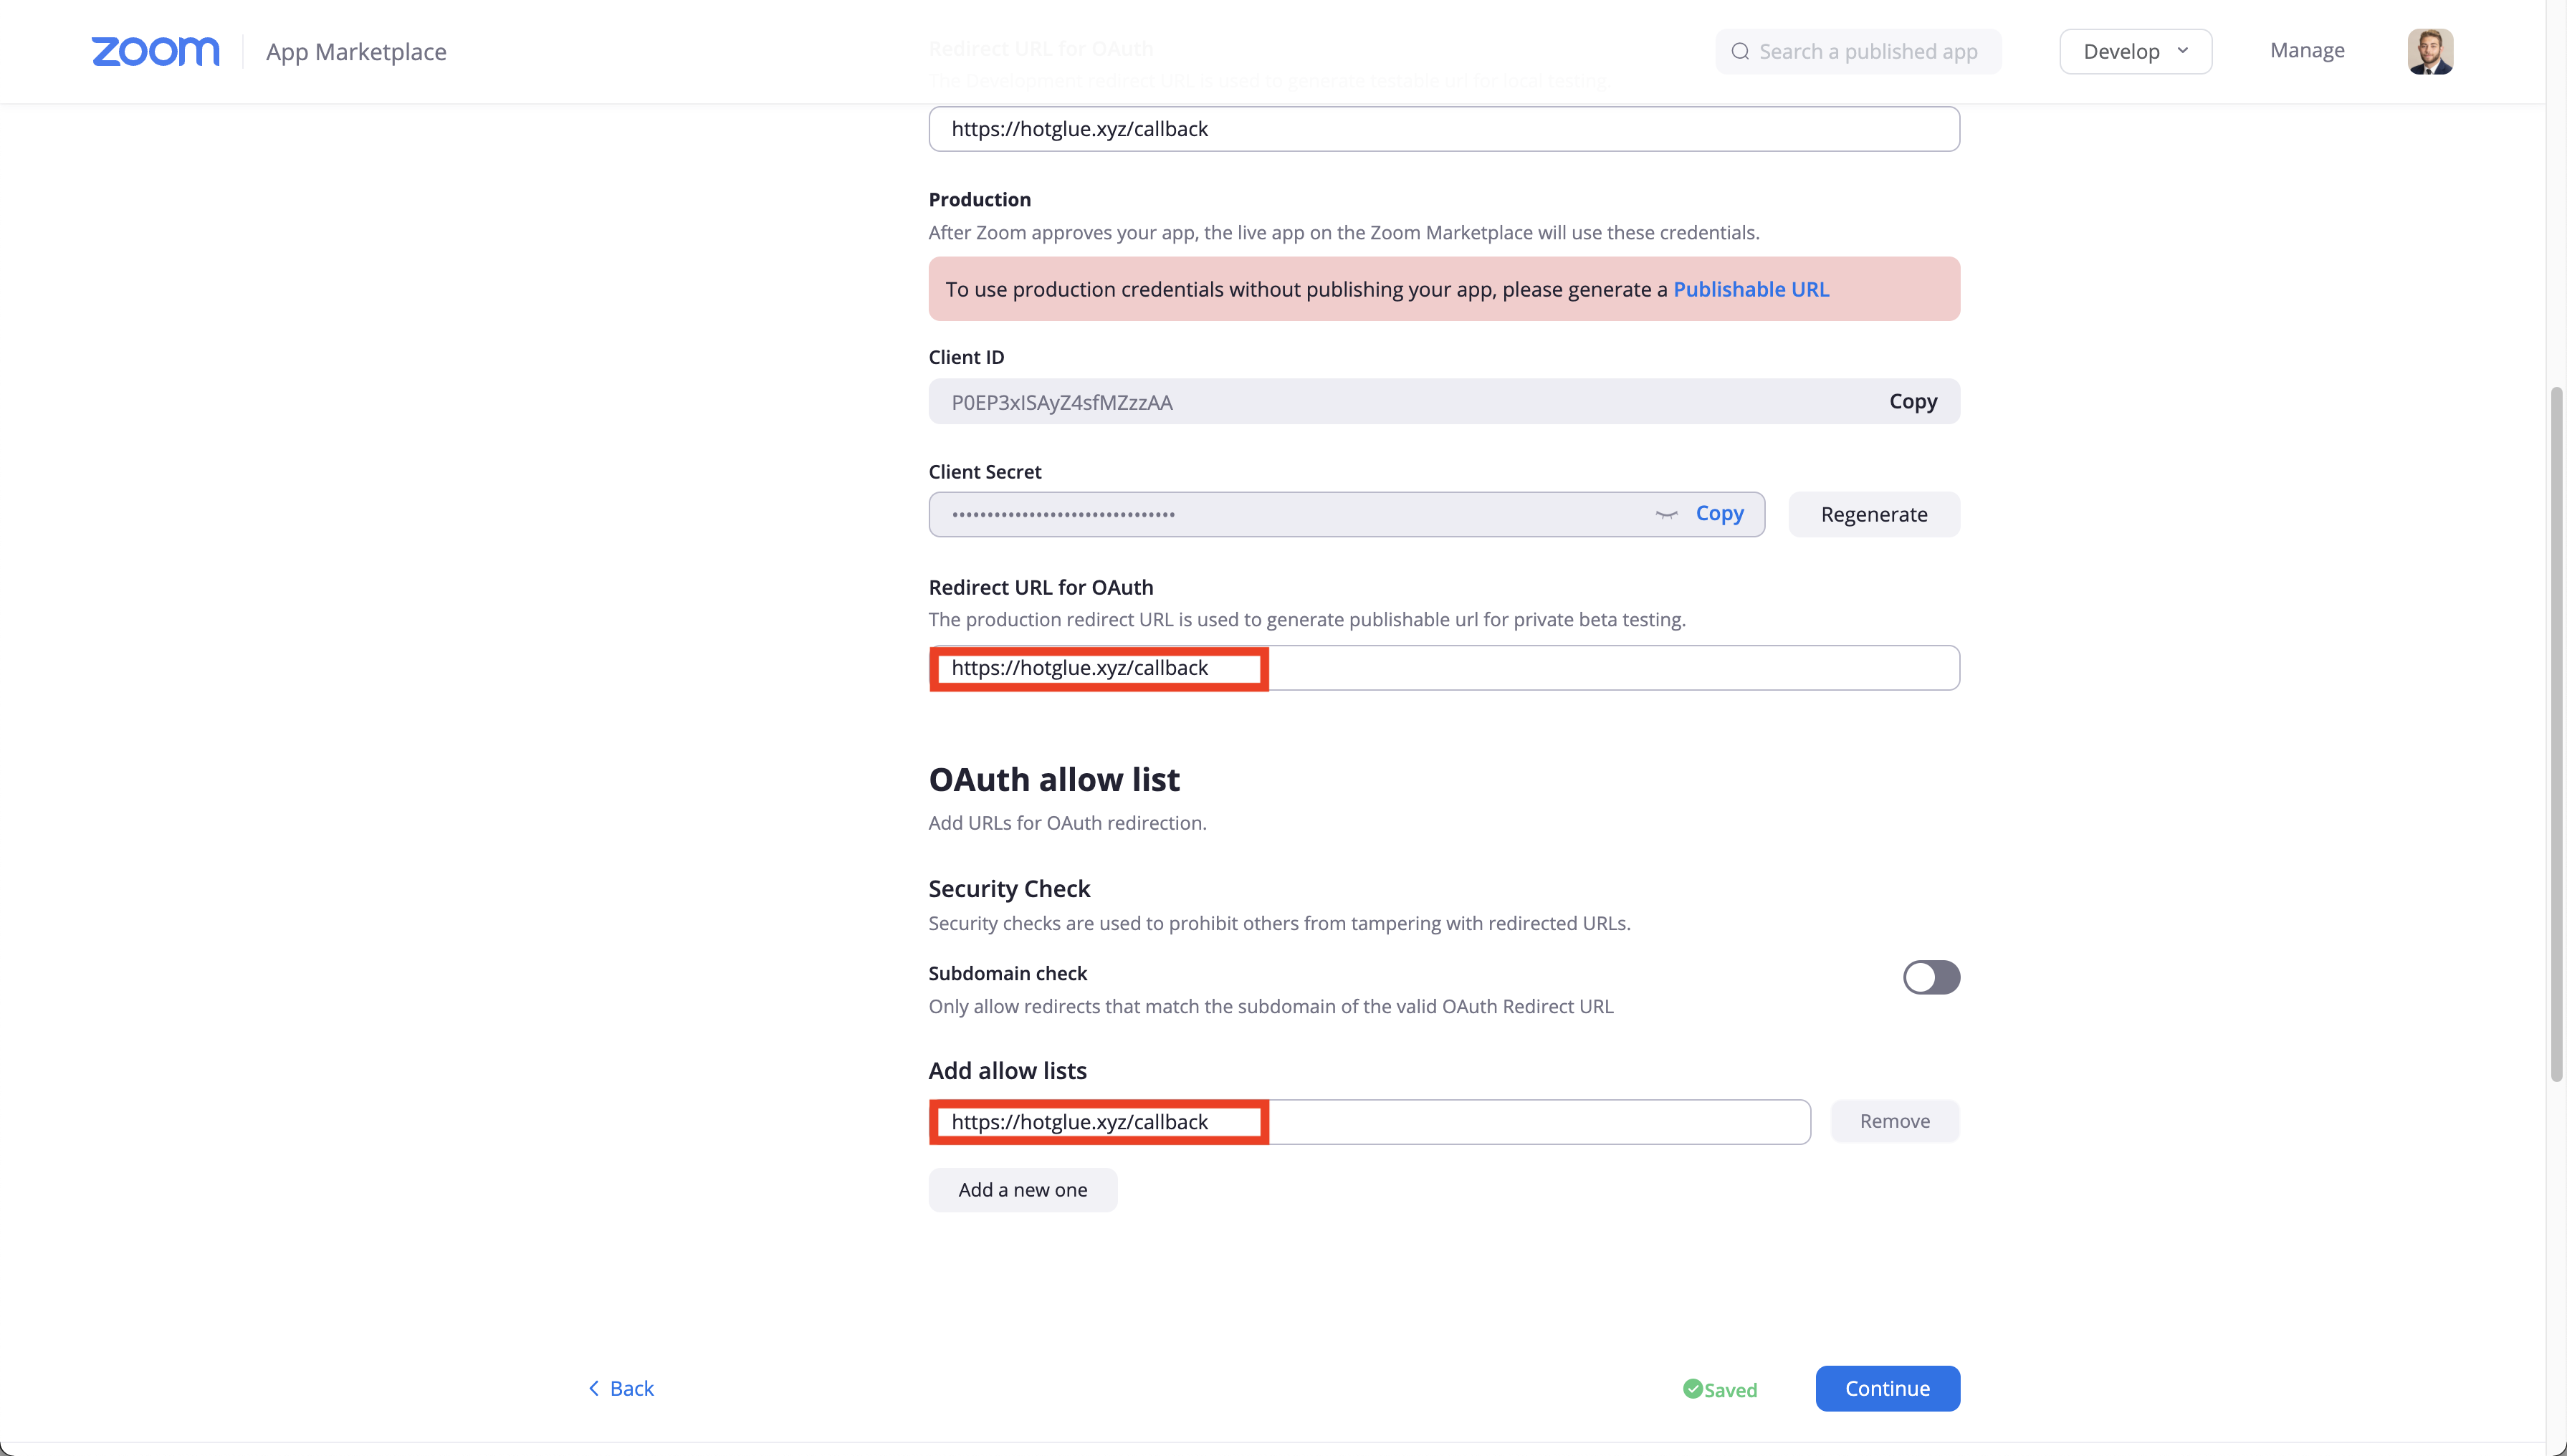 Then you will need to scroll down the page and input the same link in the Redirect URL for OAuth in Production, as well as the Add allow lists section. Once done, click Continue in the bottom right hand corner of your screen.
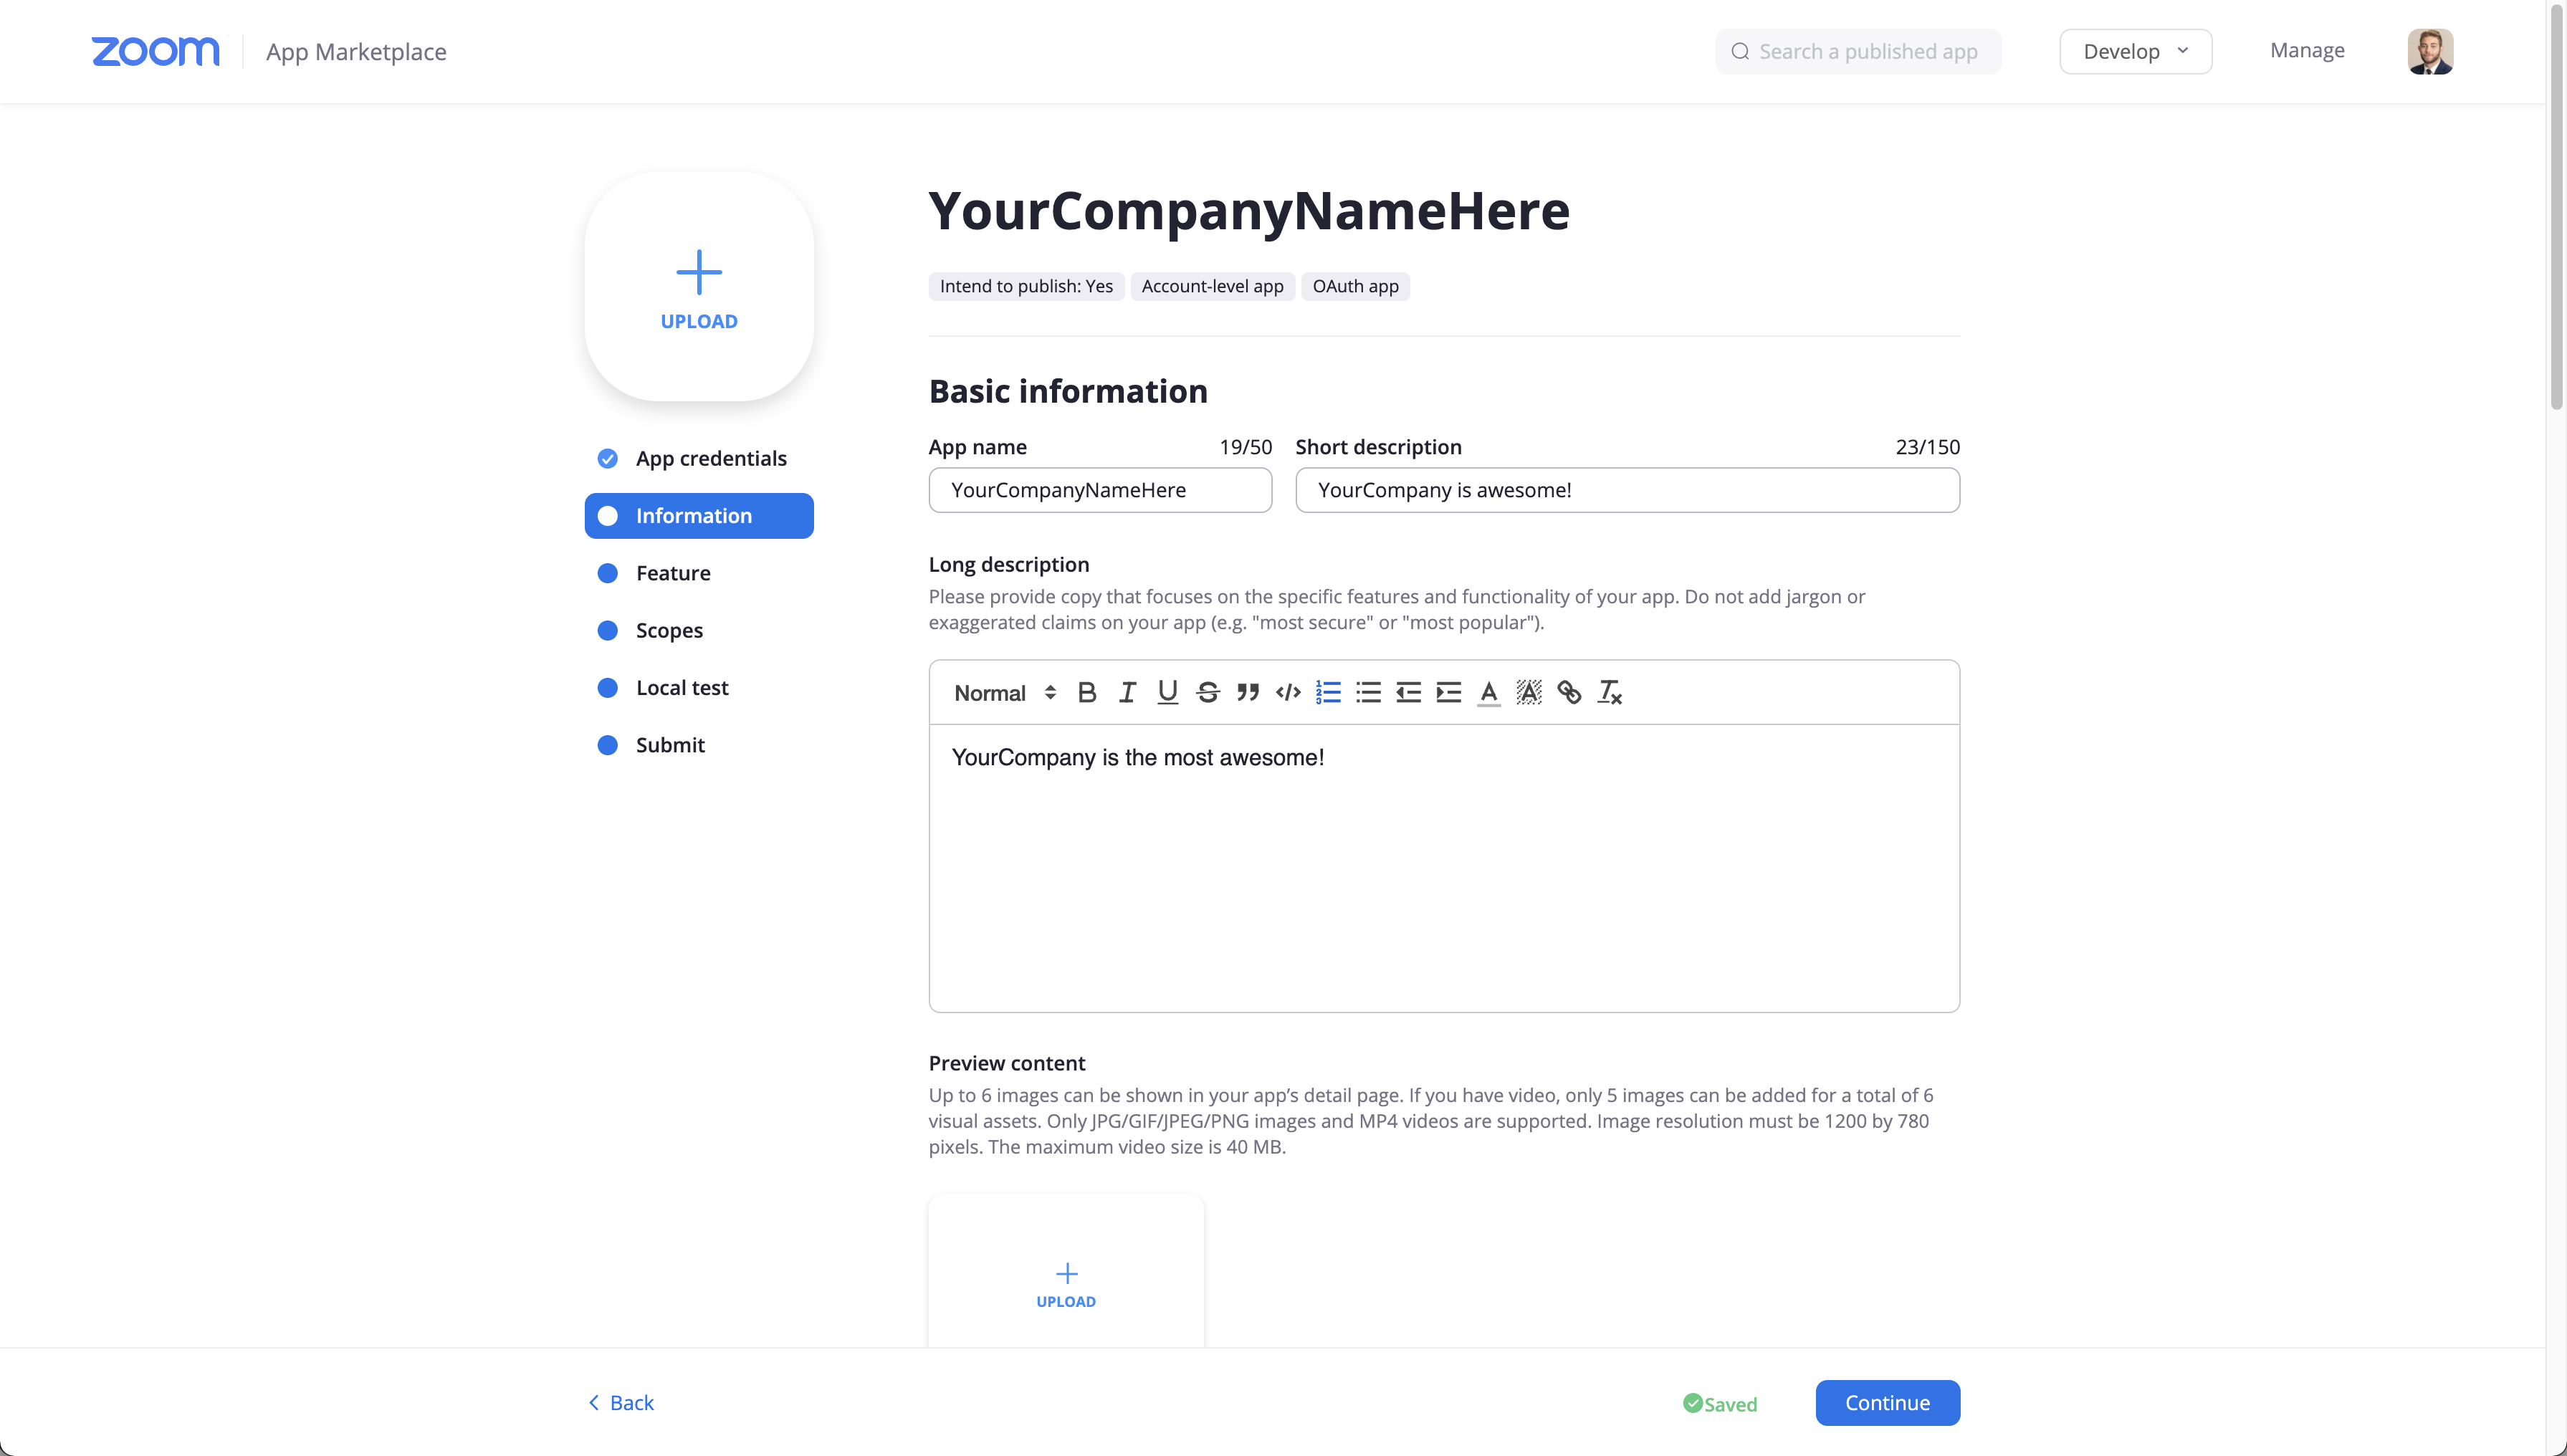 Now you should go ahead and fill out all your information here.
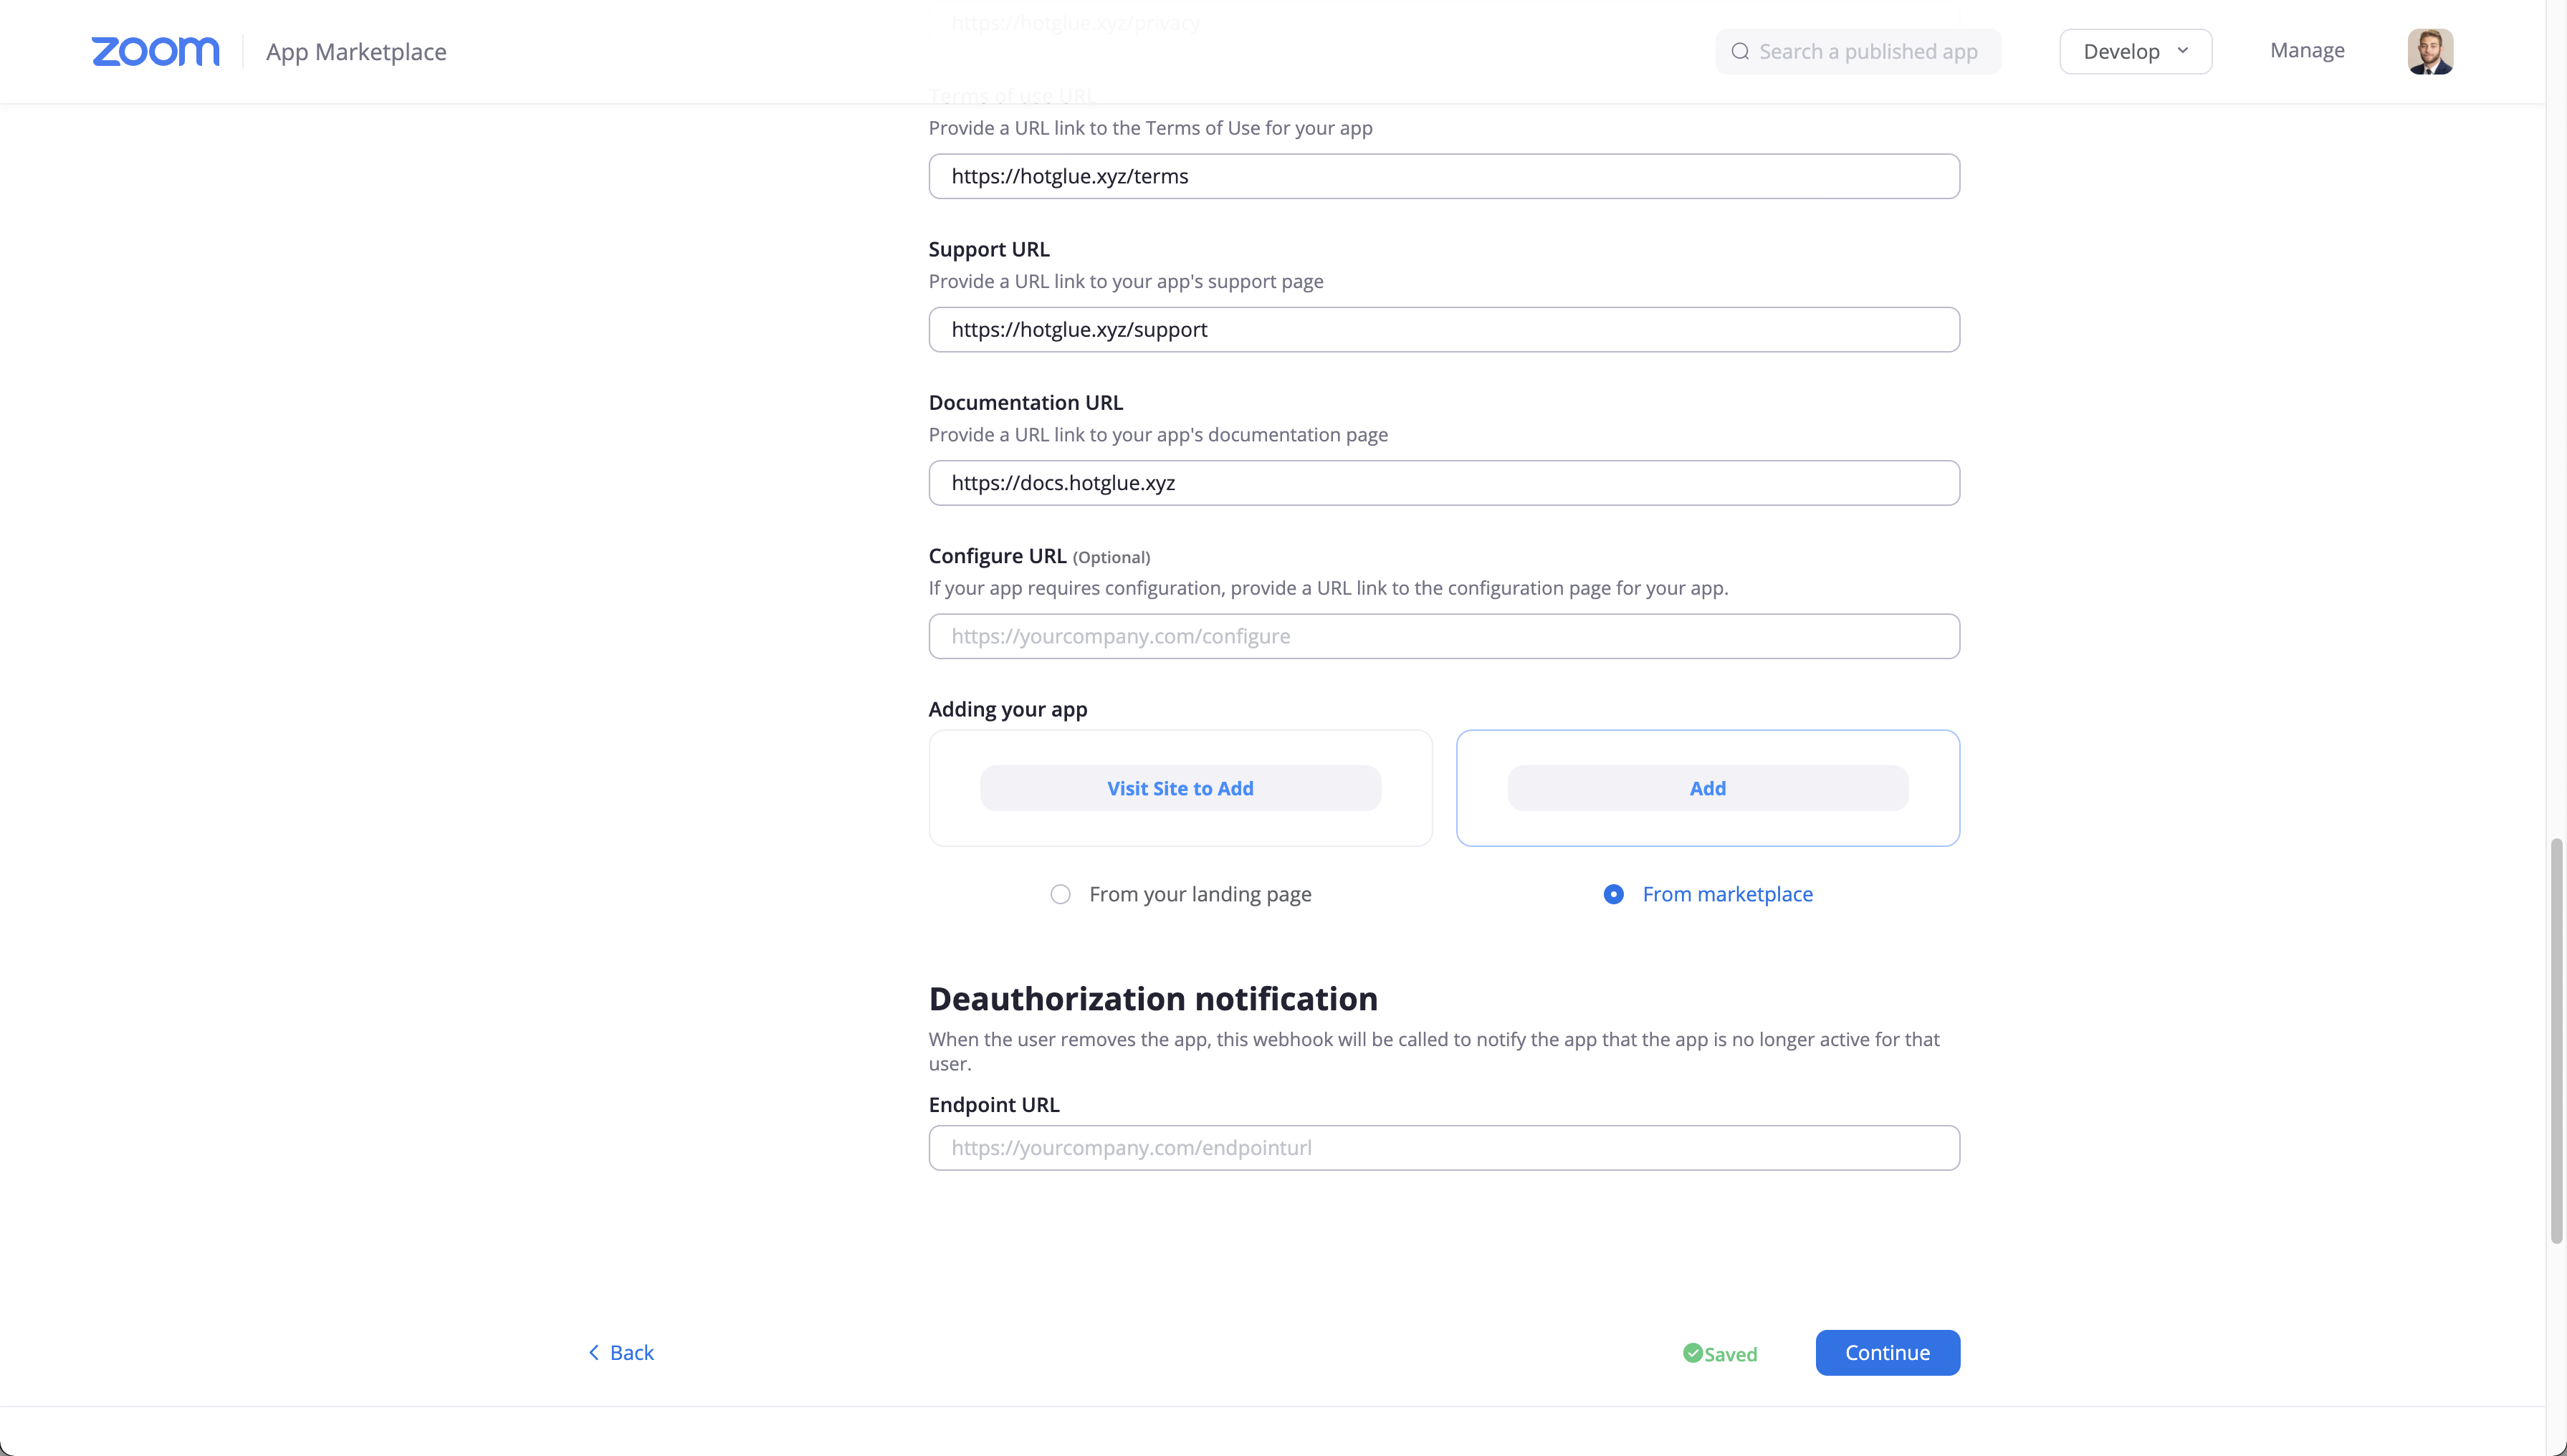 Once you fill out all your information, go ahead and click continue.
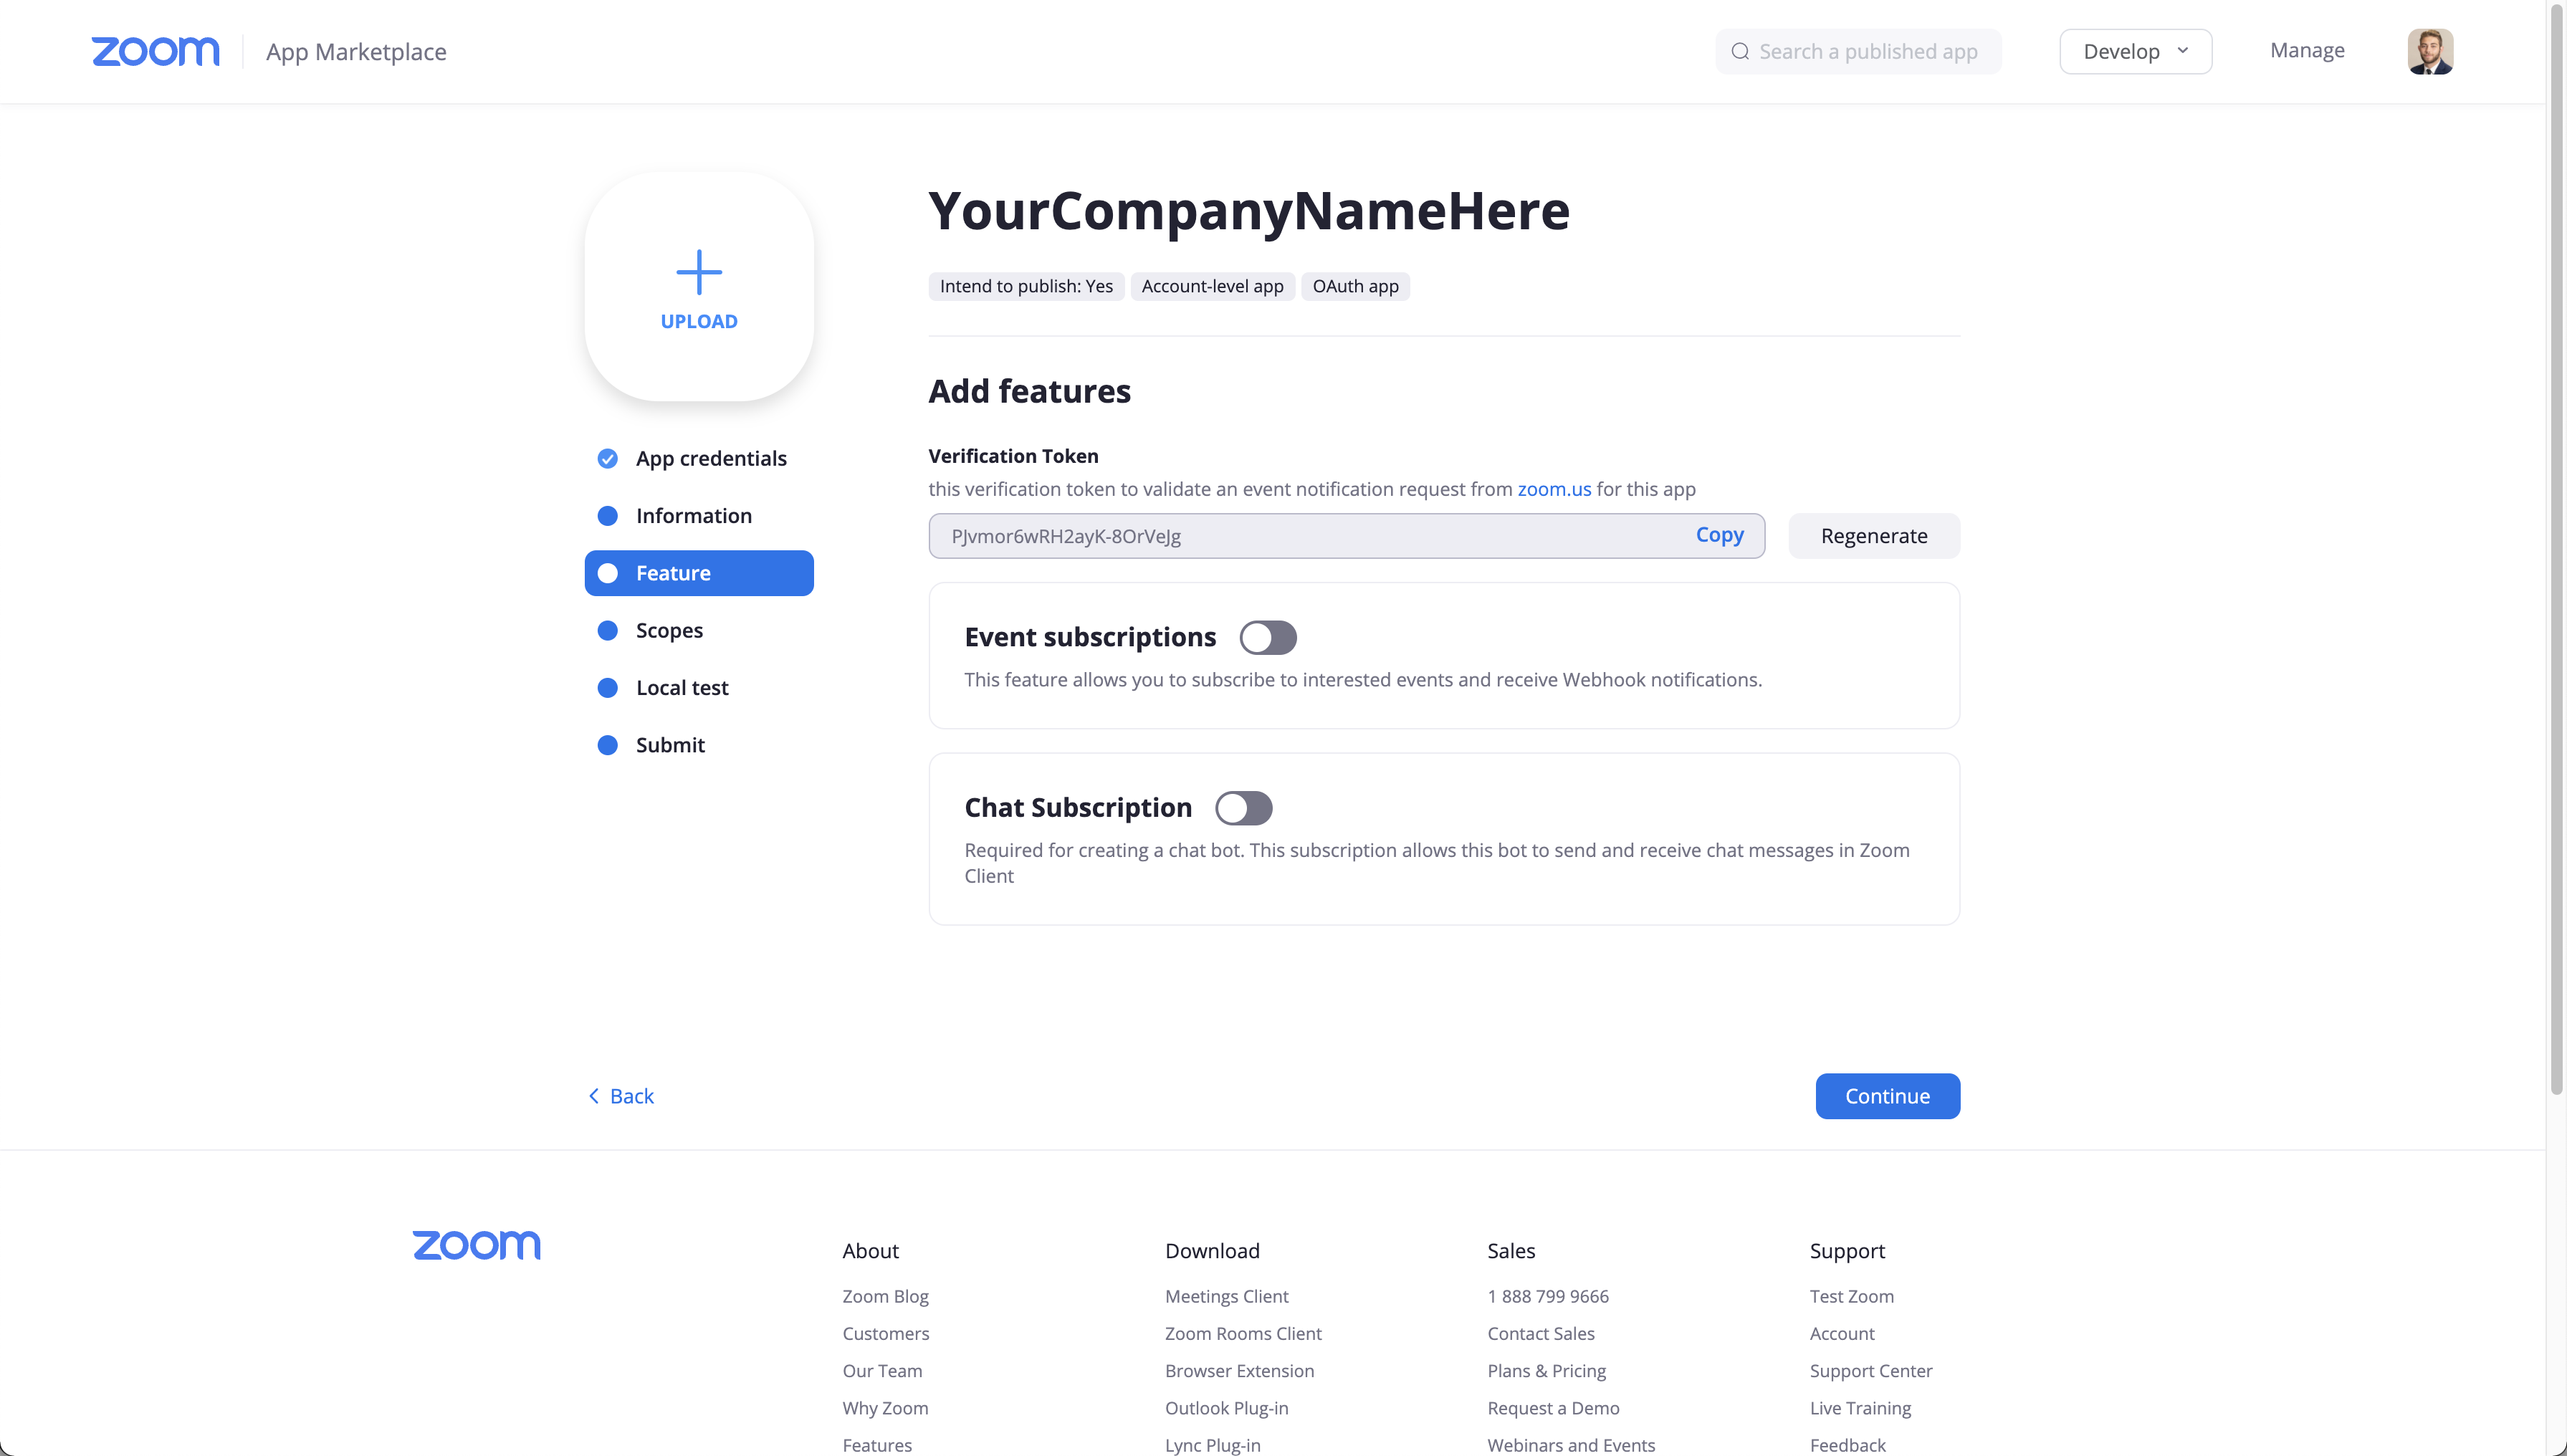 You will then be on this page which you can skip - click the Continue button.
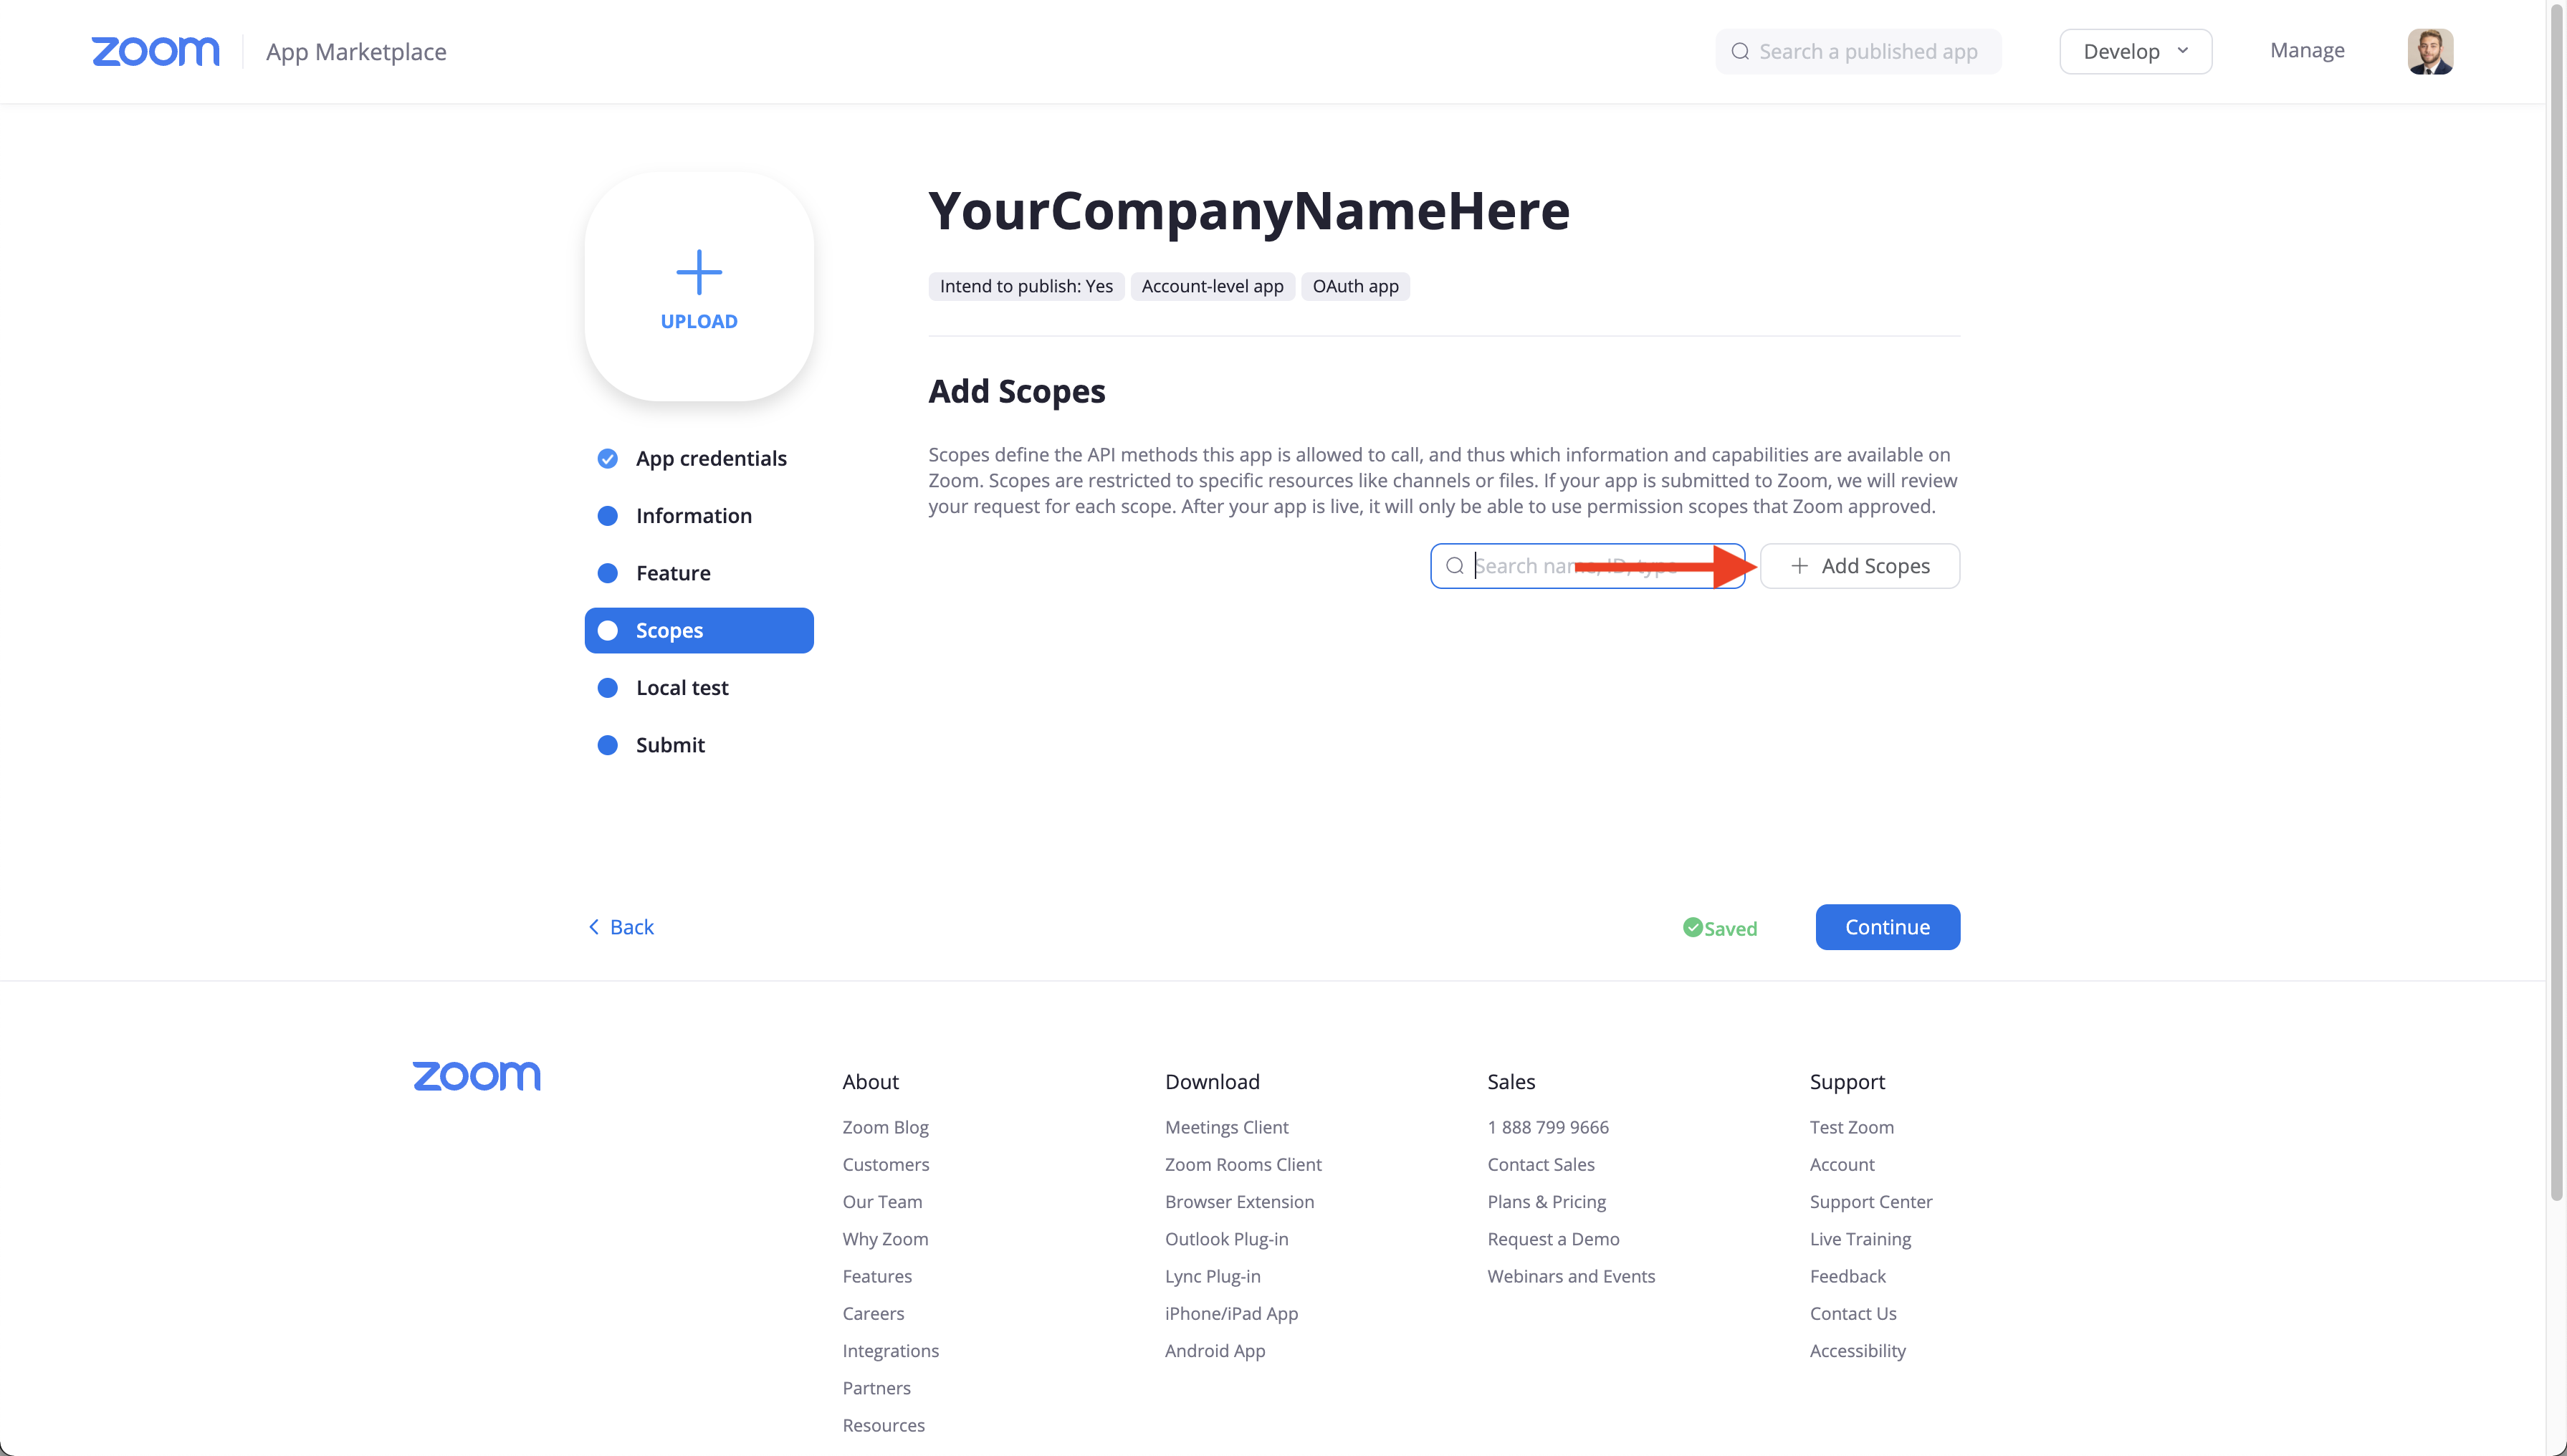 You are now on the scopes page, and your app configuration here is very important. To add scopes, you need to click the Add Scopes button.
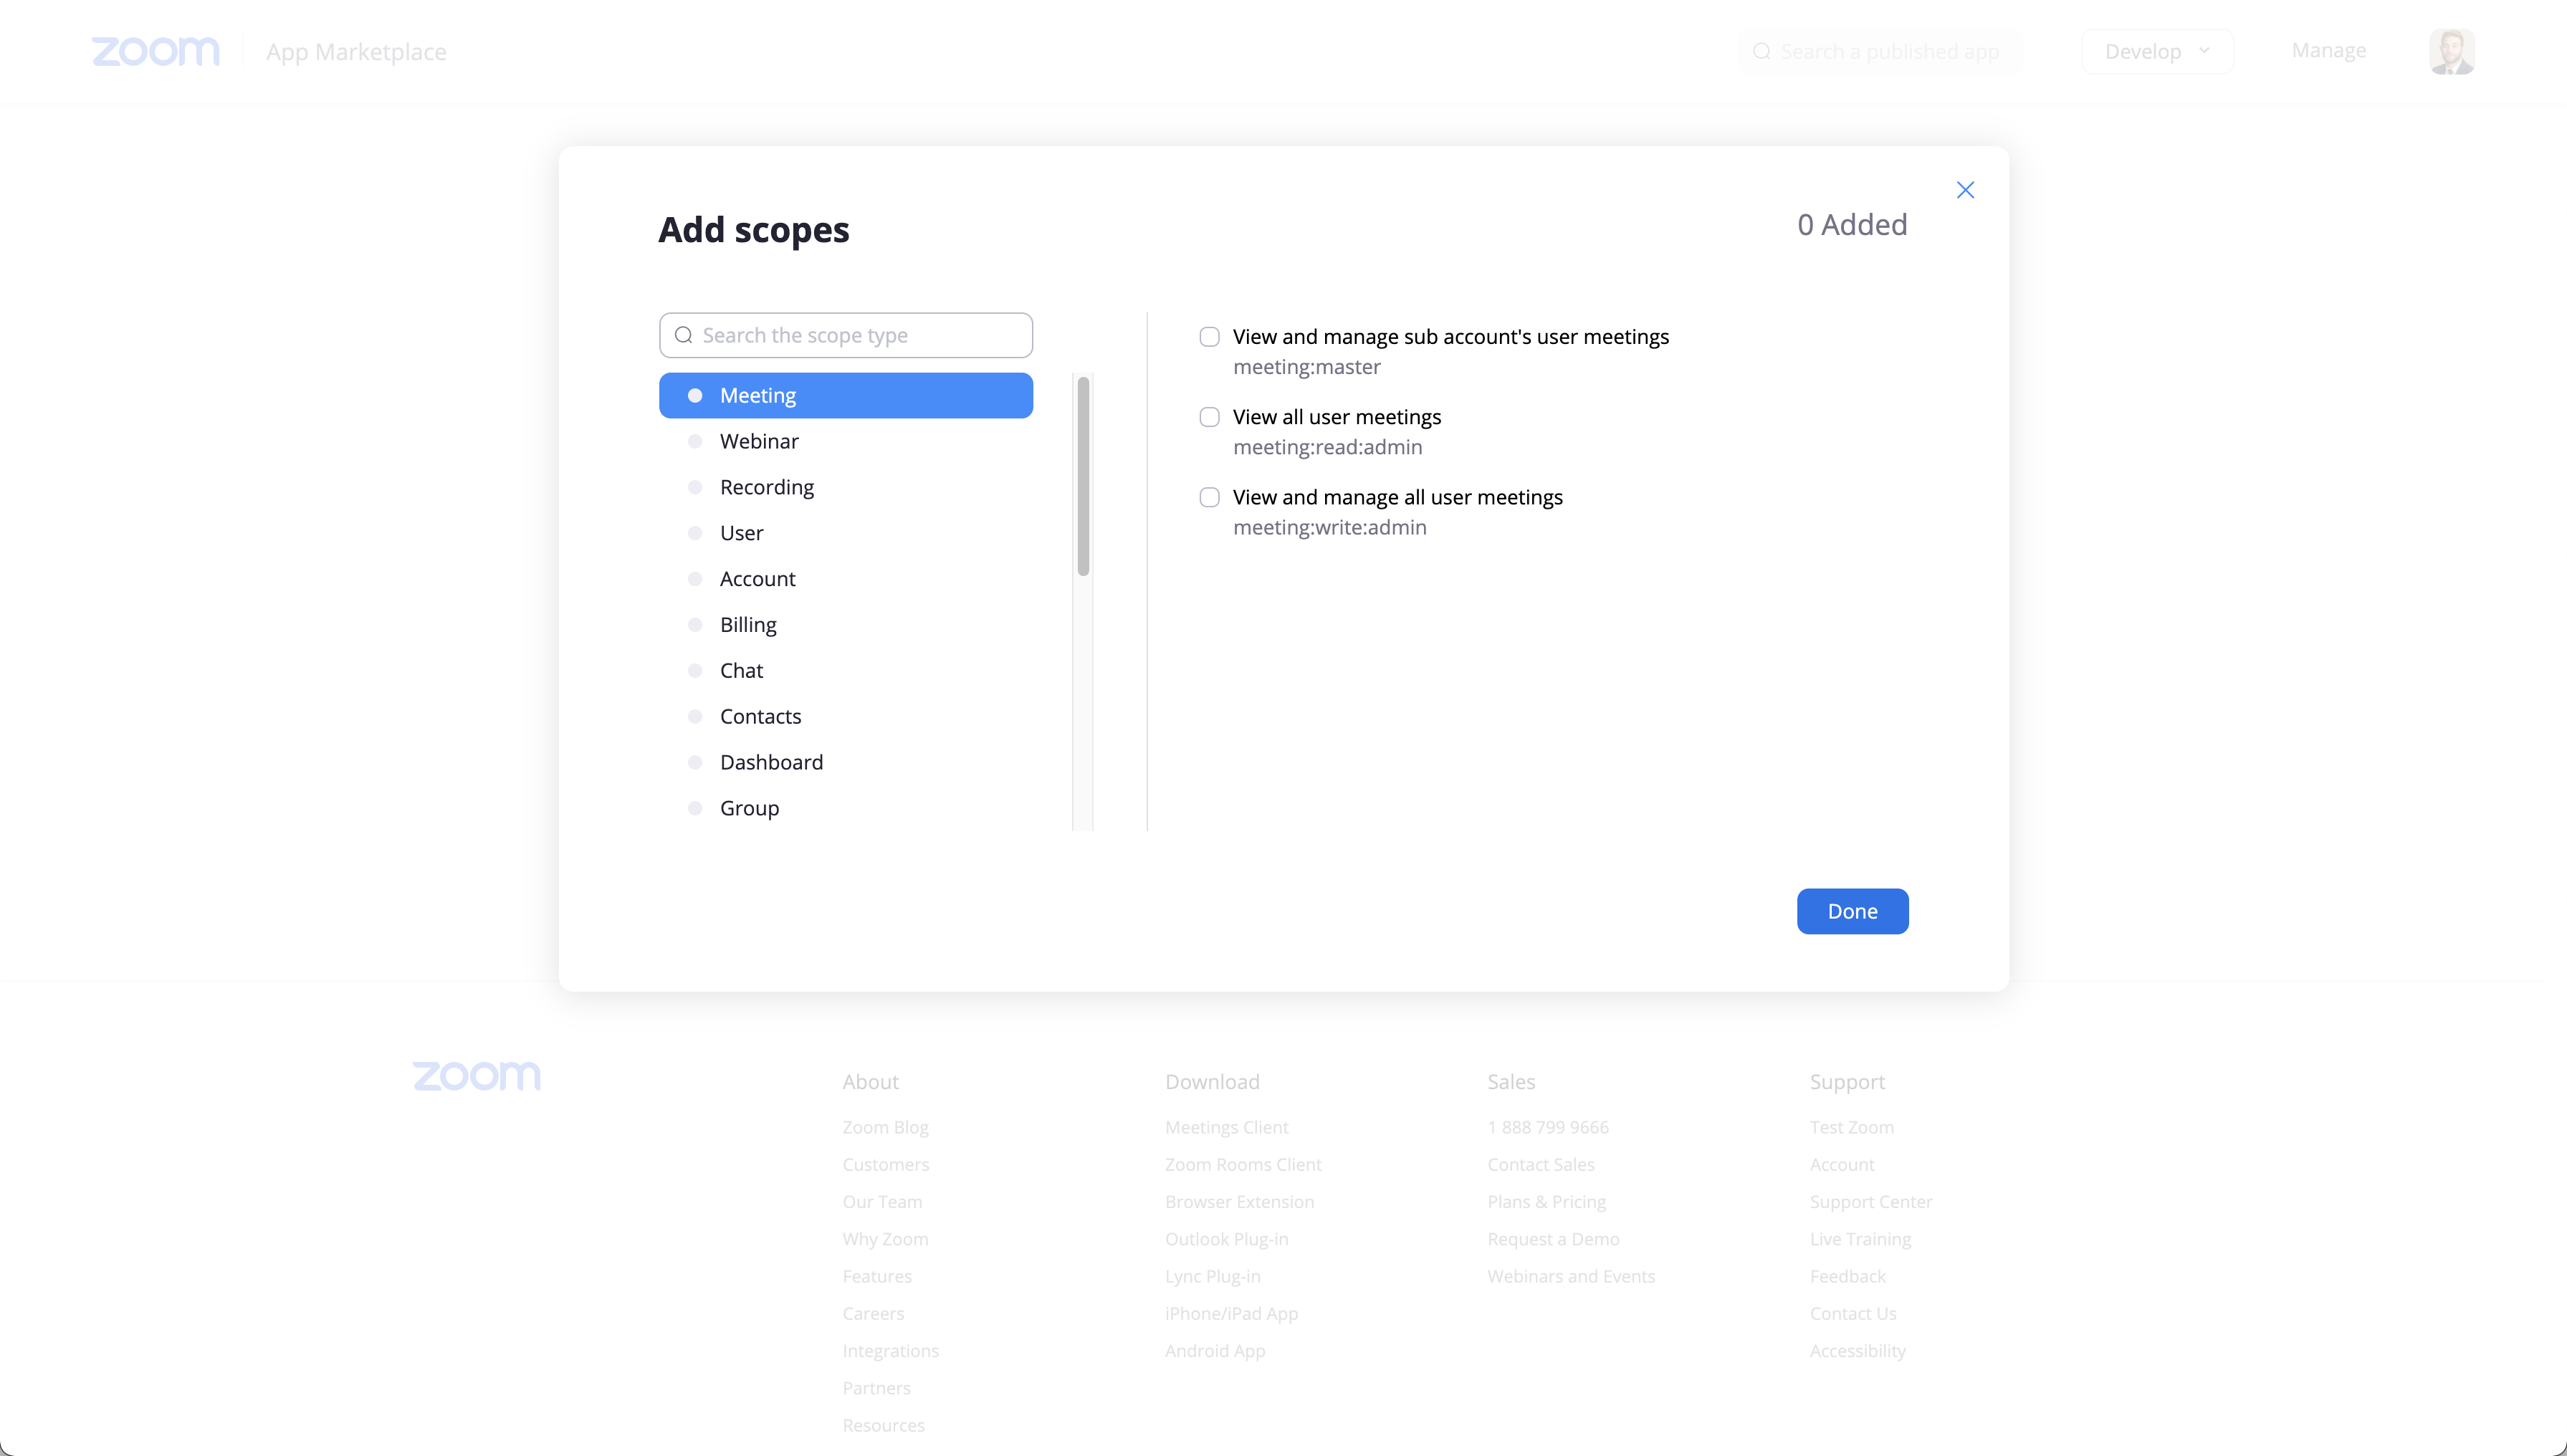 Now is when you are actually selecting the scopes of your app. You need to enable all the scopes listed below:
| Scopes |
|---|
| meeting:read:admin |
| webinar:read:admin |
| user:read:admin |
| account:read:admin |
| report:read:admin |
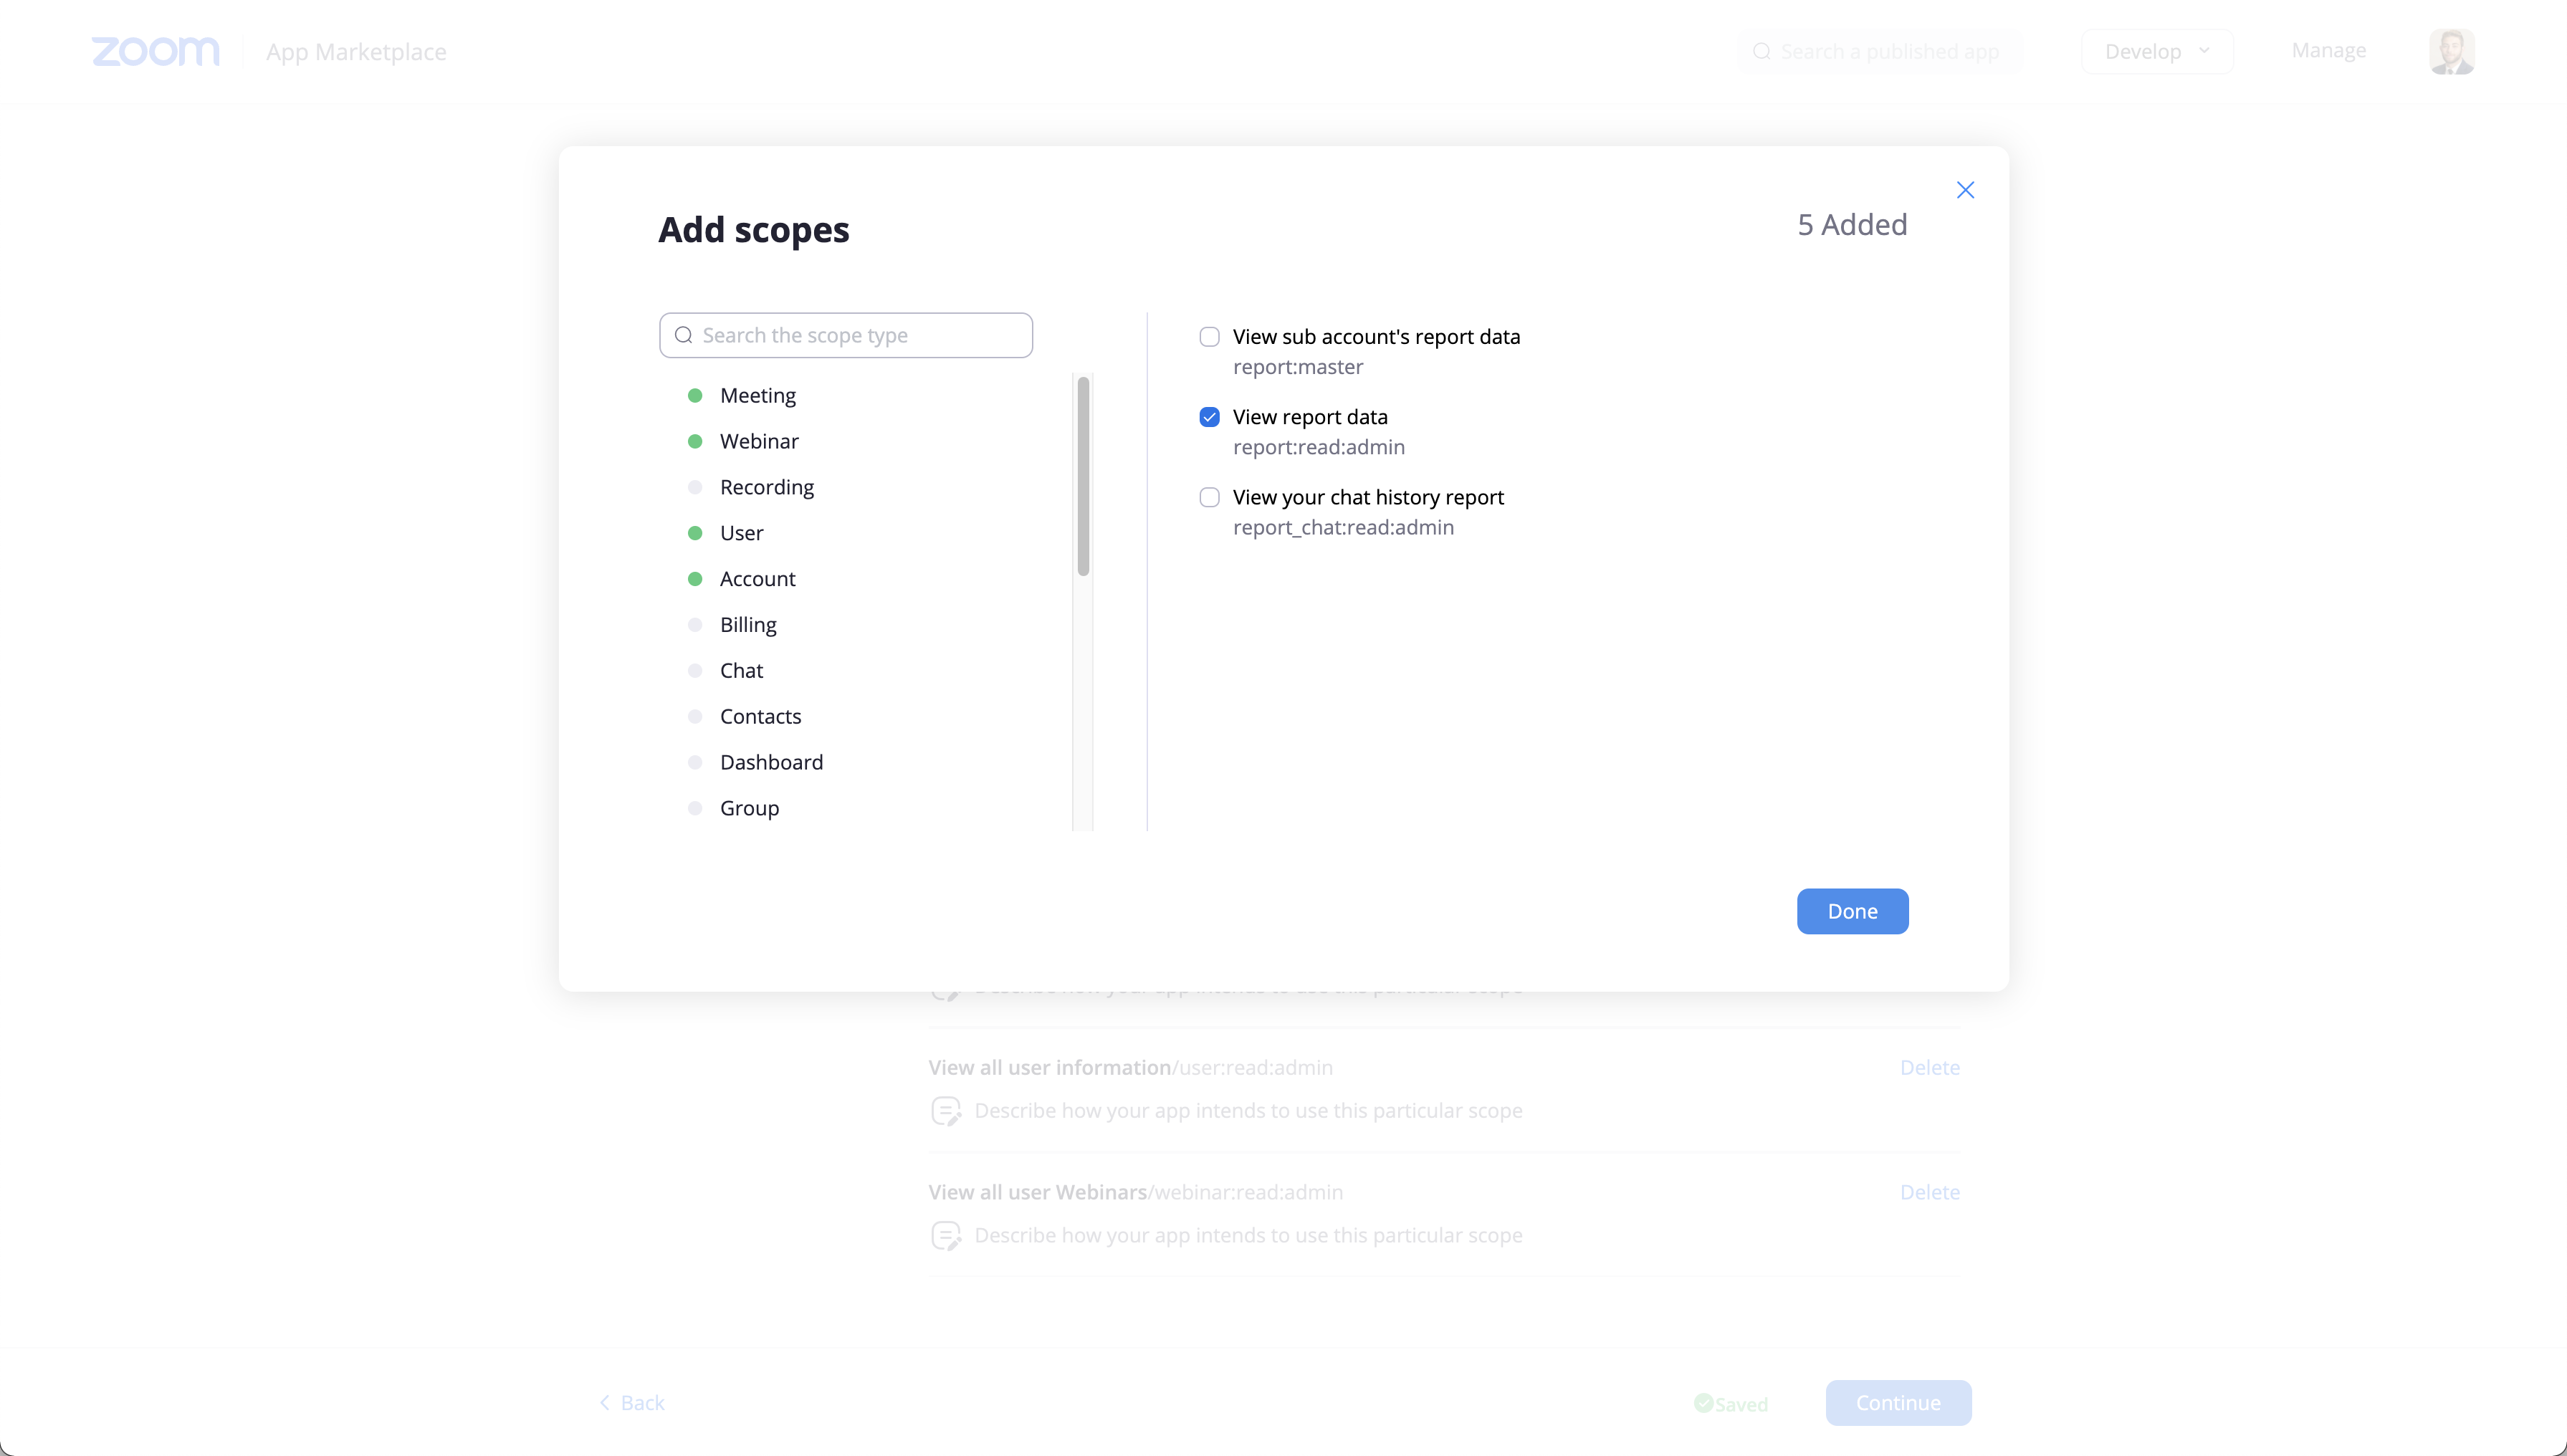 Once you have finished configuring the app, click the Done button.
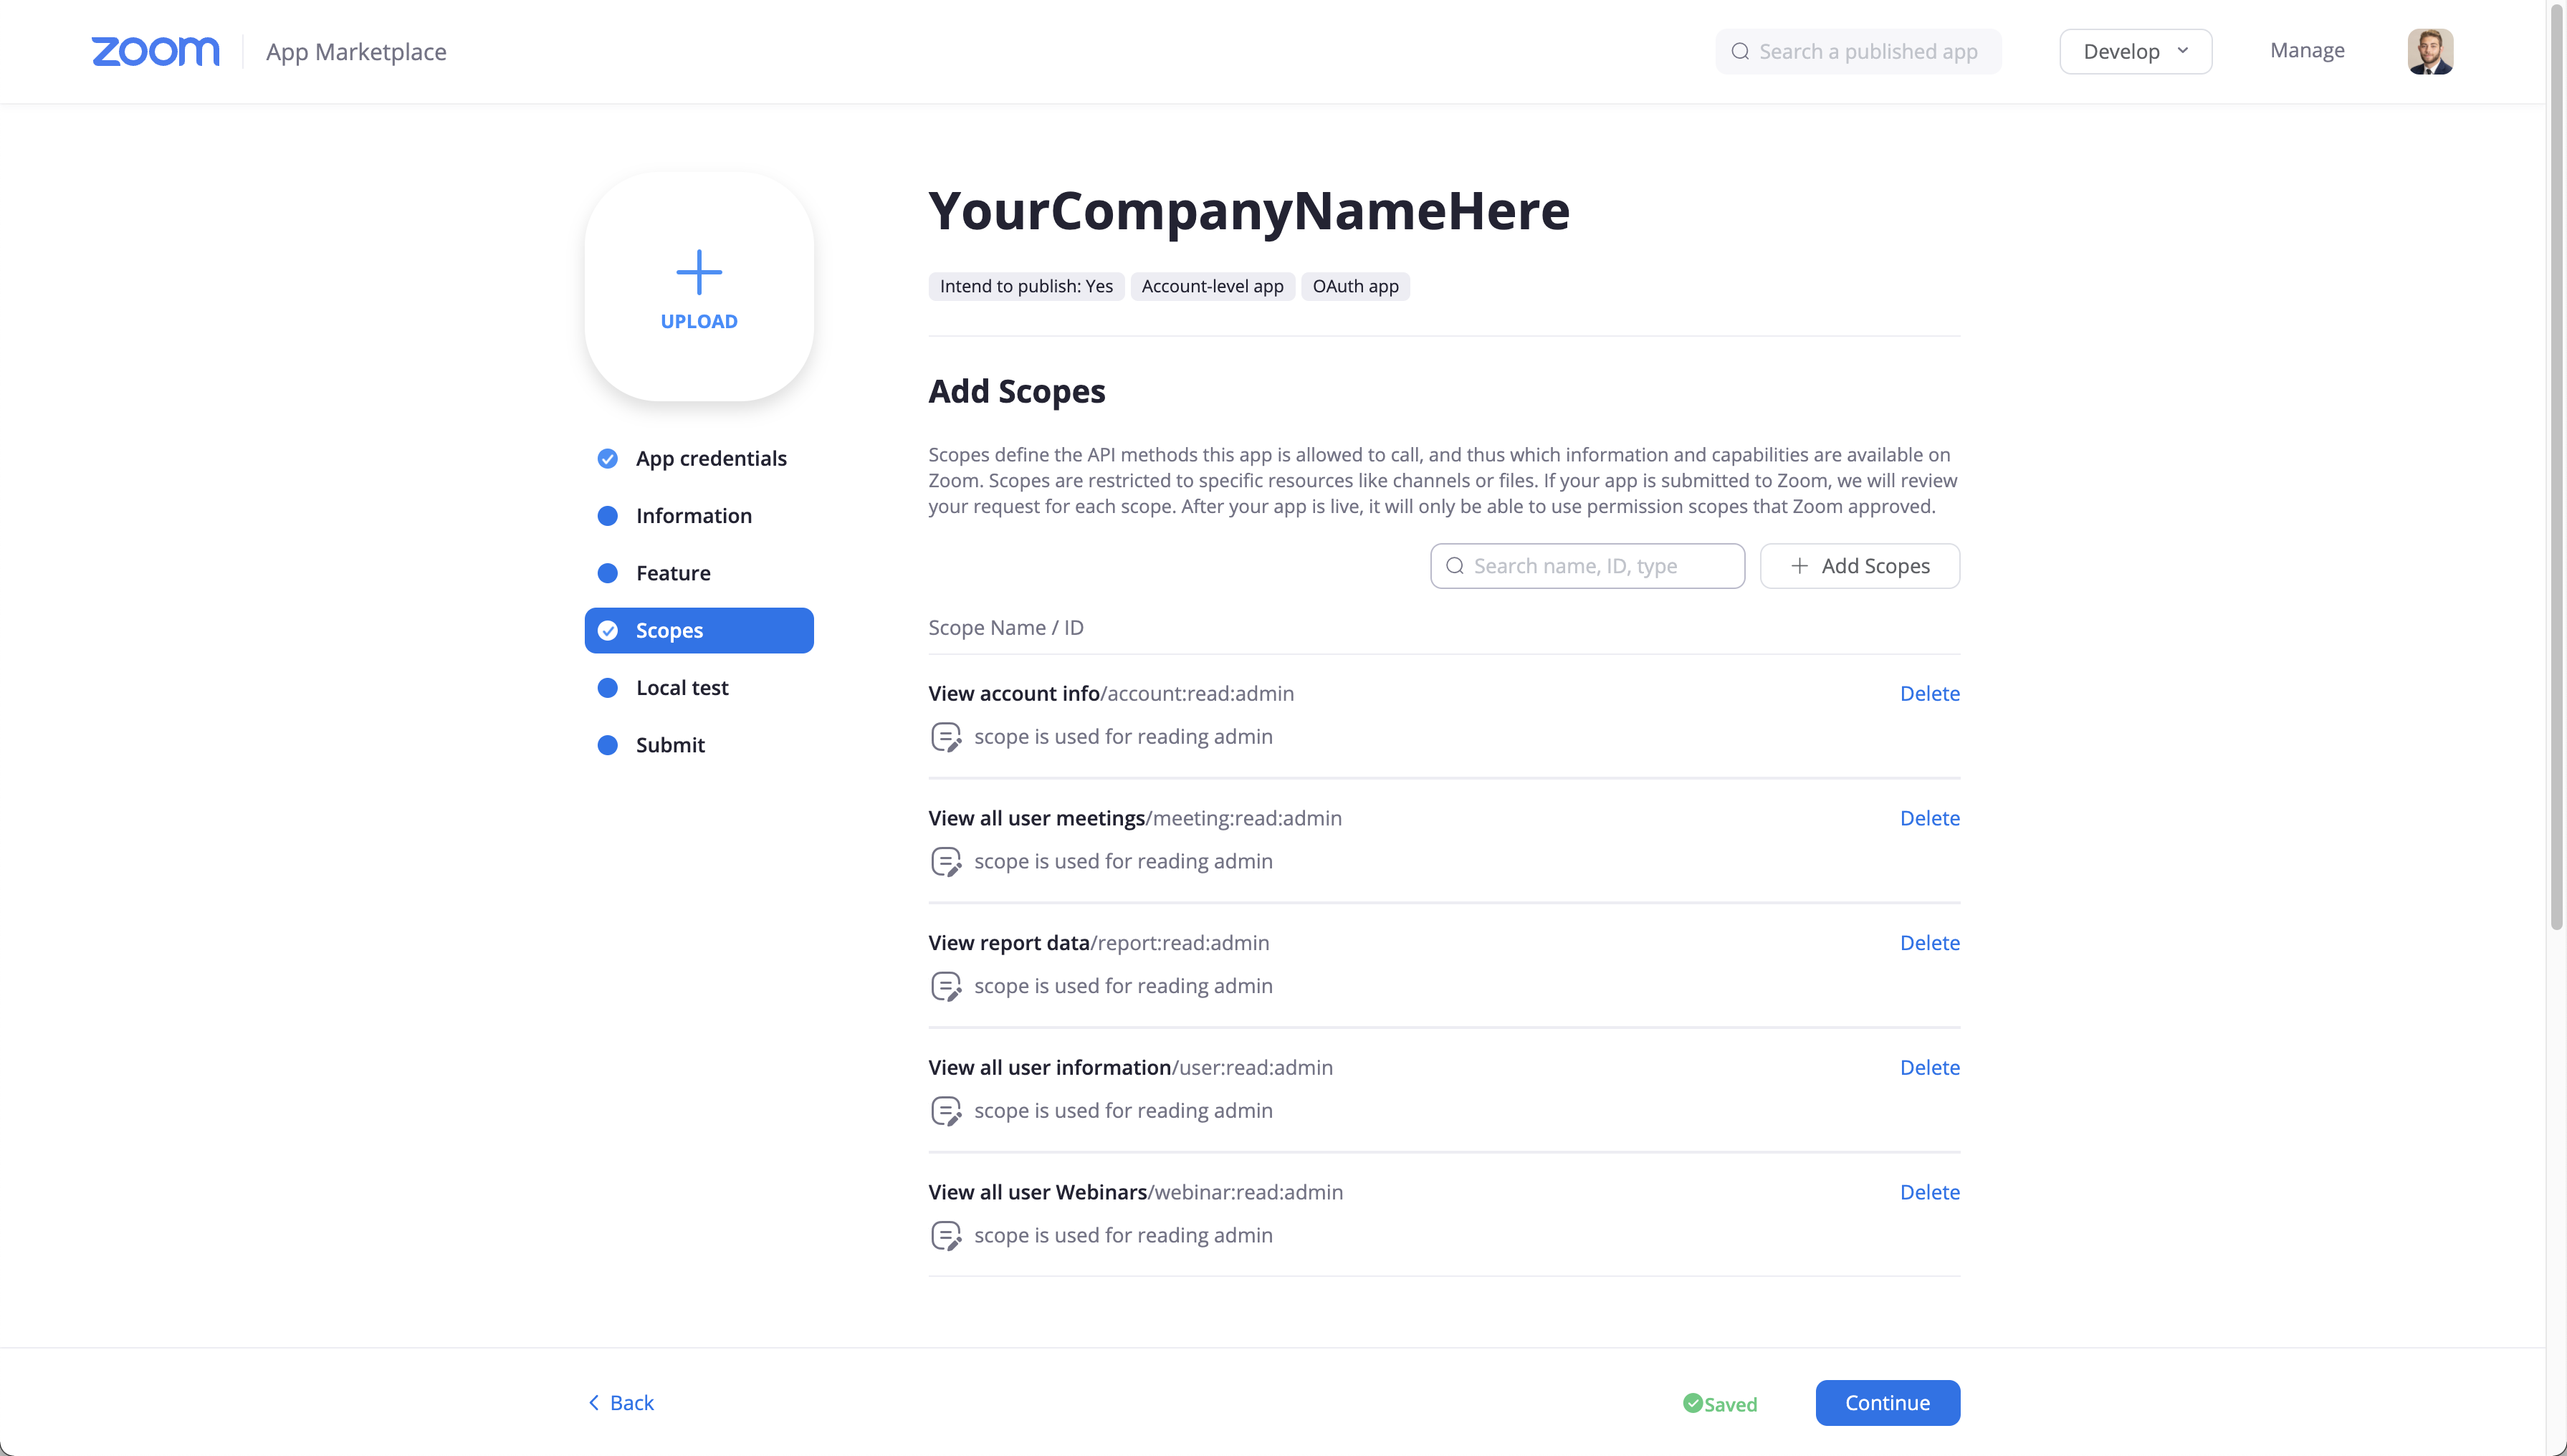 Now that you have added your scopes, you have to give descriptions for each scope. This is not a big deal, so you can put whatever you like. Once you are done giving descriptions, click Continue.
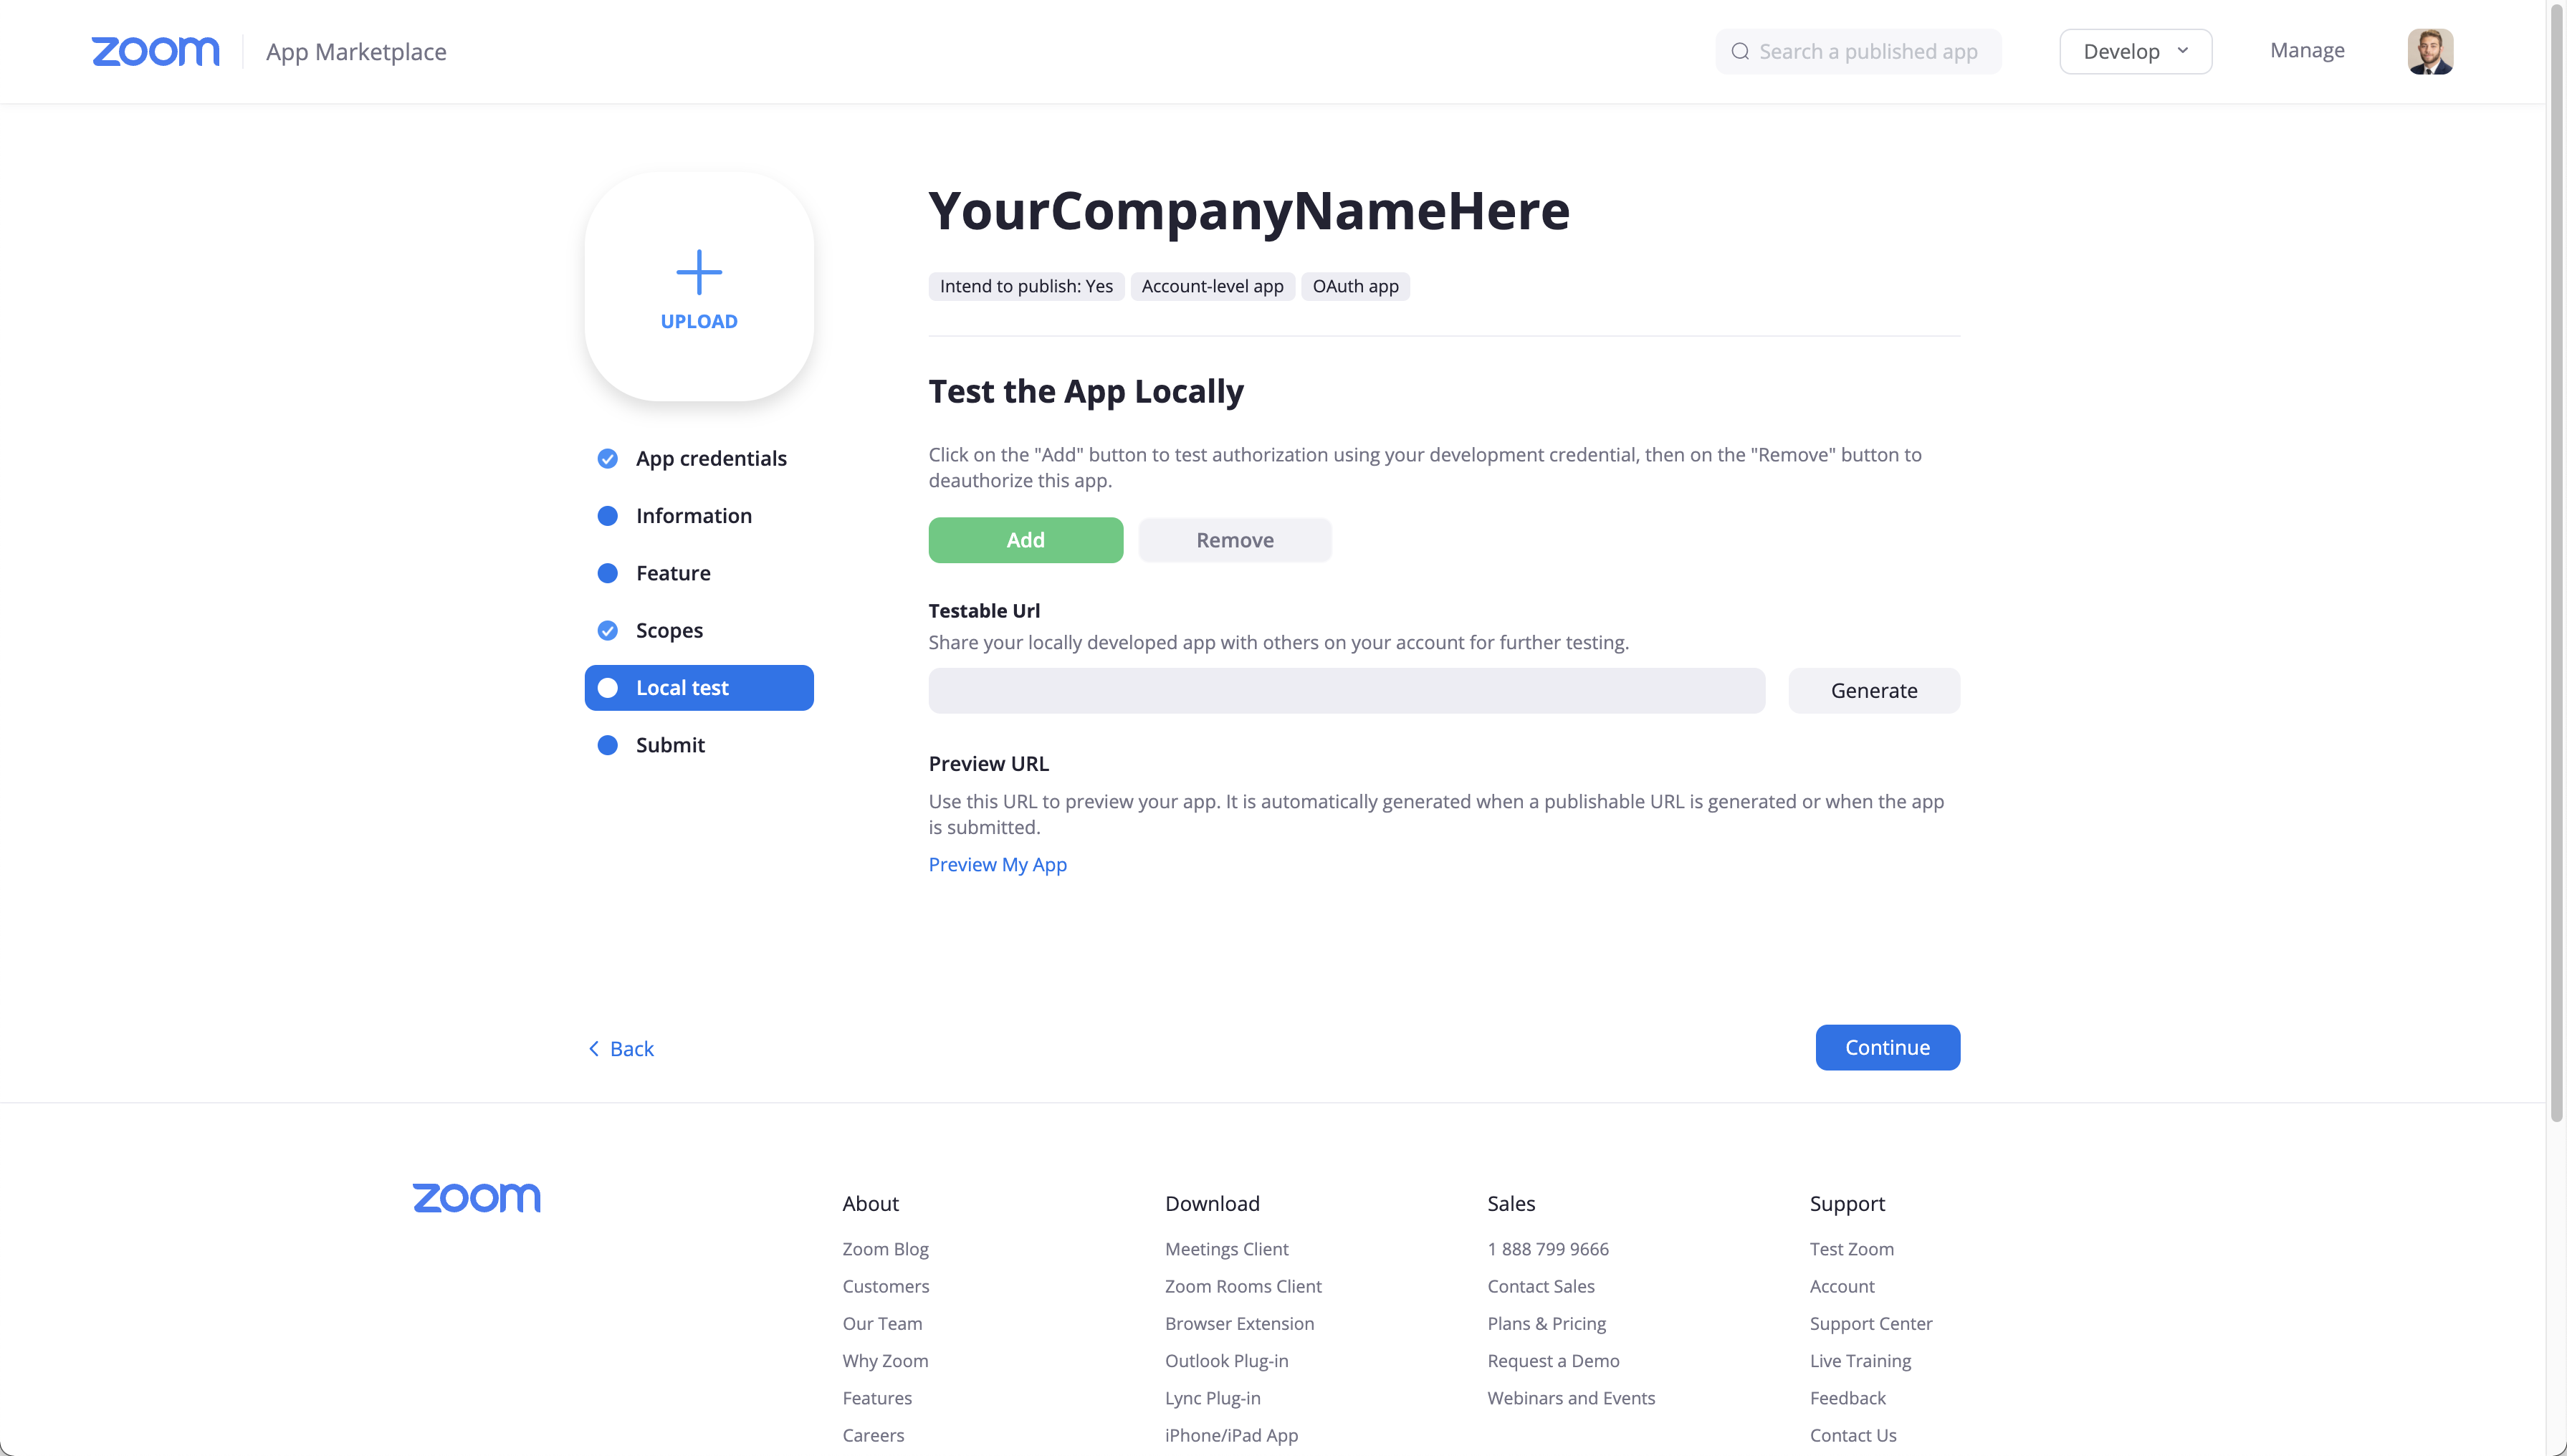 You can skip this page by clicking the Continue button. Once you get past this page, you can go ahead and submit your app!