Connector Details
| Name | Value |
|---|---|
| Platform | Jira |
| Auth Type | OAuth |
| Direction | Bidirectional |
| Tap Repo | https://github.com/hotgluexyz/tap-jira |
| Target Repo | https://gitlab.com/hotglue/target-jira |
| Tap Metrics | Usage: |
| Target Metrics | Usage: |
Credentials Setup
Follow the steps below to get the credentials you need to use the Jira connector. The first thing that you need to do to get your Jira OAuth credentials is to login in to Jira’s Developer console. If you do not have a Jira account, you can create a free one here.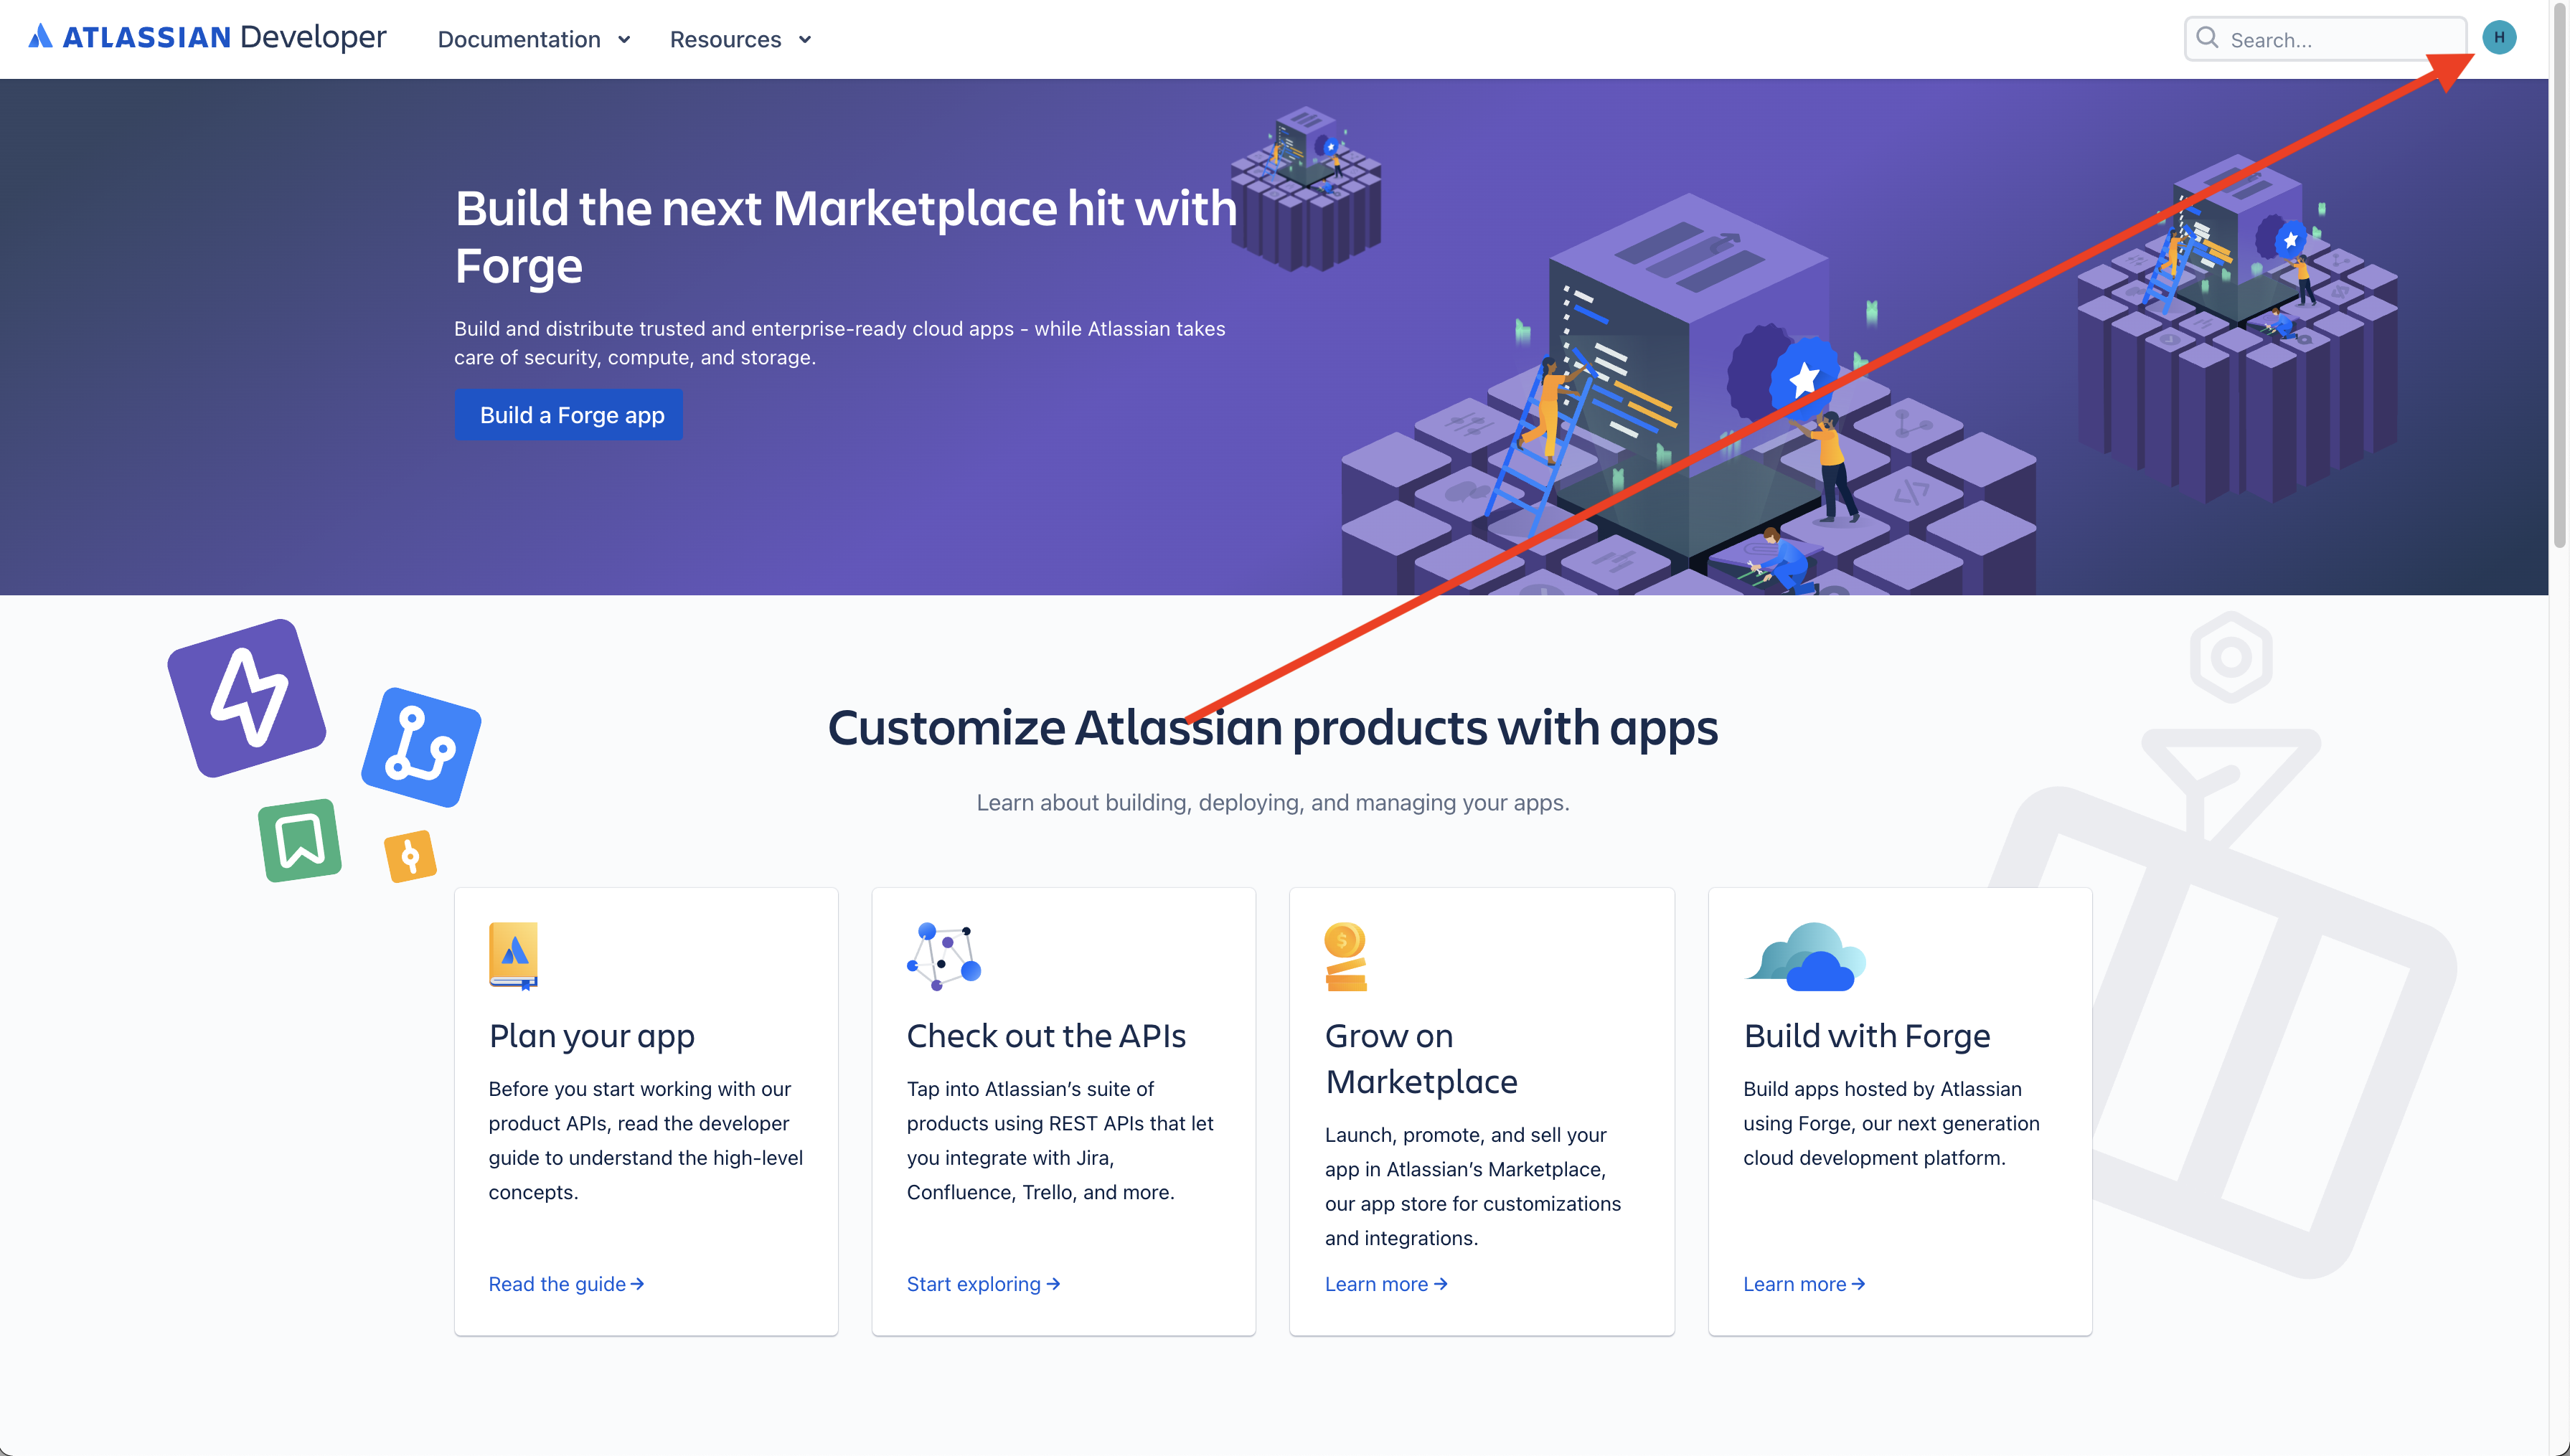 Now that you have logged into Jira, you need to actually head the developer console. Your home page should look similar to this. Head to top right hand corner of the page and click on the icon with your initial in it.
Creating the app
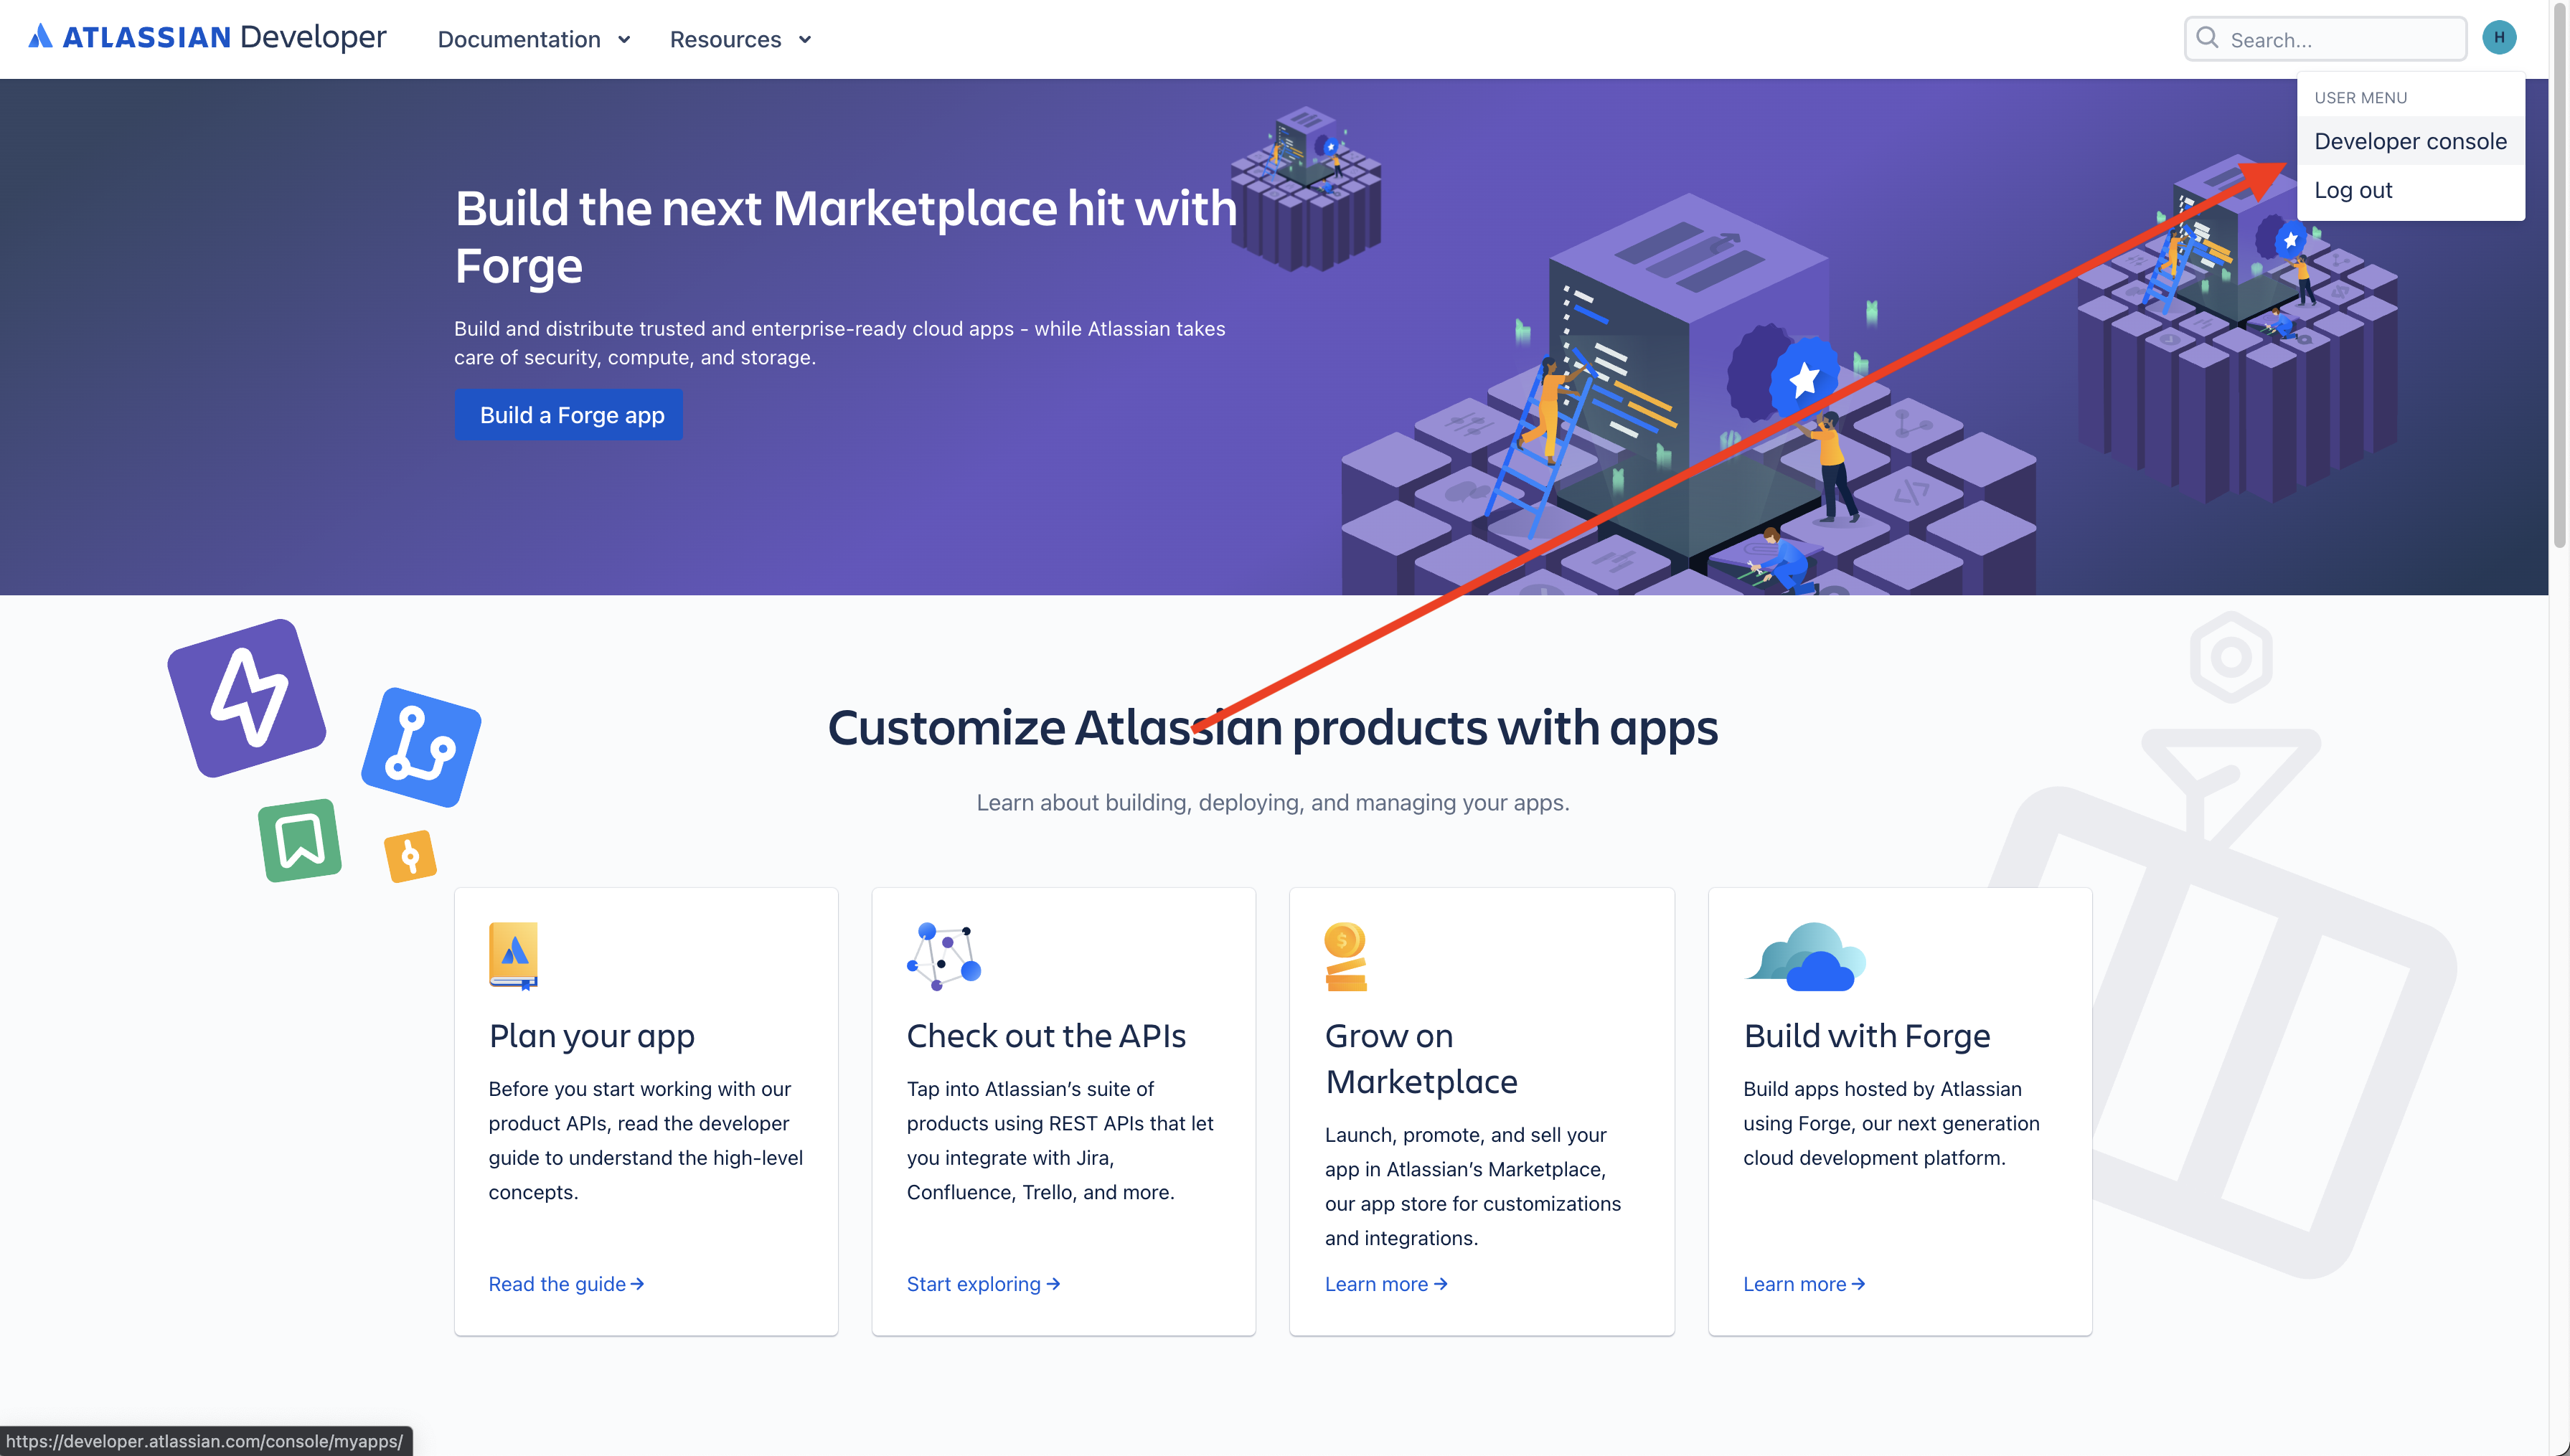
Now from the resulting drop down, you should click the Developer console tab.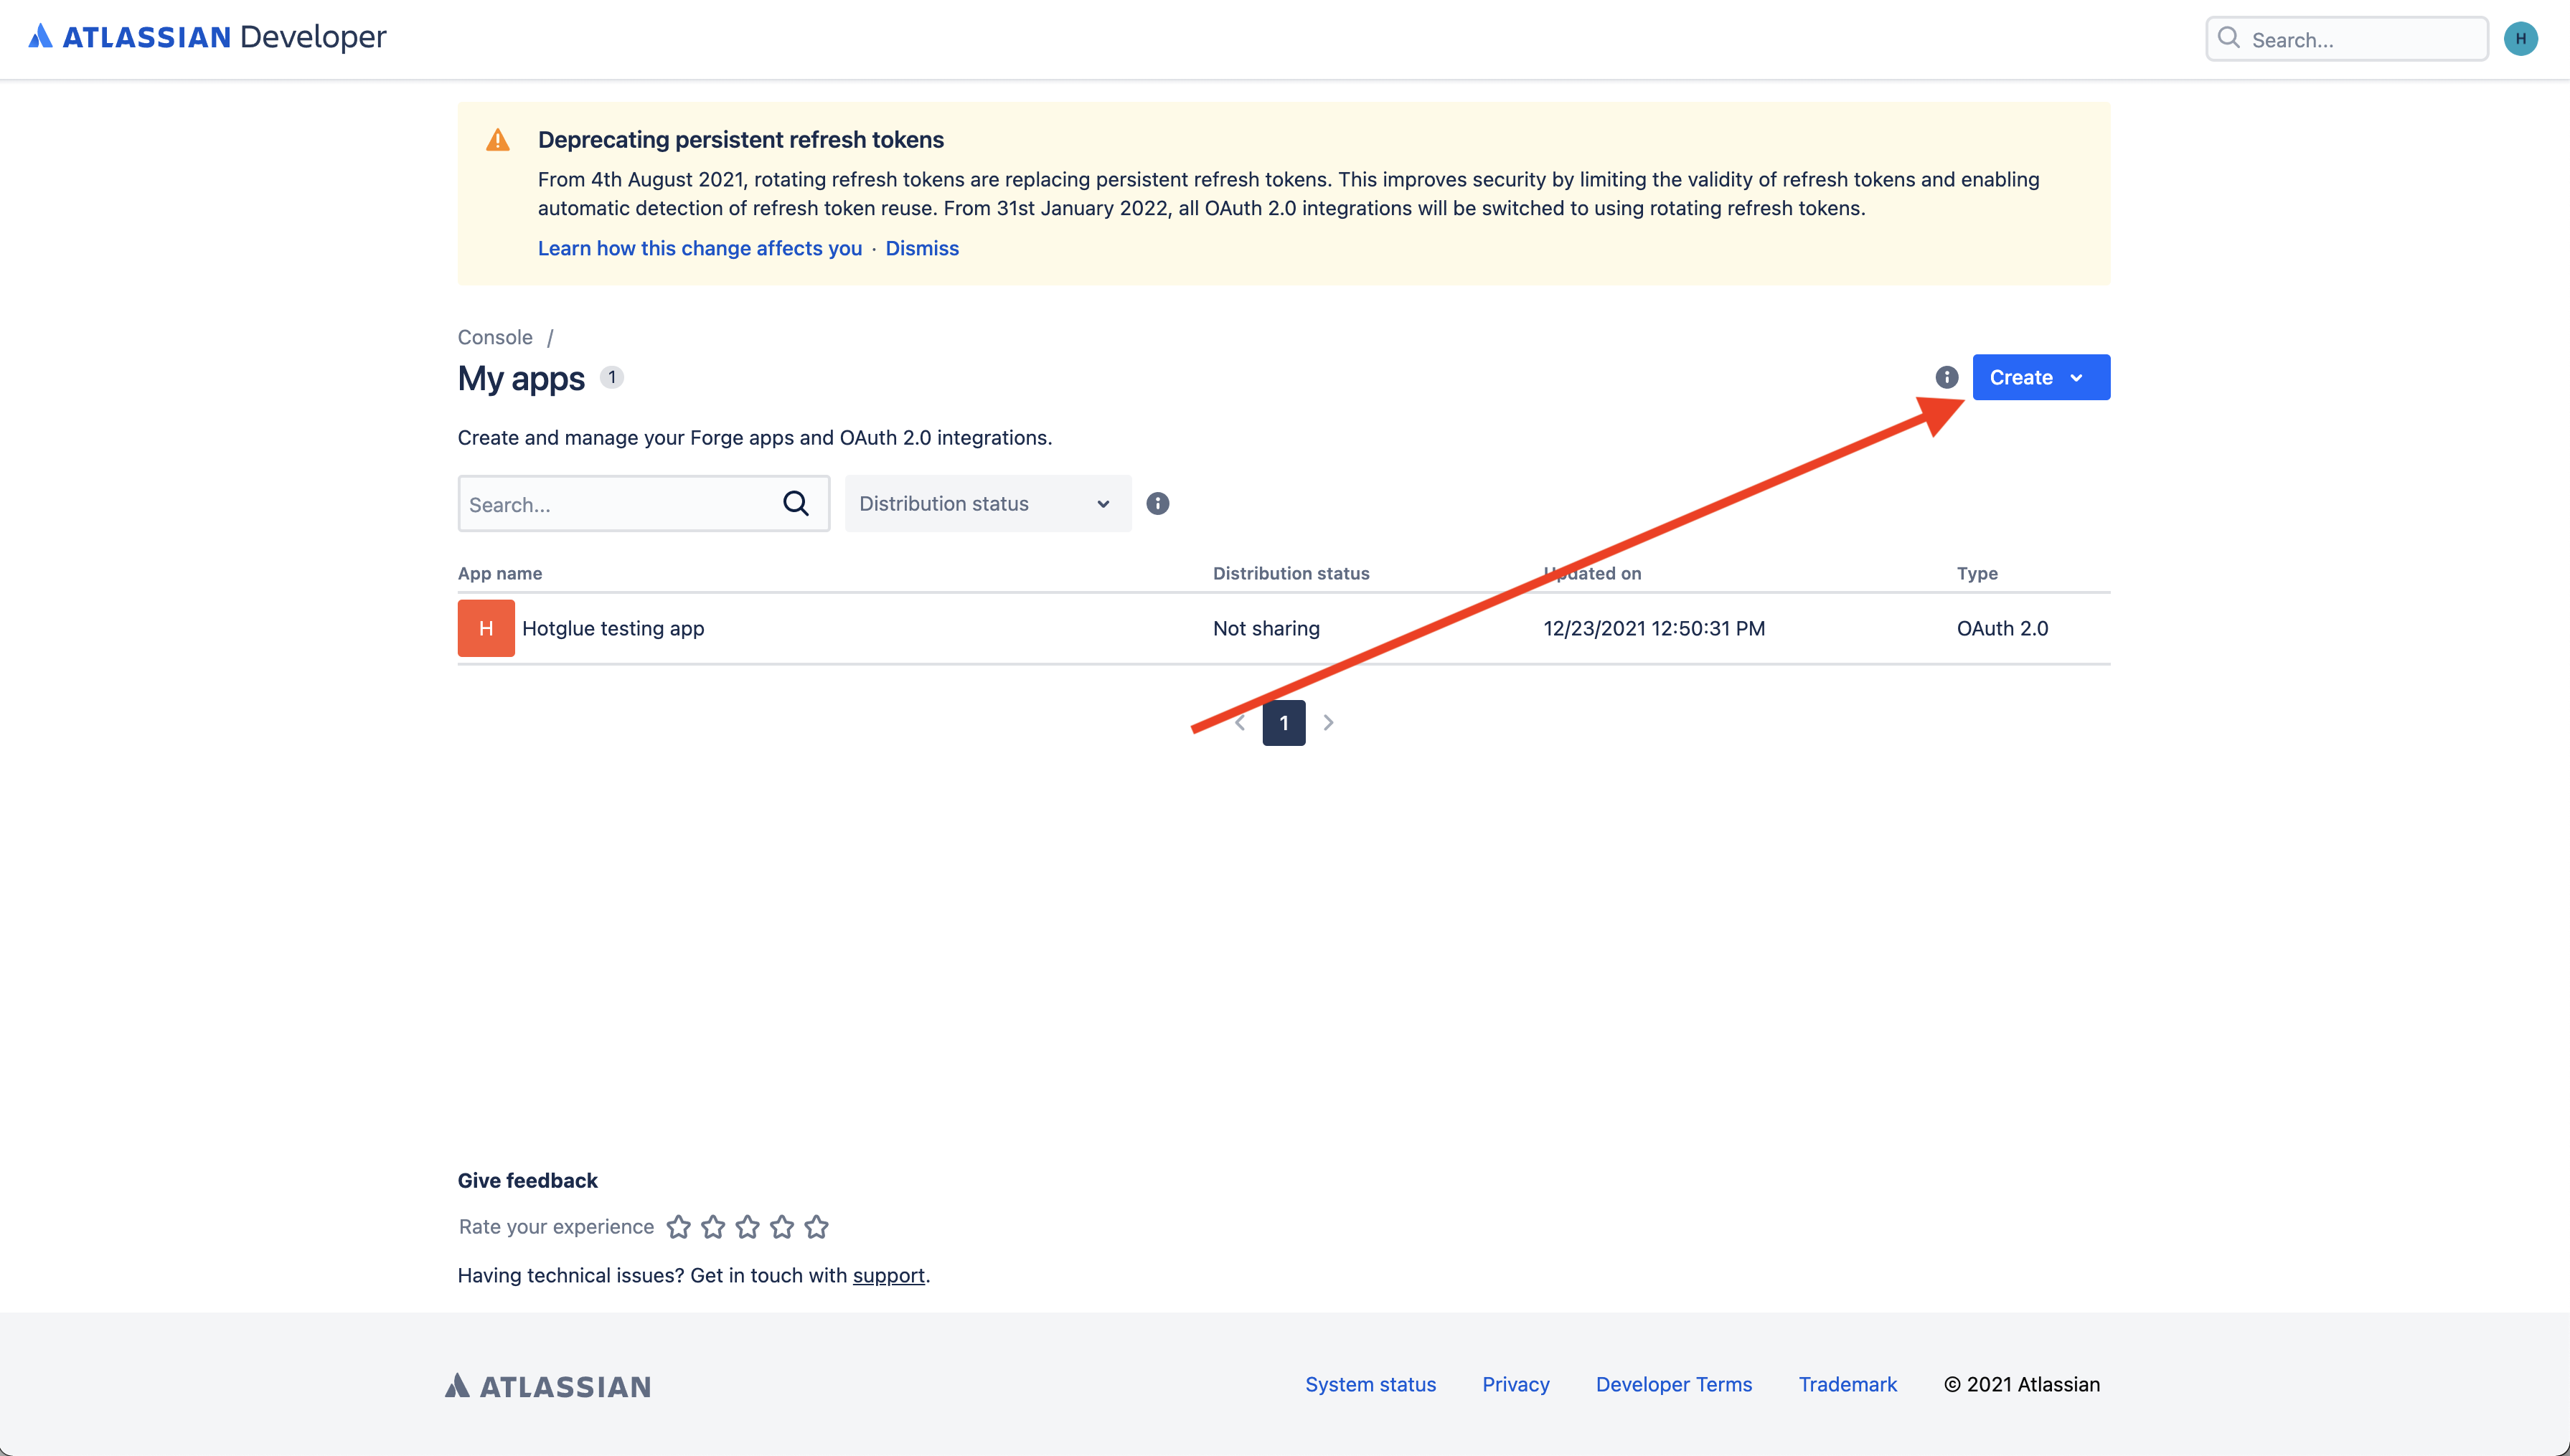 You should now be on this page. To create an OAuth app, click on the Create button on the right side of the screen.
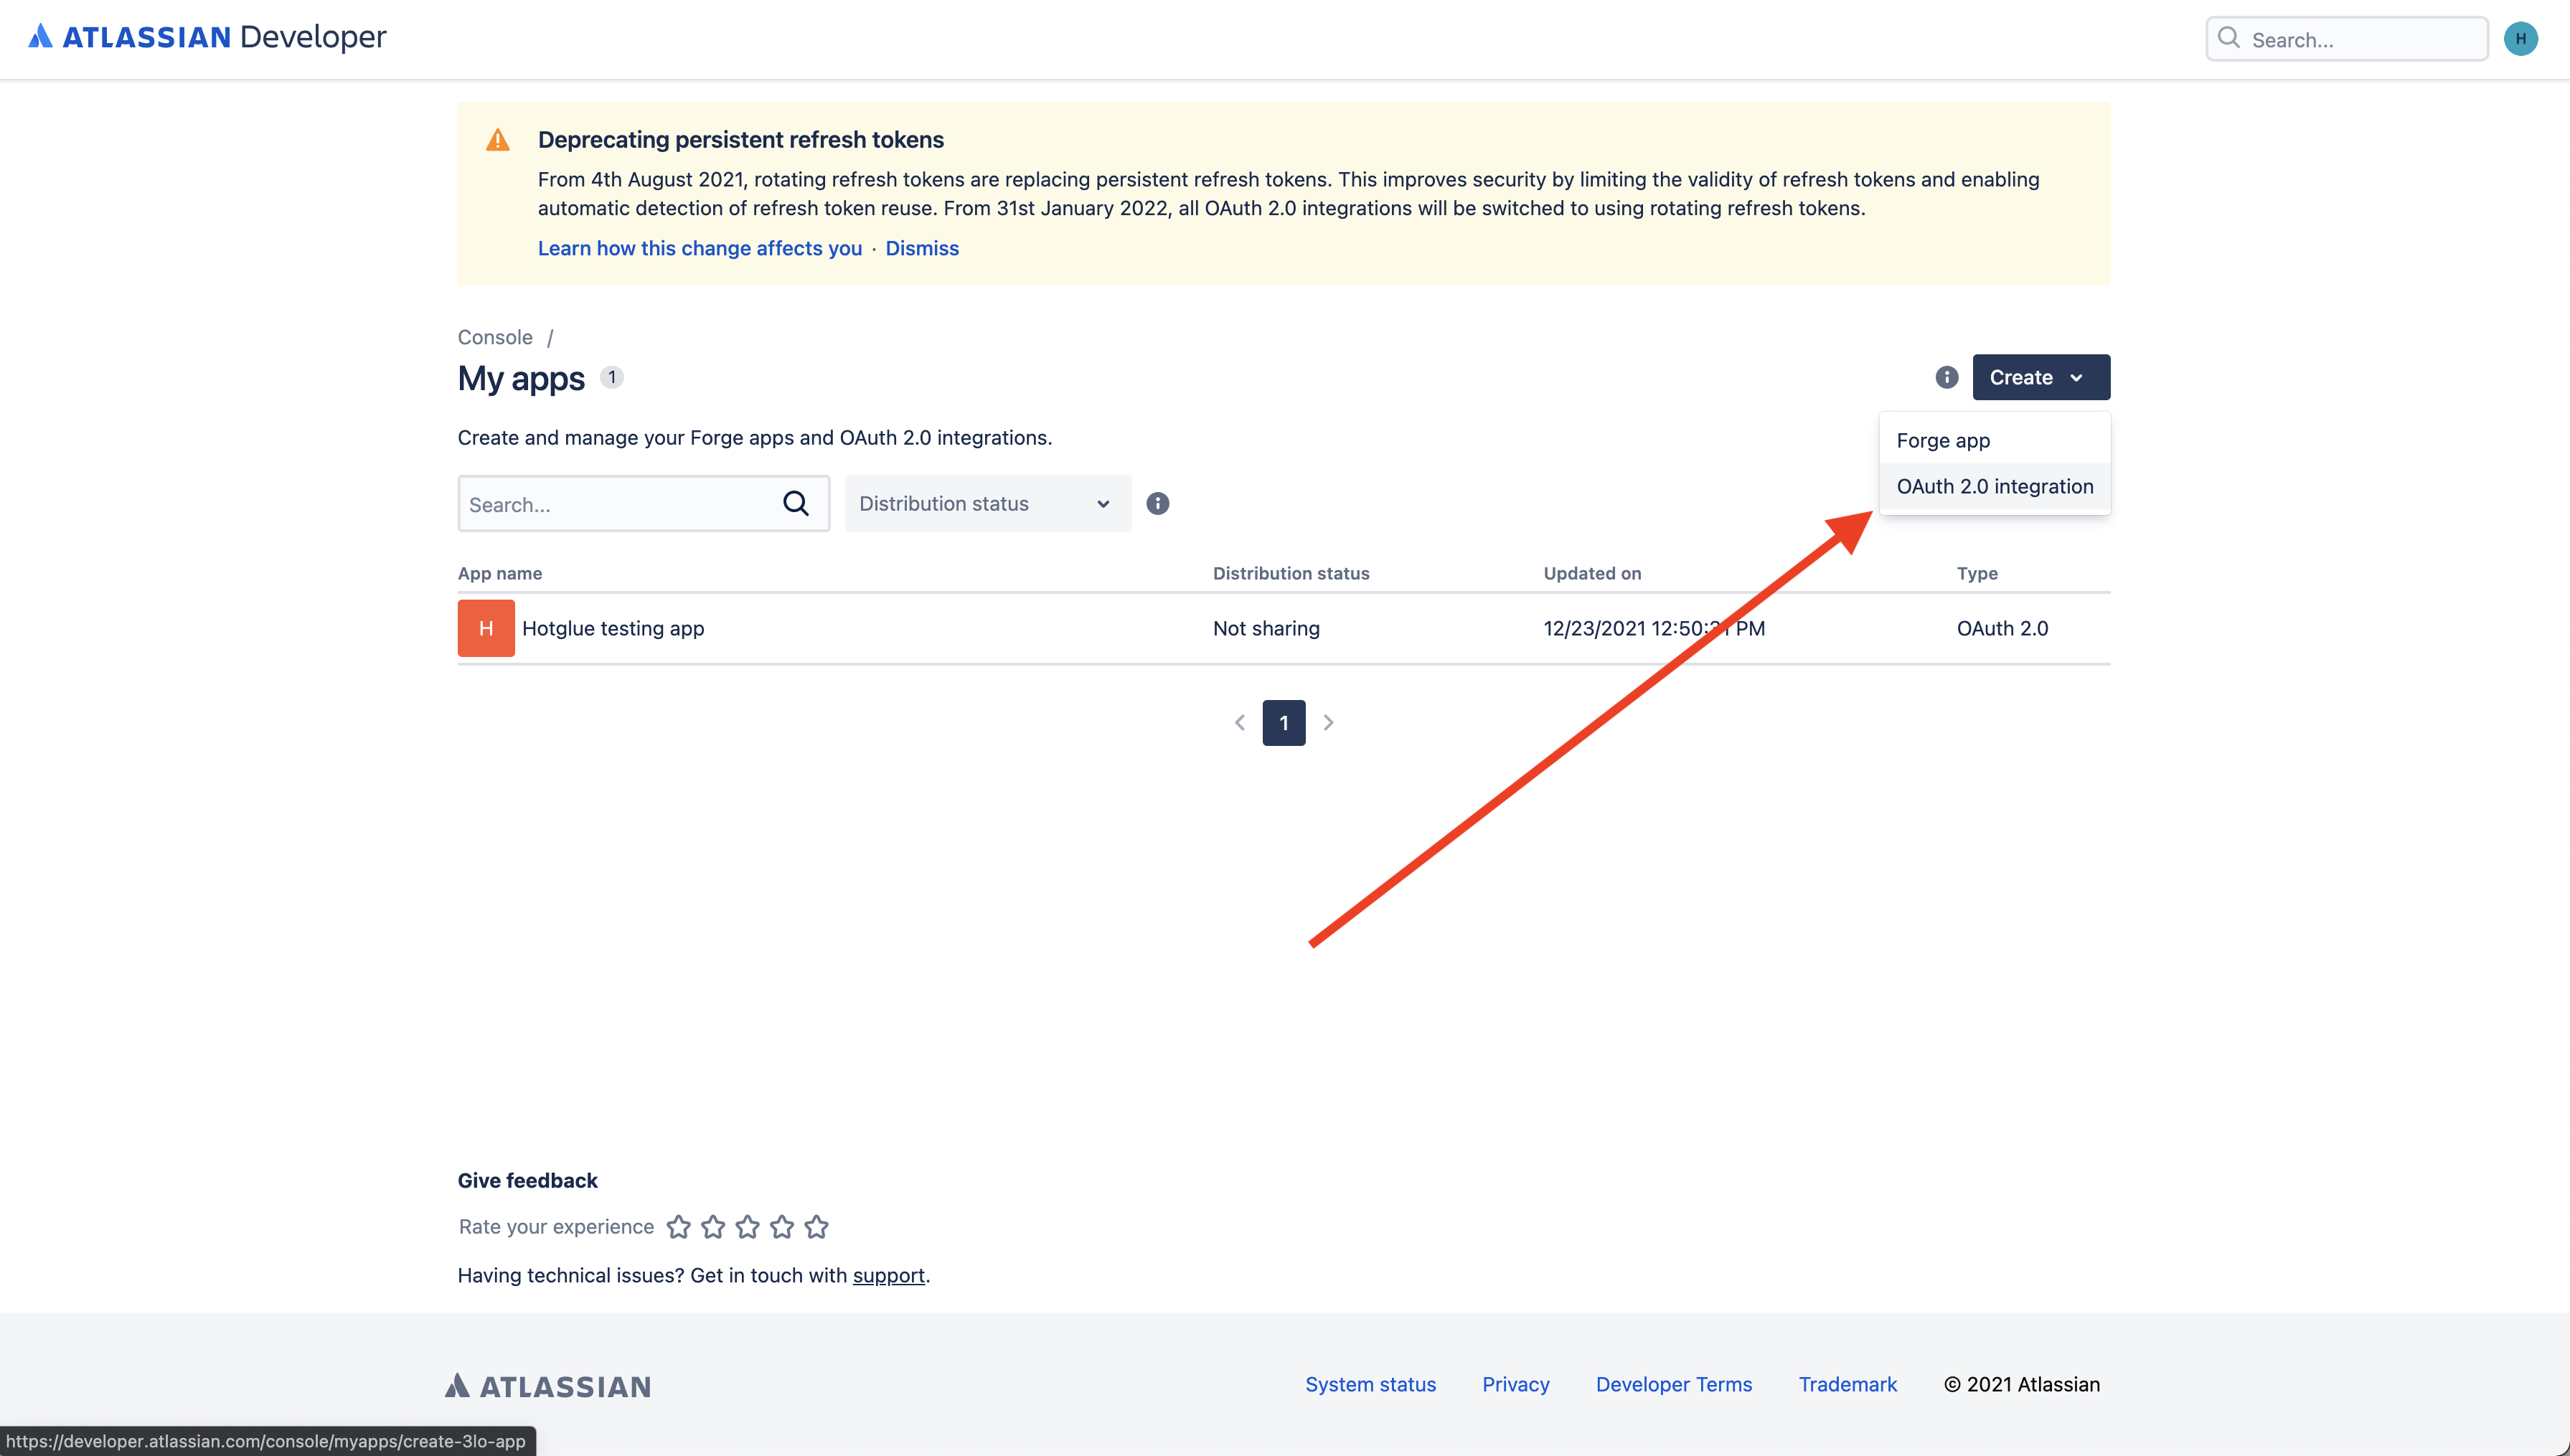 When it asks you what kind of app you would like to create, make sure to select the OAuth 2.0 integration option.
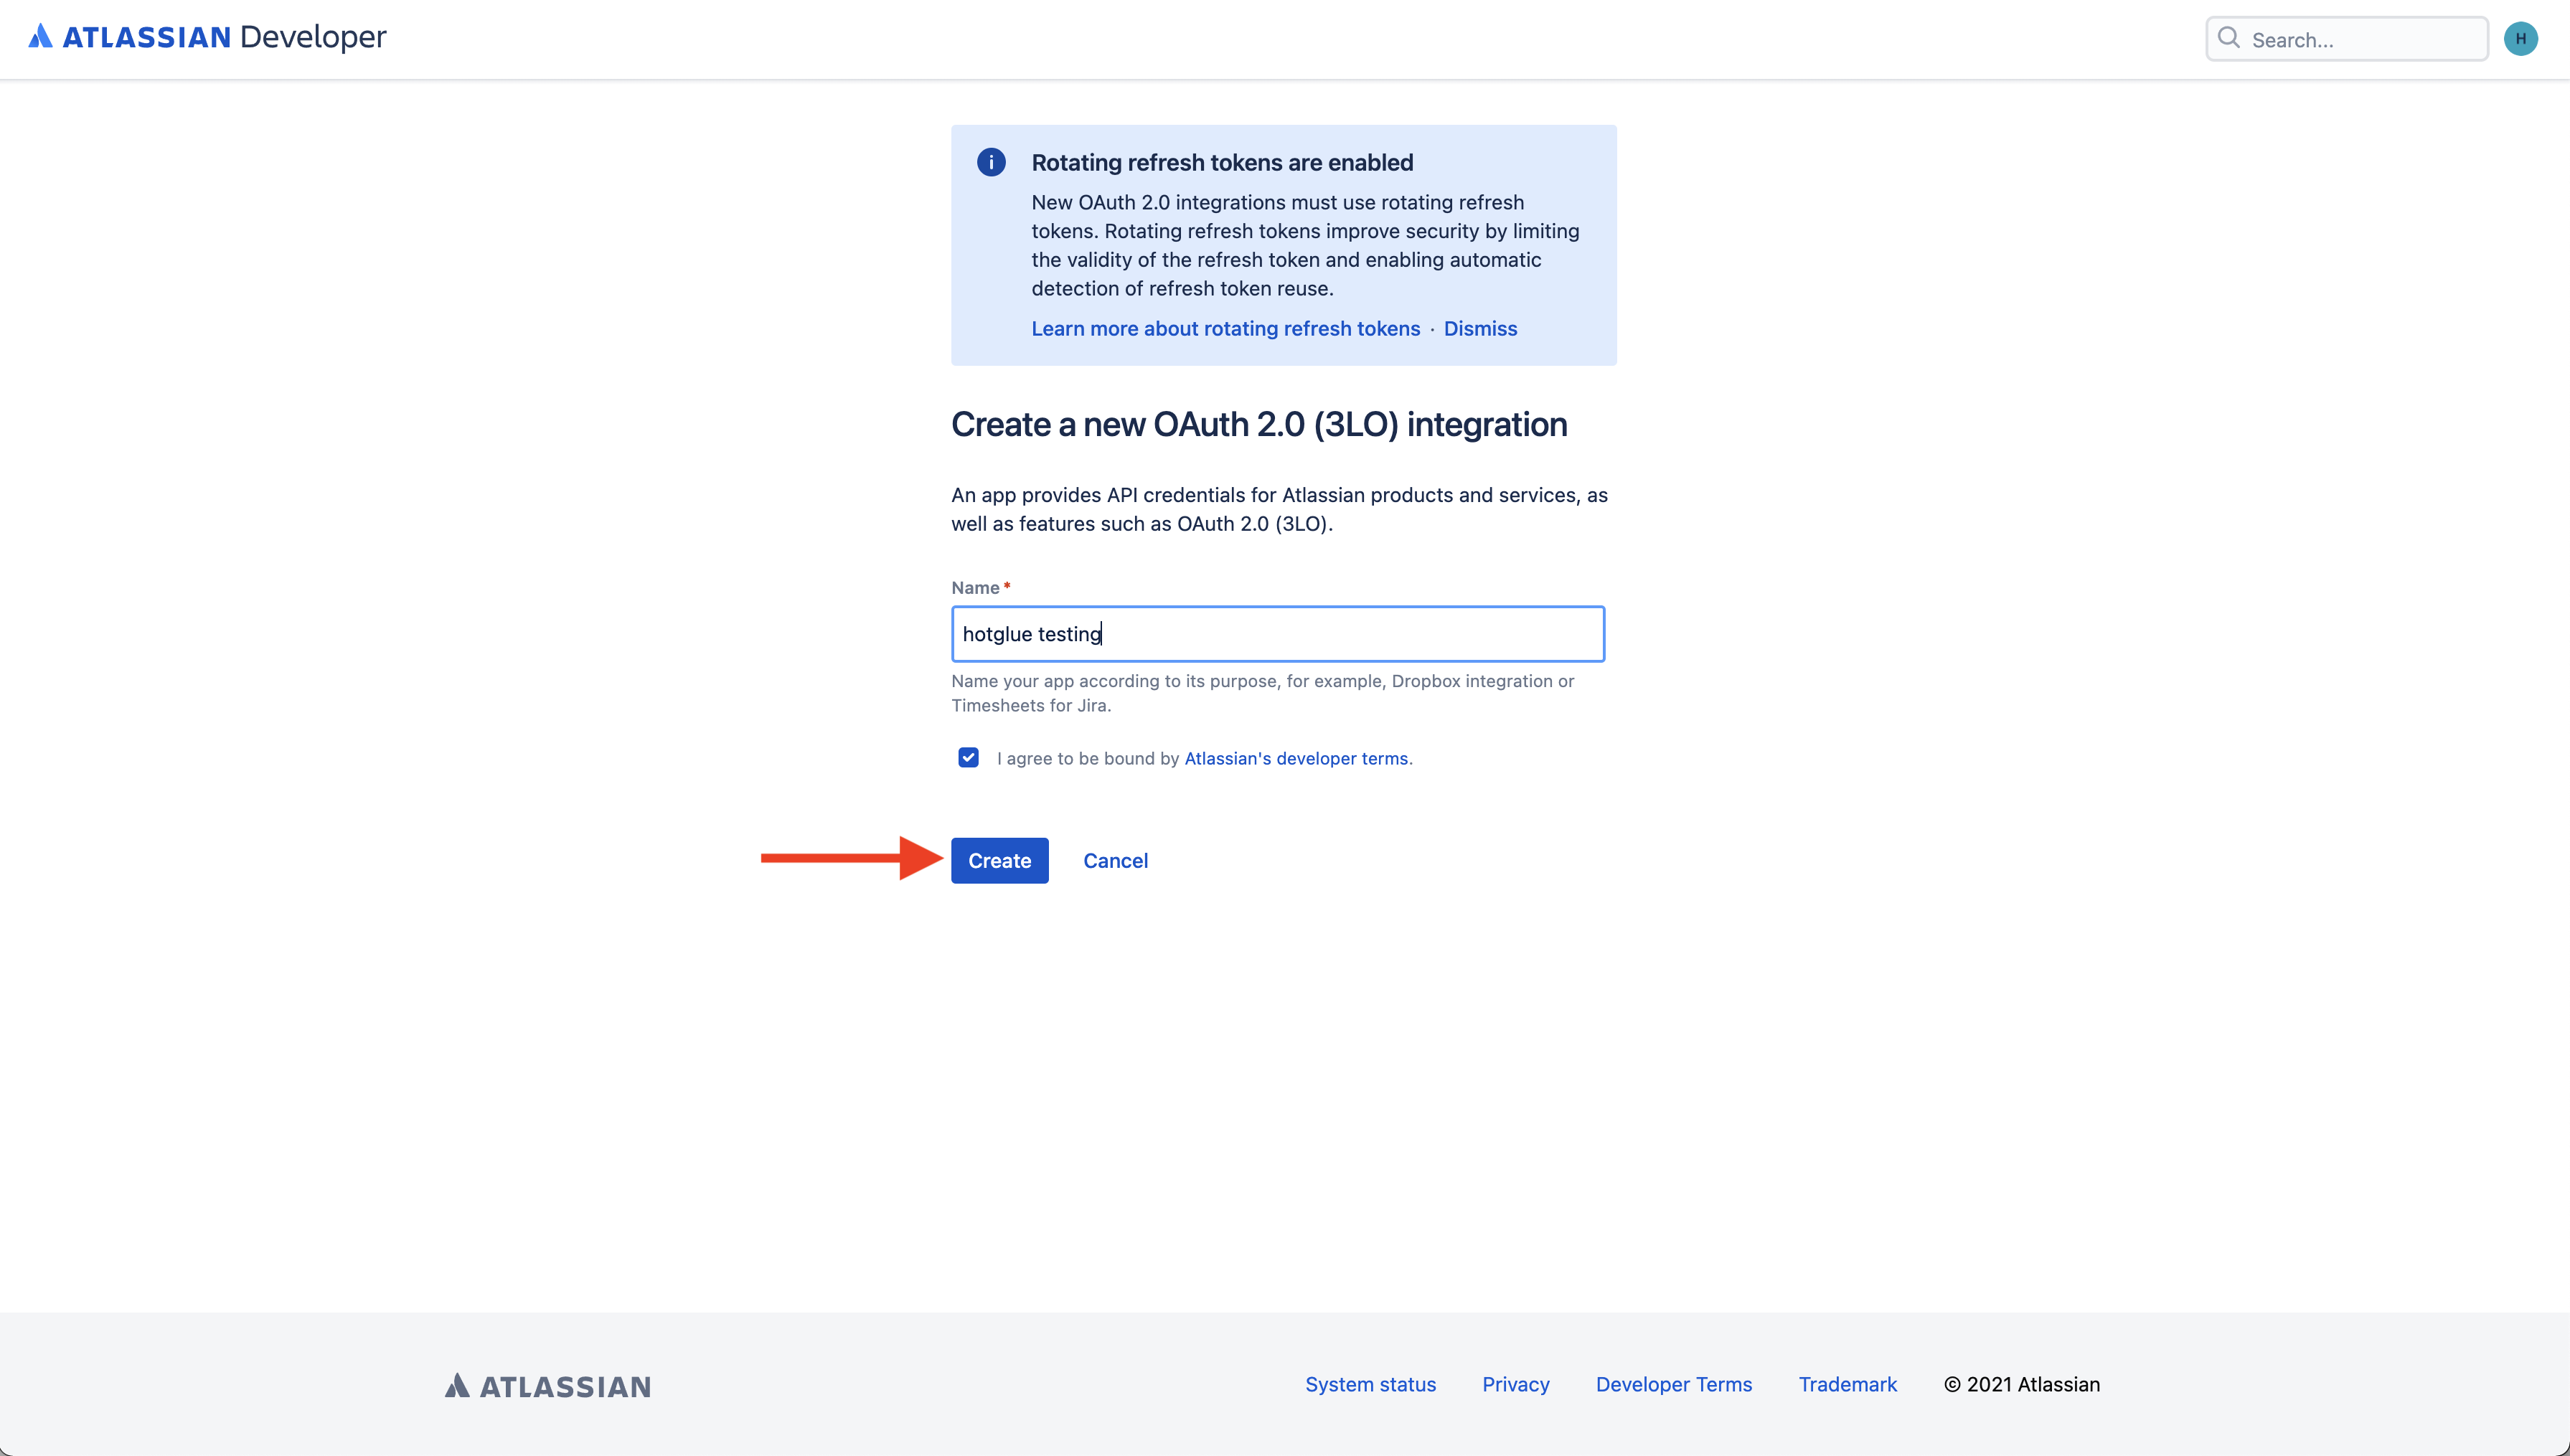 On this page, you should go ahead and name your private app as your company name, not hotglue. Remember, this is the app your customers will be seeing when they are connecting their Jira account to your platform. Once you are done inputting your app name (and agreeing to the Atlassian developer terms), click create.
Configuring Permissions
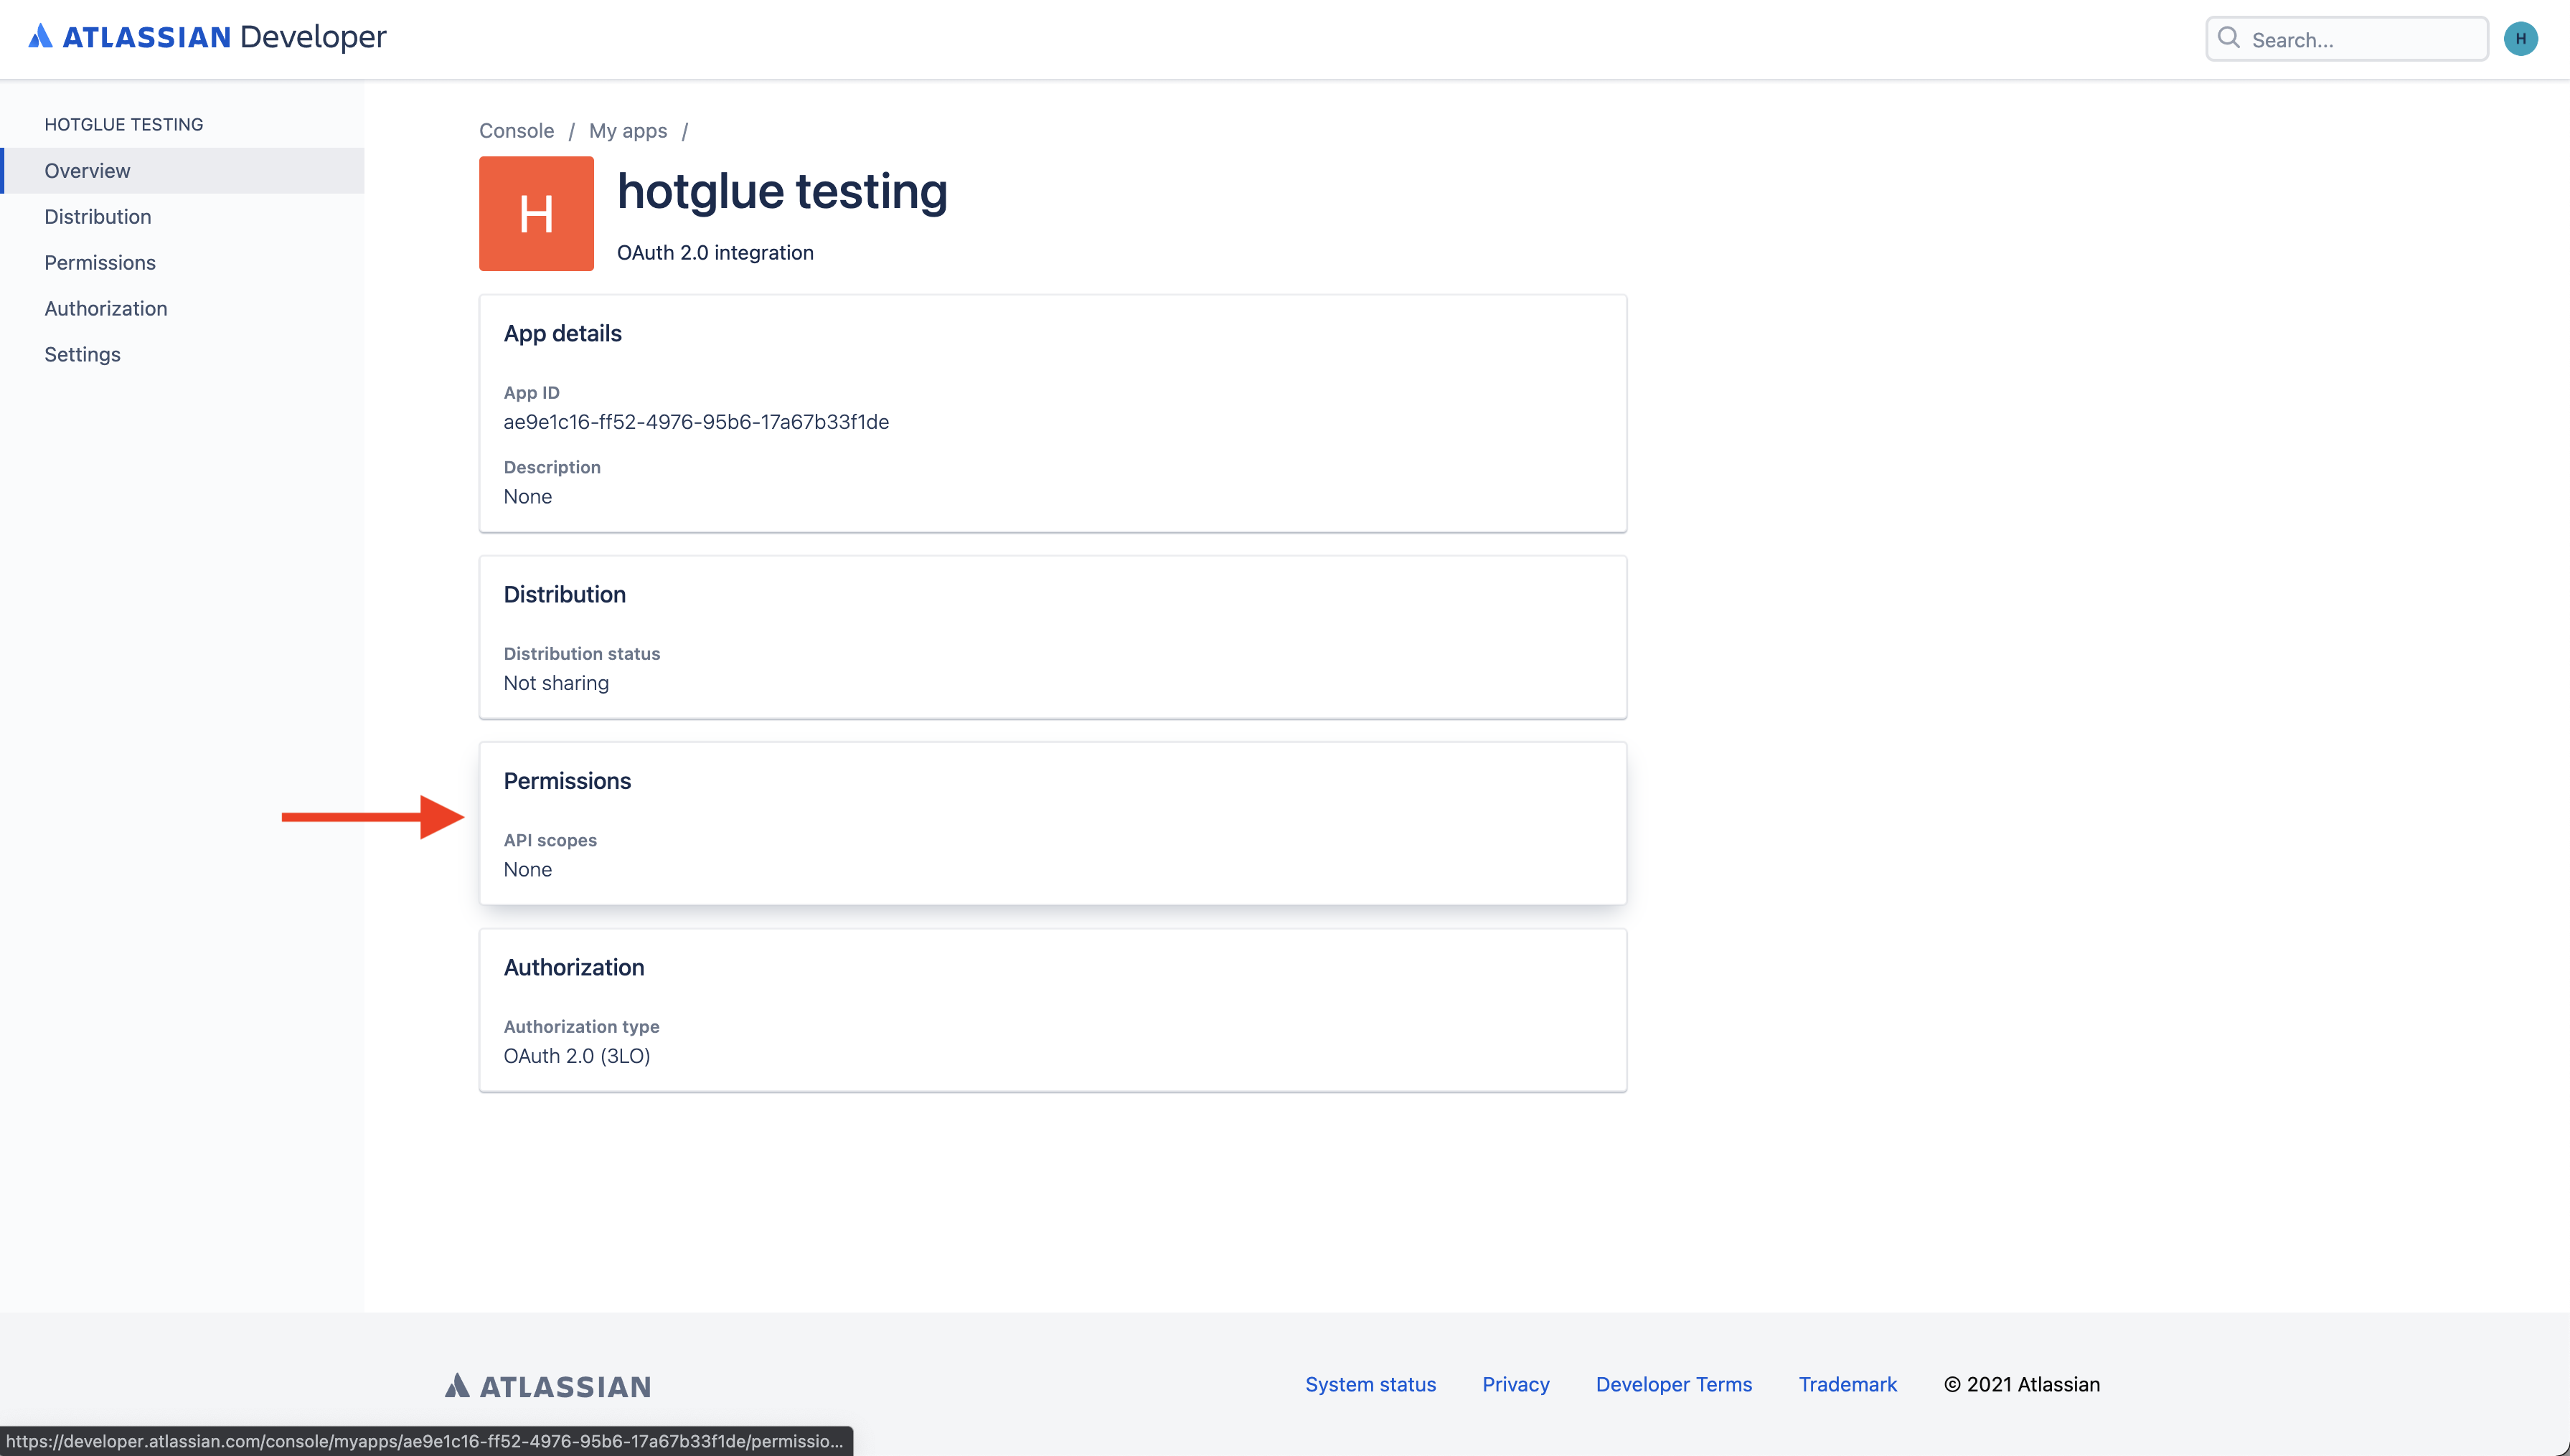 On this page, you have the ability to edit the details of your application. The first thing you should do is head to the Permissions section of your app.
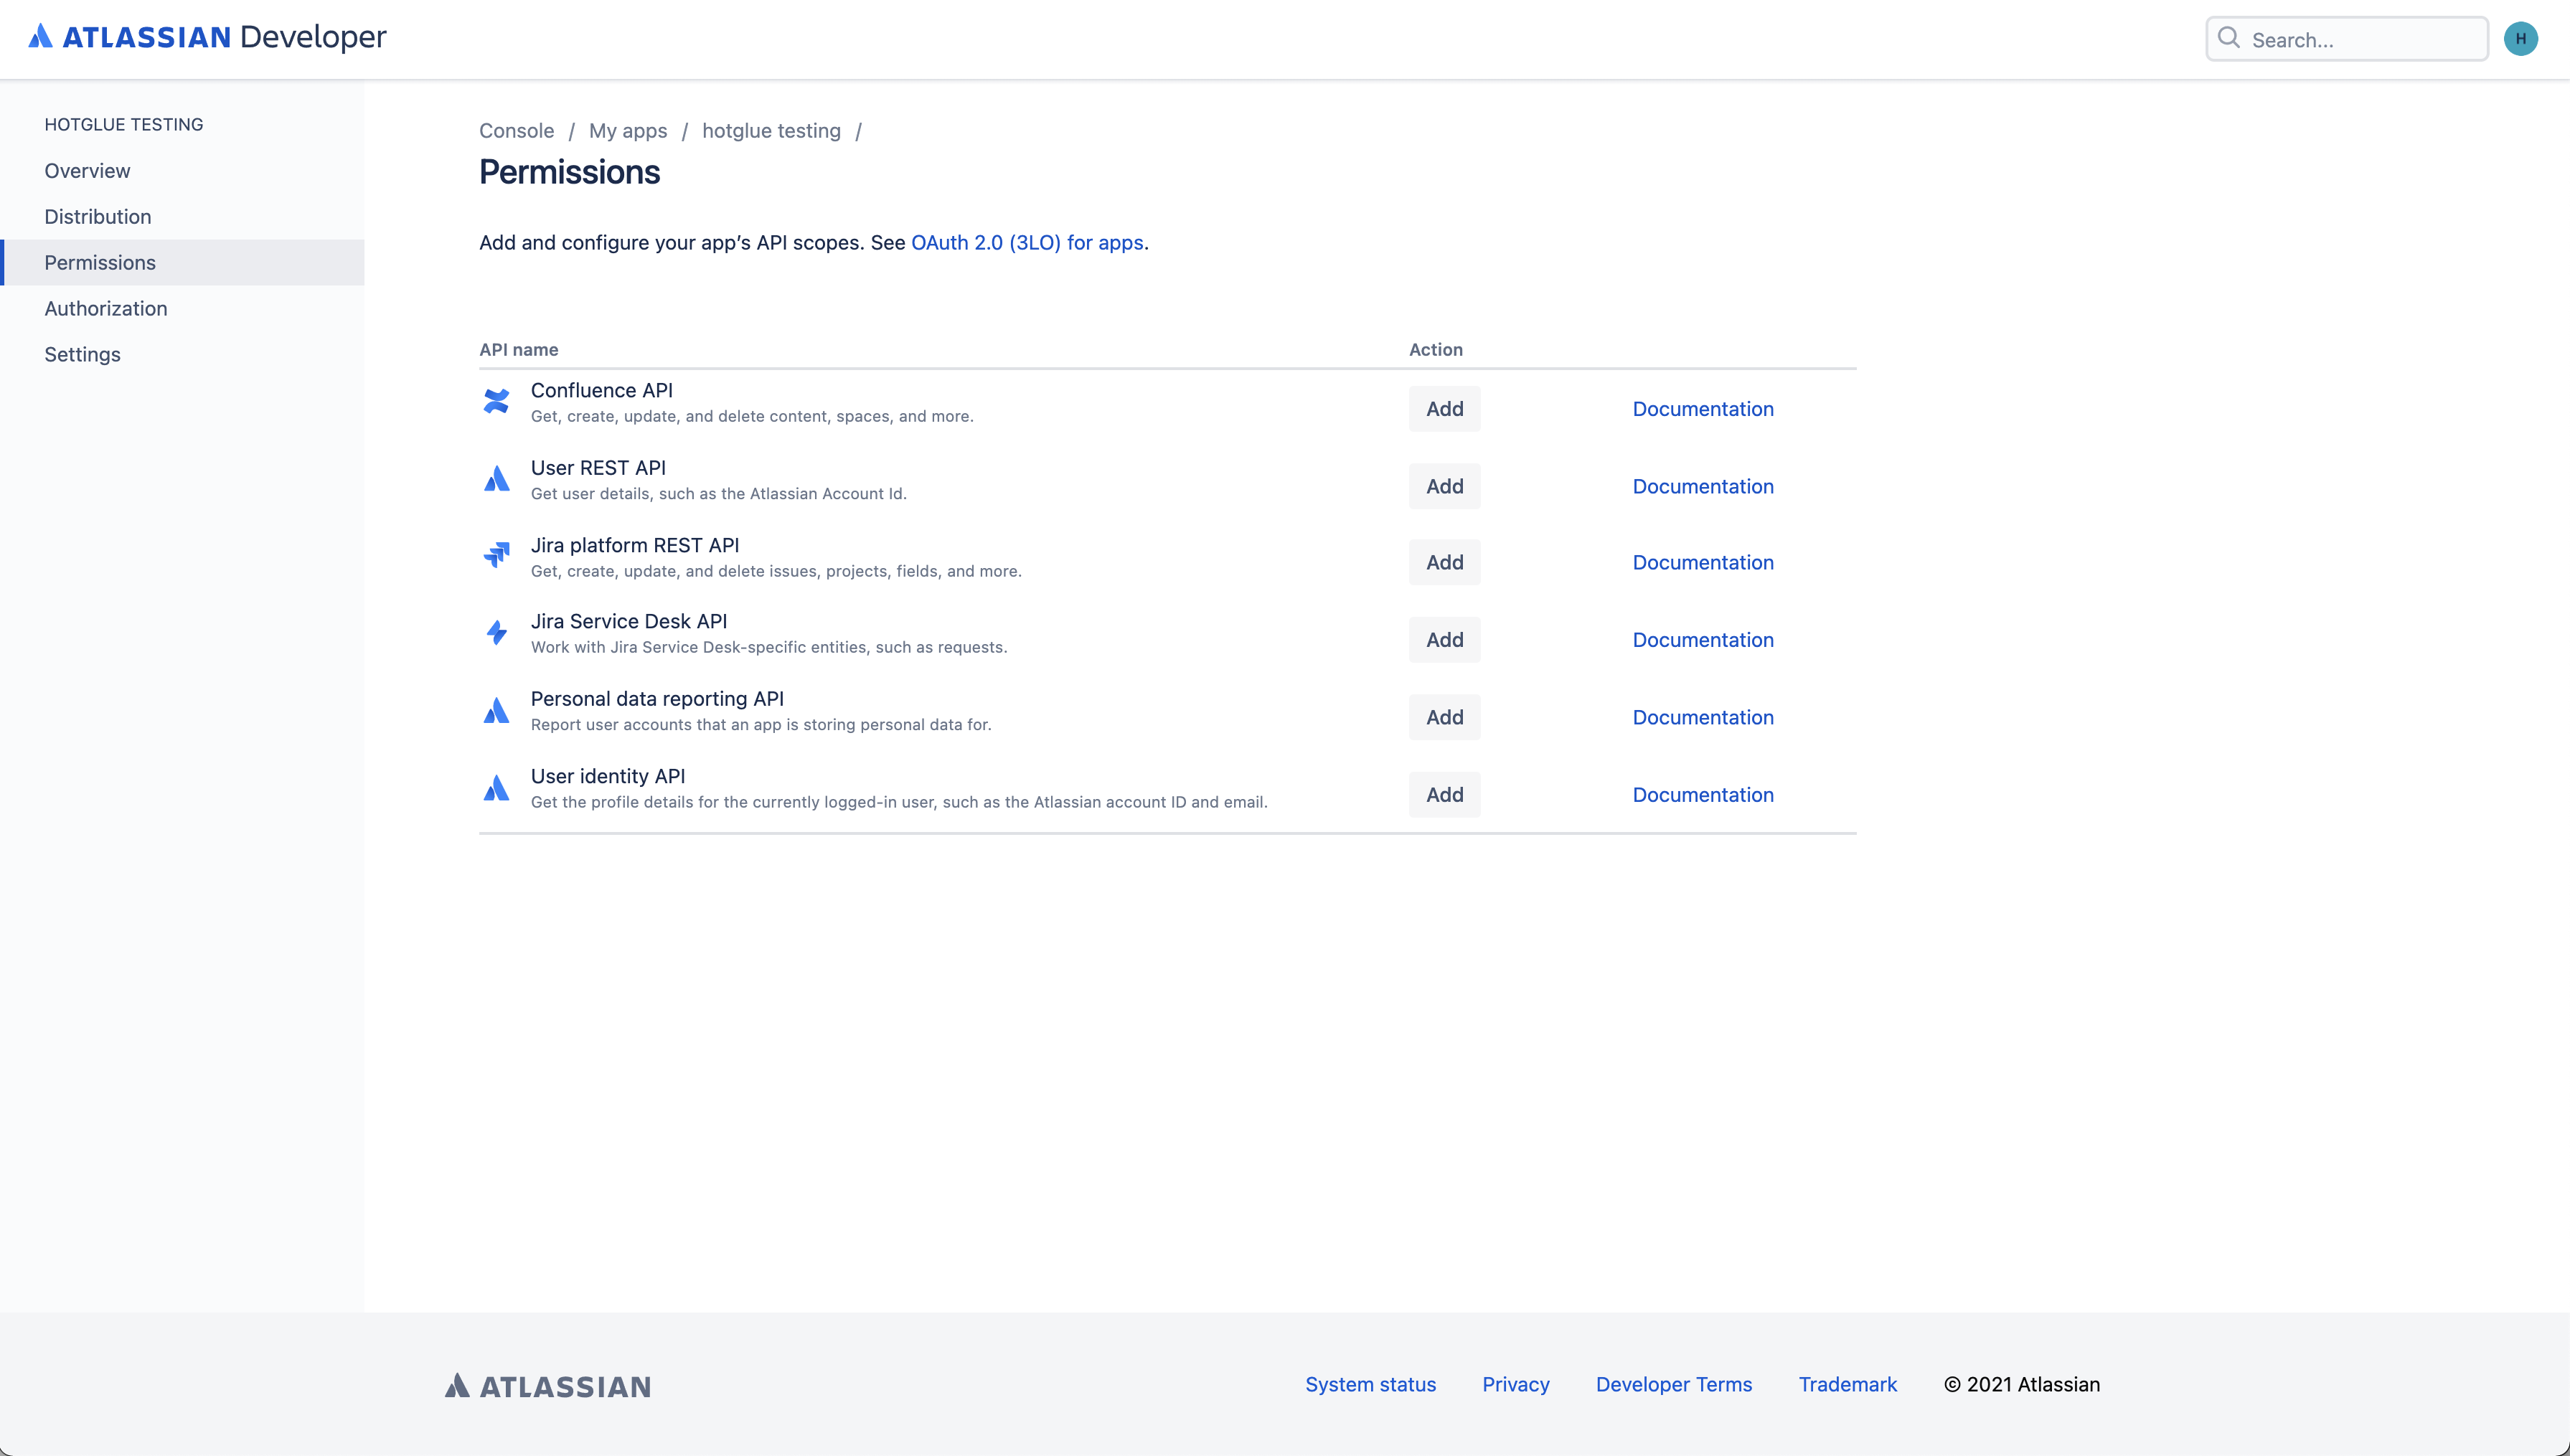 On this page, you can configure the scopes of your OAuth app. Go ahead and click Add on any of the scopes you would like to enable.
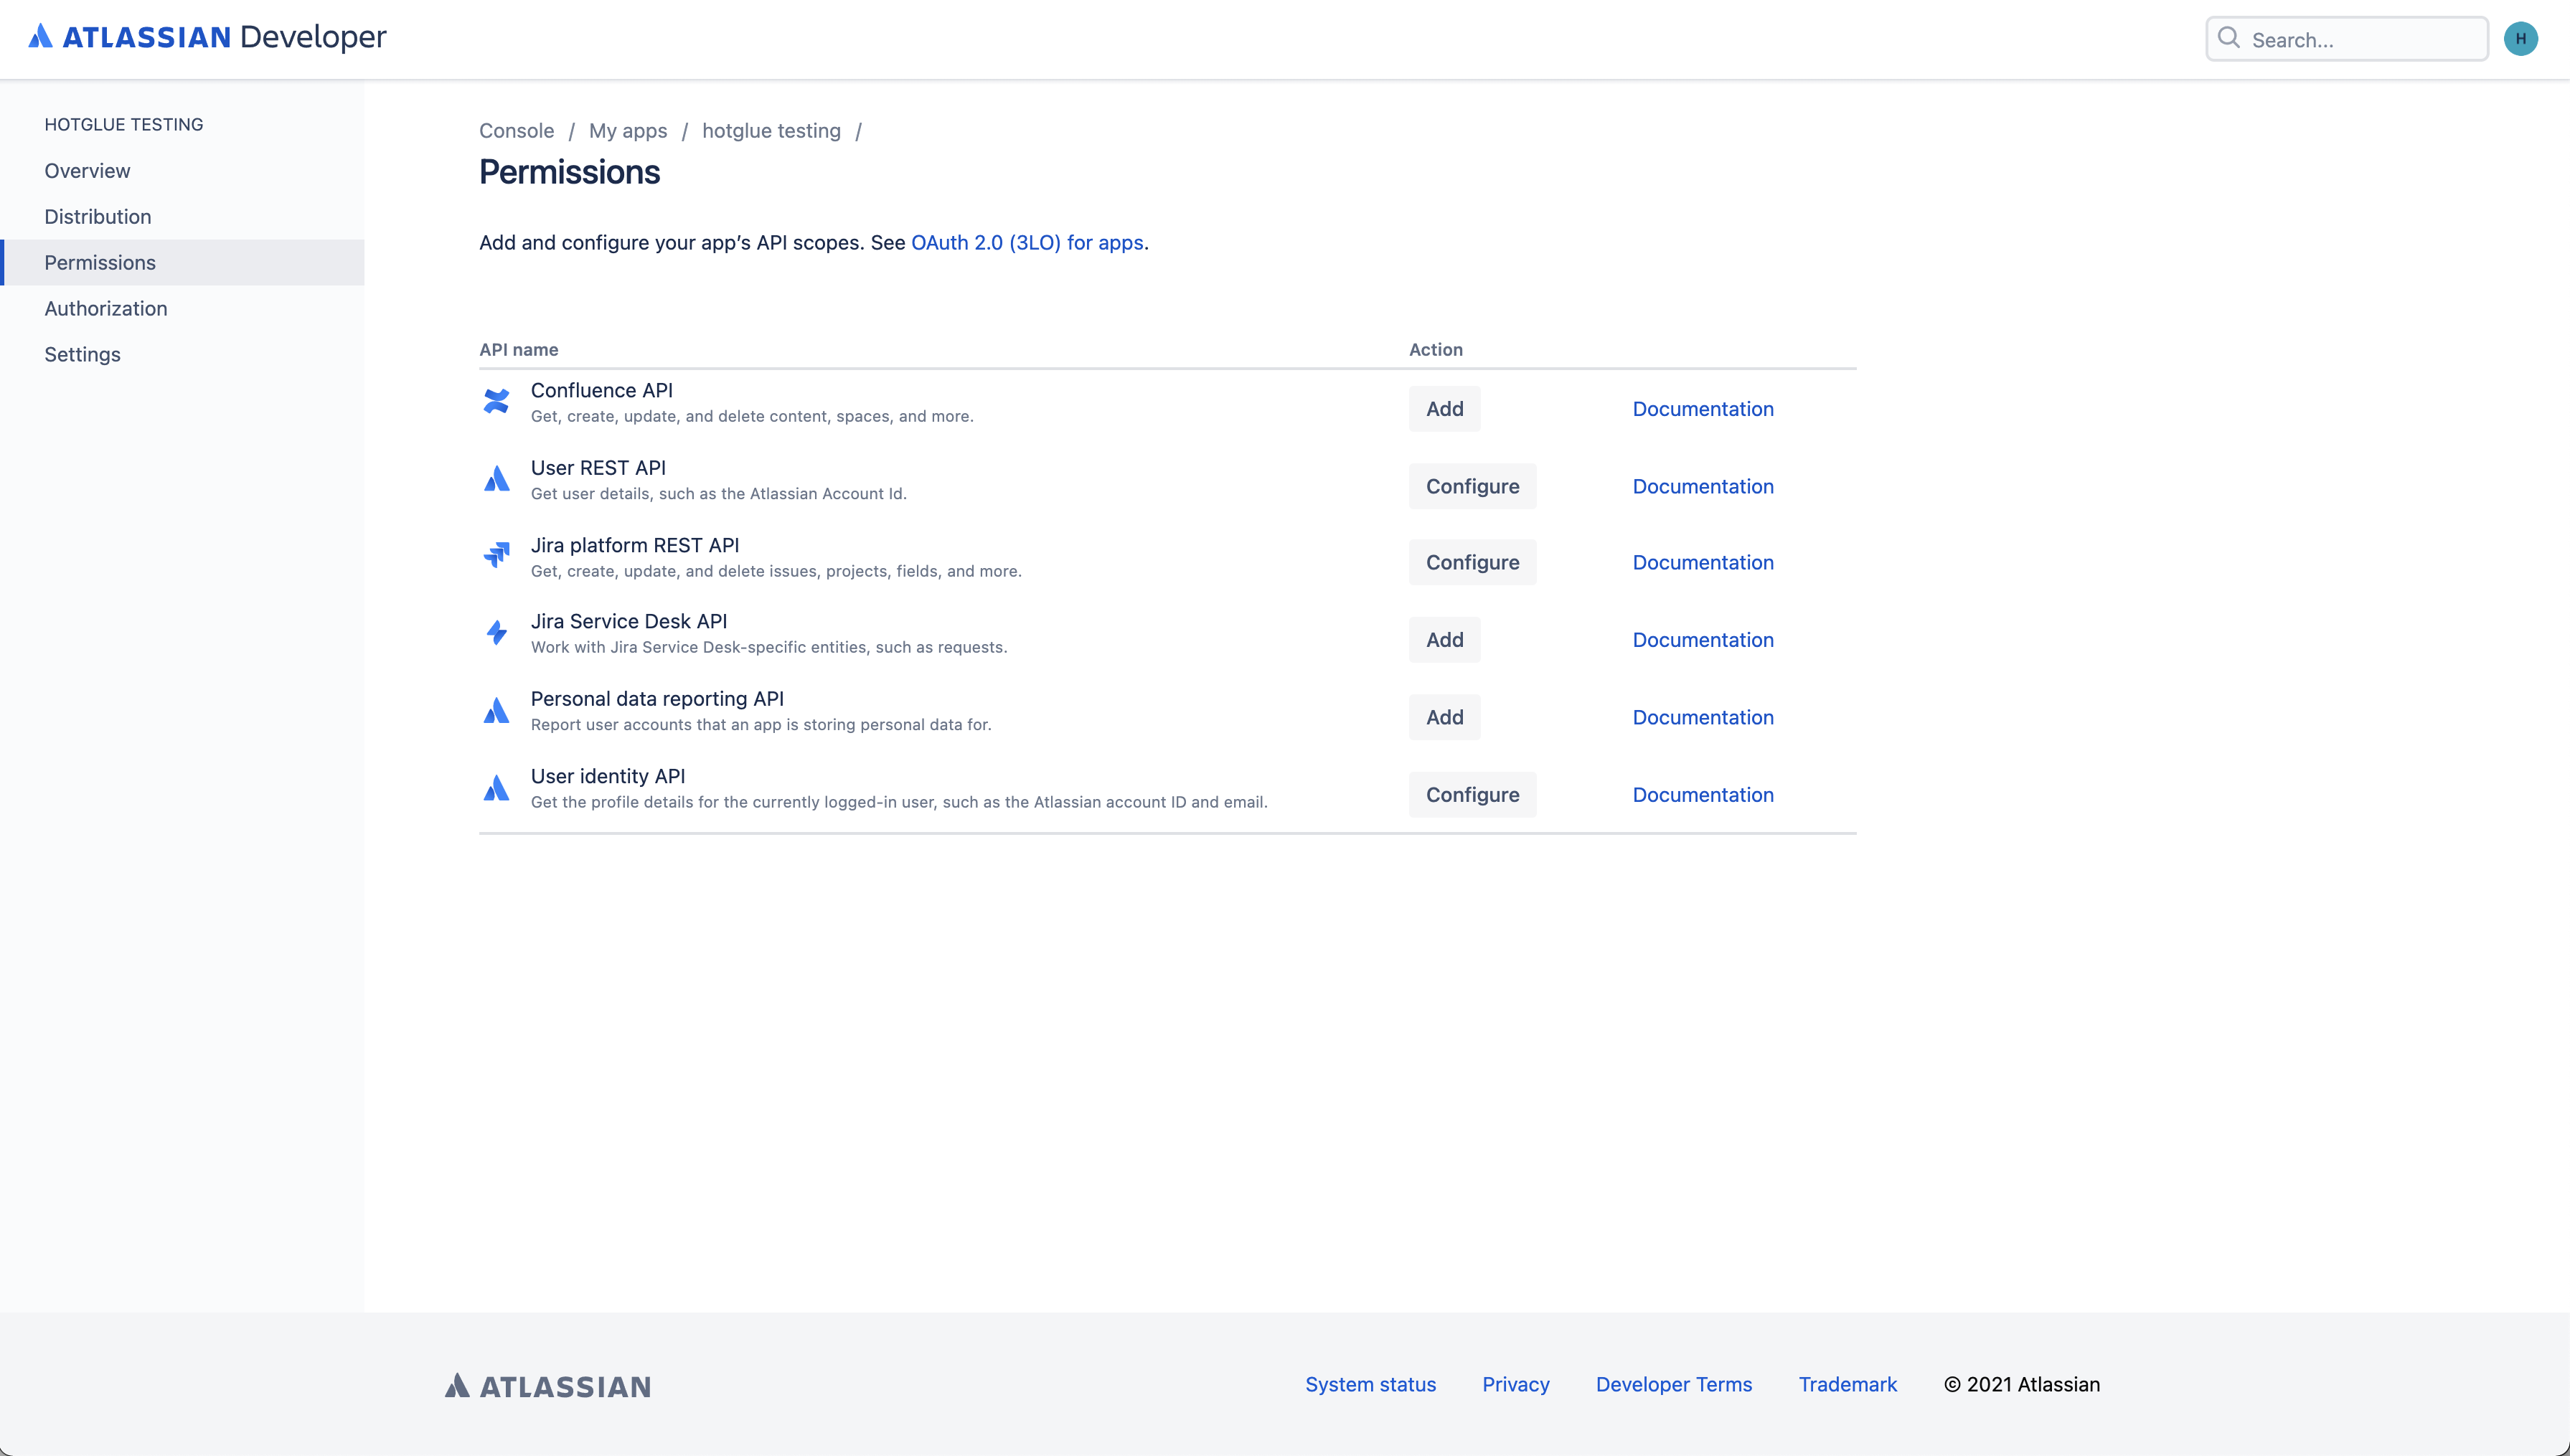 As you can see here, I have added some scopes to my app. It is important that you go in and configure each API in order to make sure the permissions you want are set. For this example, let’s do this with the Jira platform REST API.
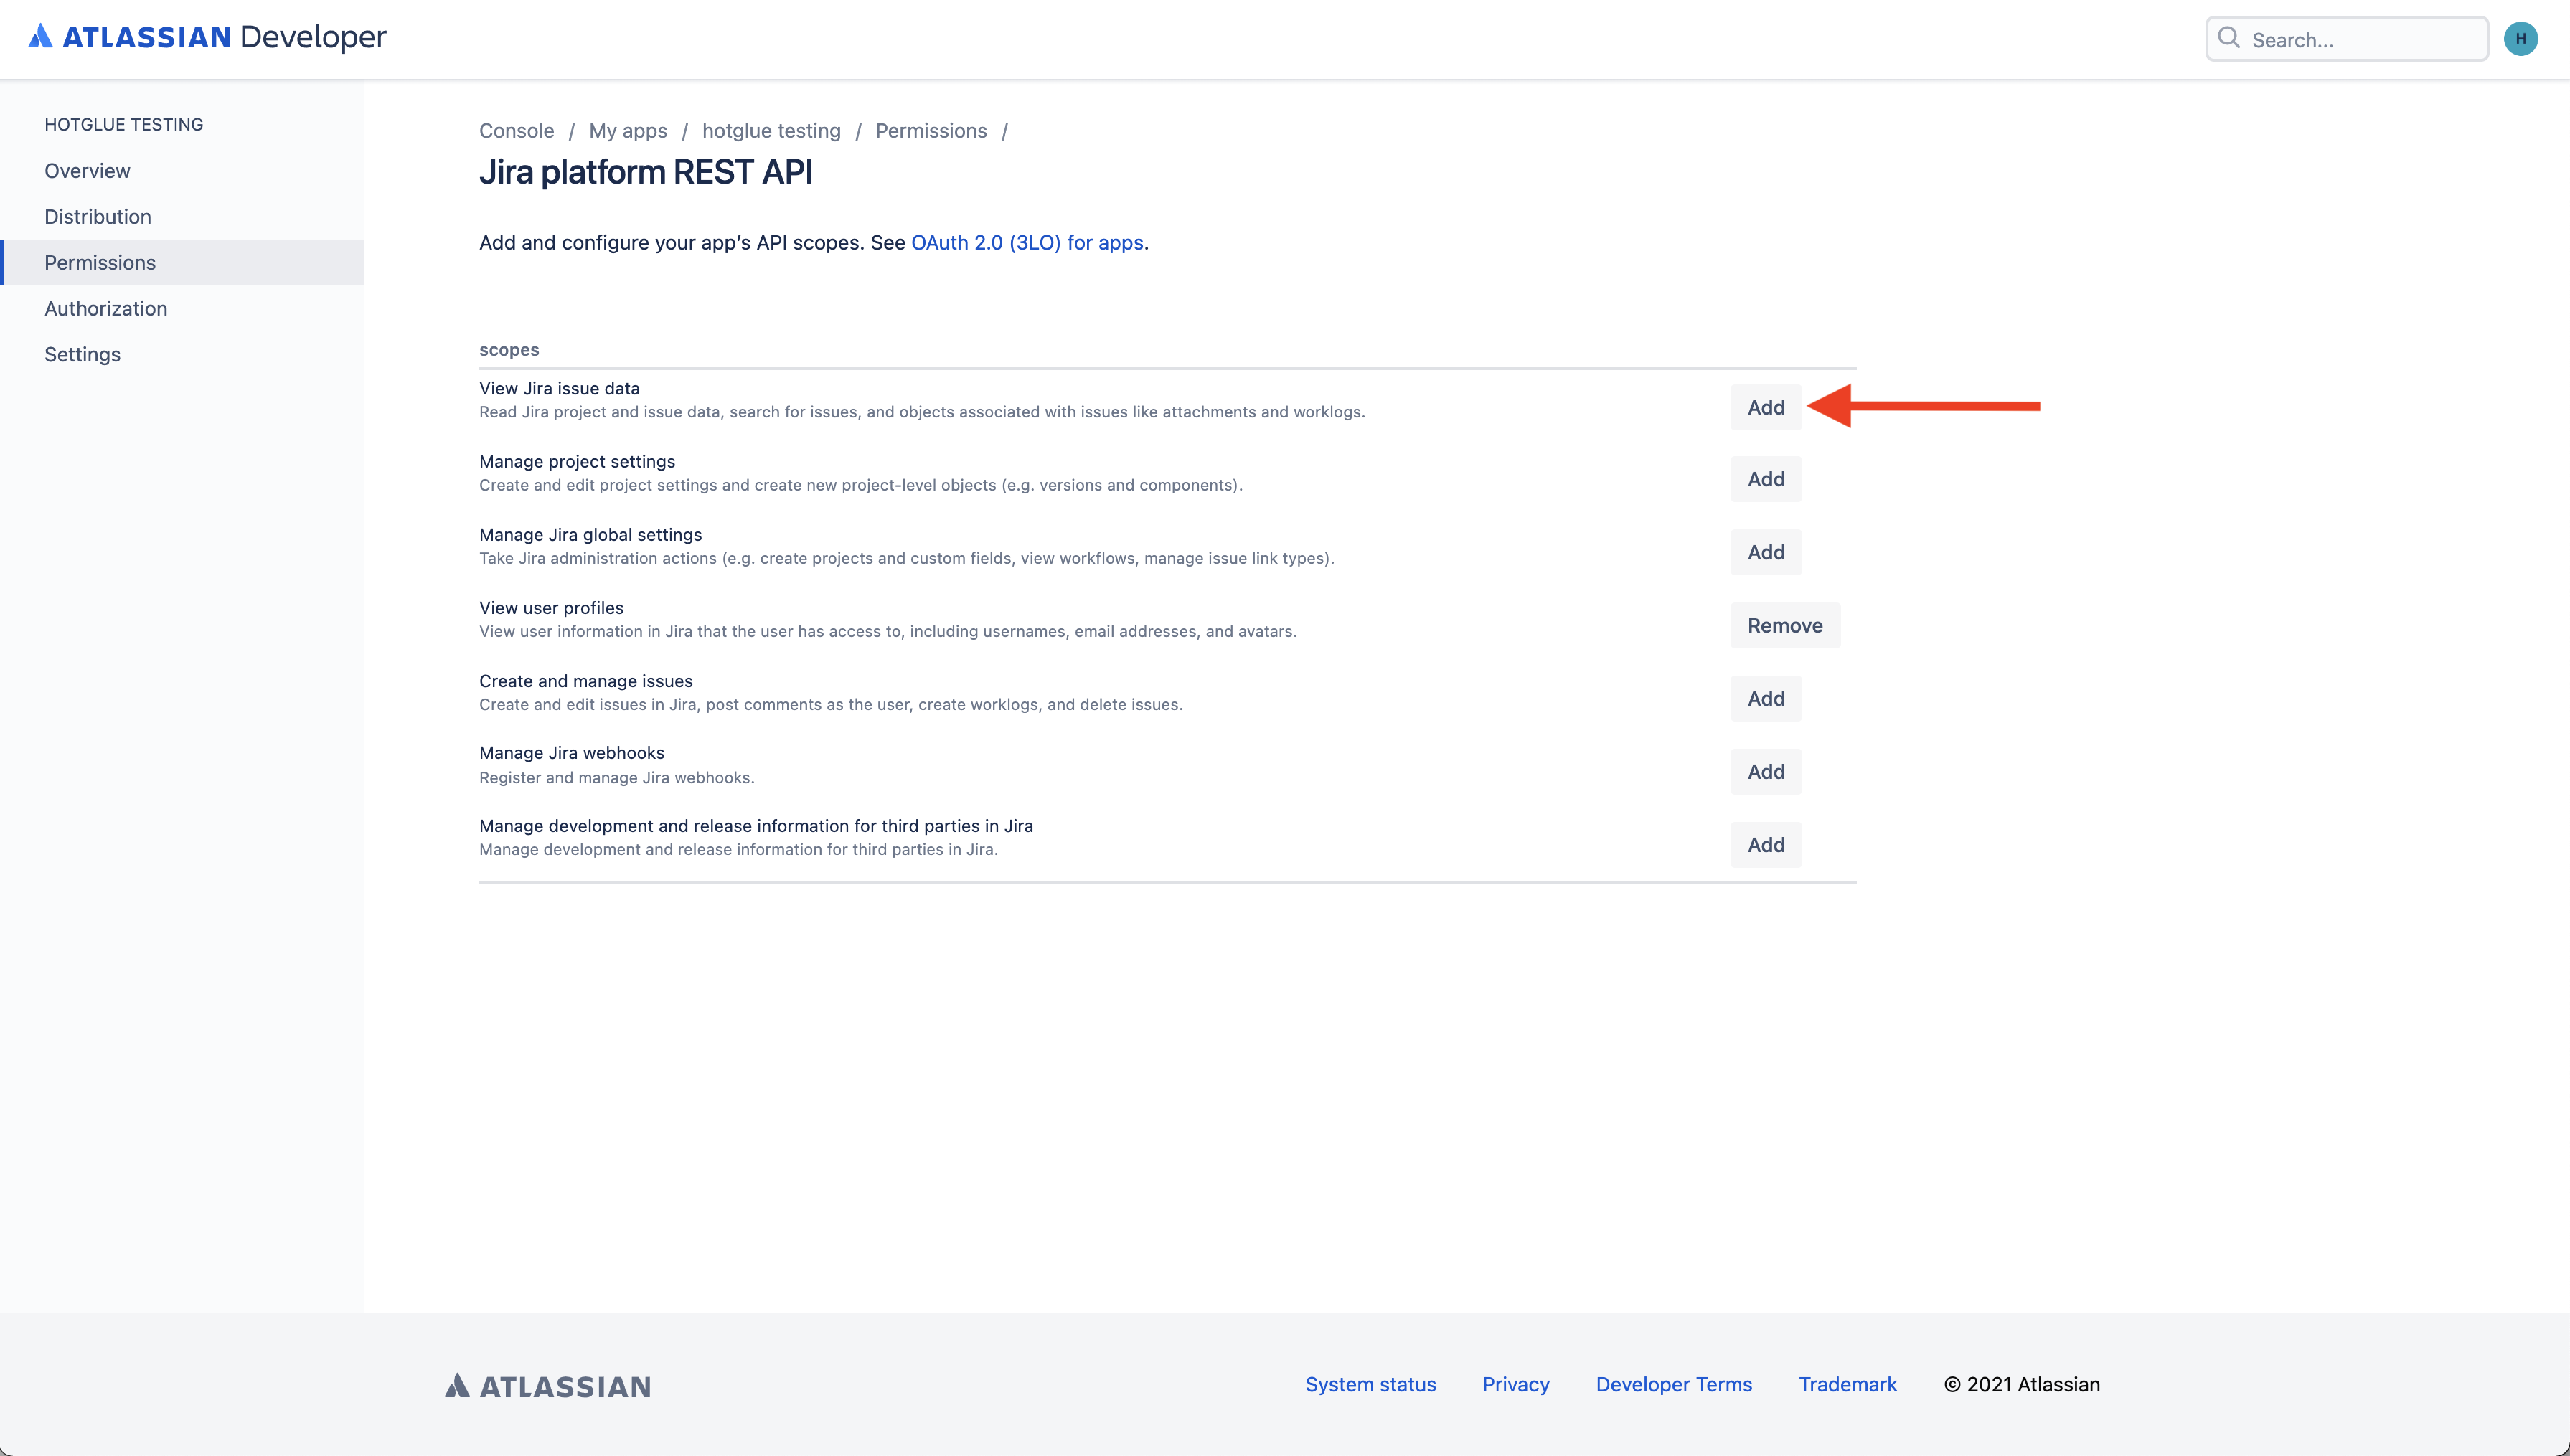 When you add the scopes for the Jira platform REST API, it defaults to just enabling the View user profiles permission. Since I want to be able to read into issue data, I am also going to add the View Jira issue data scope.
Note: If you are only going to use this app to read data from Jira, you will only need to check scopes that can View objects in Jira. If you are also planning on writing data to Jira, you should add the Create/Manage scopes as well as the View scopes.
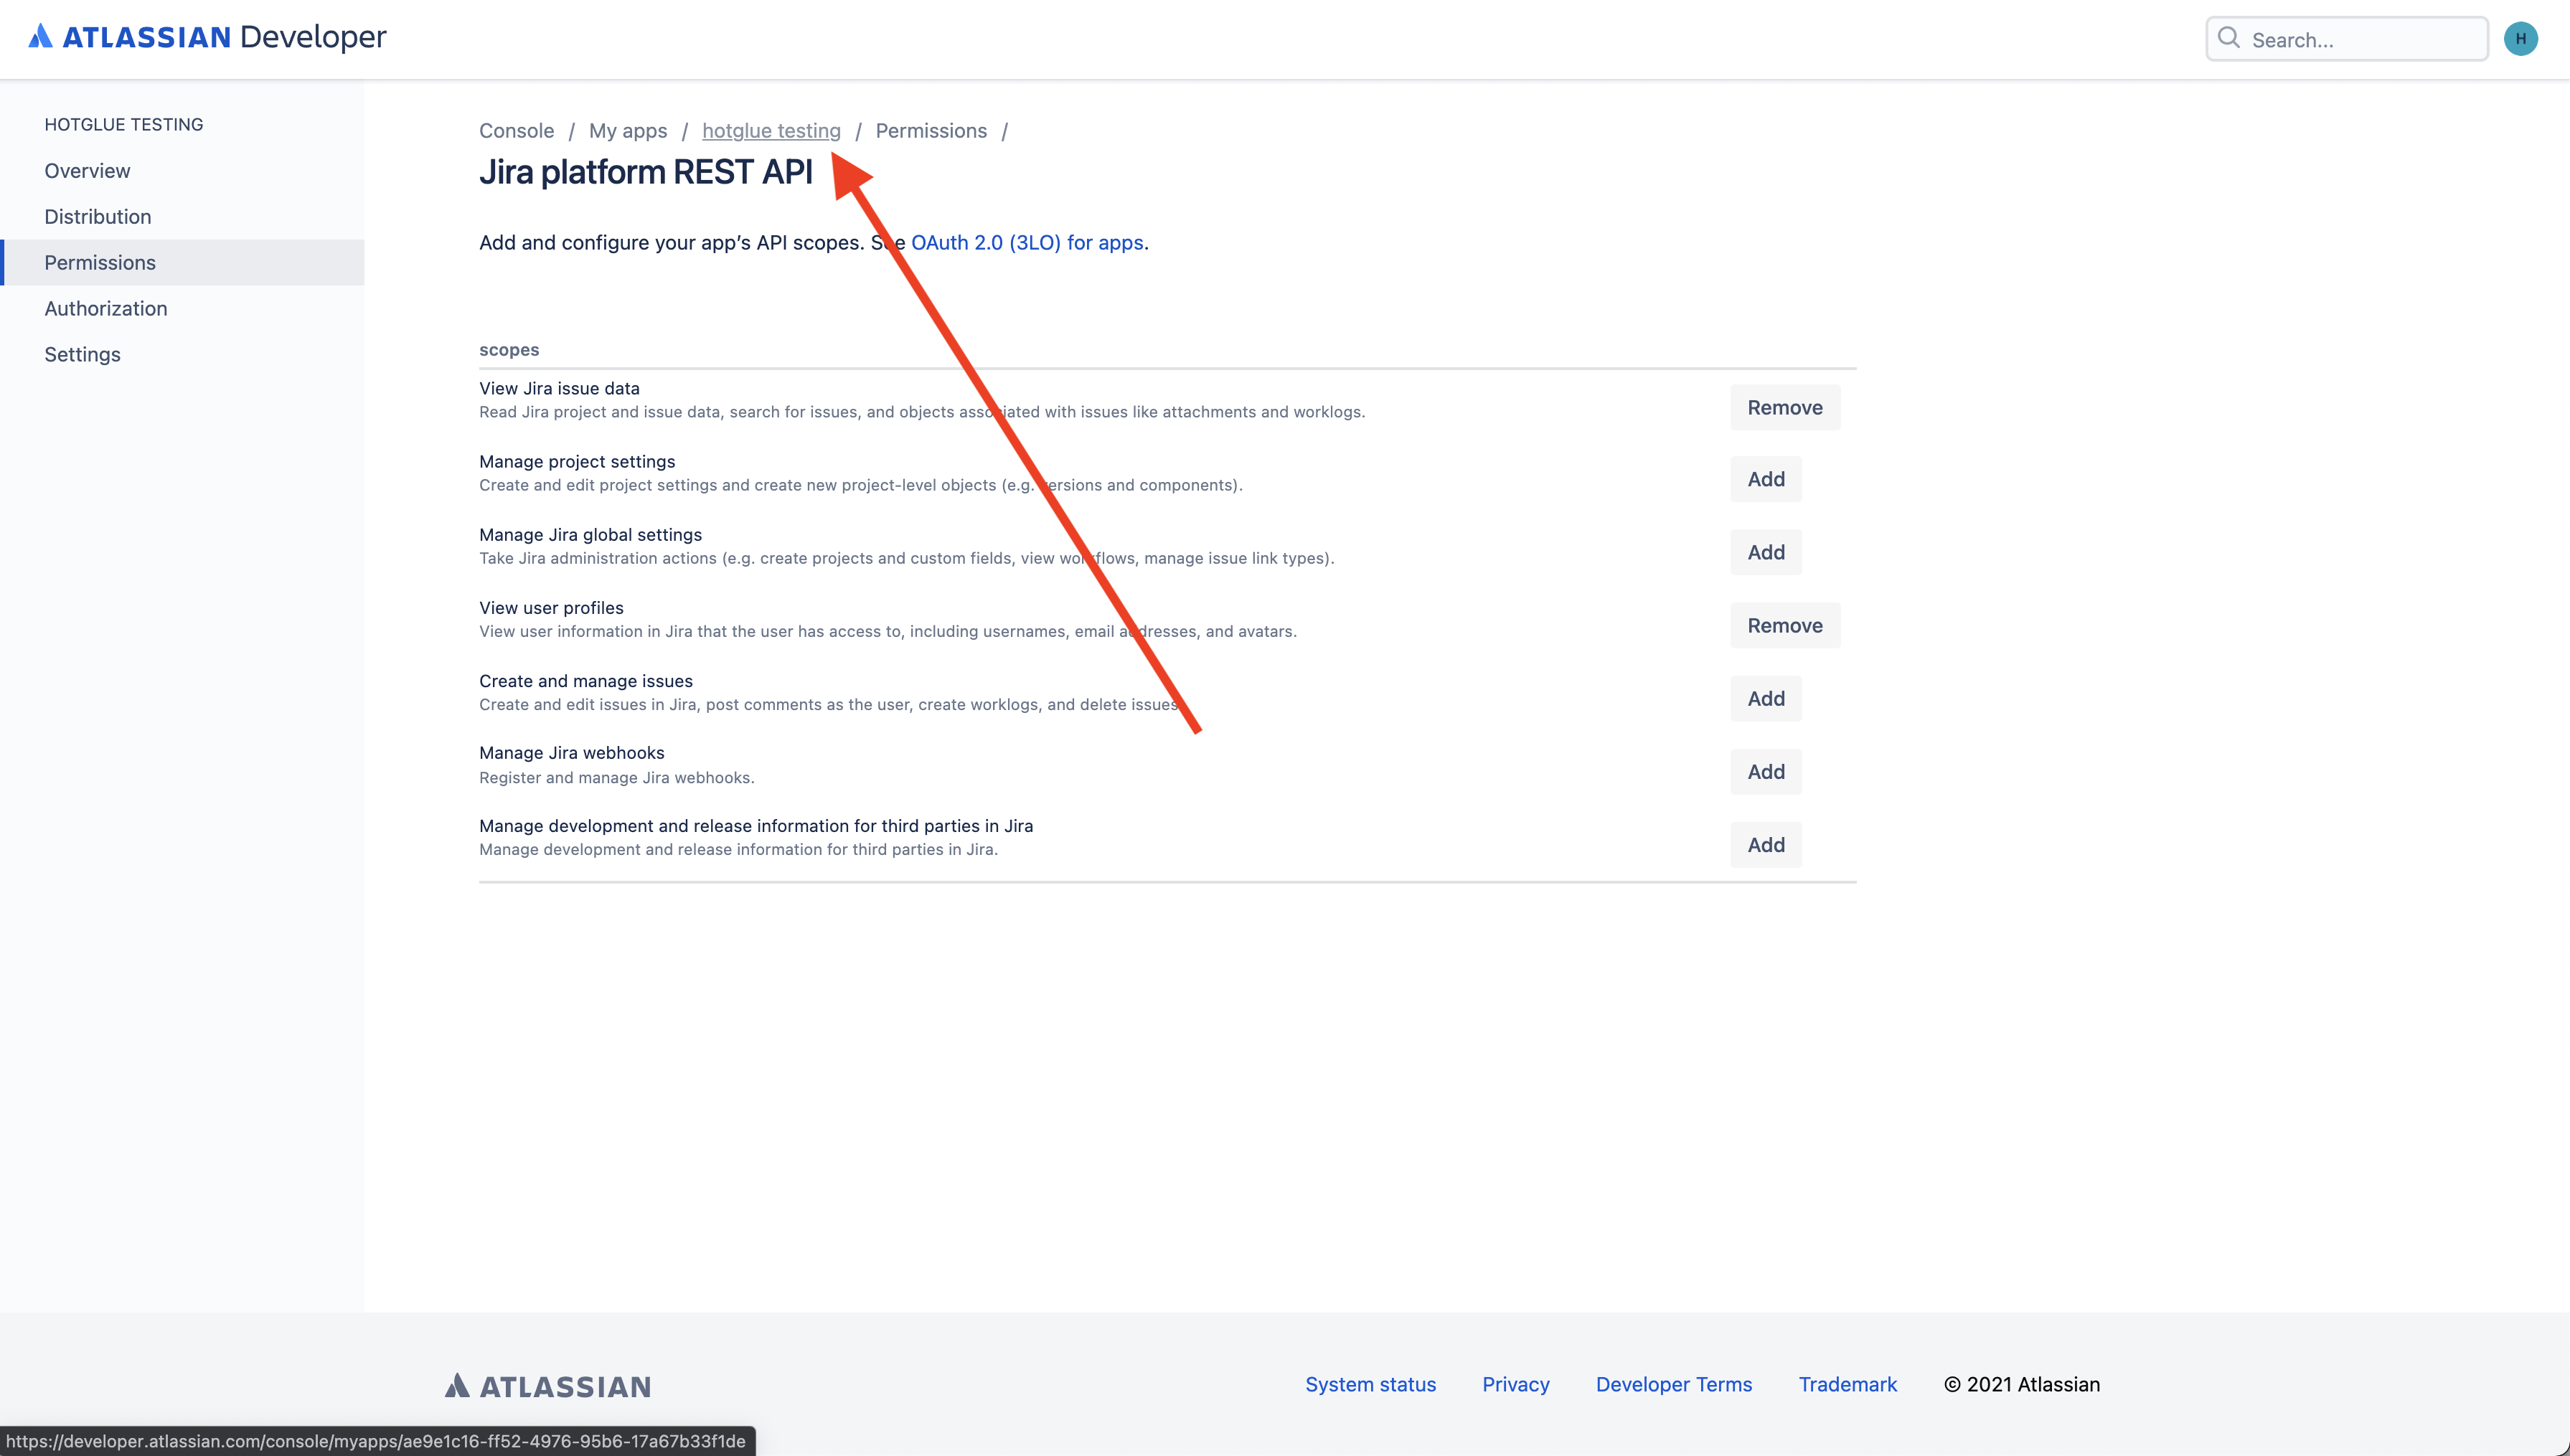 Once you are done configuring the scopes, you can go ahead and head back to your app.
Getting the credentials
Now it is finally time to grab your credentials.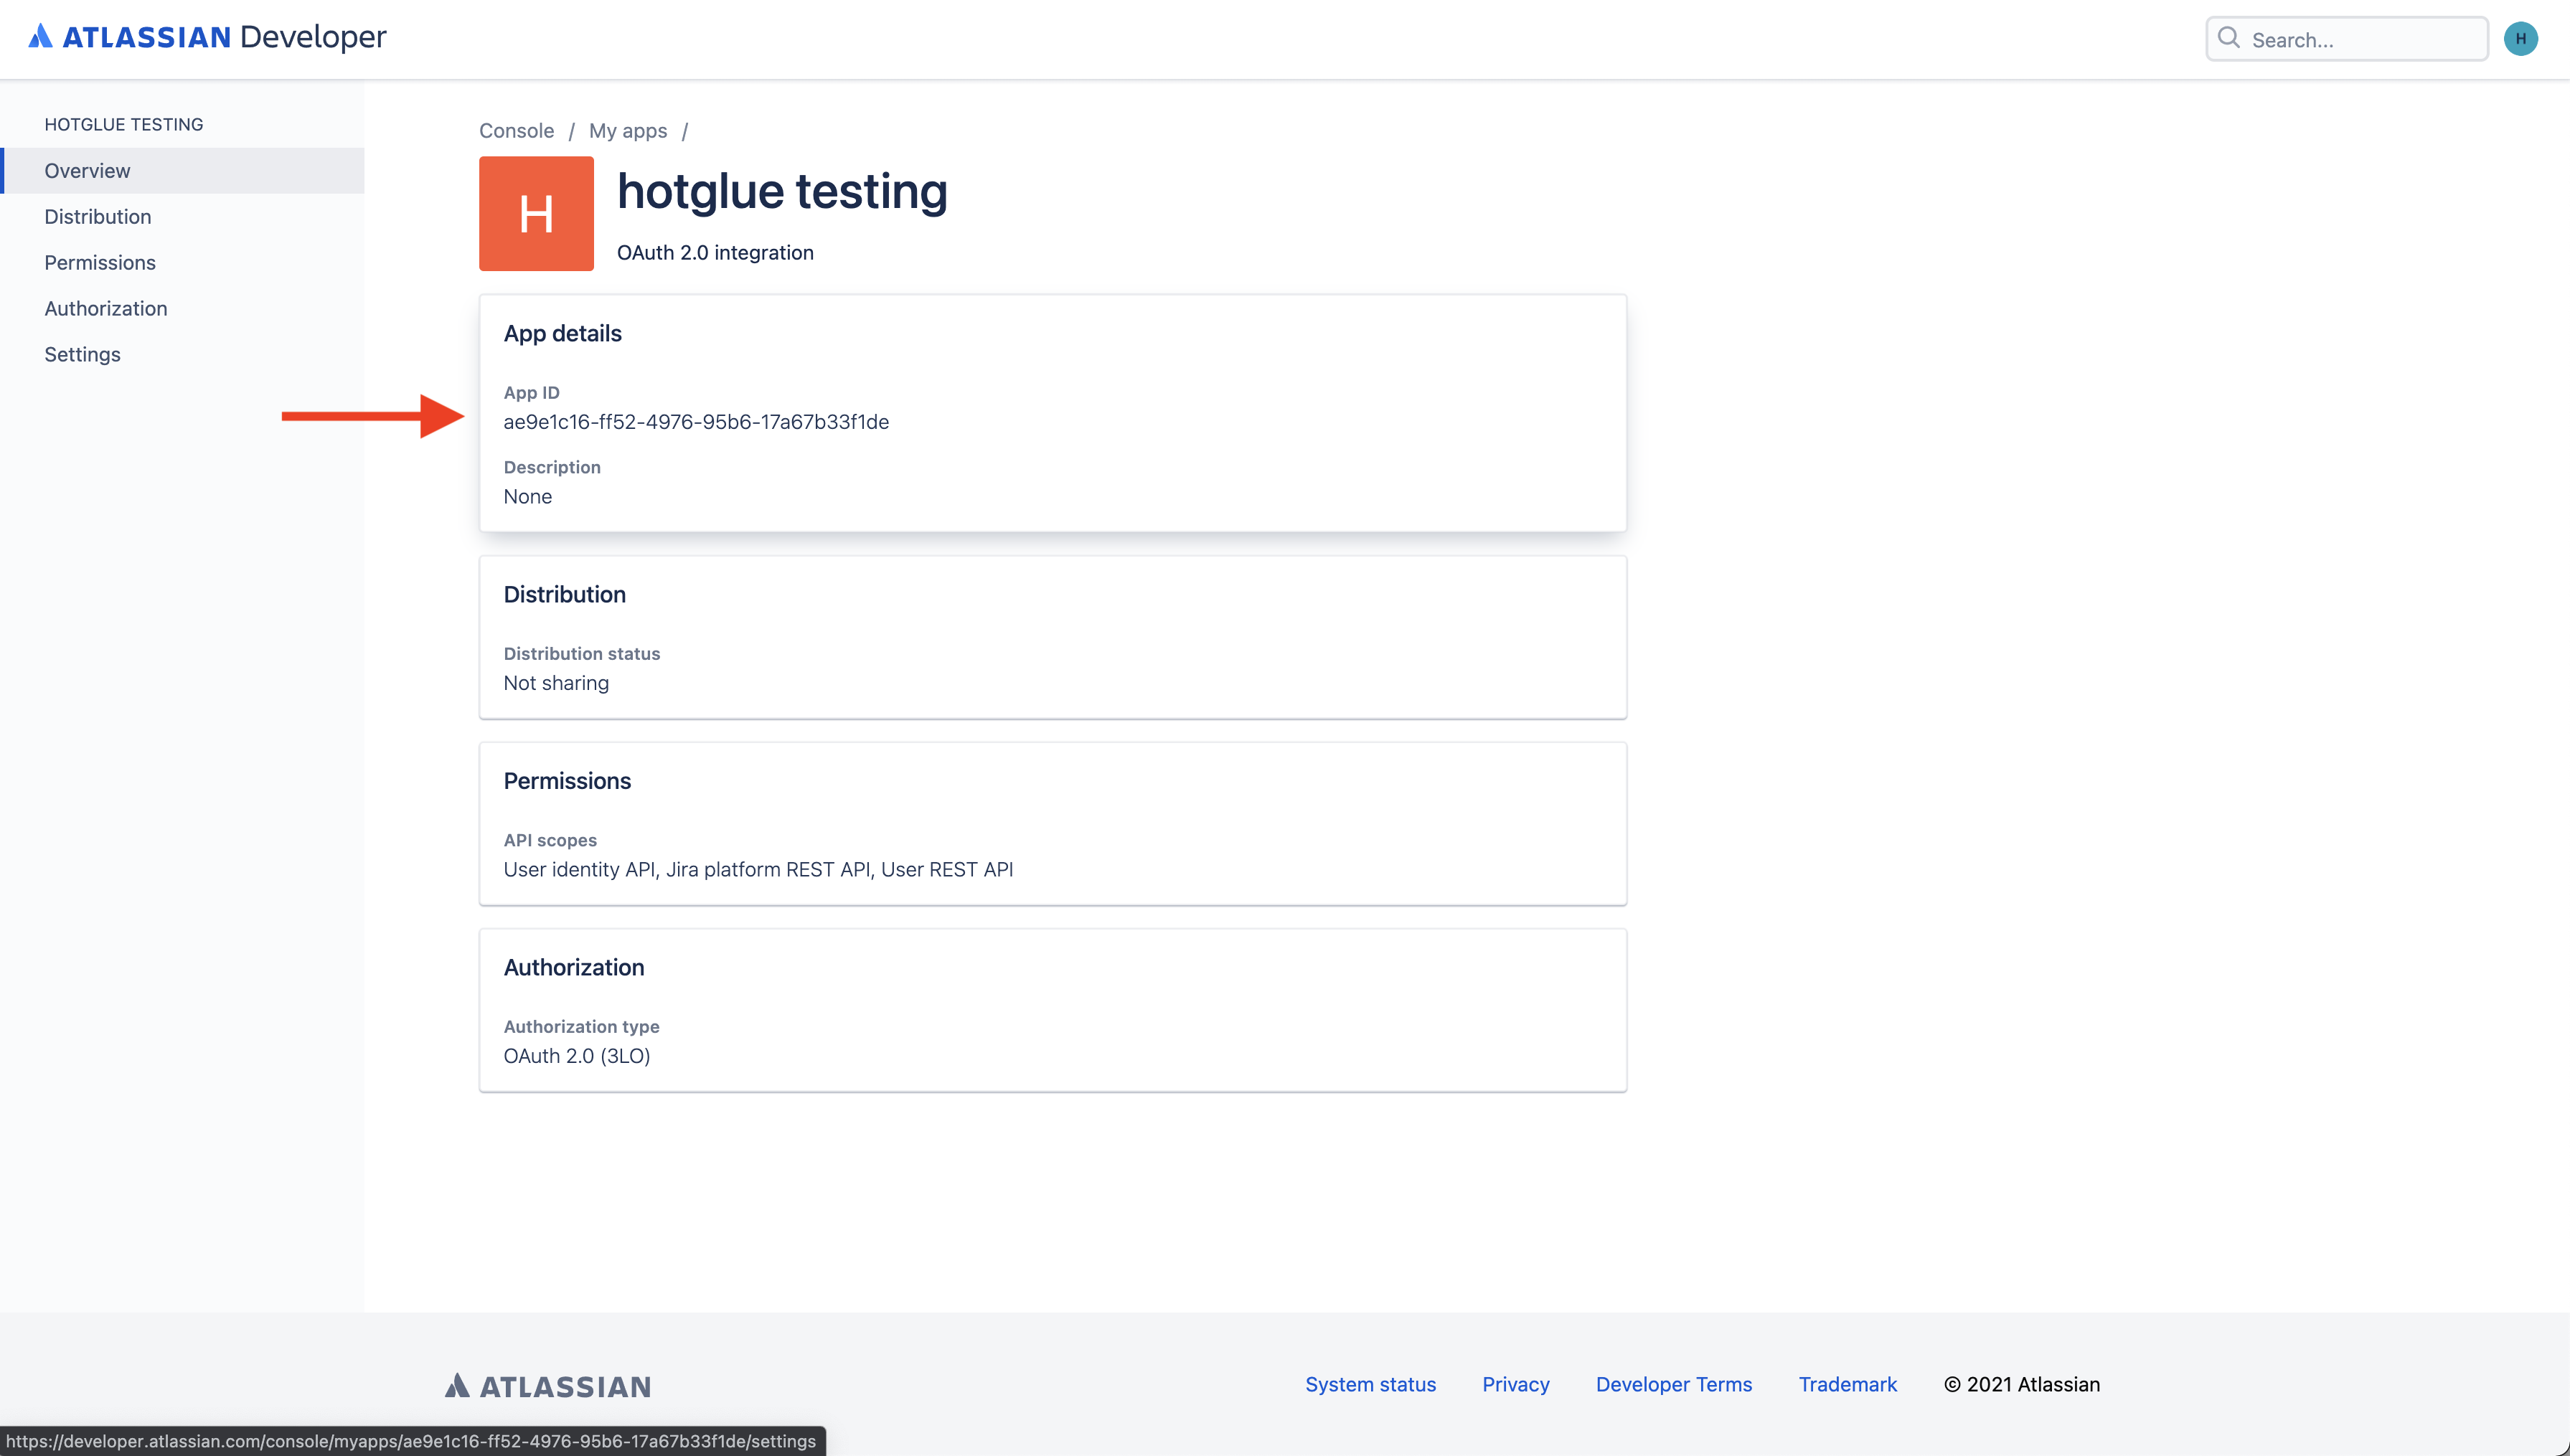 Head into the App details section of your app.
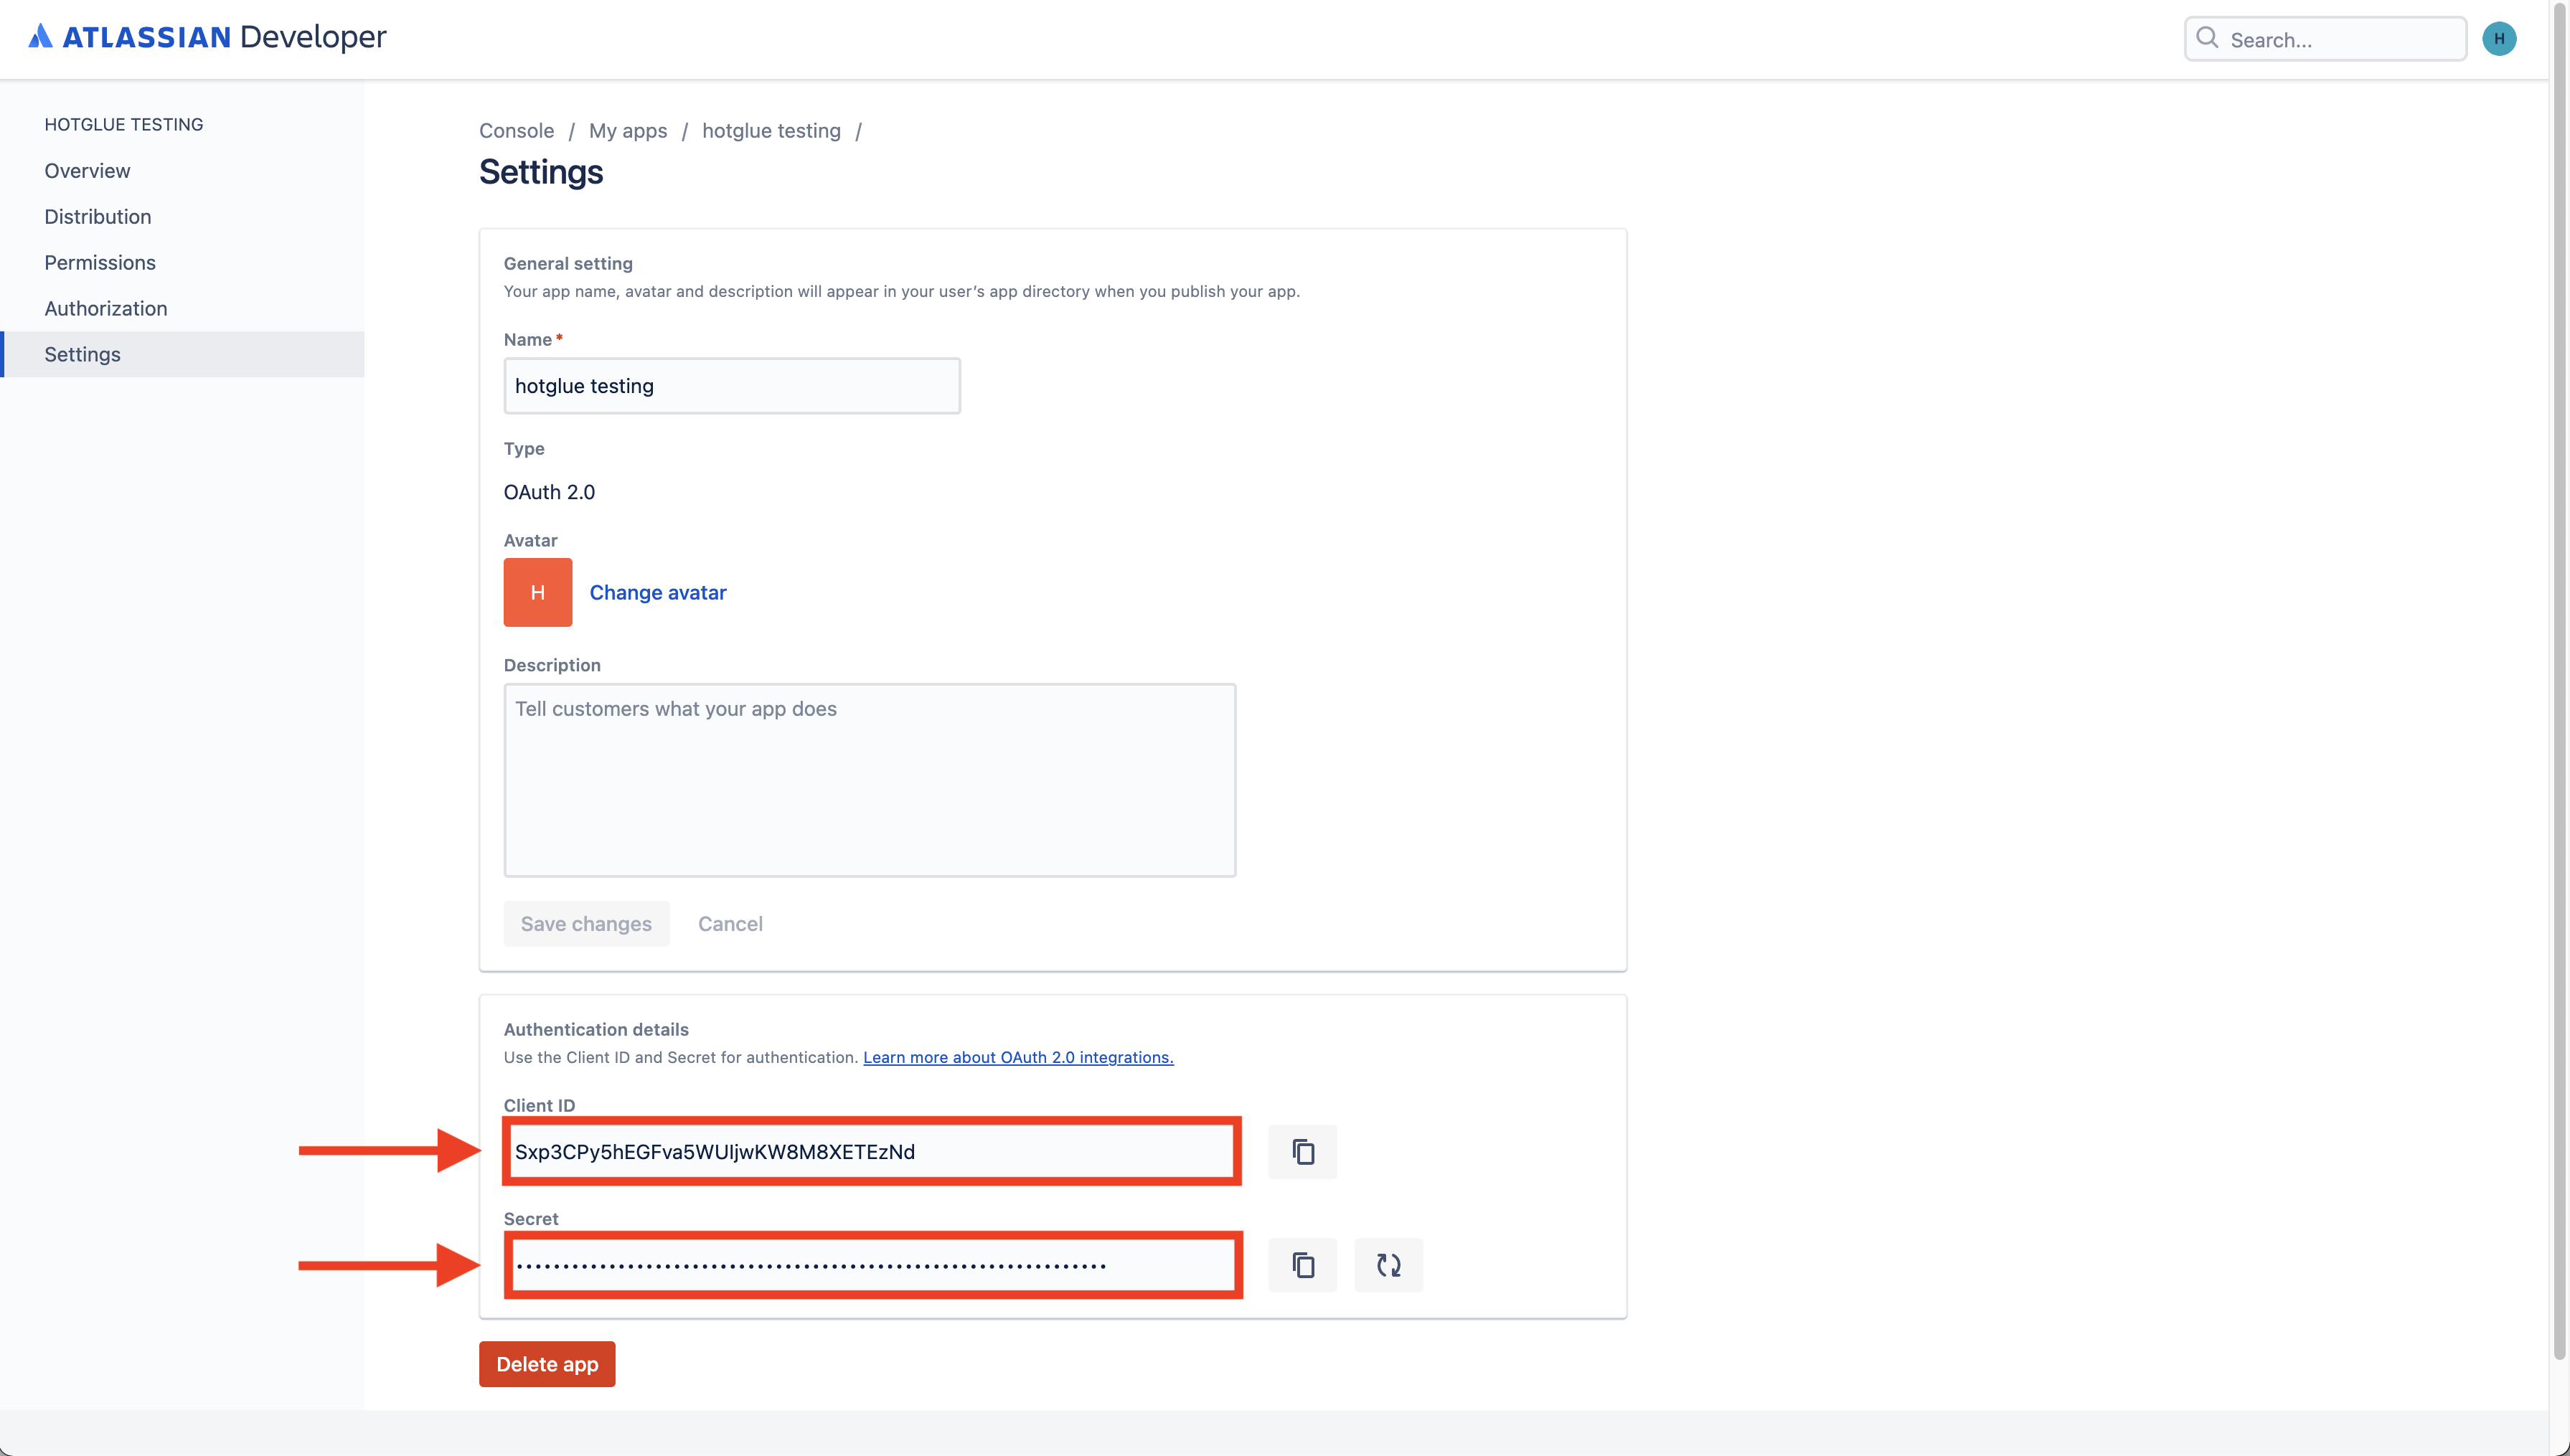 At the bottom of this page, you can access your credentials! Take these and put them in hotglue.