Connector Details
| Name | Value |
|---|---|
| Platform | Clockify |
| Auth Type | API Keys |
| Direction | Read |
| Tap Repo | https://github.com/hotgluexyz/tap-clockify |
| Tap Metrics | Usage: |
Credentials Setup
Follow the steps below to get the credentials you need to use the Clockify connector.Workspace
The first credential we will grab is the Workspace name. To do that, you need to go and create a Clockify account (there is a free plan that you can utilize).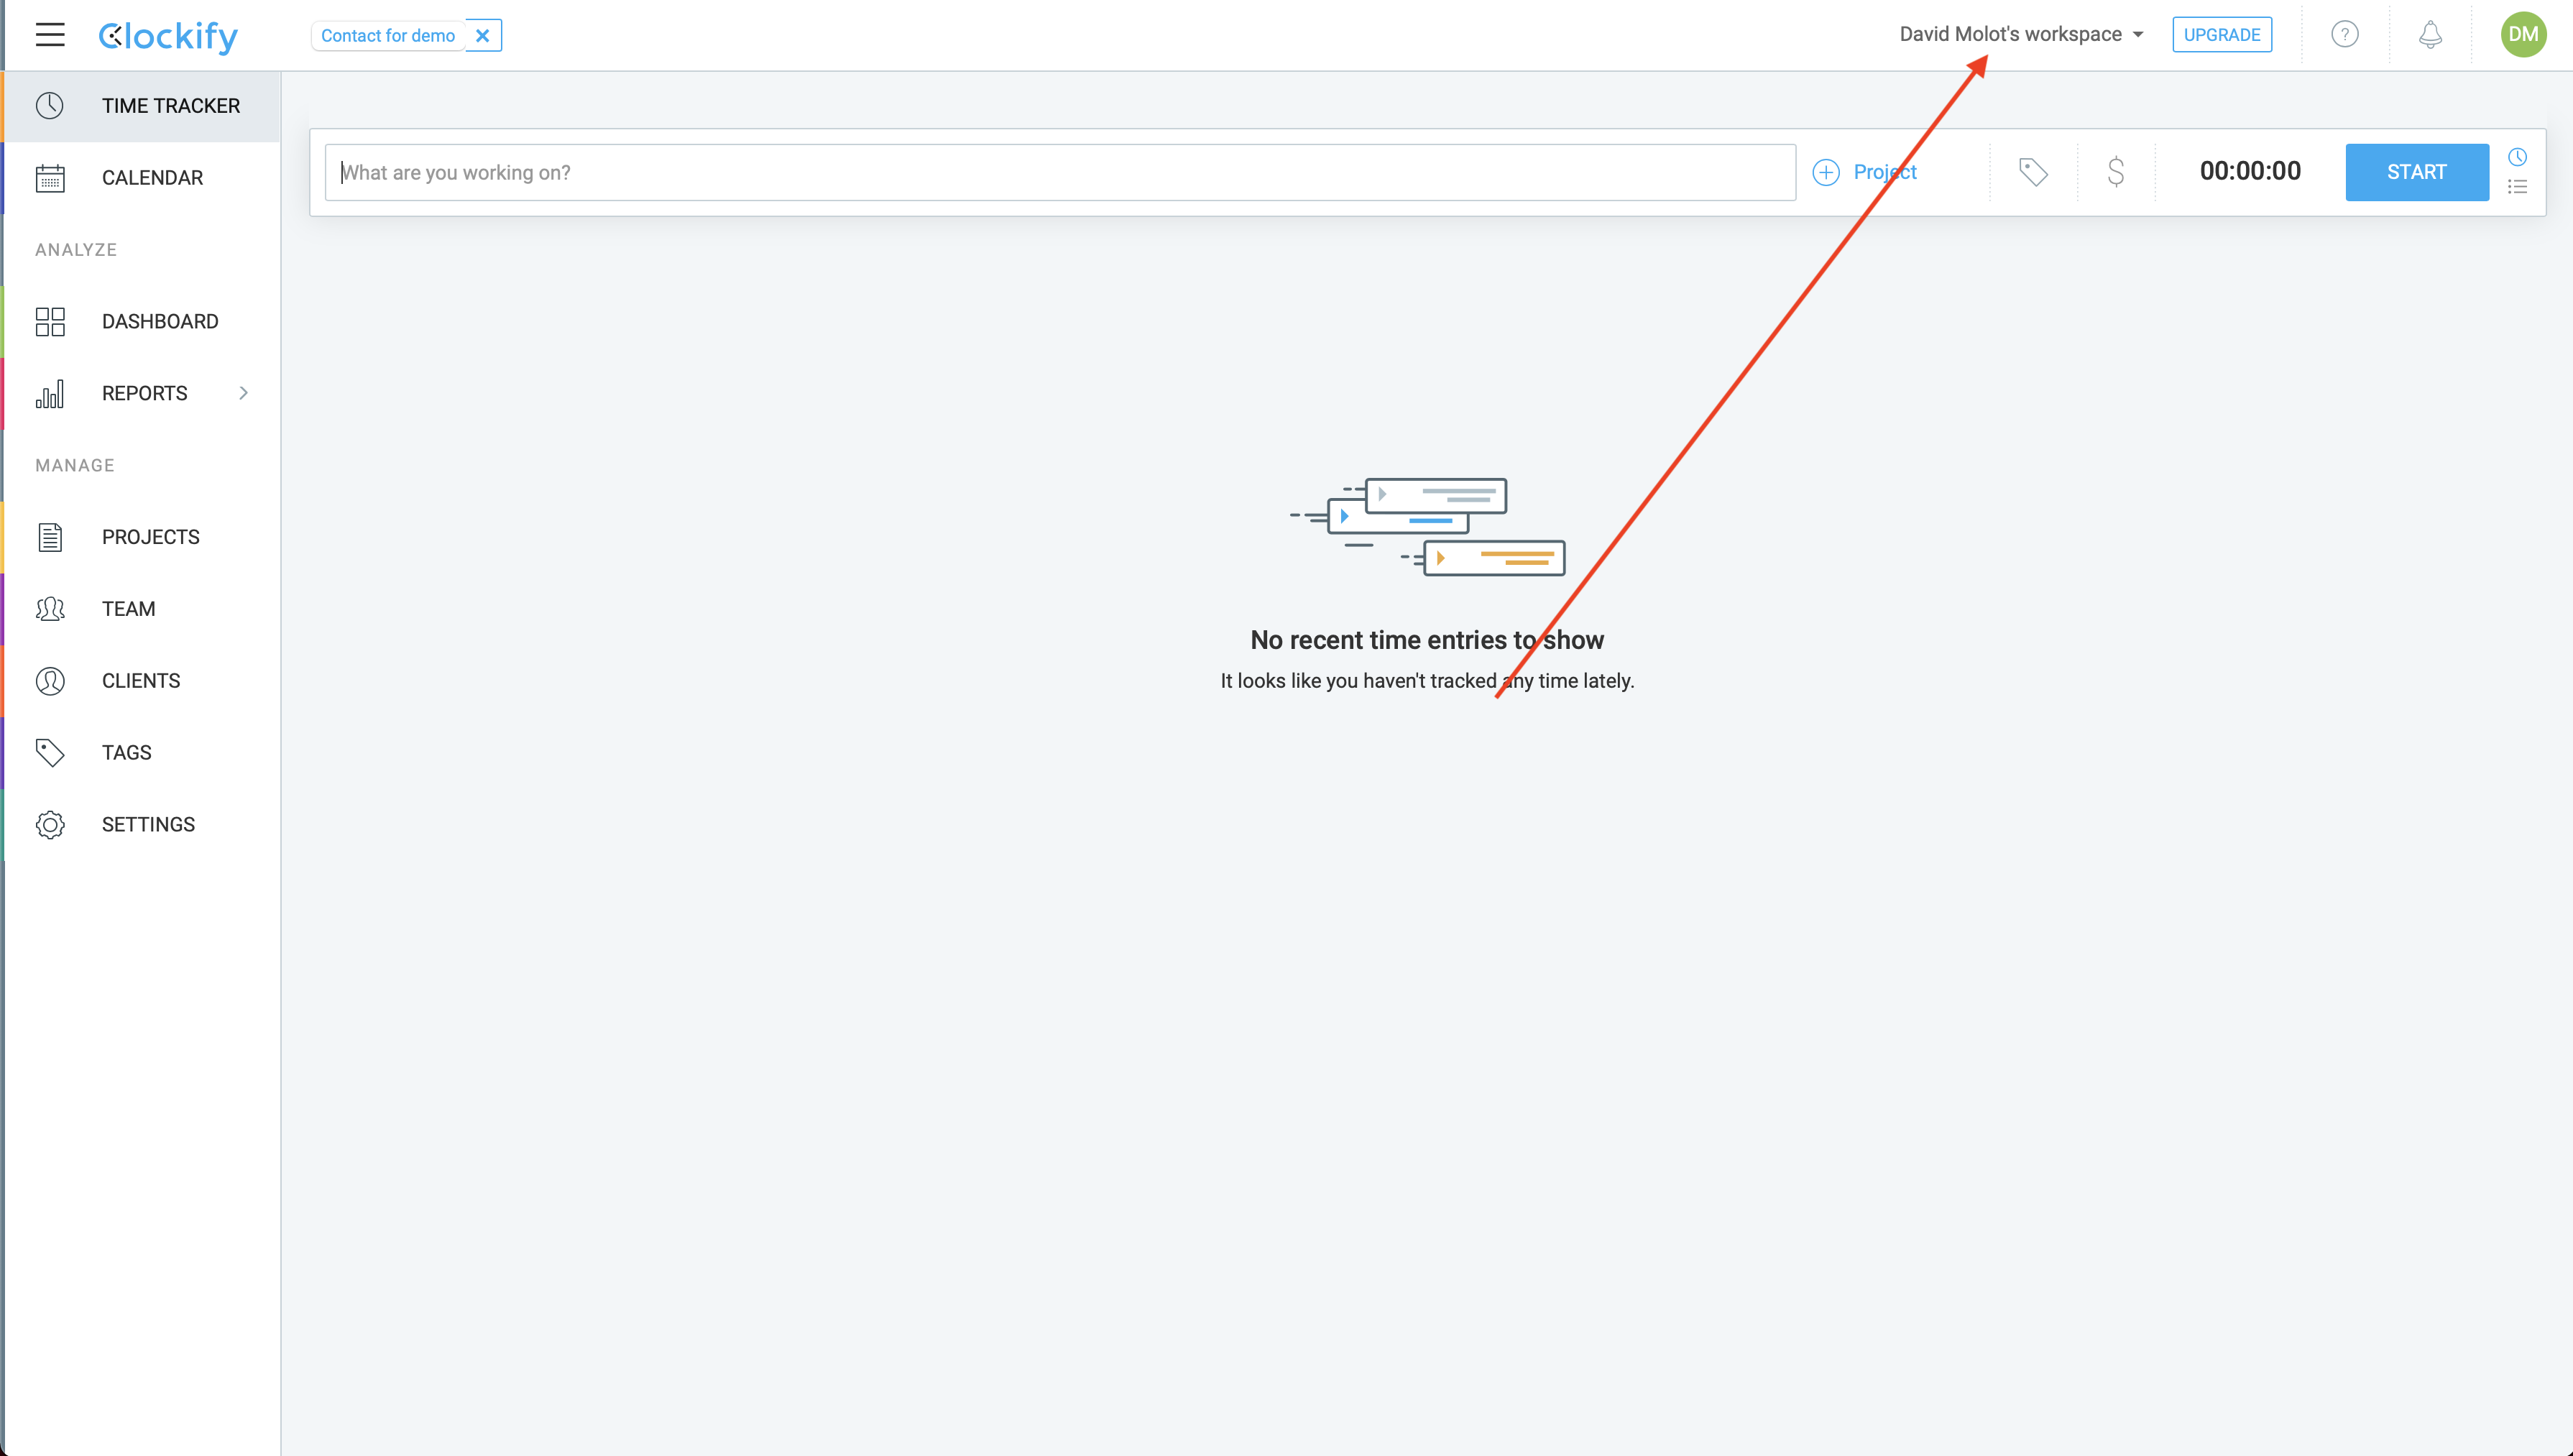 Once you log in, you will see this page. In the top right will be the name of your workspace. This is the name that you should put into hotglue.
API Key
To get to API key, you need to remain on the home page of Clockify.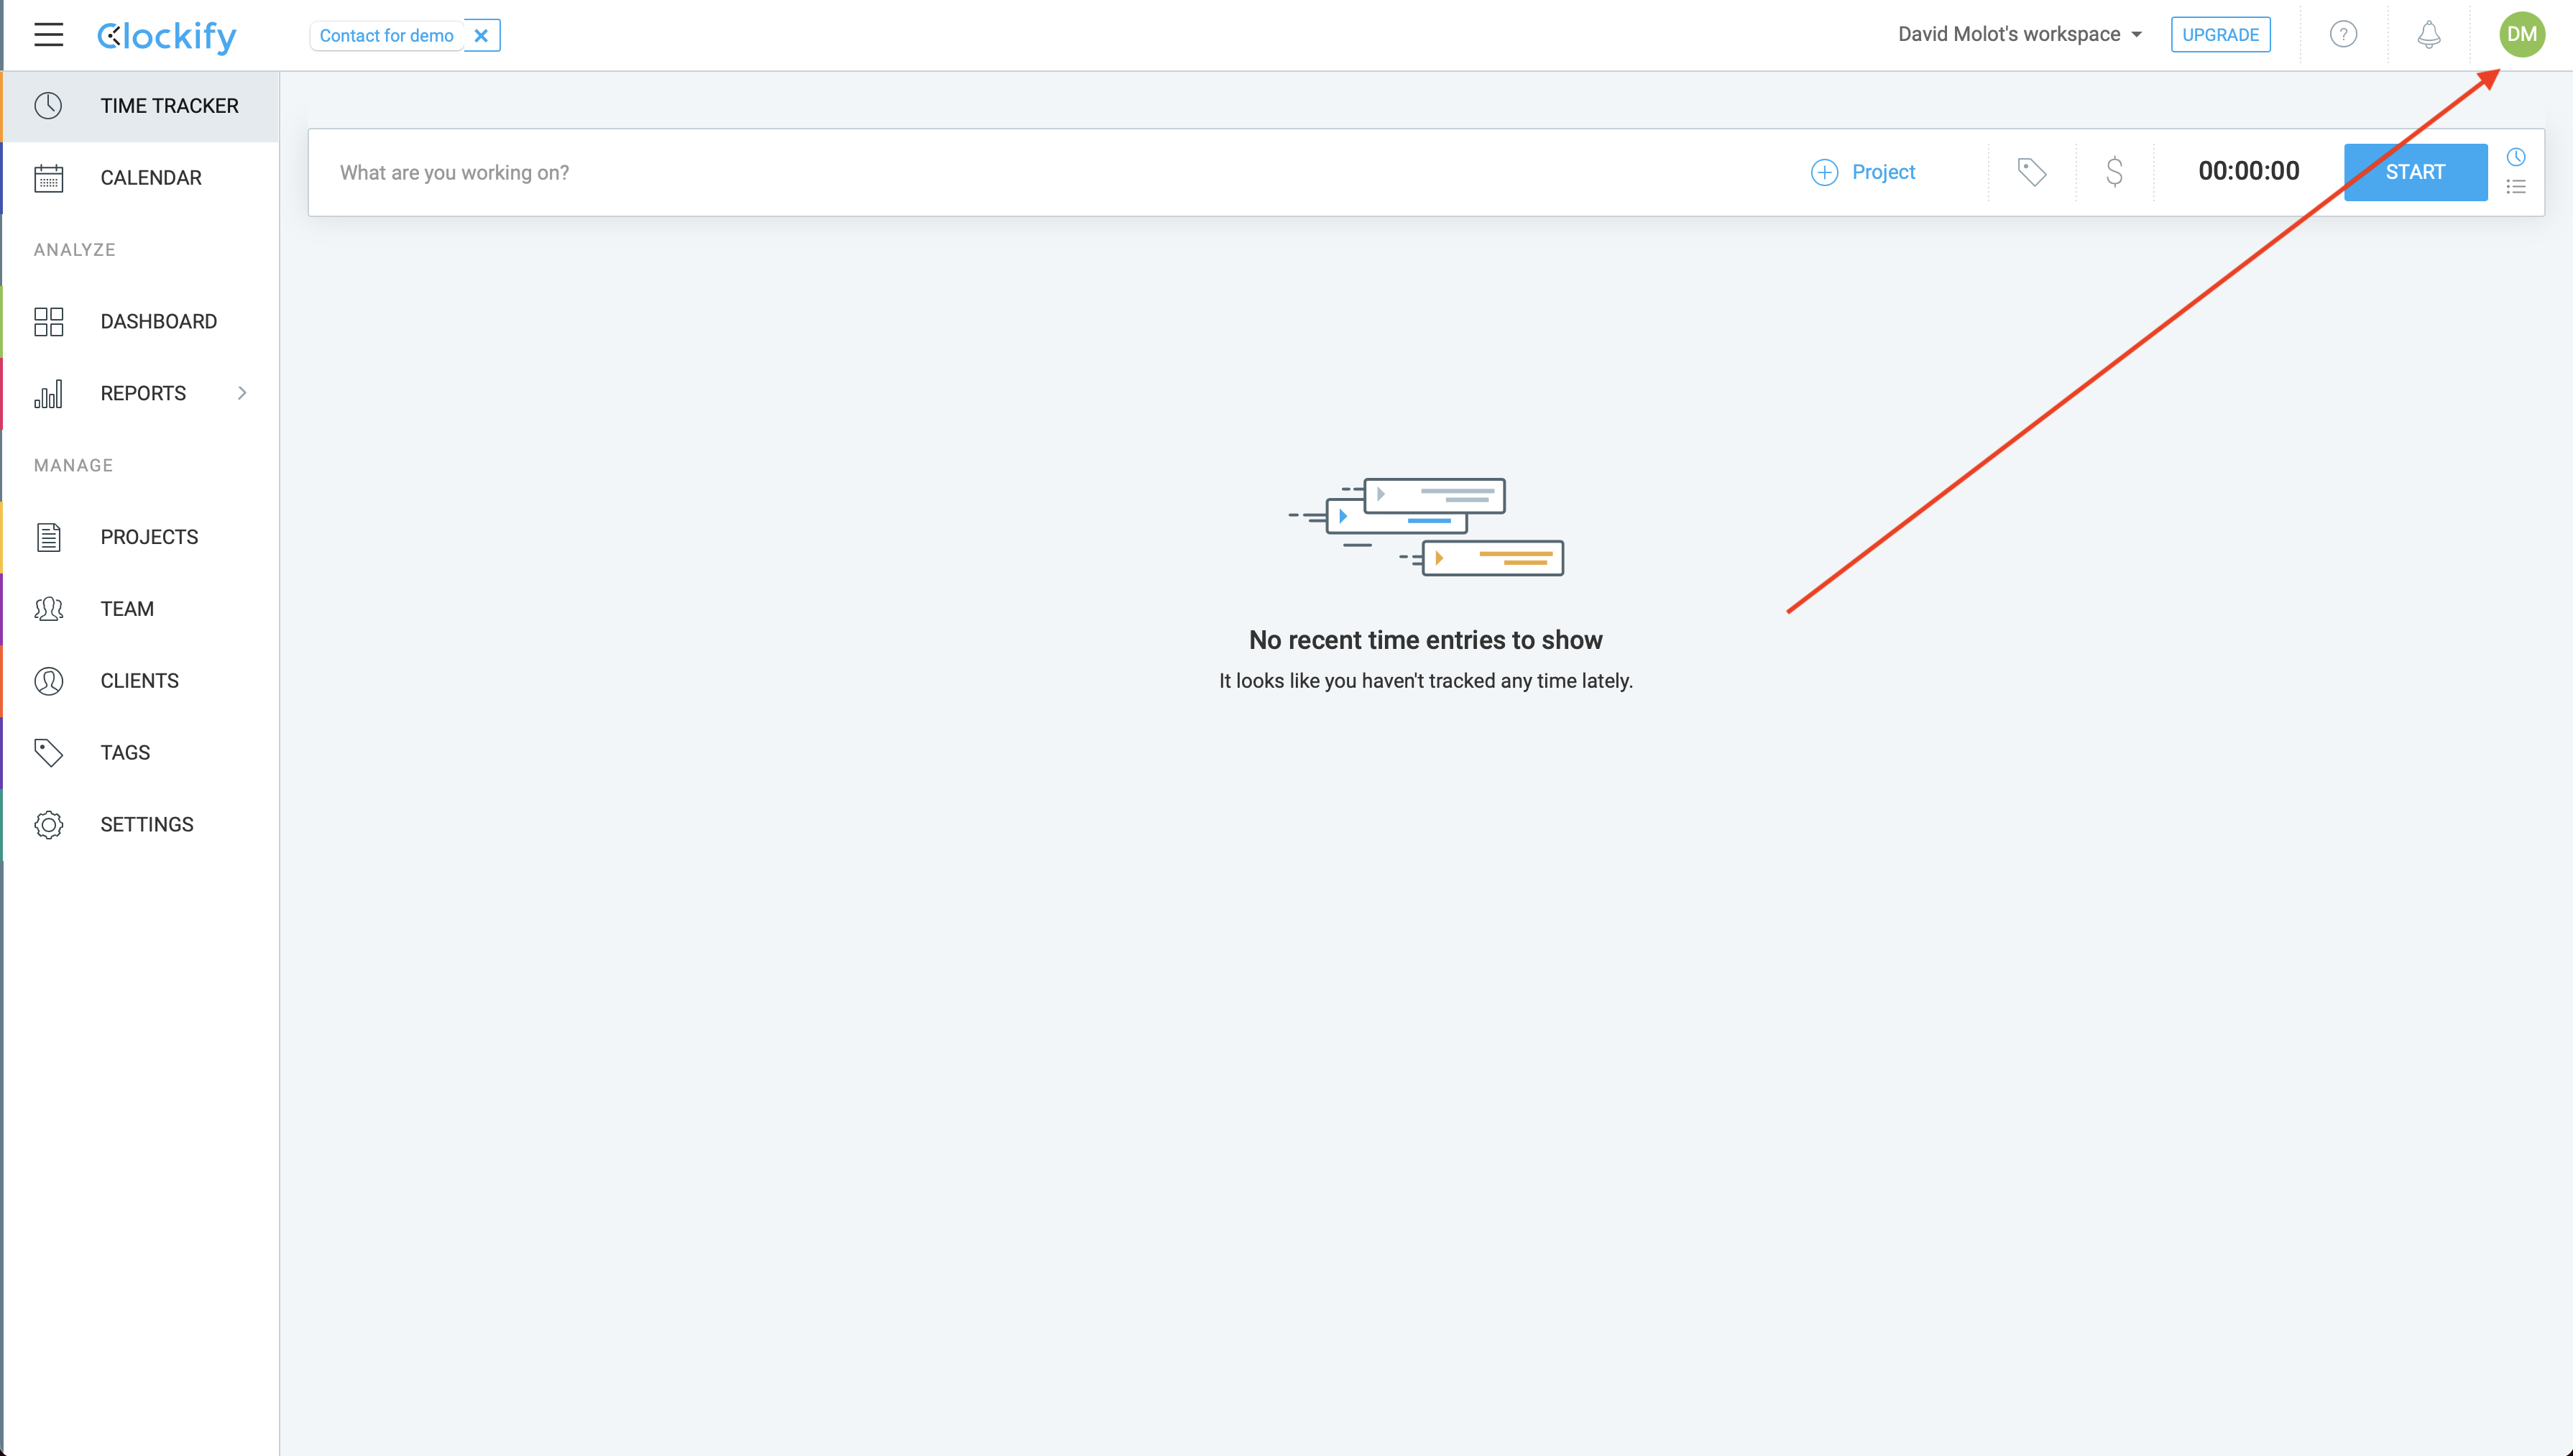 Go to the top right corner and click the circular emblem with the initals of the account owner. This will prompt a drop down.
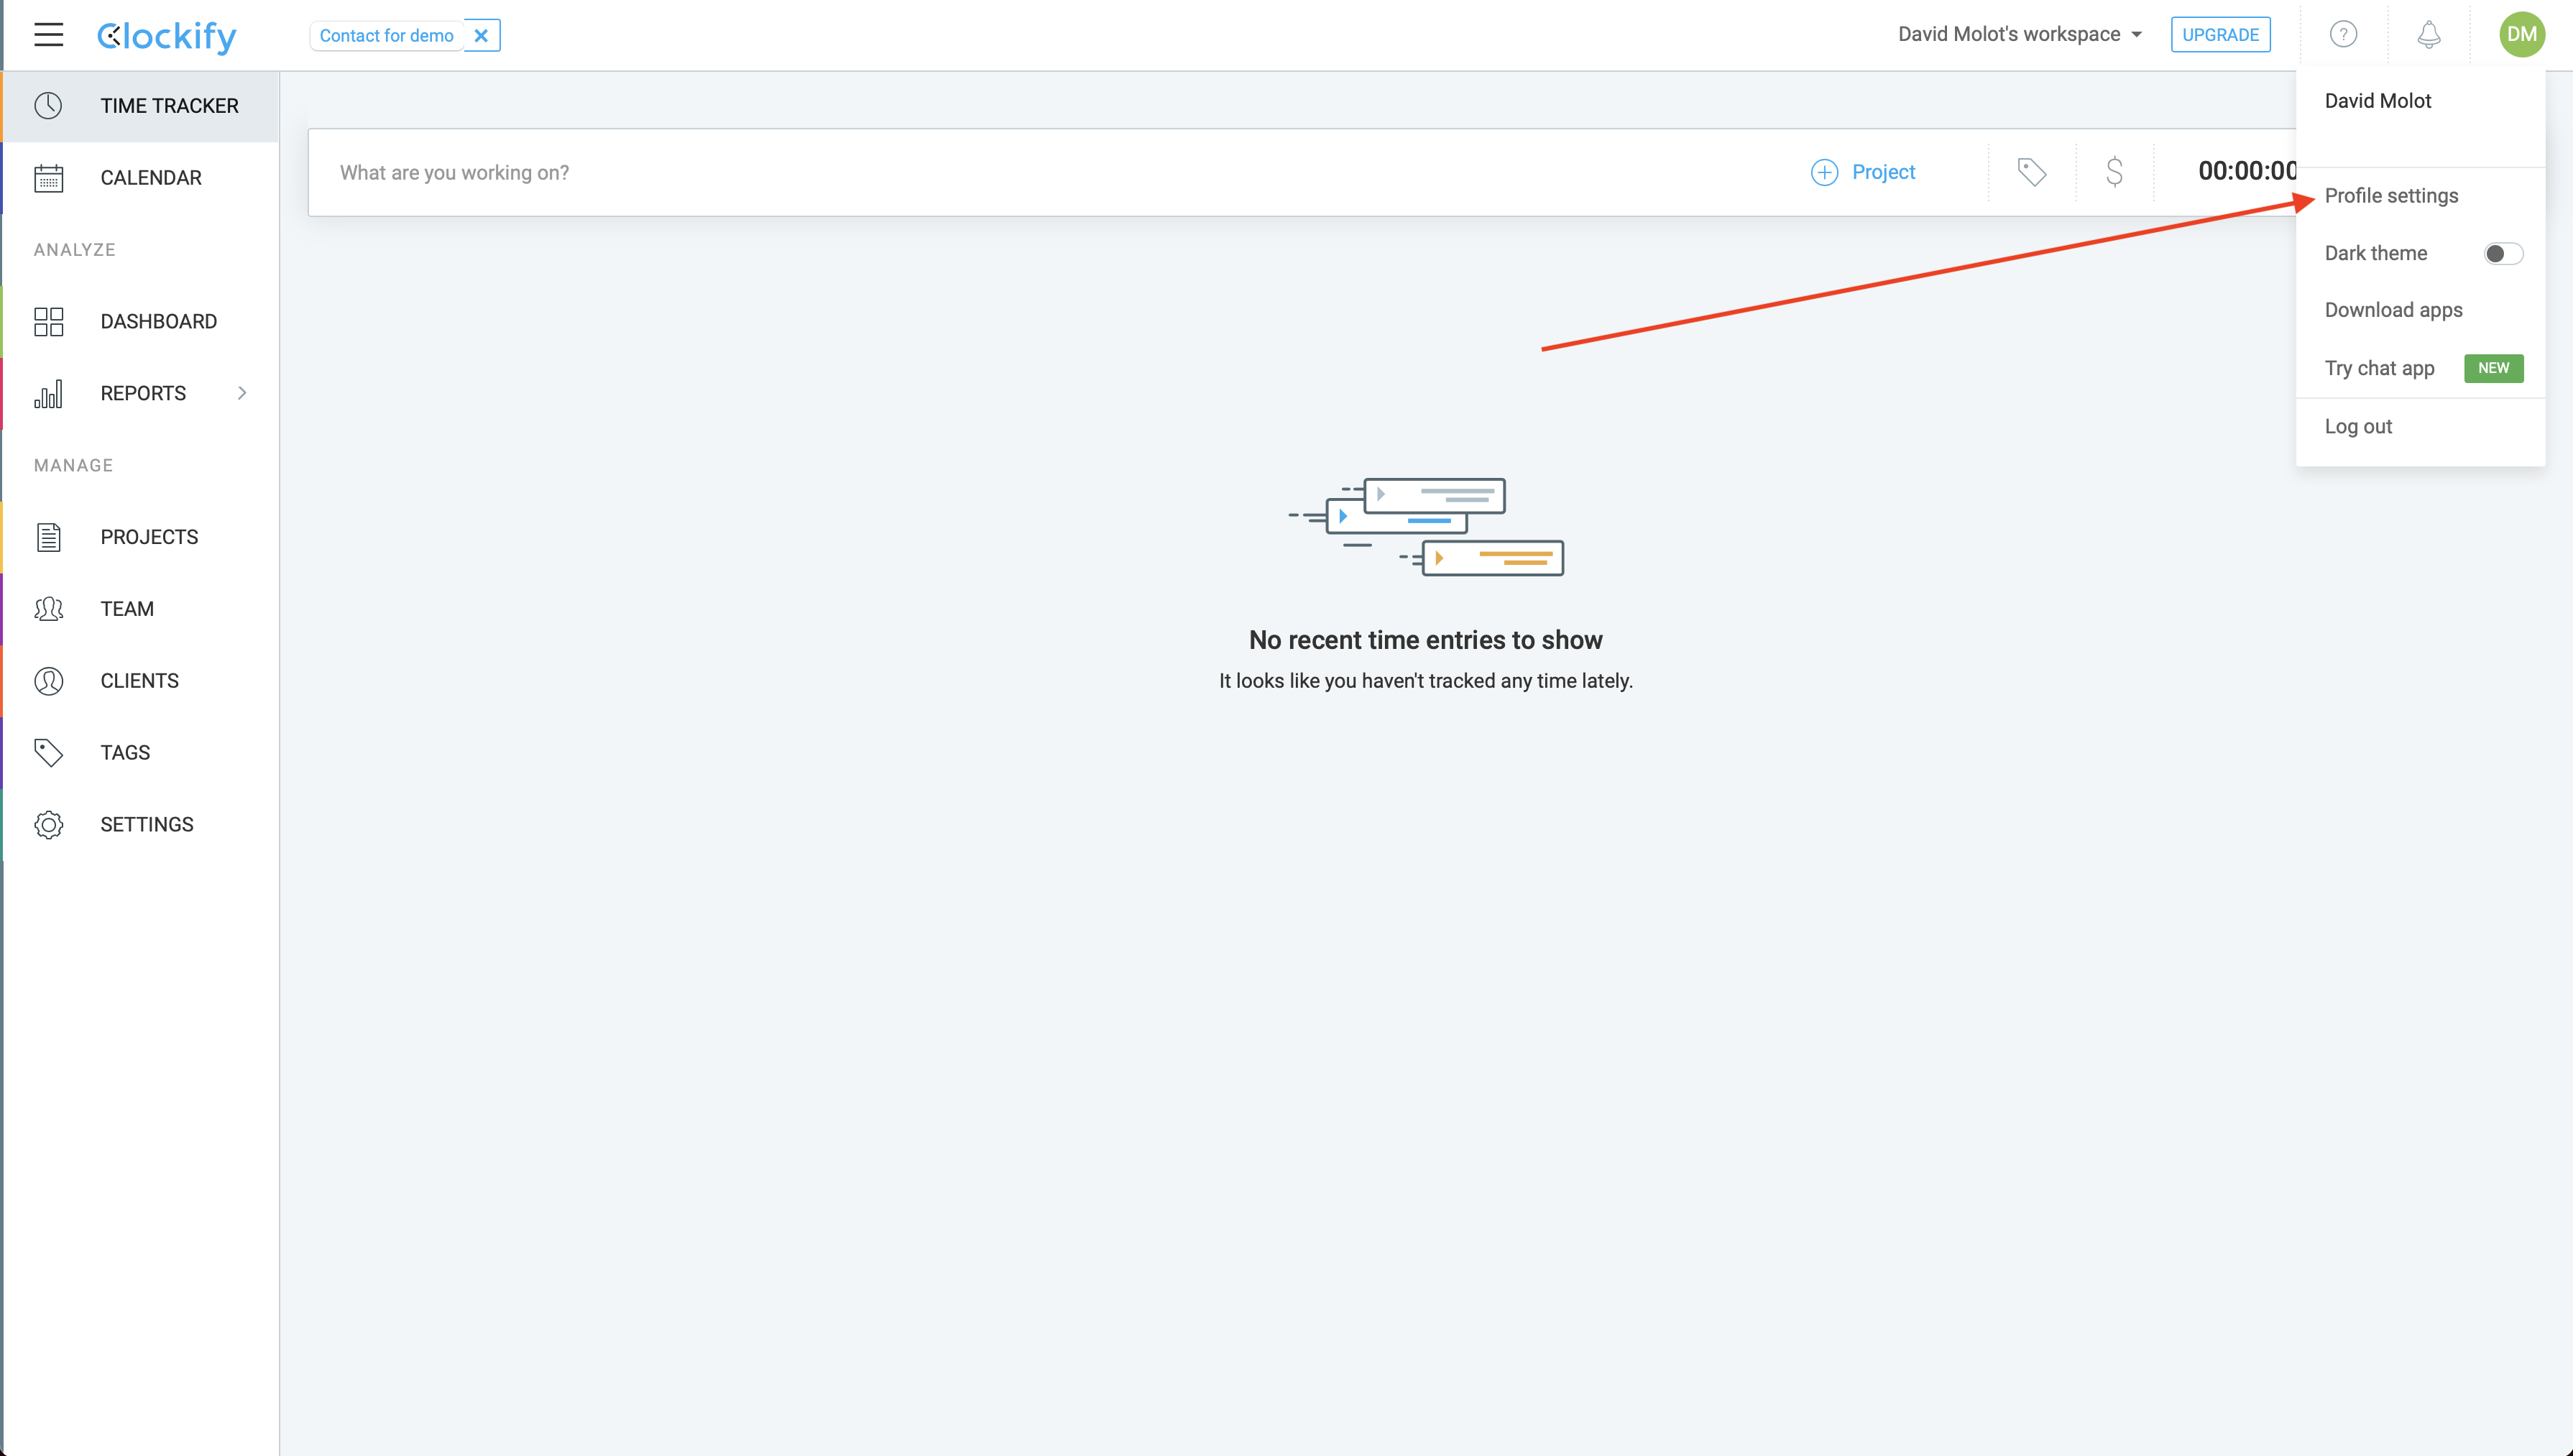 Next, you will need to head to your Profile settings by clicking on the option from the drop down.
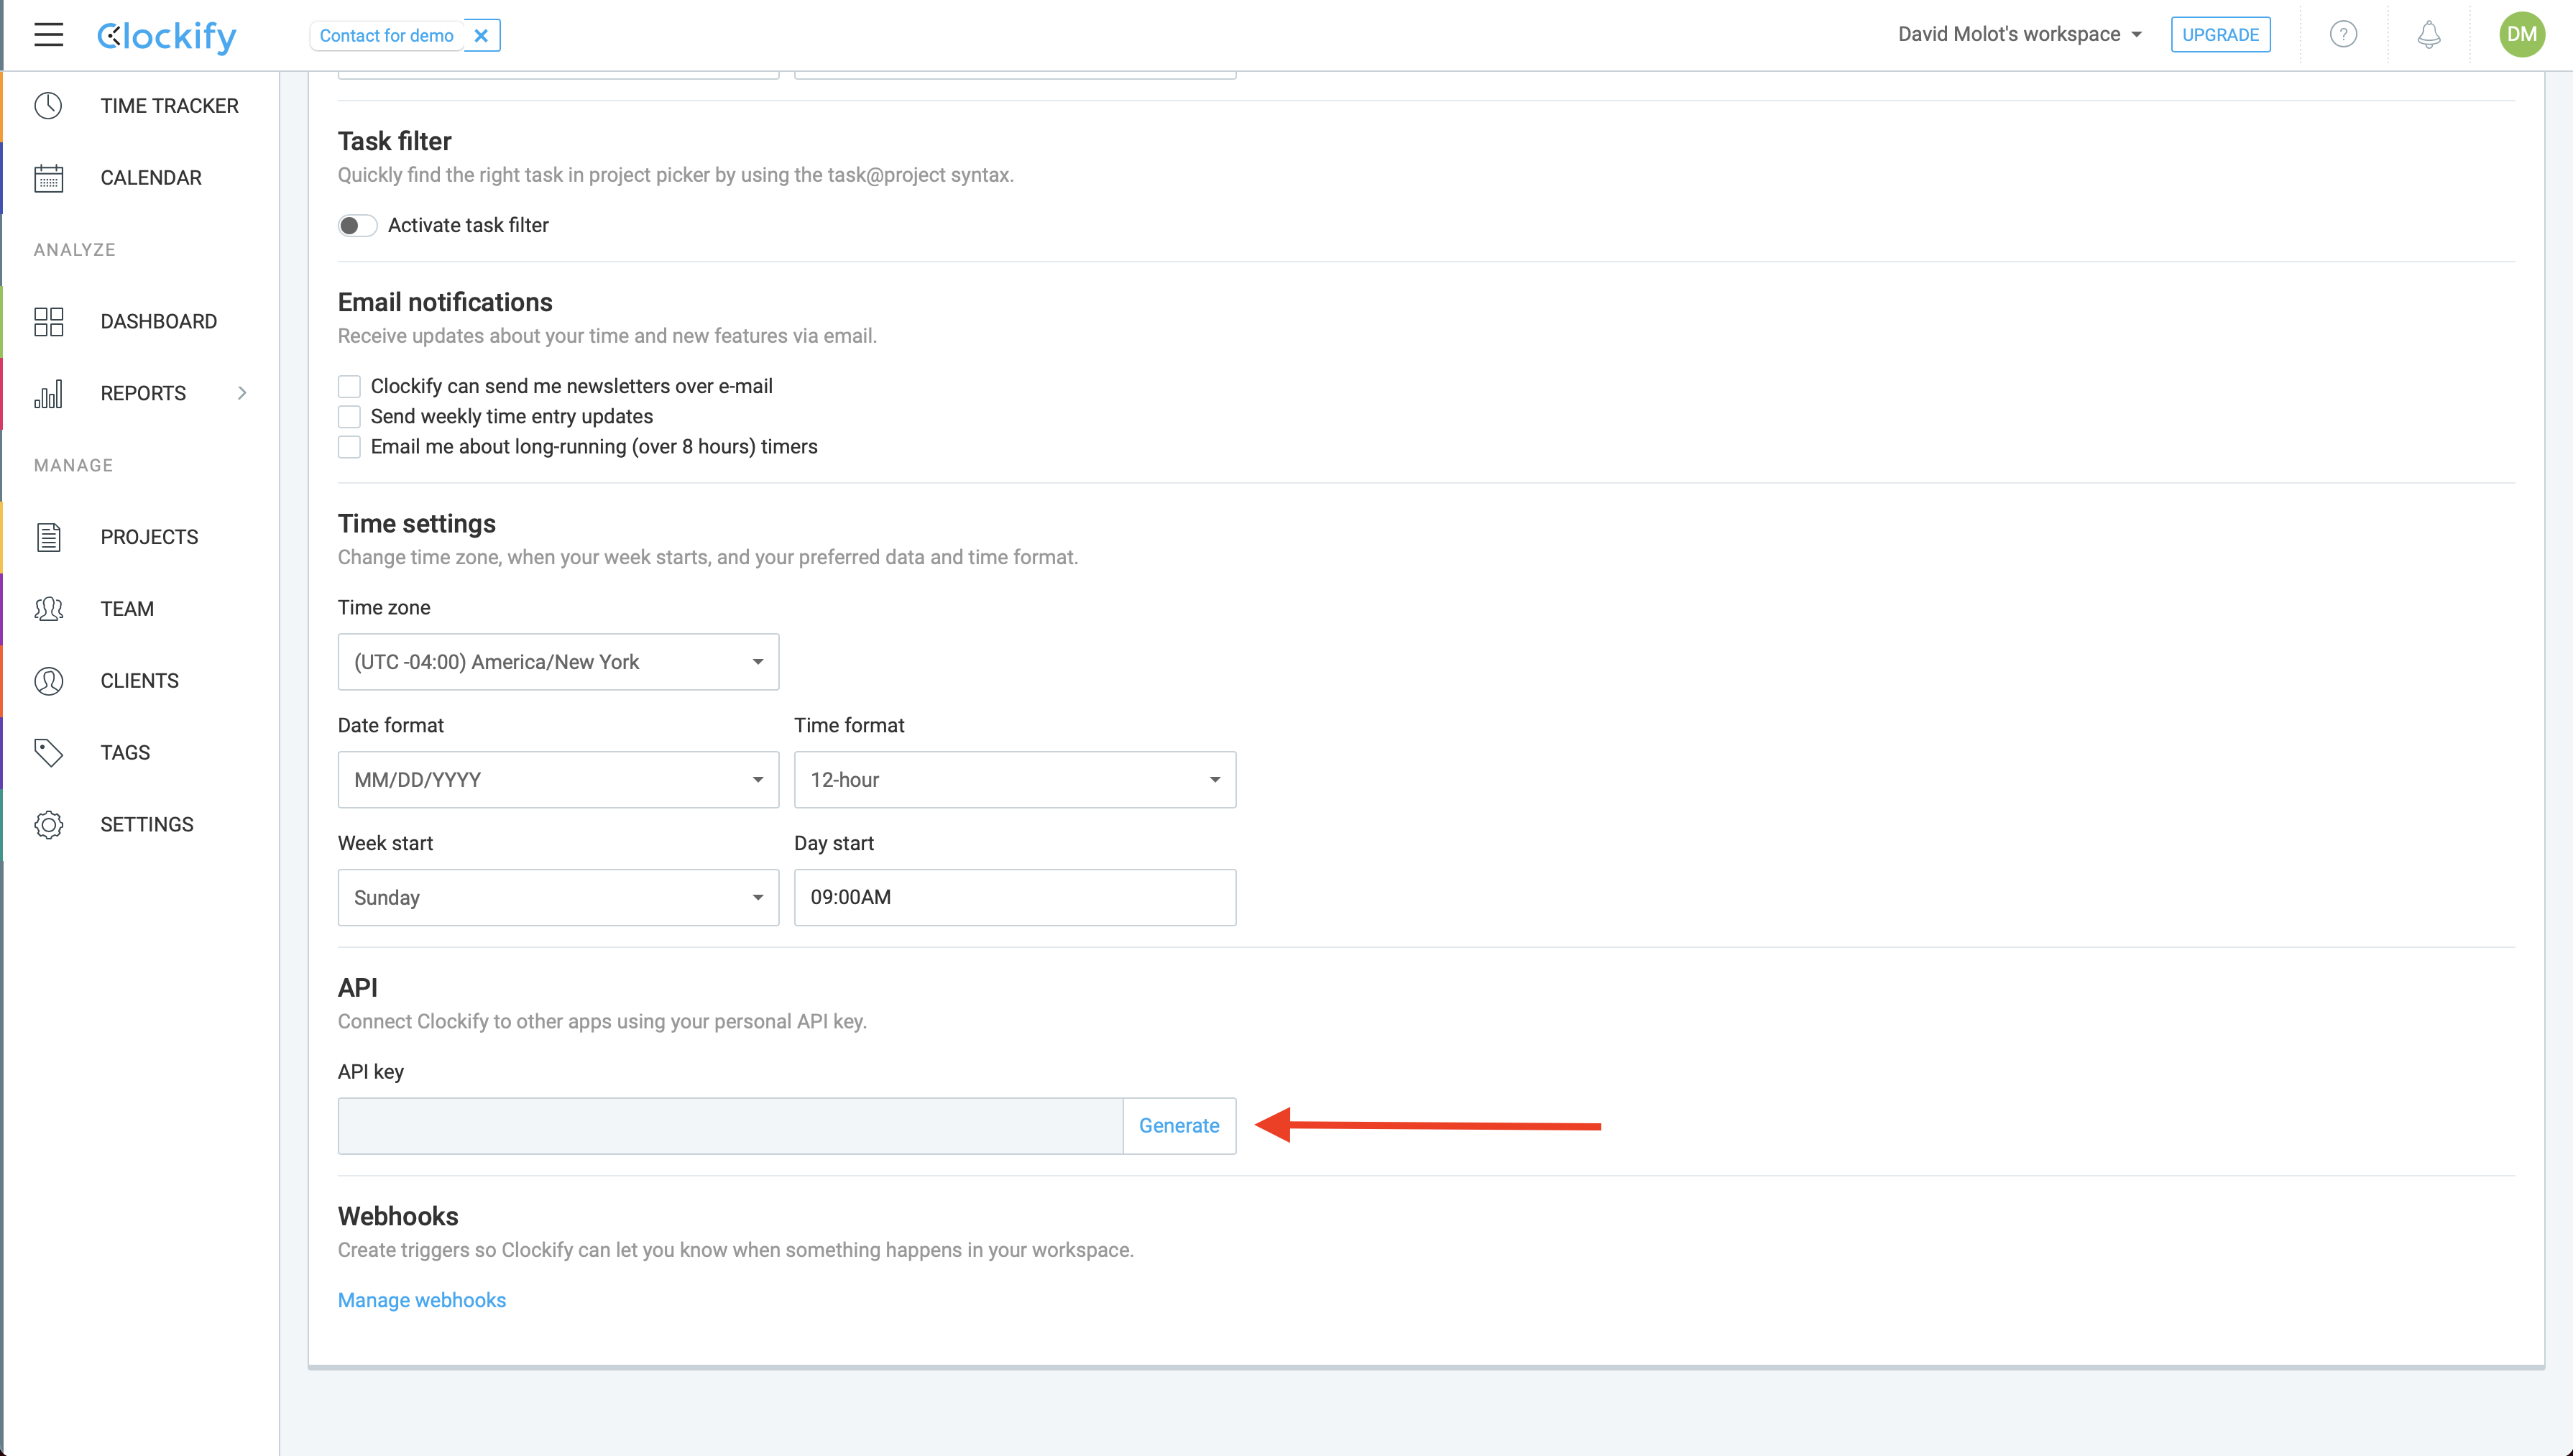 On the Profile settings page, scroll down until you see the API section. You should go ahead and click the Generate button to create an API key. Once it generates, copy it and paste it into hotglue!