Connector Details
Credentials Setup
1
Step 1: Find your Storage Account
First, you will need to go to the Azure Portal.Sign in to your Azure Portal.Use the search bar and search forstorage account. Click on Storage accounts.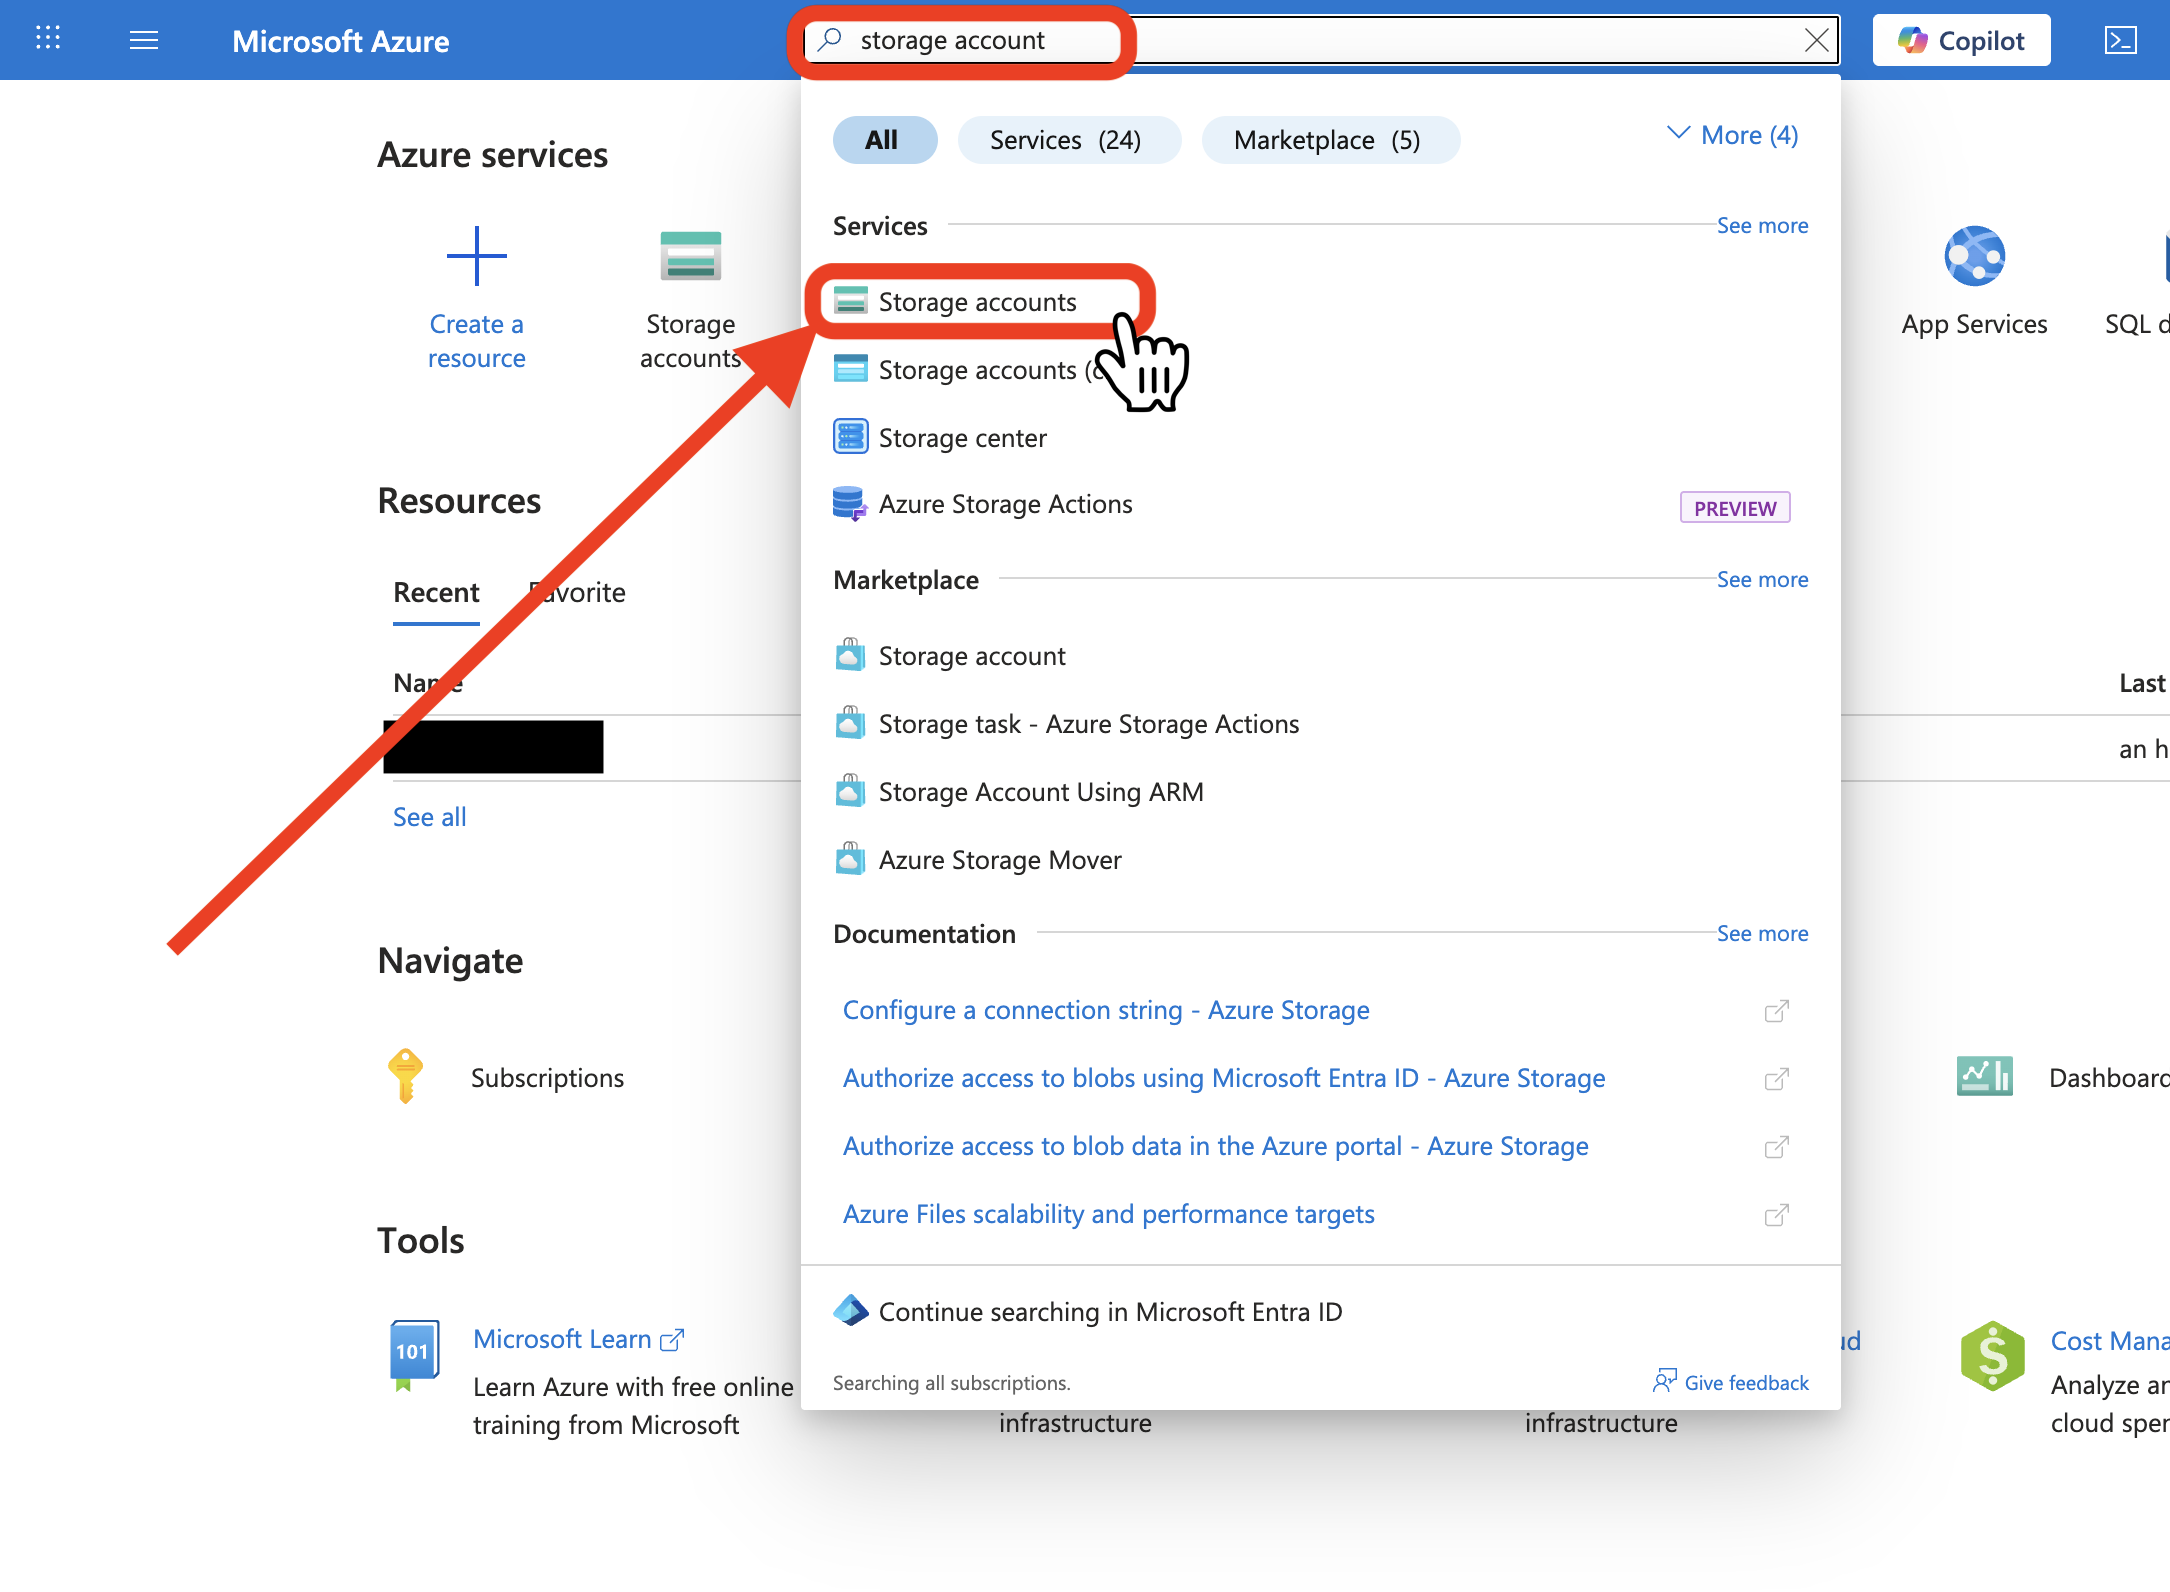
2
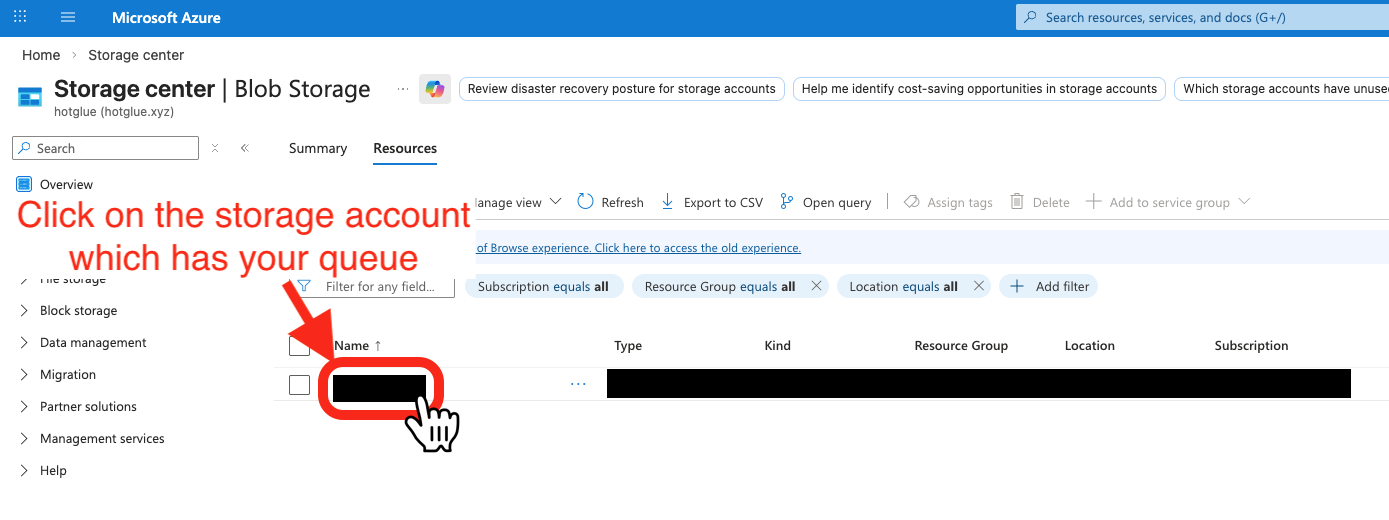
Step 2: Create a Shared Access Signature and Connection String
Once you click on the name of the storage account, you will see a pop up with a sidebar.In the sidebar, go toSecurity + networking and click on Shared access signature.You must select the following options:-
Allowed services:Queue -
Allowed resource types:Container,Object -
Allowed permissions:Read,Write,Delete,List,Add,Create,Update,Process
Start and expiry date/time section, you should set the fields as follows:Start: Do not touch the start time, it should be the current datetime.End: This is when Hotglue’s access to your queue storage will stop. You will have to get new credentials (repeat this entire process) each time you hit this end date.
Allowed IP addresses, leave the section blank. If your organization requires otherwise, you should contact us directly.Choose your Signing key with the following considerations:- Every time your
Signing key(Access key) is rotated/regenerated, you will have to get new credentials (repeat this entire process) again. - If you need more information, we recommend looking at Microsoft’s Docs
Generate SAS and connection string.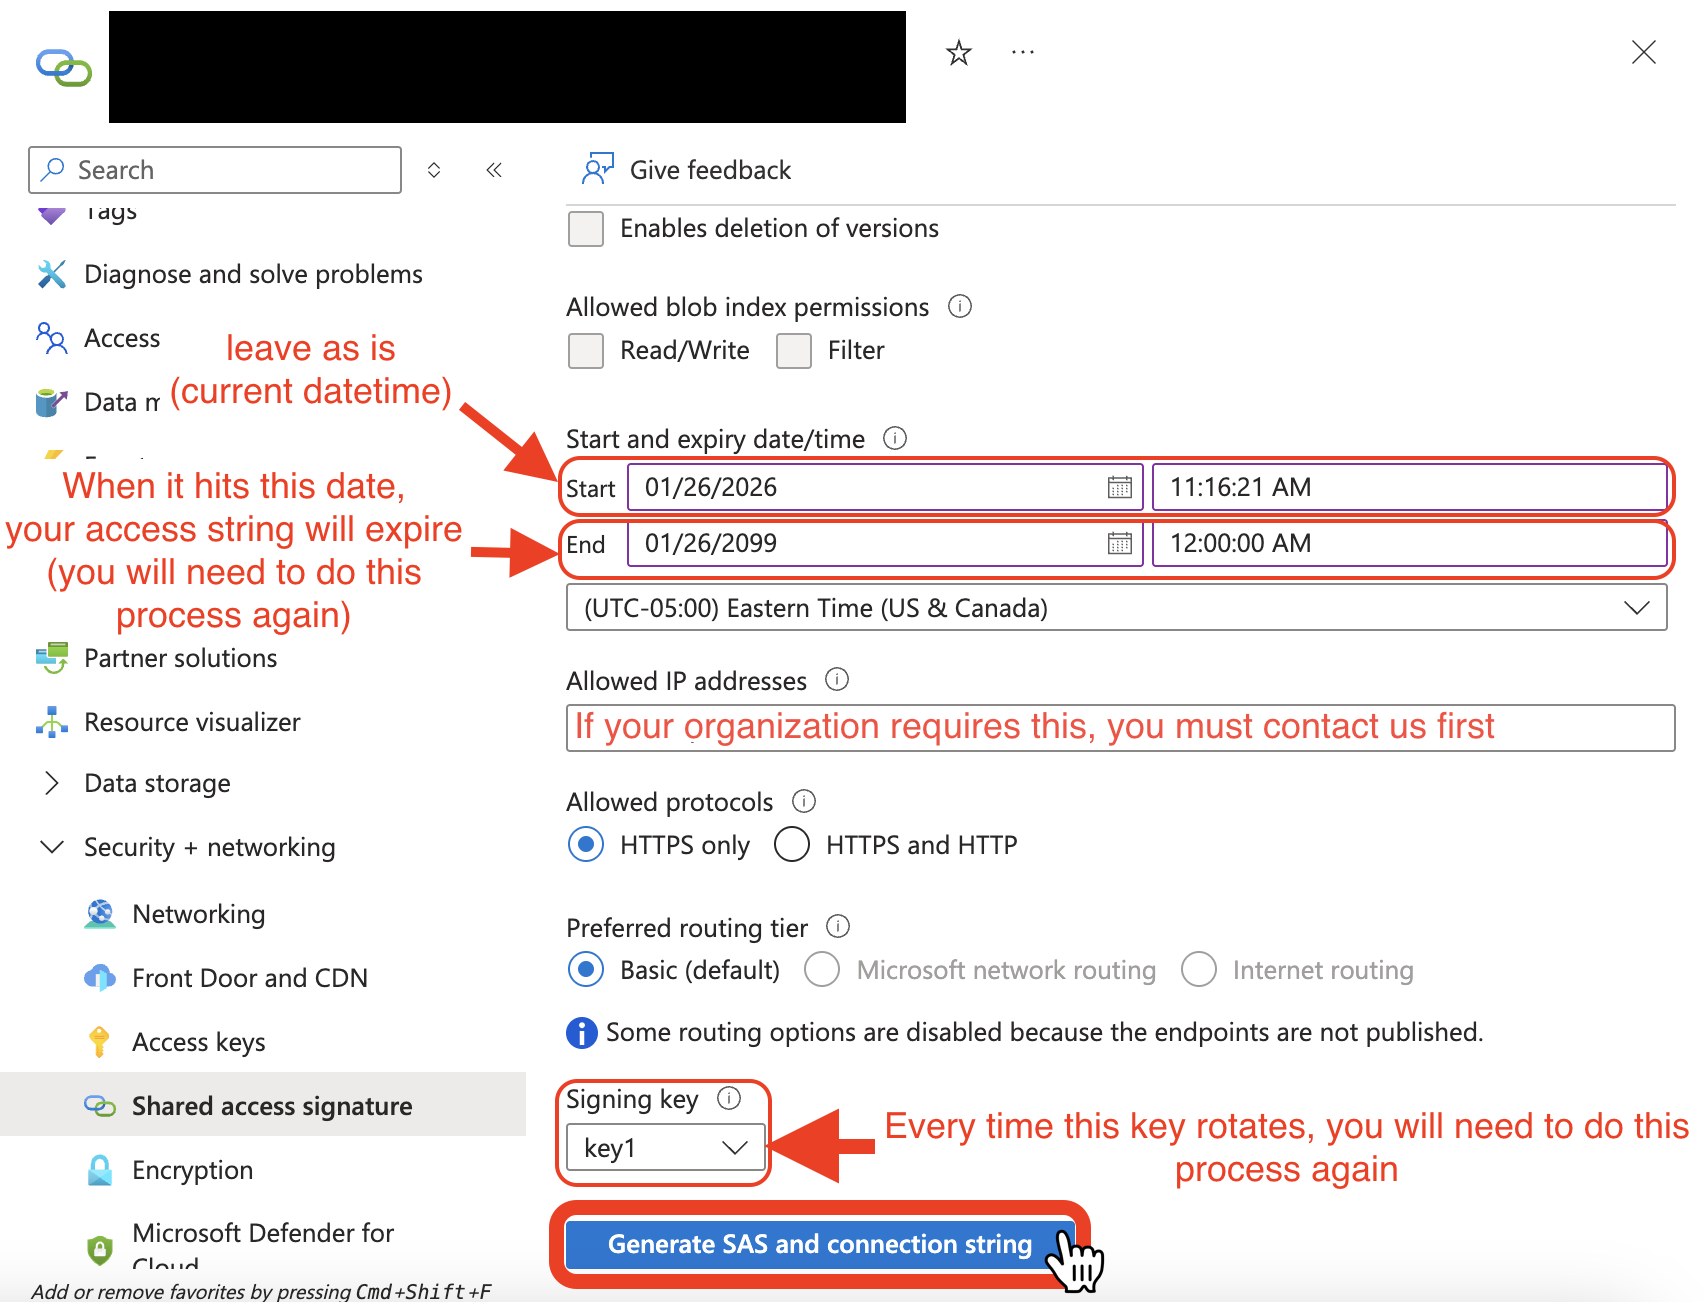
3
Step 3: Copy Credentials to Hotglue
For this step, you will need to copy over theConnection string to Hotglue.
Queue Name is the name of your queue in Azure.Your Queue Key is a label of your choice.Save your credentials.Congratulations! You have successfully connected your Queue Storage to Hotglue!